The Slick Back Diaries: 15 Sleek Styles I’d Wear Anywhere
Let me set the scene. It was my cousin’s outdoor wedding in July, 94 degrees, and I had spent forty-five minutes on curls that wilted before the first toast. A bridesmaid I’d never met walked past me with her hair pulled back in a glossy, wet-look ponytail, cool as a glass of lemonade. Not one flyaway. I asked what she’d used, and she laughed and said, “Gel, a brush, and about four minutes.”
I have been a slick back convert ever since.
If you think this look is only for ballerinas, gym bags, and people who wake up flawless, stay with me. It’s one of the most flexible, forgiving, and flattering styles you can wear, and I’ve spent years testing it on my own hair and on friends with every texture you can imagine.
Why Slick Back Gets Misjudged
The most common thing I hear is, “I can’t pull that off, my forehead is too big,” or “It’ll look greasy.” Both worries come from the same place: we’ve all seen a badly done slick back. Too much product, no shape, and a harsh line where the hair meets the face.
A good one is different. It has intention. It shows off your cheekbones, your jawline, and your earrings, and it makes even a plain T-shirt look styled. Think of it as a frame rather than a hairstyle. What matters is how you build it.
How I Score Every Style (Read This First)
Here’s something I haven’t seen on other blogs, and I think it will save you a lot of trial and error. Under each idea below, I’ve added a quick scorecard out of five for three things:
- Effort: How much time and skill it takes (1 is easy, 5 is a project).
- Hold: How well it lasts through wind, sweat, and hugging (5 is bulletproof).
- Drama: How much attention it draws (1 is quiet, 5 is a full entrance).
Pick your style based on the day ahead. A packed Tuesday needs low effort and high hold. A Saturday night needs drama.
The Toolkit: What’s Actually Worth Buying
You don’t need a bathroom shelf full of products. Here’s my short list.
- A firm gel or styling cream. Gel gives you the wet look and the strongest hold. A cream gives a softer, satin finish. If you can only buy one, buy a medium-hold gel with no crunch.
- A boar bristle brush. It grabs tiny hairs and spreads product evenly. It’s the difference between smooth and streaky.
- A fine-tooth comb. For clean parts and edges.
- A soft toothbrush or edge brush. For laying down baby hairs without stiffness.
- Bobby pins and clear elastics. Keep them in your bag always.
- A light hair oil. Two drops on your palms, smoothed over the surface, gives you that mirror shine.
- A satin scrunchie or snag-free elastic. Regular elastics cause dents and breakage.
The Four-Step Method Behind Every Look
Nearly every style below follows the same formula. Learn it once and you can adapt it forever.
- Start with damp hair, not soaking. Towel dry until it stops dripping. Dry hair resists product, and dripping hair dilutes it.
- Apply from the front backward. Work the product through starting at the hairline. Most people start at the back and run out by the time they reach the front, where you need it most.
- Brush in one direction, then flatten. Use the boar bristle brush, then press your palm over the surface like you’re smoothing a bedsheet.
- Secure, then seal. Tie the hair back, then finish with a small dab of oil or a light-hold spray.
Minimalist Looks: The “I Woke Up Like This” Group
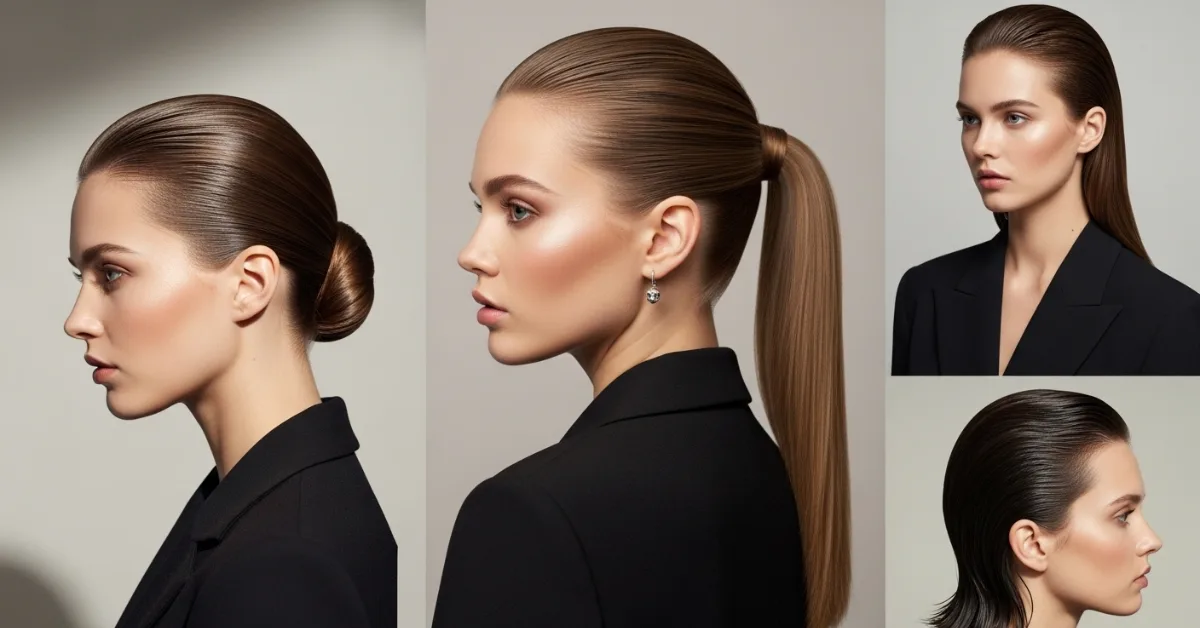
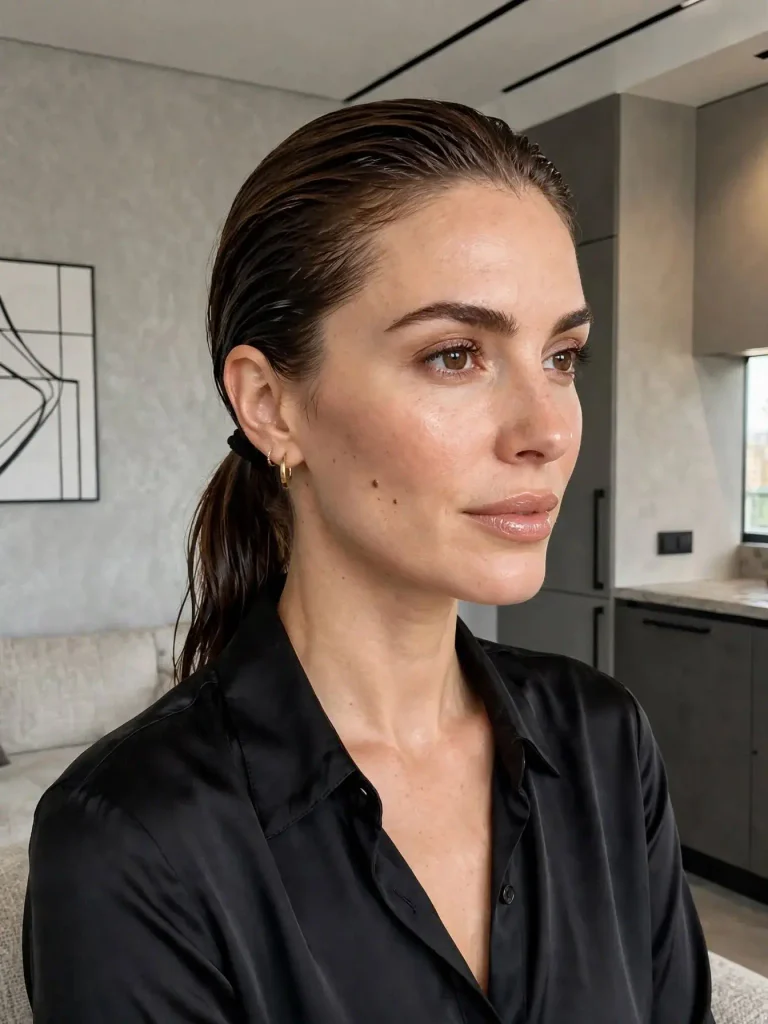
1. The Wet-Look Low Ponytail
Effort 1 | Hold 4 | Drama 2
This is the gateway style. Brush everything back, gather at the nape, and secure with a snag-free elastic. Smooth the length with a little gel so it looks glossy and deliberate. It works on almost every hair length and every face shape, and it goes from office to dinner without a change.
2. The Sleek Low Bun

Effort 2 | Hold 5 | Drama 2
Twist the ponytail into a coil and tuck it into a bun at the nape. Pin it in an X shape for extra security. This is the style I wear on travel days, because it survives airport security, a pillow, and a windy taxi line.
3. The Center-Part Slick Back
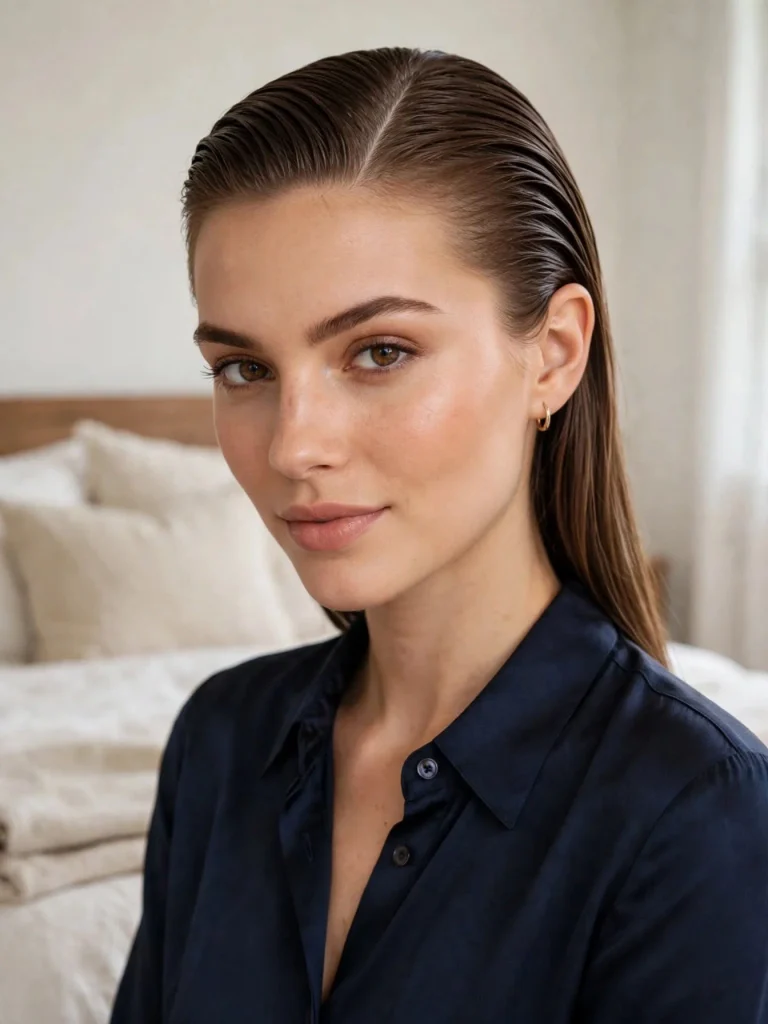
Effort 2 | Hold 4 | Drama 3
Part your hair down the middle with the comb, then smooth both sides back and tuck behind your ears. Symmetry is the whole game here. It looks especially striking with statement earrings, and it makes long faces look balanced.
4. The Slicked Half-Up
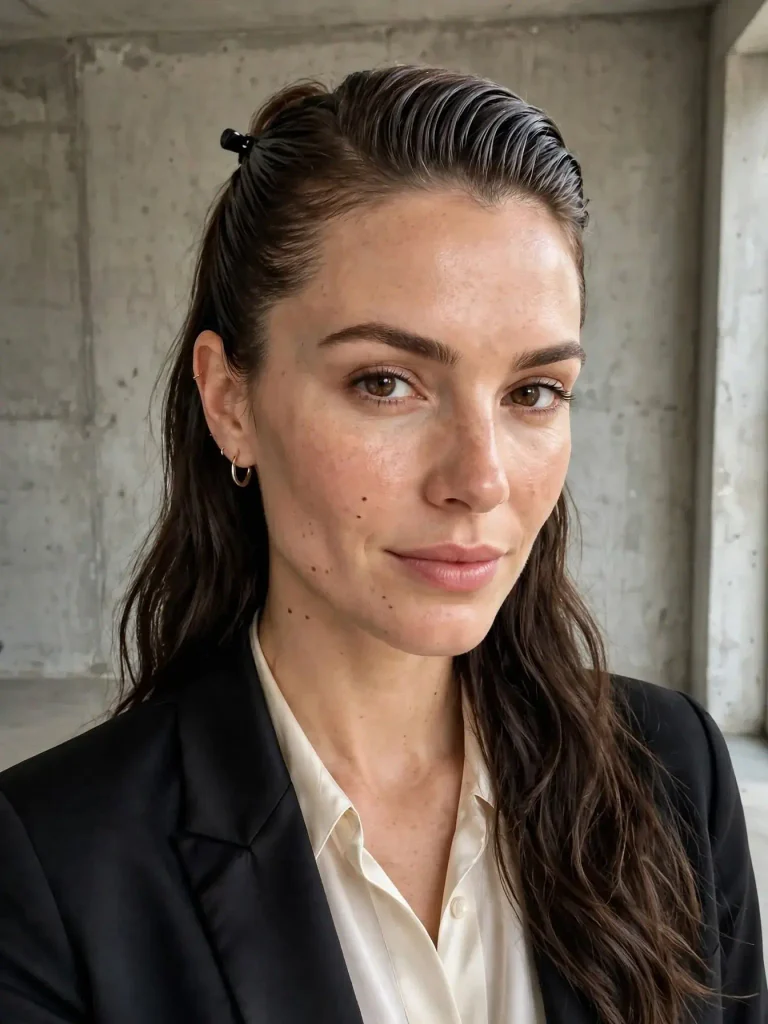
Effort 2 | Hold 3 | Drama 2
Slick the top half back into a small ponytail or a twist, then leave the rest down. It’s a great compromise if you love the look but don’t want your entire head pulled back. Keep the crown smooth and let the bottom half stay natural.
Glam Looks: The “Watch Me Walk In” Group
5. The High Sleek Ponytail

Effort 3 | Hold 4 | Drama 5
Place the ponytail at the highest point of your crown for a natural lift. Wrap a small strand of hair around the elastic and pin it underneath so nothing shows. Comb the tail smooth, or curl the ends slightly for movement. It lifts your face instantly, which is why I call it the free facelift.
6. Slick Roots with Loose Waves
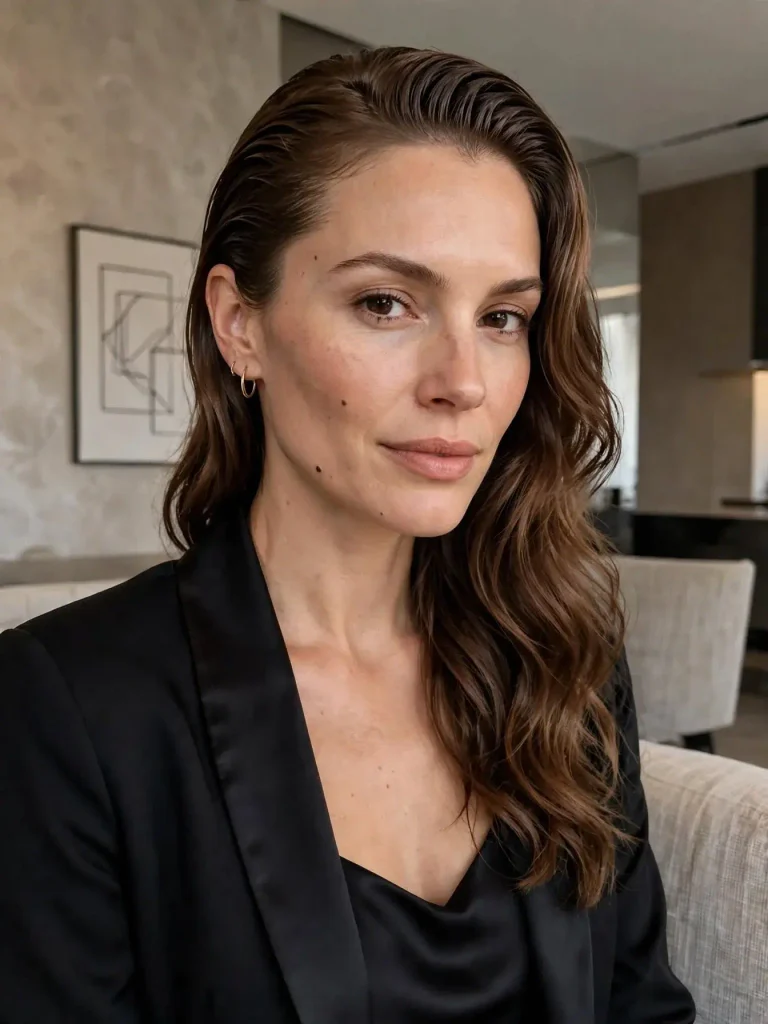
Effort 3 | Hold 3 | Drama 4
Here’s a look I adore. Slick the hair back from the forehead and temples, keep it flat through the crown, then let loose, brushed-out waves fall past your shoulders. You get the polish of a slick back and the softness of a blowout. Perfect for date nights.
7. The Ballerina Bun

Effort 3 | Hold 4 | Drama 4
Gather your hair high on your head, twist it around the base, and pin it into a neat, round bun. Use a bun donut if your hair is fine. A bit of oil makes it glow. It’s elegant with off-the-shoulder tops and a great option for weddings.
8. The Braided Extension Ponytail
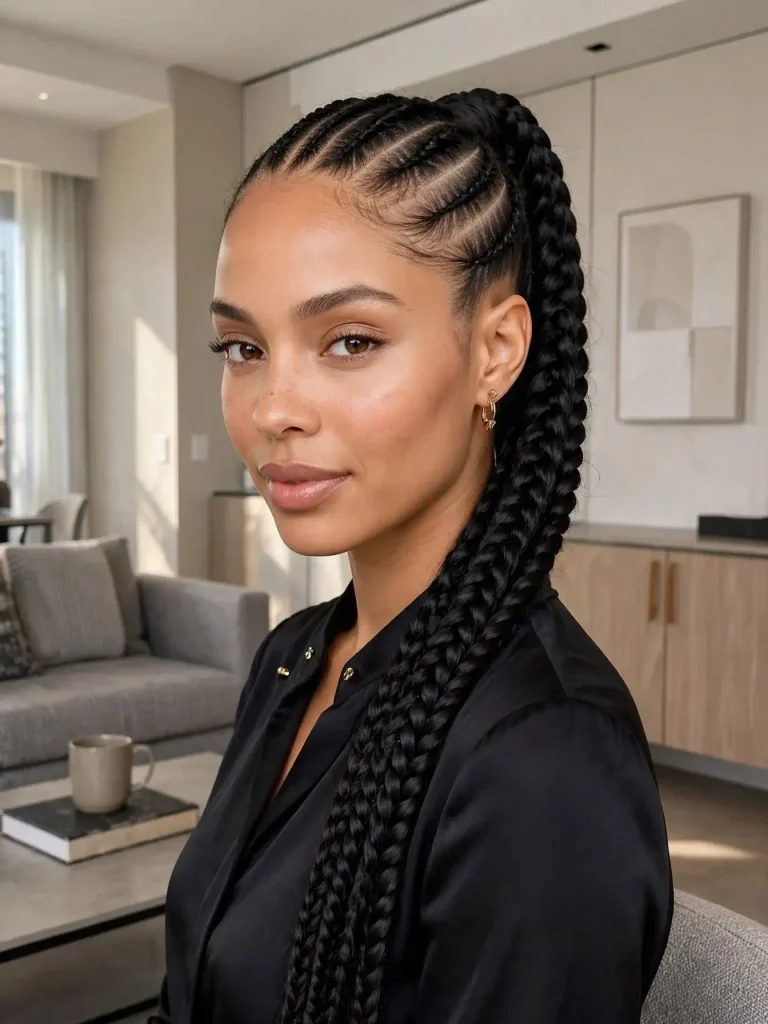
Effort 4 | Hold 5 | Drama 5
Slick your hair up into a tight high ponytail, then attach a long braided extension and wrap the base with your own hair. The look is dramatic, sculptural, and endlessly photogenic. Take your time on the first try, since the wrap at the base is the tricky part.
Edgy Looks: The “Rules Are Optional” Group
9. The Slick Back Bob
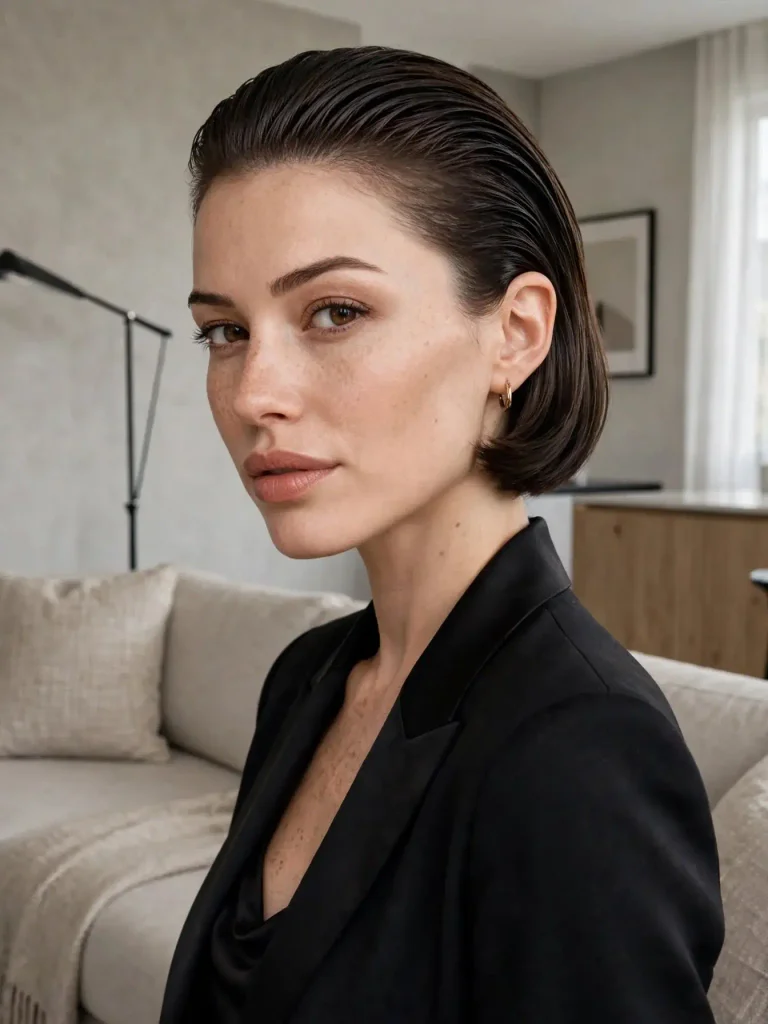
Effort 2 | Hold 4 | Drama 4
Yes, short hair can do this. Comb your bob straight back from the face, letting the ends flick slightly at the nape. Use a stronger gel because shorter hair has less weight to hold it down. It feels sharp, modern, and a bit fashion-editorial.
10. The Wet-Look Pixie
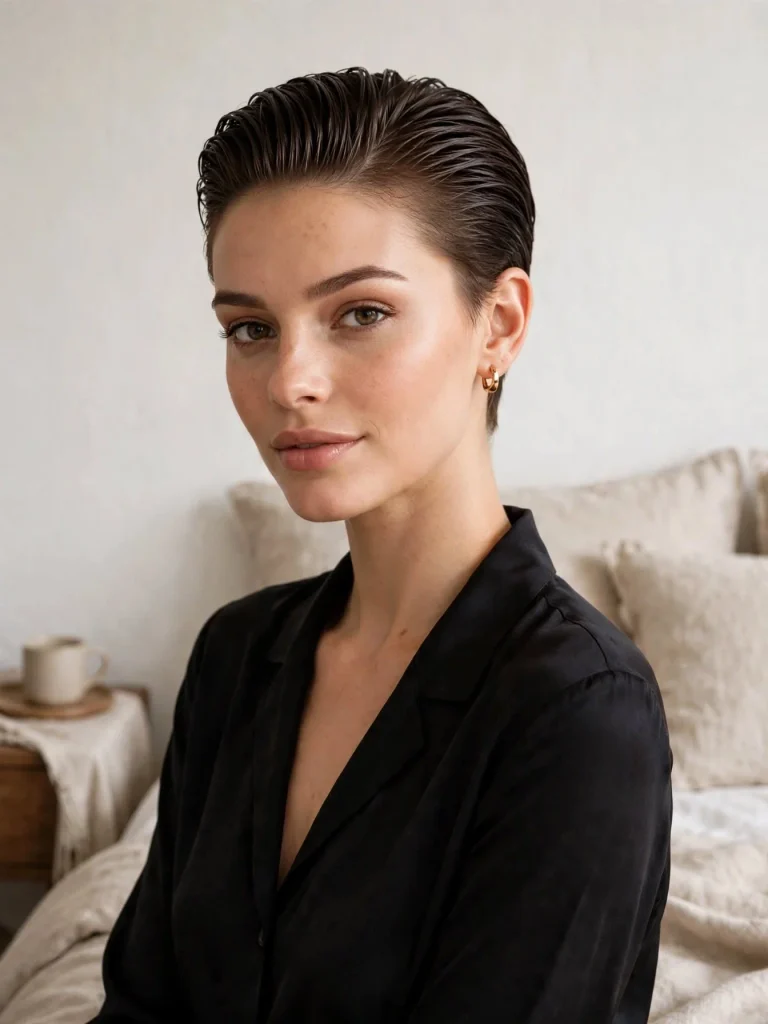
Effort 1 | Hold 4 | Drama 4
Take a pea-sized amount of gel, run it through, and comb everything back from the forehead. That’s the whole recipe. Pixie cuts look incredible slicked back, especially with bold lipstick or dramatic brows.
11. The Undercut Slick Back
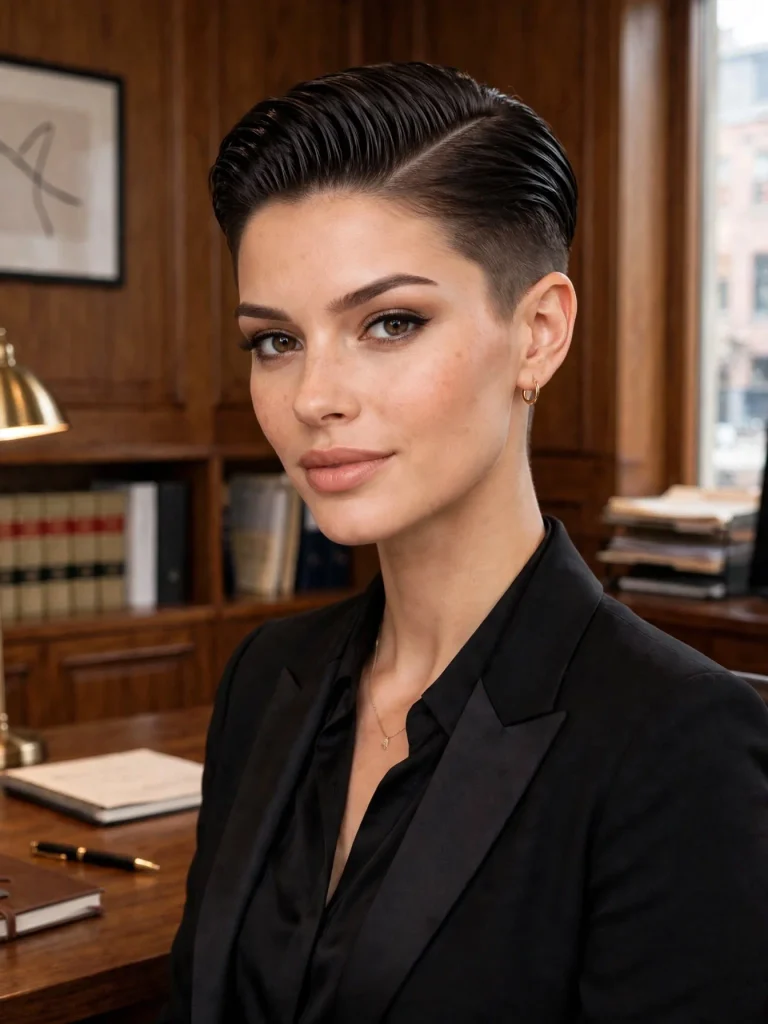
Effort 2 | Hold 5 | Drama 5
If you have shaved sides or an undercut, slicking the top back shows off the contrast beautifully. Keep the top smooth and defined and let the shaved detail be the star. This one gives me serious “I own this room” energy.
12. The Side-Part Slick Back
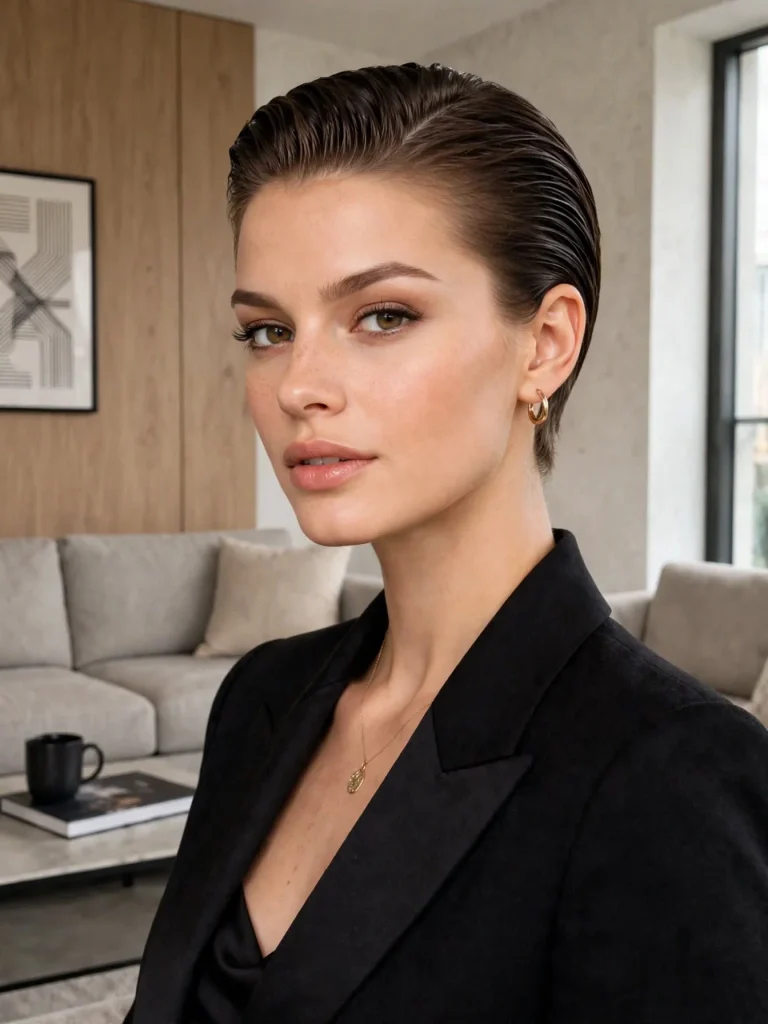
Effort 2 | Hold 4 | Drama 3
Create a deep side part, then sweep the hair back and away from the part. It adds a little asymmetry that feels vintage without being costume-y. Great for round faces, because the diagonal line adds length.
Soft Looks: The “Sleek But Sweet” Group
13. The Slicked Curl Puff
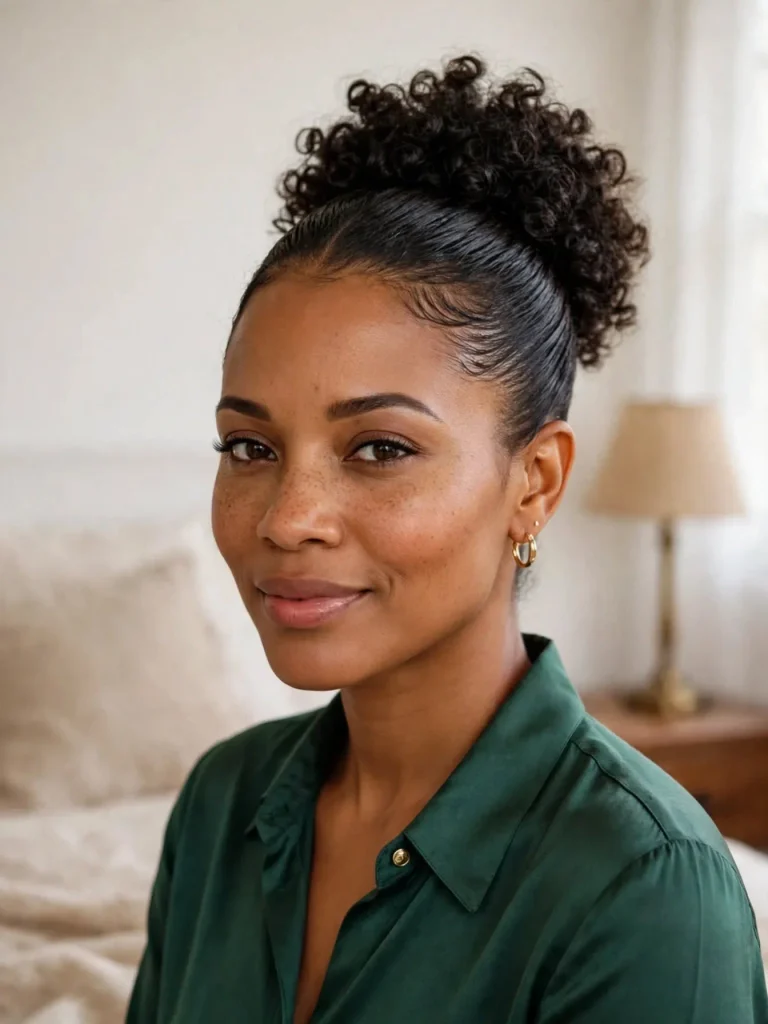
Effort 3 | Hold 4 | Drama 4
For curly and coily hair, smooth the front and sides back with a curl-friendly gel, then gather the hair into a high puff. Keep the curls voluminous and defined. The contrast of smooth edges against big texture is stunning, and it celebrates natural hair rather than hiding it.
14. The Slick Back with Face-Framing Tendrils
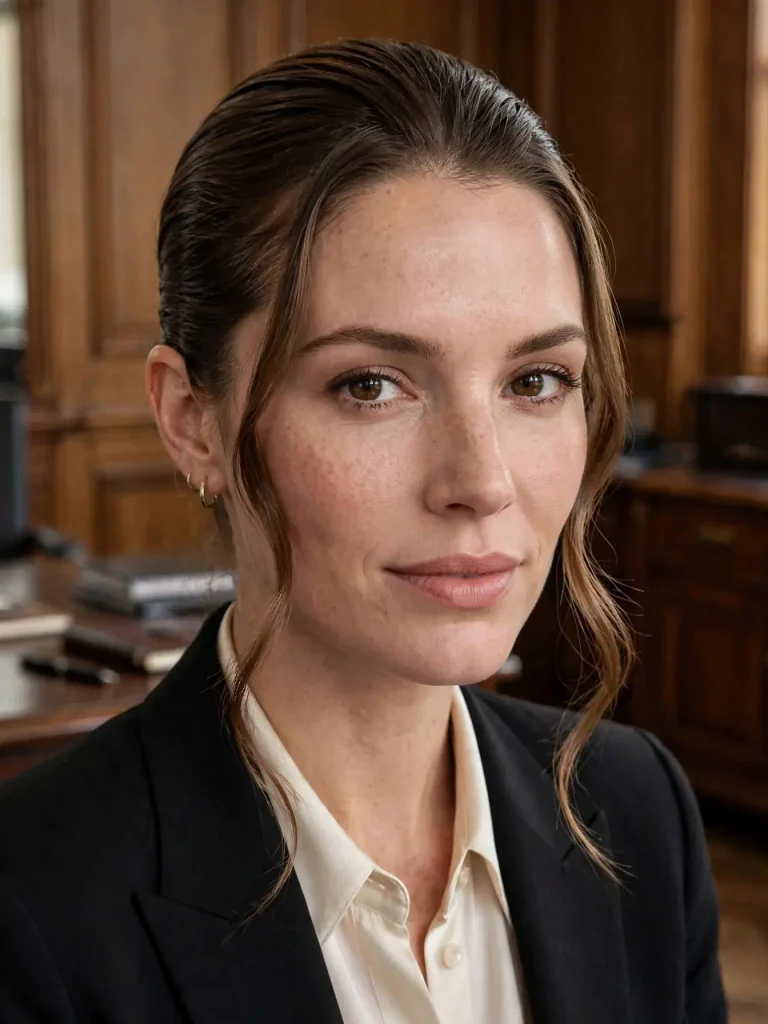
Effort 2 | Hold 3 | Drama 3
Pull everything back but leave two thin strands down at the temples. It softens the look and flatters almost every face. If a full slick back feels too severe, this is where I’d start.
15. The Slick Back with Curtain Fringe

Effort 3 | Hold 3 | Drama 3
If you have curtain bangs, slick back the length and let the fringe part softly on either side of your forehead. It gives you a romantic, lived-in feel and keeps you from committing to the full exposed-forehead look.
Which Style Flatters Your Face Shape?
This is my quick cheat sheet, but remember that confidence beats geometry every time.
- Round face: Go high. The high ponytail, ballerina bun, and side-part slick back add height and length.
- Oval face: You can wear anything. Try the center part and low buns.
- Square face: Soften the angles with tendrils, waves, or a slicked half-up.
- Heart-shaped face: The low ponytail and low bun balance a wider forehead.
- Long face: Avoid too much height. Choose low styles or the center-part look with volume at the sides.
Something New: My Homemade Flaxseed Slick Gel
This is my favorite discovery of the last two years, and it’s the extra I promised. If store-bought gels leave your hair crunchy or flaky, try making your own.
What you need:
- 1/4 cup whole flaxseeds
- 2 cups water
- A few drops of your favorite hair oil (optional)
- A fine mesh strainer
How to make it:
- Boil the flaxseeds in the water on medium heat for about 8 to 10 minutes, stirring often.
- Watch for the water to turn silky and slightly thick, like egg whites.
- Strain it right away while it’s hot, since it thickens fast as it cools.
- Stir in the oil once it’s warm, not hot.
- Store it in a clean jar in the fridge and use within about a week.
It gives a soft, flexible hold with a natural shine, and it’s brilliant for slicking edges and curls. Do a small patch test on your skin first if you have sensitivities, and toss it if it smells off.
What to Wear With a Slick Back
Because your hair is out of the way, your face and neckline take center stage. My rules:
- Bold earrings. Hoops, studs, or drops all look intentional here.
- Interesting necklines. Halter tops, square necks, and off-the-shoulder styles show off your neck and shoulders.
- Simple makeup with one focus. Choose either a defined eye or a statement lip. A glowy base and brushed-up brows are all a slick back really needs.
- Blazers and oversized shirts. A slick back adds a sharp finish to relaxed outfits.
Slick Back Troubleshooting
Here’s what to do when things go wrong.
- It looks greasy, not glossy. You used too much product or oil. Blot with a tissue and use less next time. Gloss comes from smoothness, not quantity.
- White flakes show up. You probably layered too many products, or the gel is drying too fast. Try a lighter formula or the flaxseed recipe above.
- Hairs keep popping up. Spritz a toothbrush with a touch of hairspray and brush them into place.
- It gives me a headache. Your ponytail is too tight. Loosen it slightly and lift the elastic a bit.
- My scalp feels itchy. Product buildup is likely. Use a clarifying shampoo once a week.
The Sunday Night Reset
Slick backs are wonderful, but they need a little aftercare. I do a quick reset once a week.
- Rinse out all product thoroughly, then use a clarifying shampoo.
- Follow with a deep conditioner, focusing on the ends.
- Massage your scalp for two minutes to boost circulation and loosen buildup.
- Let your hair air dry with no tension, so the roots and edges get a break.
Rotating in a few looser days also protects your hairline, especially if you wear tight styles often.
Quick Answers to Questions I Get Asked
Can I do a slick back on thin or fine hair?
Yes. Use a light gel or cream, and avoid heavy oils that flatten it further. A bun donut can add fullness to buns and ponytails.
Will it damage my edges?
Only if it’s pulled too tightly or done constantly. Choose gentler tension and use snag-free elastics.
How long does it last?
A good gel lasts all day. Add a light mist of flexible-hold spray if you’re heading into humidity.
Can I sleep in it?
I’d suggest not. Take it down and let your scalp breathe, or cover it with a silk scarf if you want to preserve the smoothness for a second day.
One Last Thing
The best slick back isn’t the most perfect one. It’s the one that makes you stand a little taller when you catch your reflection. Start with the wet-look low ponytail, learn how your hair takes product, then move up to the ballerina bun or the braided extension when you’re feeling bold.
Give it a try this week, and don’t be afraid of the mirror. Chances are, you’ll walk past someone at a wedding who asks what you used, and you’ll get to say, “Gel, a brush, and about four minutes.”