15 Scarf Hairstyles idea, Sorted by the Shape of Scarf You Actually Own
I own roughly nine scarves and, until recently, used exactly one of them for my hair, on repeat, because I genuinely didn’t realize the others weren’t interchangeable. A long rectangular scarf and a square silk one do completely different jobs. Trying to wrap a headband style with a scarf that’s the wrong shape is like trying to fold a fitted sheet with the wrong technique — technically possible, deeply frustrating, rarely worth it.
So this list starts with the scarf itself, not the hairstyle. Figure out which shape is sitting in your drawer, find that section, and go from there.
Square Scarves (Silk or Silk-Like, Folded Into a Band)
Square scarves are the most common type people already own, often inherited or bought for the neck rather than the hair, and they fold down beautifully into a flat band once you know the trick.
1. The Classic Folded Headband

Fold the square scarf into a long triangle, then roll it from the point inward until it becomes a flat band. Tie it at the nape of your neck, over either loose hair or a low bun, and the fold itself does most of the visual work without needing any additional styling underneath.
This is genuinely the easiest entry point if you’ve never styled with a scarf before, since the folding technique transfers to almost every other square-scarf style on this list. Once your hands know this fold, everything else here becomes a small variation on the same basic move.
2. The Top Knot Wrap
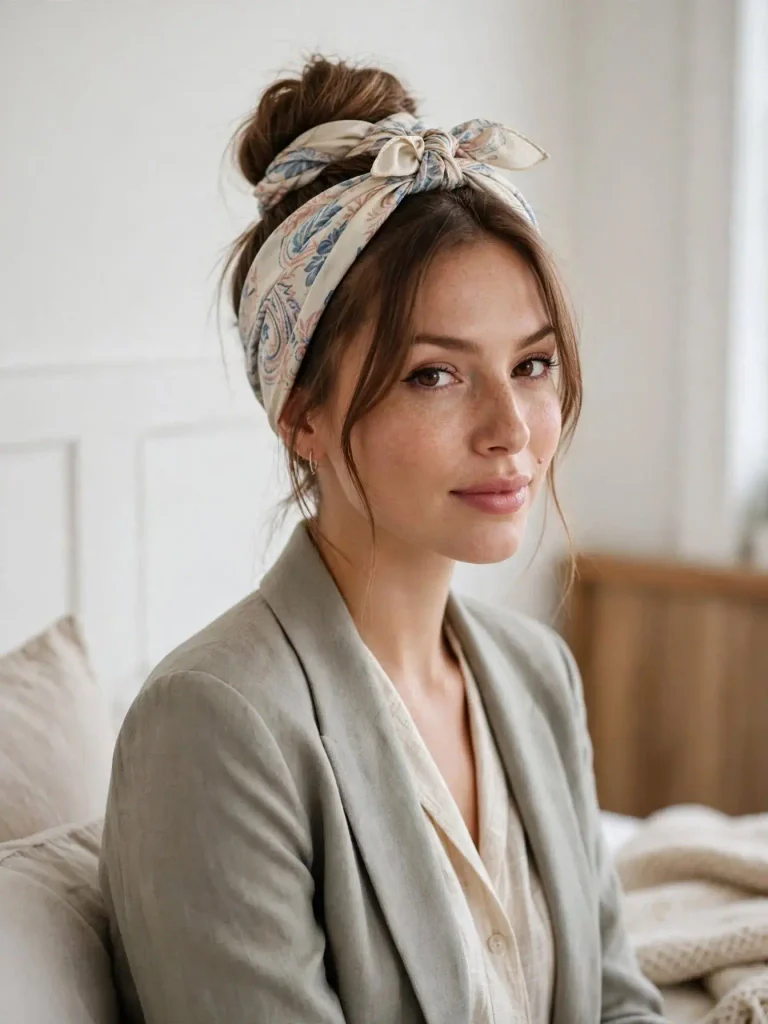
Fold the scarf the same way as above, but instead of tying it at the nape, wrap it around a high bun or top knot, crossing the ends underneath and tying them at the base of the bun itself. The scarf becomes an accent around the bun rather than a band across your forehead.
This works particularly well with a slightly messy, undone bun, since the structure of the scarf balances out the looseness of the hair. A too-perfect bun with a wrapped scarf can start to look overly matched and stiff, so leaving a few pieces loose actually improves the overall effect here.
3. The Ponytail Wrap-Around
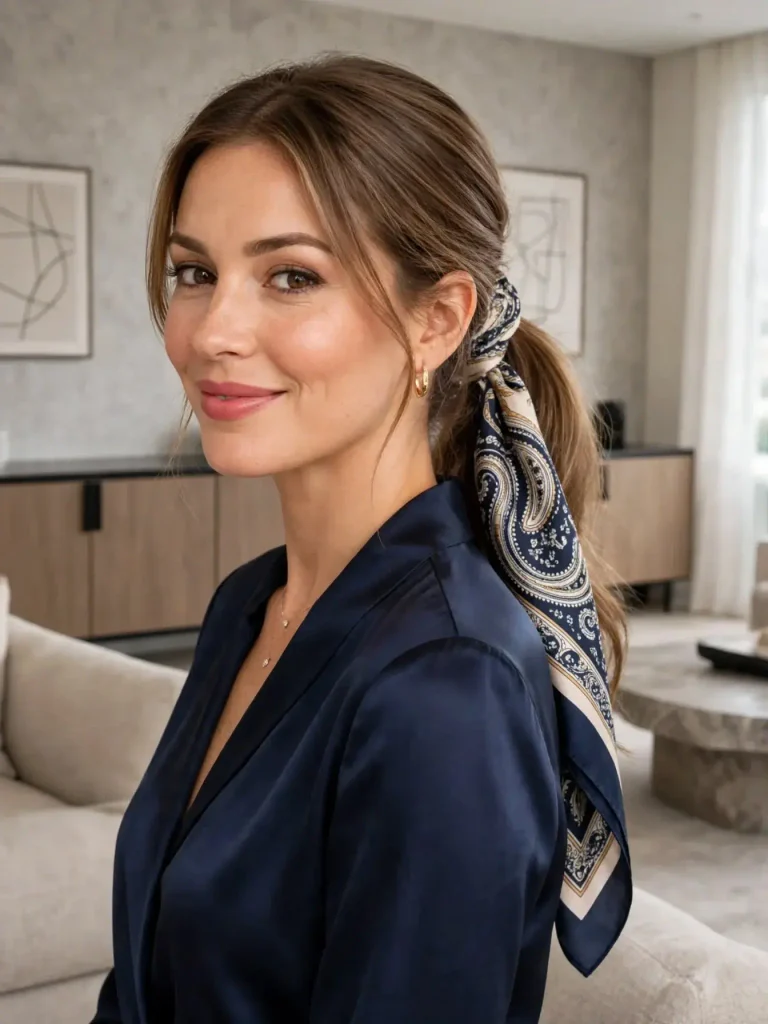
Gather hair into a low or mid ponytail, then wrap the folded square scarf around the base of the ponytail several times, tucking the end underneath itself to hide it, rather than tying a visible knot. This hides the hair elastic completely and adds color and texture right at eye level.
It’s a particularly good option for second or third-day hair, since a ponytail hides a multitude of texture issues, and the scarf at the base draws attention away from the roots and toward the wrap itself. This is one I reach for constantly on days I haven’t washed my hair and don’t especially want anyone to know.
Long Rectangular Scarves (Silk, Chiffon, or Lightweight Knit)
Long rectangular scarves give you more length to work with than square ones, which opens up styles that actually need extra fabric to wrap multiple times or trail decoratively.
4. The Double-Wrap Headband
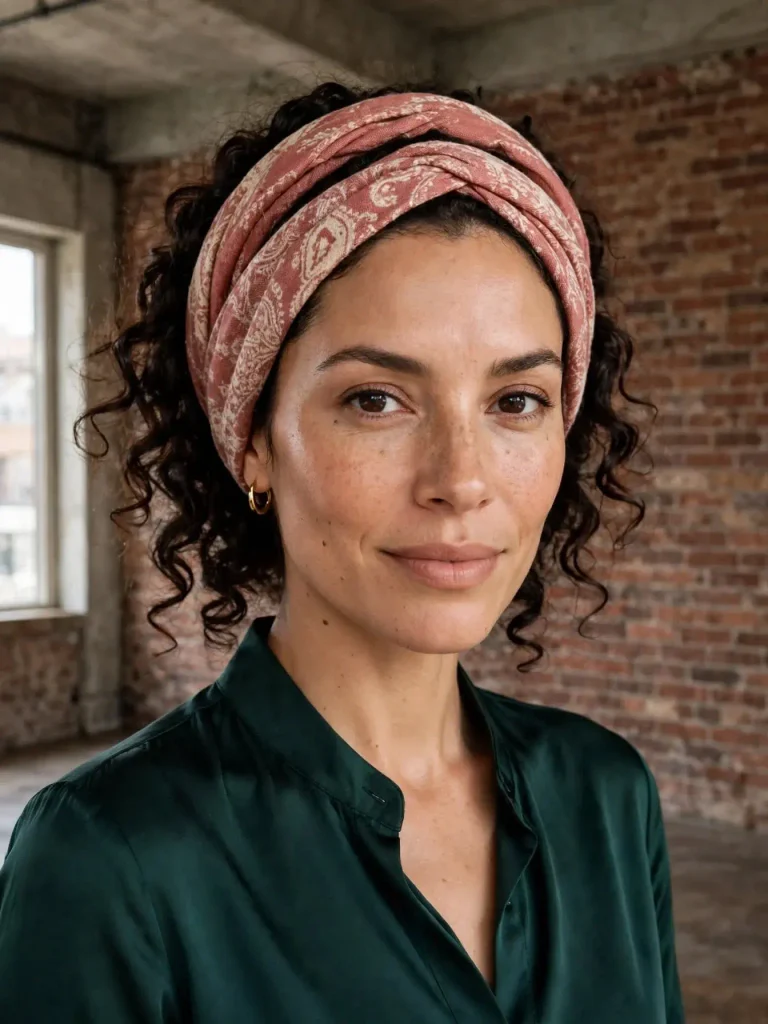
Wrap the long scarf around your head twice instead of once, tying the ends in a small knot or bow off to one side rather than at the back. The double wrap gives a fuller, more built-up look at the hairline than a single-wrap version, without needing a thicker fabric.
This style holds up especially well through a full day, since the second wrap adds friction against the first and keeps everything from slipping the way a single wrap sometimes does on very smooth hair. It’s my go-to for a longer day out where I don’t want to be adjusting a scarf every hour.
5. The Trailing Side Tie
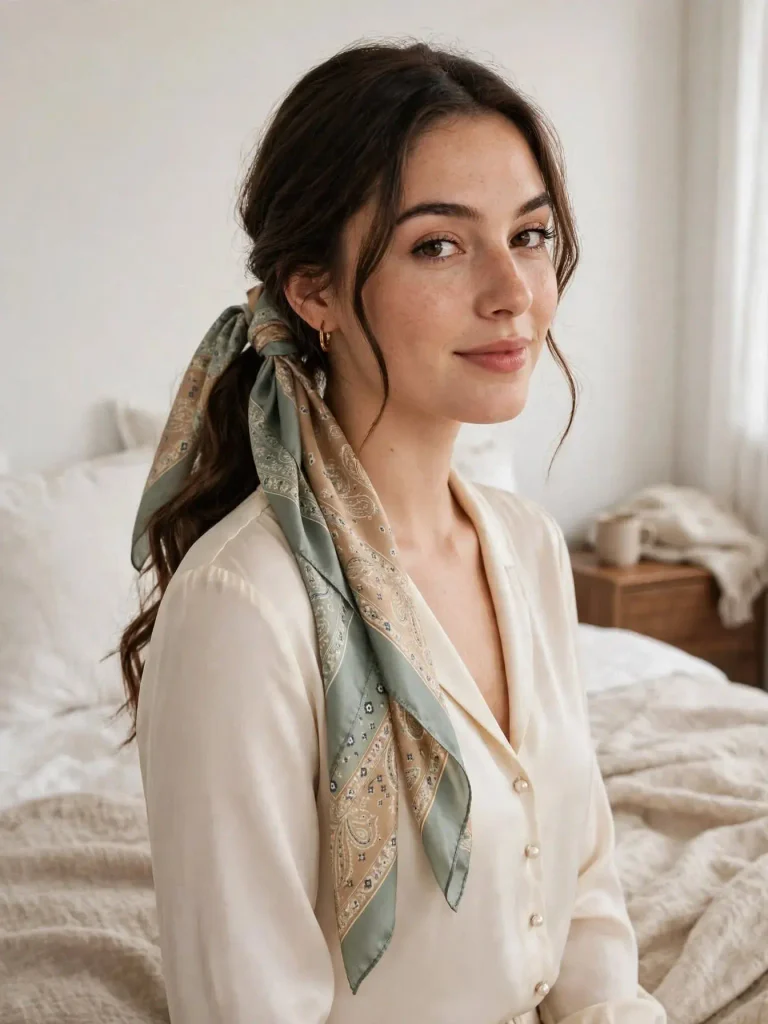
Tie the long scarf at the side of your head rather than the back, letting the extra length trail down over one shoulder instead of tucking it away. This turns the scarf into a visible design element rather than something that disappears once tied.
It works best with hair worn down or in loose waves underneath, since the trailing fabric needs some movement in the hair around it to look intentional rather than accidental. A very sleek, straight style underneath can make the trailing tail look like it was simply forgotten rather than placed there on purpose.
6. The Braided Scarf Plait
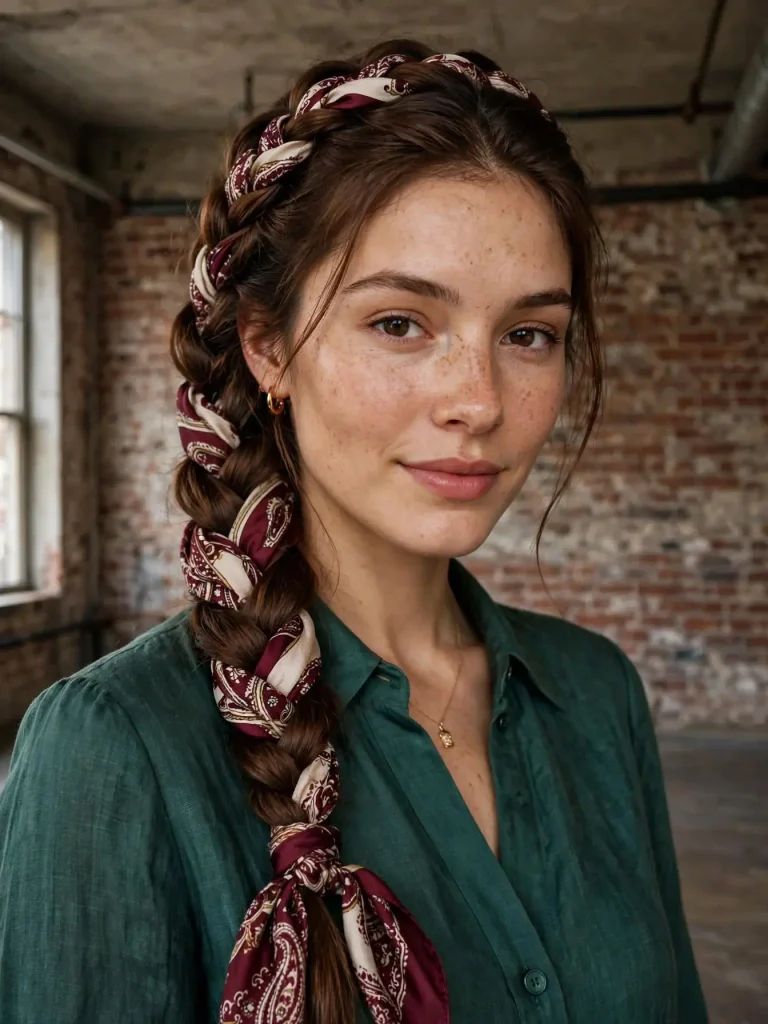
Incorporate the long scarf directly into a three-strand braid, treating it as a fourth strand alongside sections of your actual hair. This produces a braid with a continuous ribbon of color running through it from root to tip.
This is a slower style to put together than anything else on this list, and it’s worth setting aside a few extra minutes the first couple of times you try it, since keeping the scarf strand consistent alongside two hair strands takes a bit of practice. Once you’ve done it a handful of times, though, it becomes a genuinely fast, repeatable braid you can do without looking in a mirror.
7. The Low Ponytail Streamer
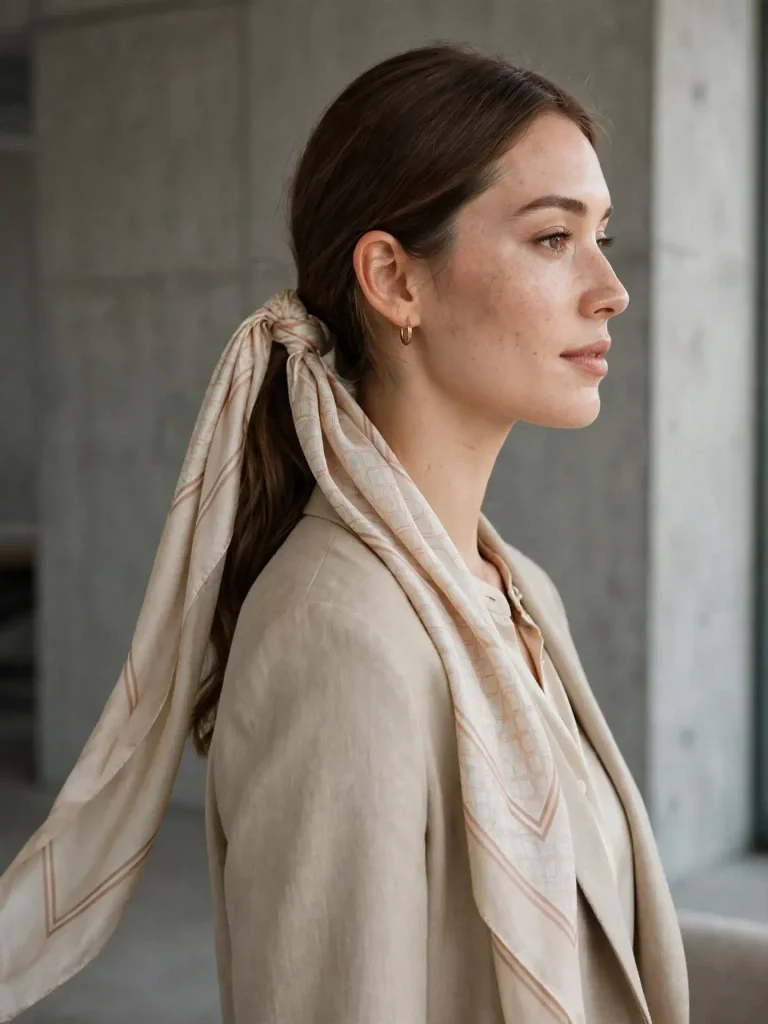
Tie a low ponytail as normal, then knot the long scarf just above the hair elastic and let both ends hang freely down the length of the ponytail rather than wrapping them around anything. The scarf becomes a decorative streamer rather than a functional wrap.
This is one of the lowest-effort styles here, since there’s no actual wrapping technique involved — just tying the scarf in place and letting gravity do the rest. It’s a good option for anyone who wants the visual impact of a scarf without learning any of the wrapping methods the other styles require.
Bandana-Style Triangles (Pre-Folded or Folded From a Square)
A true triangle bandana, whether store-bought pre-folded or a square you’ve folded yourself, sits differently against the head than a flat band does, since the point naturally falls toward the crown or the nape.
8. The Classic Front-Tied Bandana

Place the folded triangle over your head with the point at the back, and tie the two side ends at the nape of your neck, letting the point drape down over your hair. This is the most traditional bandana placement, and it works whether your hair is up or down underneath.
It’s especially practical for keeping hair off your face entirely, which makes it a genuinely functional choice, not just a decorative one, for anything involving actual physical activity — cleaning the house, gardening, a long day of errands where you just want your hair contained.
9. The Reversed Nape Tie
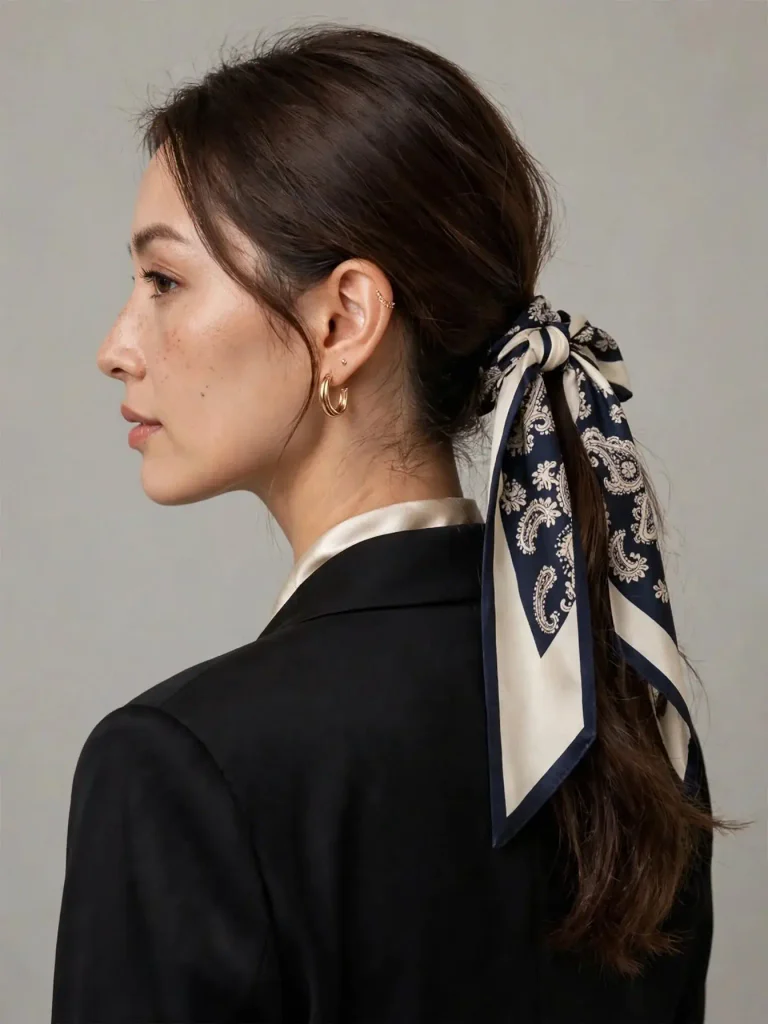
Flip the bandana so the point sits at your forehead instead of the back, and tie the ends underneath your hair at the nape, tucking the knot out of sight beneath a low ponytail or bun. This creates a slightly more polished, front-focused look than the classic tie.
This version photographs particularly well from the front, since the triangle point creates a clean, symmetrical line right at your hairline, without any bulk or knot visible from that angle. Save it for days you know you’ll be facing a camera more than the back of a room.
10. The Half-Up Bandana Base
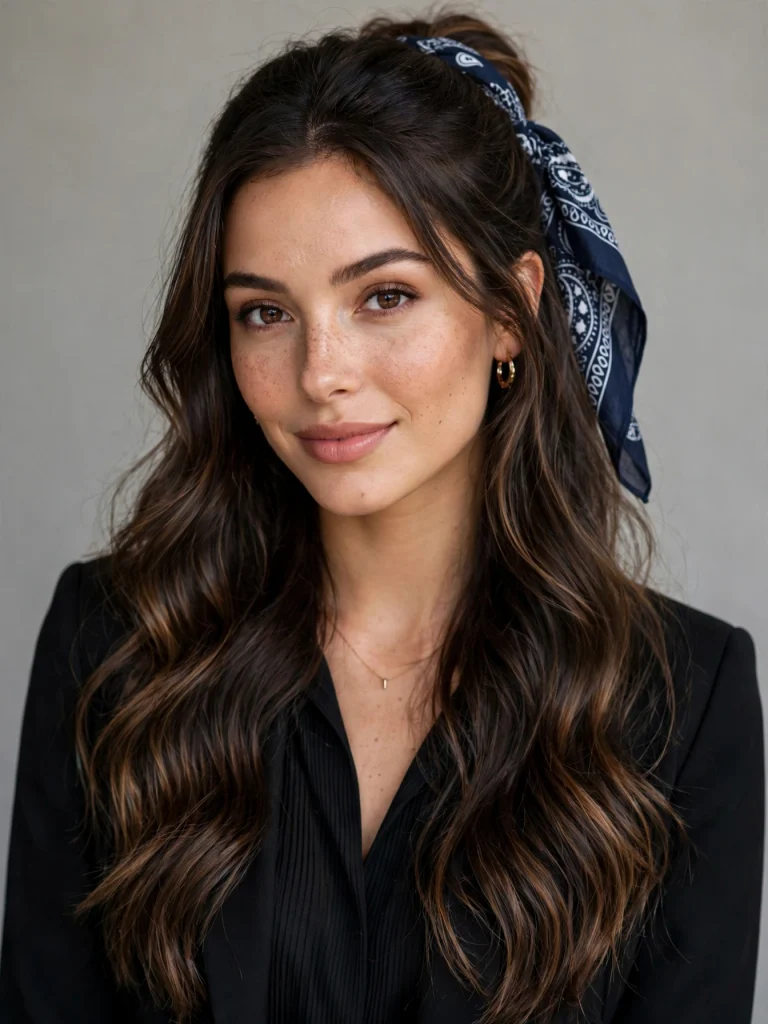
Fold the bandana into a headband shape rather than wearing the full triangle, and tie it toward the back of the crown rather than at the hairline, using it as the base for a half-up style. Pull the top section of hair back and secure it just in front of the tied bandana.
This gives you the visual interest of a scarf combined with the practicality of hair being partially off your face, which makes it one of the more versatile entries on this list for anyone who finds a full headband slightly too structured for daily wear.
Thin Skinny Scarves (Narrow Strips, Often Knit or Ribbon-Like)
Thin scarves behave more like ribbon than fabric, and they’re suited to smaller, more delicate details rather than full-coverage wraps.
11. The Braid Ribbon
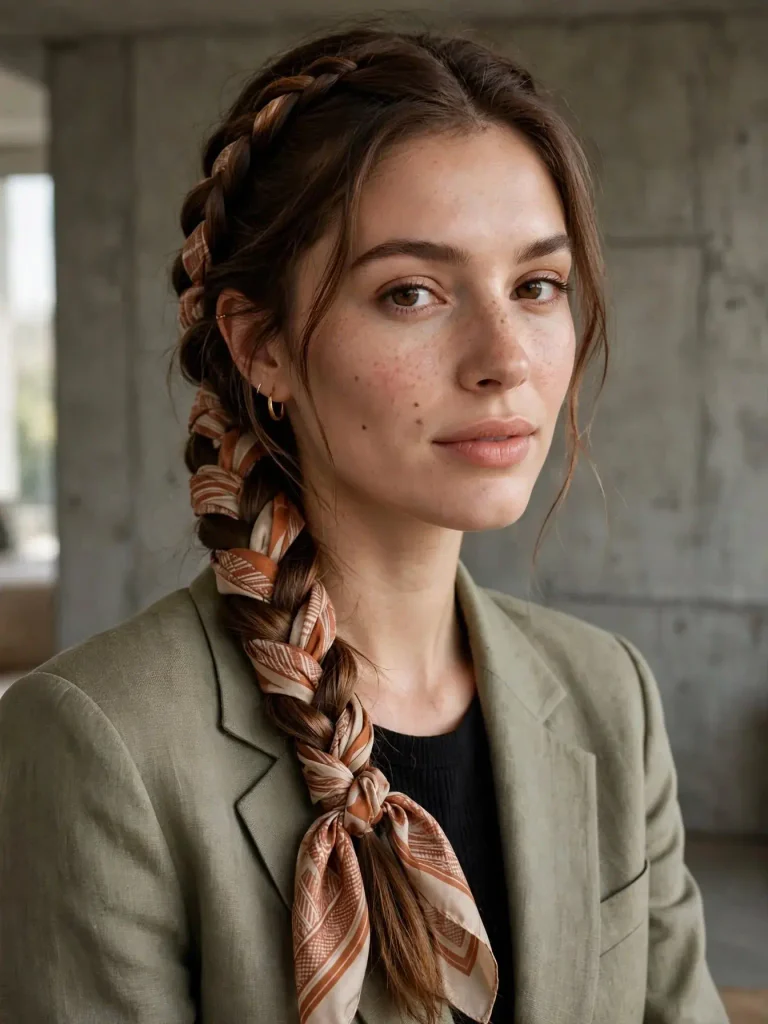
Thread a thin scarf through a simple three-strand braid, the same technique as the wider braided plait above, but with a noticeably more delicate, ribbon-like finish because of the narrower width. This reads as considerably more subtle and refined than the same technique with a wider scarf.
It’s a good choice for a slightly dressier occasion where you still want a scarf detail without it becoming the loudest part of your outfit. The thinness does a lot of the “quiet elegance” work here on its own, without you needing to choose a particularly muted color.
12. The Bow at the Base of a Ponytail
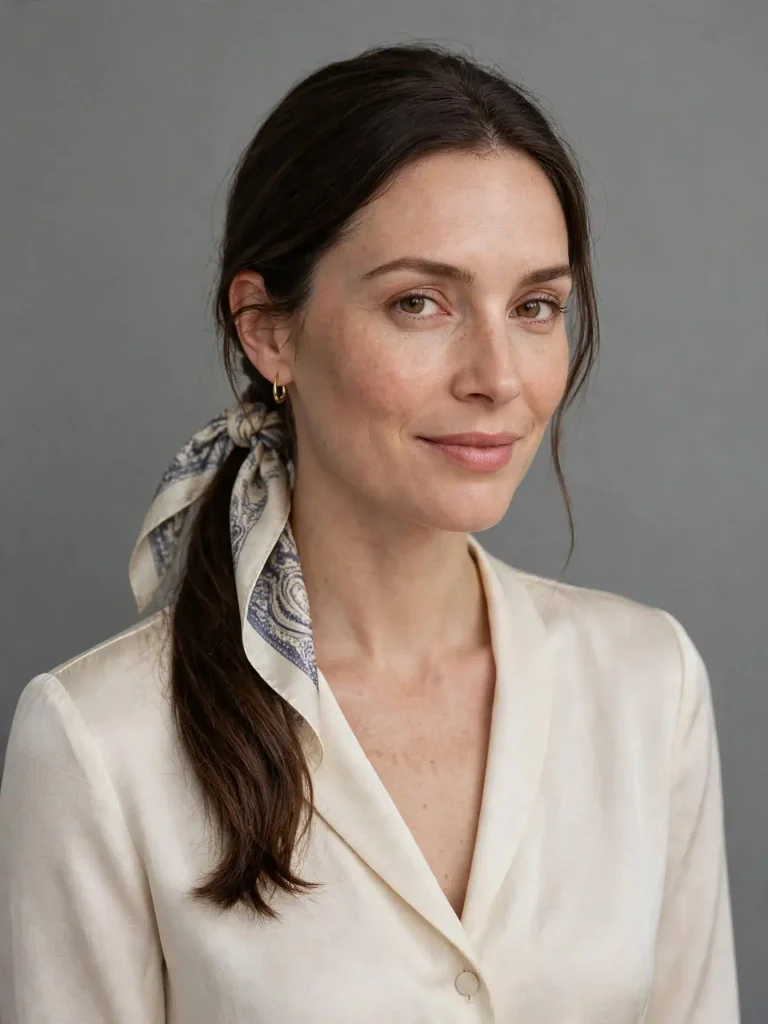
Tie the thin scarf into a simple bow directly at the base of a ponytail or low bun, letting the tails hang just slightly rather than trailing dramatically. This is essentially treating the scarf as jewelry for your hair rather than a functional wrap.
It’s one of the fastest styles in this entire list to execute, taking closer to ten seconds than a full minute, which makes it a strong option for the mornings you want a small detail without any real time investment.
13. The Wrapped Ponytail Cuff
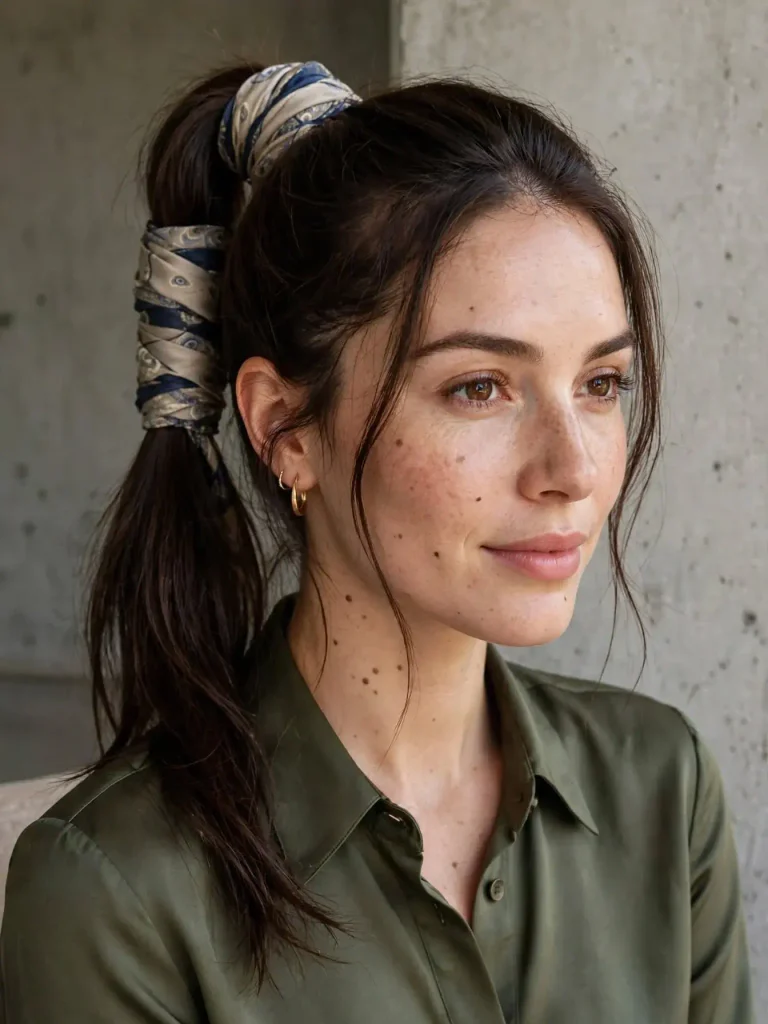
Wrap a thin scarf multiple times around a small section of ponytail, just below the hair elastic, creating a narrow cuff of color rather than a bow or a knot. Secure the end by tucking it under the final wrap rather than tying anything visible.
This works especially well with two or three thin scarves in coordinating colors, wrapped in sequence to create a layered, striped cuff effect. It’s a small detail, but it consistently gets asked about more than styles that took considerably more effort.
Oversized Blanket Scarves (Thick, Often Wool or Flannel)
The heaviest, warmest category here, better suited to a handful of bold, simple styles than anything delicate or multi-wrap, since the fabric itself is too thick for fine detail work.
14. The Single Wide Headband
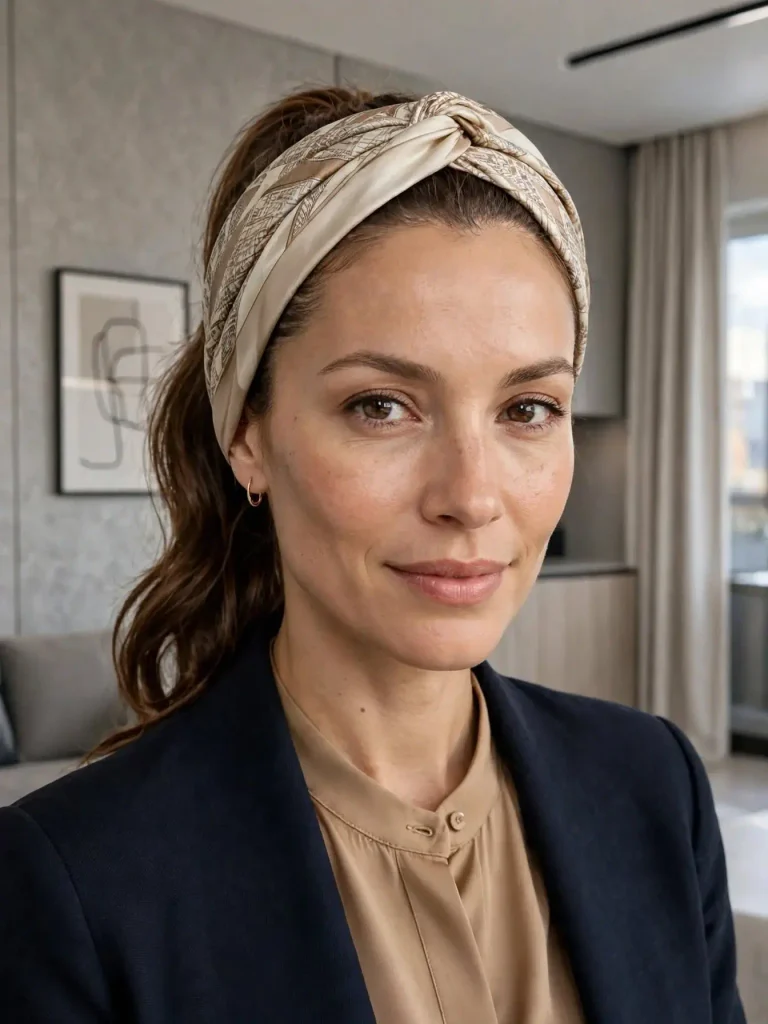
Fold the blanket scarf lengthwise into a wide band, roughly two to three inches, and tie it once at the nape rather than attempting any elaborate wrap. The thickness of the fabric means one confident wrap reads as intentional, while multiple wraps quickly become bulky and uncomfortable.
This is a genuinely practical winter option, since the thickness provides real warmth around the ears and hairline, not just visual interest. It’s the one scarf-hair style on this entire list that’s doing double duty as both an accessory and actual cold-weather protection.
15. The Loose Hood Drape
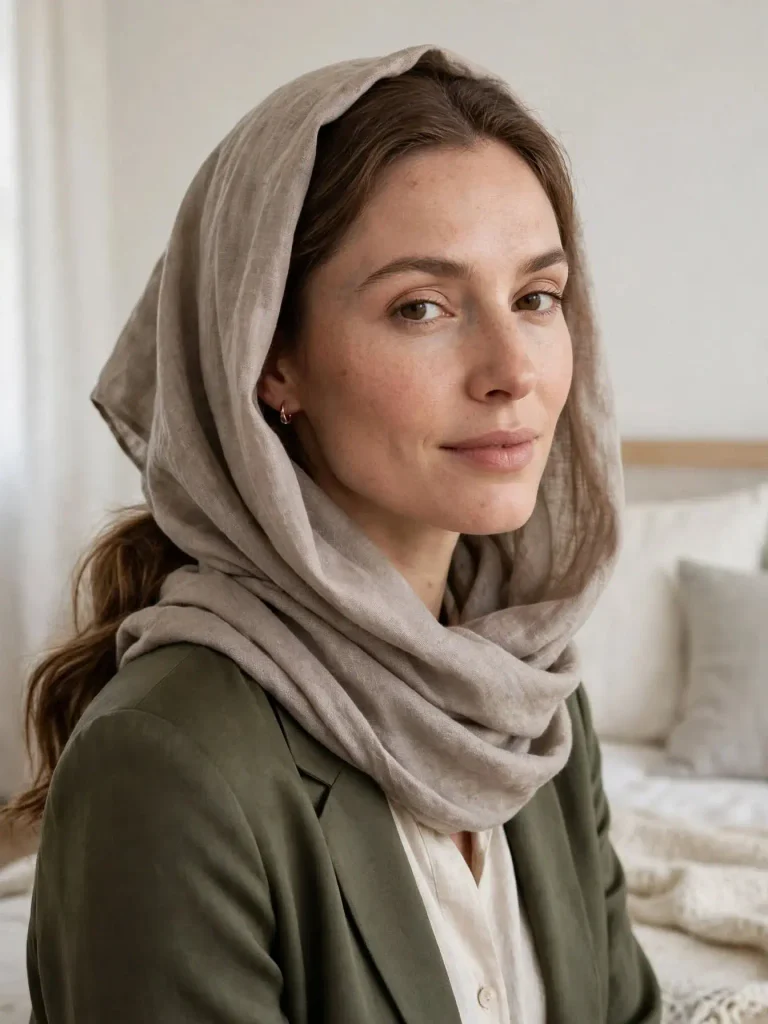
Rather than tying the blanket scarf at all, drape it loosely over your head like a soft hood, letting the ends hang down over your shoulders or chest without any knot securing it in place. This is less a “hairstyle” in the traditional sense and more a way of framing your hair and face with fabric.
It works best with hair left down and loose underneath, since the soft, unstructured drape of the scarf pairs naturally with equally unstructured hair. A very sleek, tightly styled look underneath tends to clash with how casually the fabric is sitting on top of it.
The Fabric Slip Test
Before committing to any style on this list, do a quick thirty-second check that tells you almost everything about how a scarf is going to behave once it’s actually tied: pinch a small section of the fabric and rub it gently between two fingers.
If the fabric feels genuinely slick and smooth, like true silk or a silk-blend, expect it to slip and loosen throughout the day, no matter how tightly you tie it initially. These fabrics look beautiful but need a small anchor, like a bobby pin hidden underneath the knot, to actually stay in place for more than an hour or two.
If the fabric has any texture or grip to it — cotton, knit, flannel — it’ll generally hold its tie without much help, which is why the thin skinny scarves and oversized blanket scarves in this list rarely need pins the way silk styles do. Knowing this in advance saves you from redoing a beautiful wrap three times before you’ve even left the house.
Face Shape Quick Match
A detail that’s genuinely useful and rarely mentioned directly: where a scarf sits on your head changes how it interacts with your face shape, in the same way a haircut’s part or fringe does.
If your face is rounder, styles that sit further back from your hairline, like the reversed nape tie or the half-up bandana base, tend to be more flattering than anything that creates a hard, straight line directly across your forehead, since that line can visually shorten the face. If your face is longer, a style that sits closer to the hairline, like the classic folded headband, actually helps by visually breaking up the length rather than elongating it further. If you have a more angular or square face shape, the softer, draped styles — like the loose hood drape or the trailing side tie — tend to balance sharper features better than a very structured, tightly wrapped band would.
This isn’t a rigid rule, and every style here can genuinely work on any face shape with enough confidence behind it. But if you’ve ever tried a scarf style and felt like something was “off” without being able to name it, checking where the tie sits relative to your face shape is usually where the answer is hiding.
Matching Scarf to Style
Before you try to recreate any specific look from a photo, check your own drawer first. A gorgeous braided-scarf photo means nothing if you only own square silk scarves, since that particular style genuinely needs the extra length a rectangular scarf provides.
Sort what you already have by shape, pick the section above that matches, and build your confidence with the easiest style in that category before moving to anything more involved. That’s really the whole approach — the scarf you already own is doing more to determine your options than any tutorial ever will.