15 Fall Green Nails, Mapped Like a Trail From Valley Floor to Summit
Green is the one color people underestimate the most when they’re planning a manicure, usually because they’re picturing a single shade, the bright grass green of a summer lawn, and assuming that’s the only option available. It isn’t. Walk any actual trail from a low valley up to a mountain summit and the green around you shifts constantly: deep, wet moss near a stream, dusty sage on a dry hillside, near-black pine at higher elevation, and eventually nothing green at all once you’re above the treeline.
So I mapped this post like an actual trail. Fifteen stops, each one at a different elevation, with an ecosystem description of the specific green found there, a trail difficulty rating for how durable the design is day to day, and a gear note on technique. Start at the trailhead and work your way up, or jump straight to the elevation that matches your mood.
The Trail
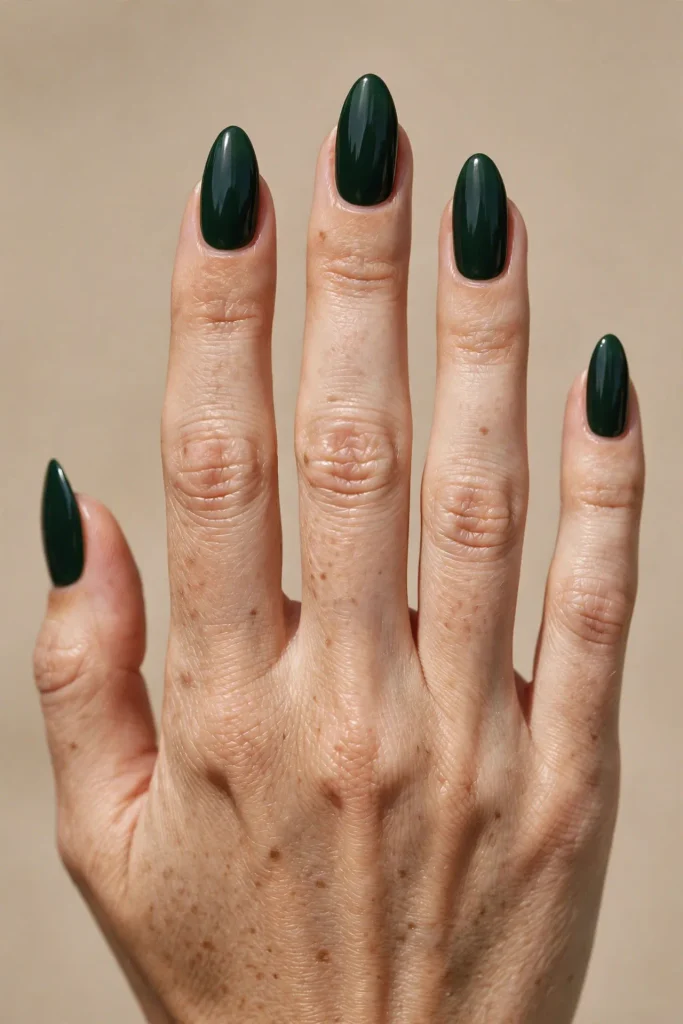
Stop 1, Trailhead, Valley Floor.
Ecosystem: the damp, shaded ground near a stream bed, thick with dark, wet moss.
Design: a deep, near-black forest green creme, glossy, no additional pattern.
Trail difficulty: Easy, meaning excellent wear, since a solid deep creme has no fine detail to chip unevenly.
Gear note: this is the entry point for anyone new to green nails at all, requiring zero technique beyond clean, even application.
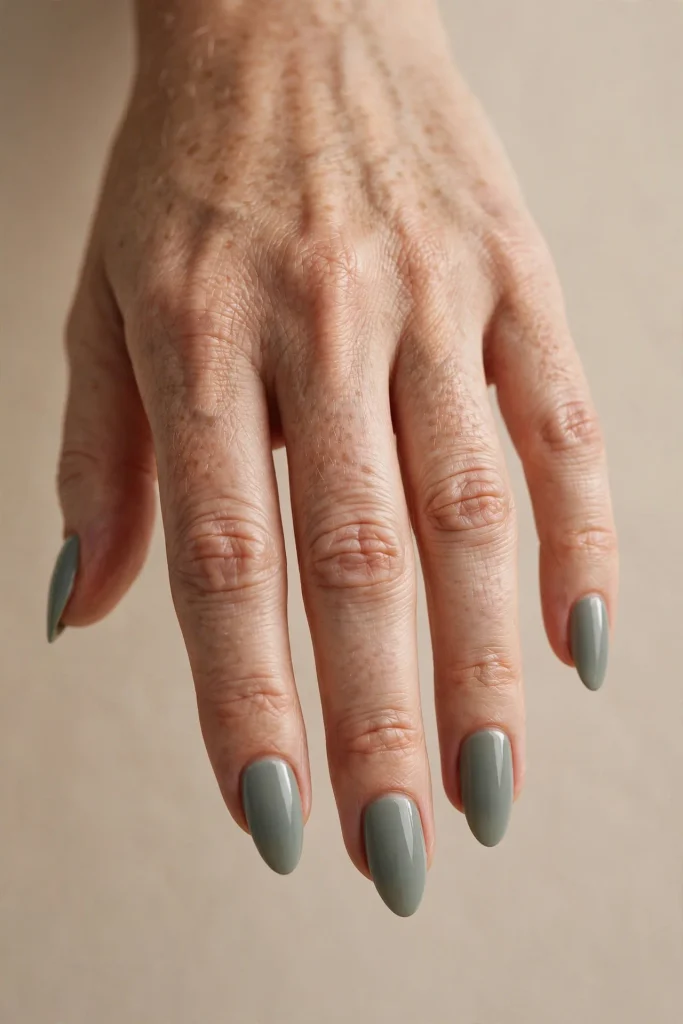
Stop 2, Lower Meadow.
Ecosystem: an open, sunlit meadow with soft, silvery-green sage brush scattered through tall grass.
Design: a dusty, muted sage-gray-green base, no pattern.
Trail difficulty: Moderate, since lighter, muted tones show natural nail growth and minor wear slightly sooner than deep pigments.
Gear note: pairs with almost any skin tone, since sage sits in a genuinely neutral zone between warm and cool green.
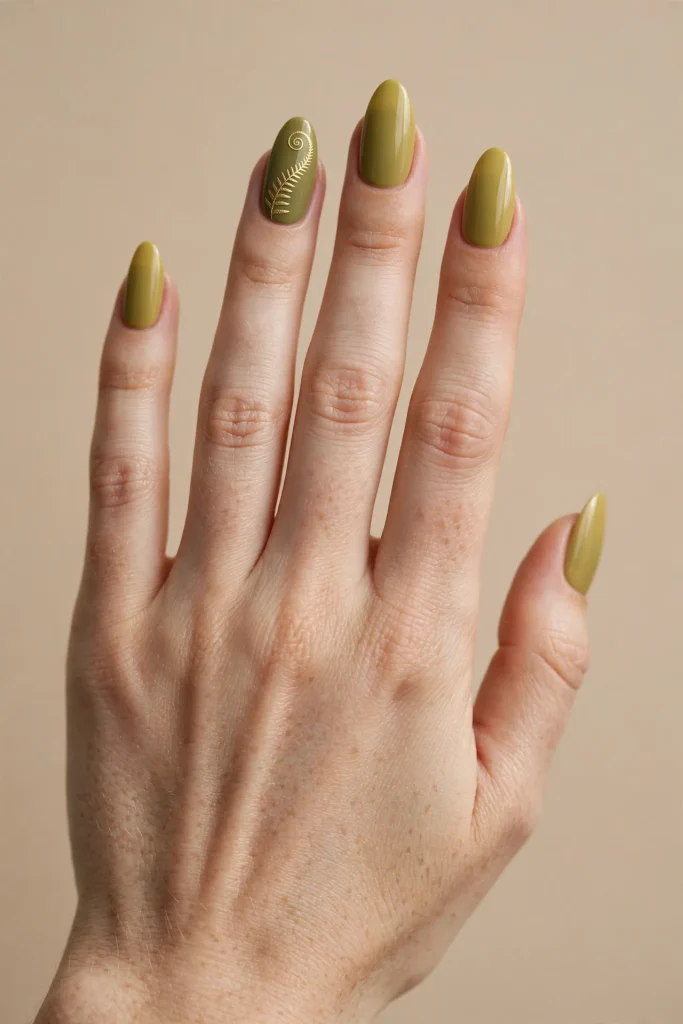
Stop 3, The Fern Grove.
Ecosystem: a shaded grove thick with unfurling fern fronds, bright and slightly yellow-toned green.
Design: a warm, yellow-leaning olive base with a single thin, curled gold line on the ring finger, echoing a fern’s characteristic spiral unfurling shape.
Trail difficulty: Moderate, since the fine curled line near the tip is the first element likely to show wear.
Gear note: use a fine detail brush and let your hand move in one continuous curved stroke rather than several short ones, mimicking the fern’s natural spiral.
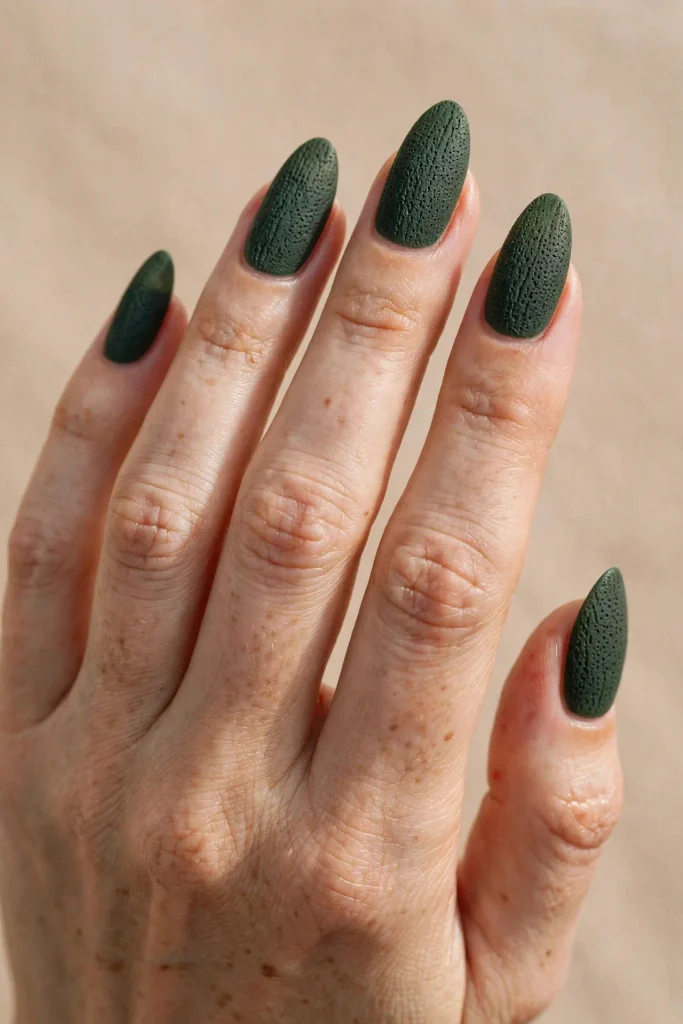
Stop 4, The Old Growth Grove.
Ecosystem: ancient, towering trees with deep, textured bark and a canopy so thick the light below turns almost gray-green.
Design: a deep hunter-green matte base, textured with a fine stippling technique across the entire nail to suggest rough bark.
Trail difficulty: Moderate, since matte, textured finishes require slightly more frequent top coat refreshing than a smooth glossy surface.
Gear note: use a stippling brush or a slightly stiff makeup brush dabbed lightly, rather than a smooth sponge, to create the rougher bark-like texture this stop specifically calls for.
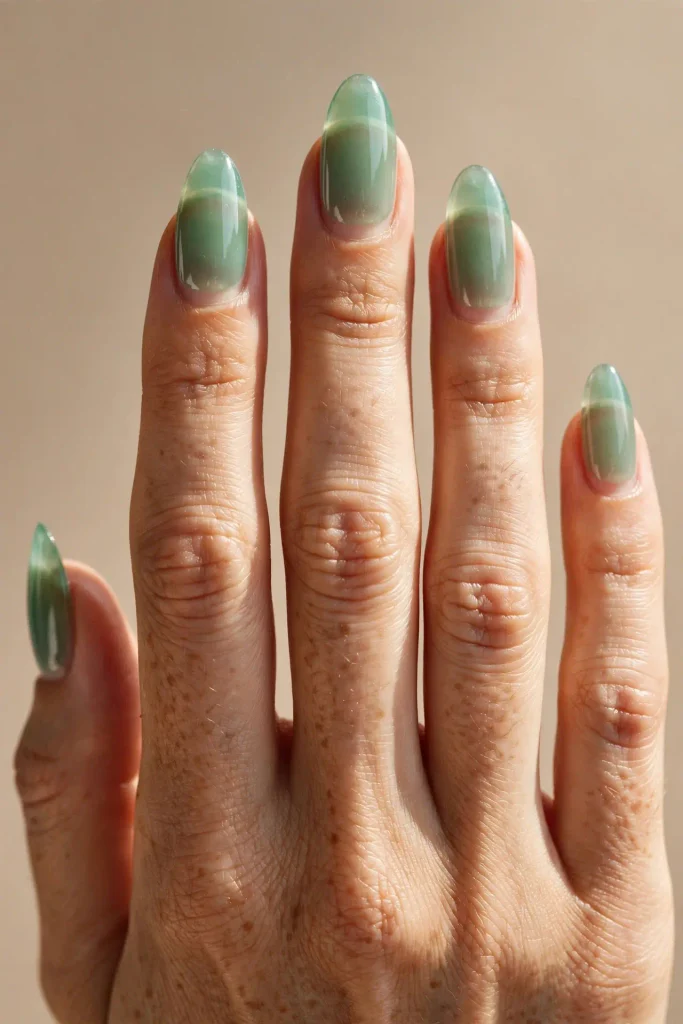
Stop 5, The Creek Crossing.
Ecosystem: smooth, algae-covered stones sitting just below clear, moving water.
Design: a translucent, sheer jade-green jelly polish built up in three thin layers, allowing the natural nail to show through the way stones show through shallow, clear water.
Trail difficulty: Moderate, since sheer jelly formulas generally wear slightly faster than opaque cremes.
Gear note: let each thin layer dry fully before the next, since jelly polish genuinely deepens with each additional coat and rushing the process leads to a streaky, uneven finish.
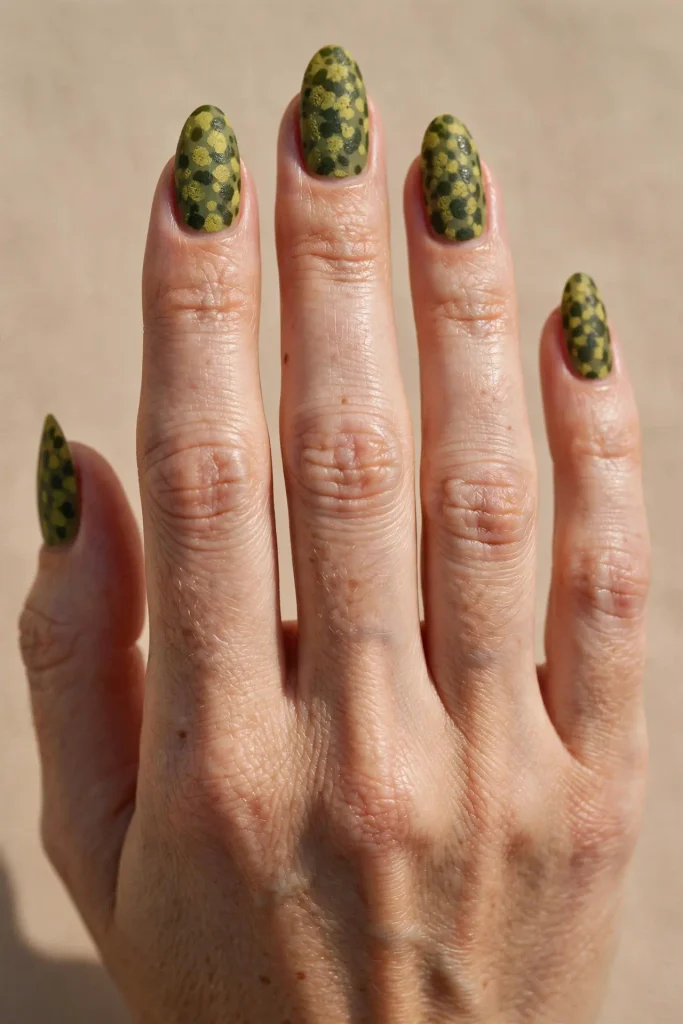
Stop 6, The Switchback Climb.
Ecosystem: the trail begins climbing here, winding through mixed forest where sunlight breaks through in patches, creating dappled light and shadow across the green undergrowth.
Design: an olive-green base with an irregular, dappled pattern of lighter yellow-green and darker forest-green spots applied with a sponge, mimicking sun breaking through a forest canopy.
Trail difficulty: Moderate, since the dappled sponge pattern hides minor wear reasonably well within its own irregularity.
Gear note: press the sponge at varying pressure and angle across the nail rather than in a repeating rhythm, since real dappled light has no consistent pattern to it.
Stop 7, The Ridge Trail.
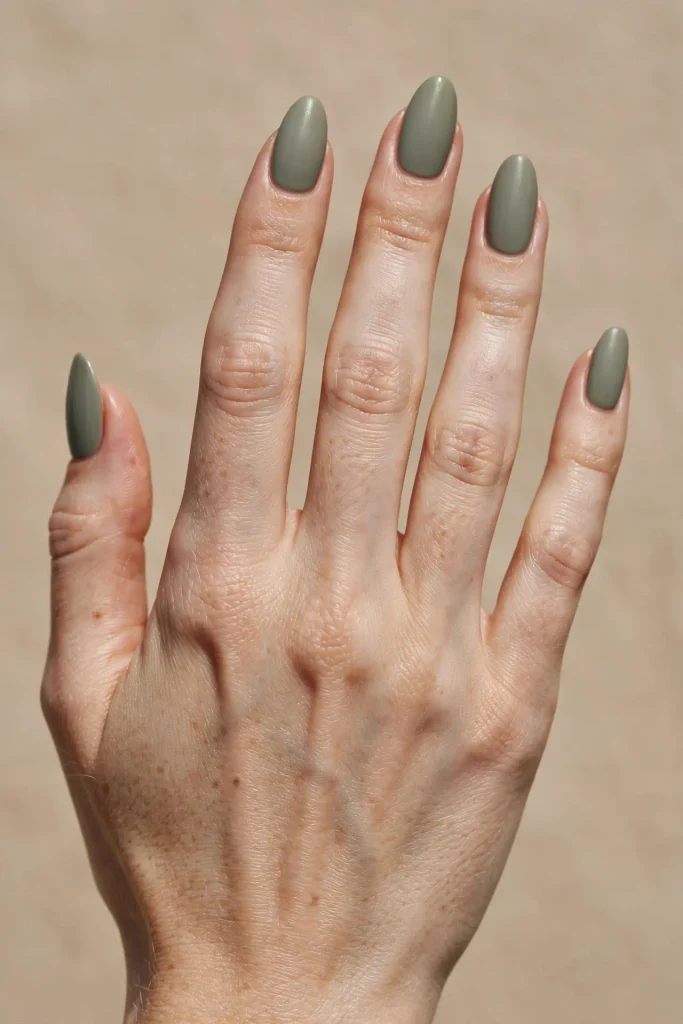
Ecosystem: exposed rock and hardy shrubs, where green becomes sparser and tougher, surviving wind and thinner soil.
Design: a muted, gray-green olive base with a matte finish, deliberately understated compared to the richer forest tones lower on the trail.
Trail difficulty: Easy, since muted matte tones hide wear exceptionally well.
Gear note: this stop pairs specifically with silver jewelry rather than gold, since the cooler, grayer undertone clashes slightly with warmer metals.
Stop 8, The Pine Stand.
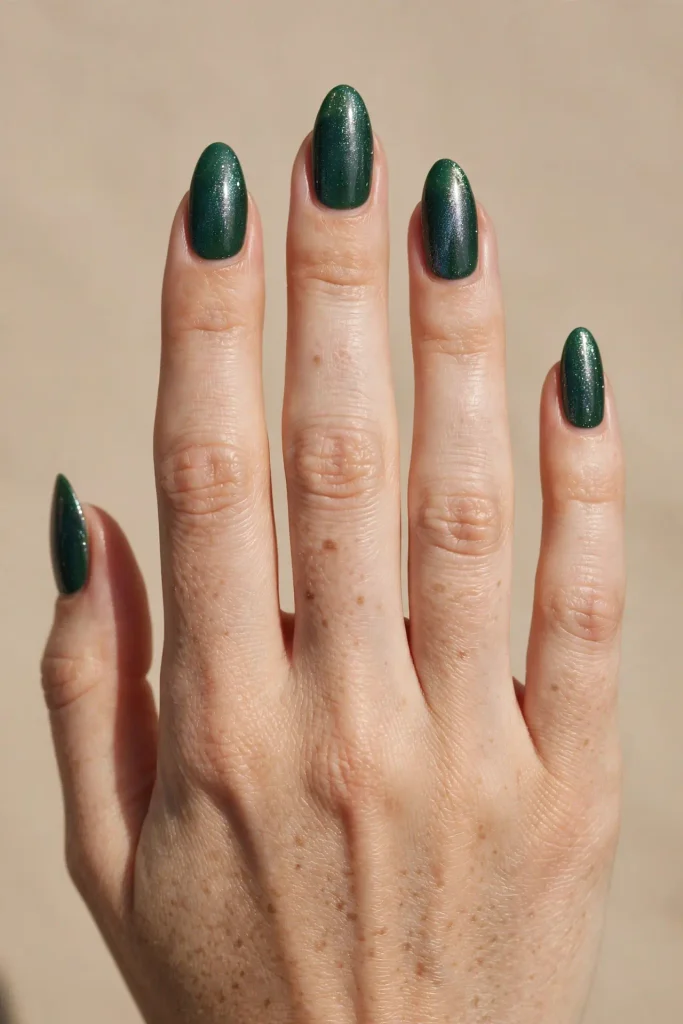
Ecosystem: a dense stand of evergreen pines, deep, almost blue-green, the needles holding their color even as the deciduous trees around them turn orange and red for fall.
Design: a deep pine-green creme with a fine cool-toned silver shimmer mixed through the base, suggesting frost catching on pine needles in the cooler higher-elevation air.
Trail difficulty: Easy, since a deep, shimmer-flecked creme wears similarly well to a plain solid color.
Gear note: apply the shimmer as a thin topper layer over the pine-green base rather than trying to find a premixed polish with both qualities built in, since layering gives more control over the shimmer’s density.
Stop 9, The Lichen Rocks.
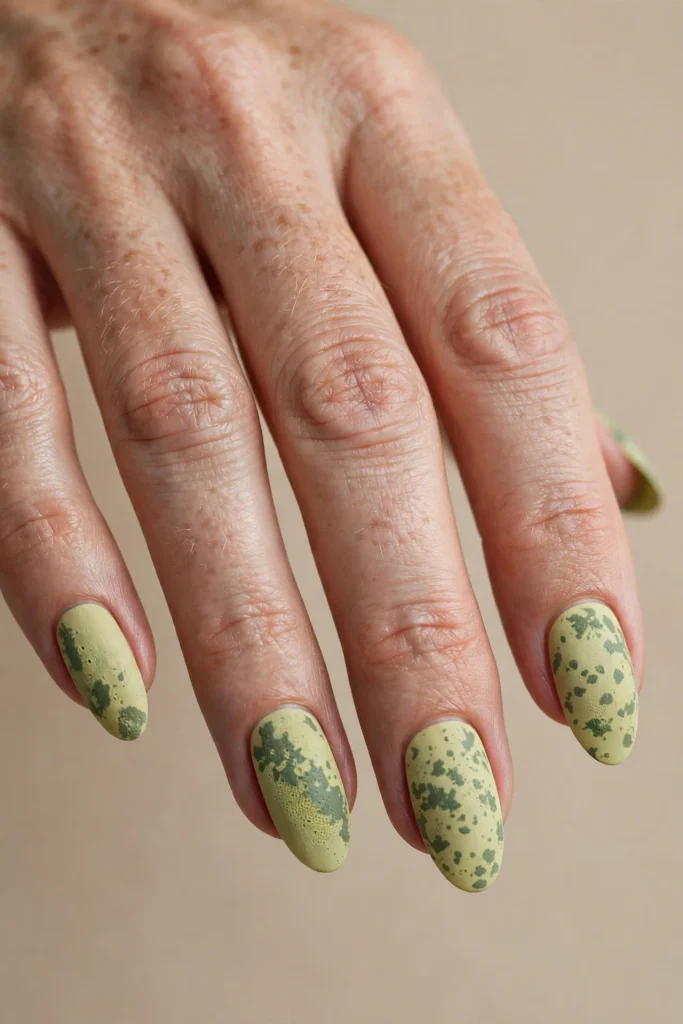
Ecosystem: exposed boulders along the higher trail, covered in patches of pale, chalky lichen in unexpected yellow-green and sage tones.
Design: a chalky, matte sage-yellow base with small, irregular patches of a slightly darker sage sponged on in a scattered, organic pattern.
Trail difficulty: Moderate, since the textured, patchy design hides small chips within its own irregularity, similar to the dappled Stop 6.
Gear note: this is a genuinely unusual, less common green, worth trying specifically if you find most green polishes reading as either too bright or too dark for your taste.
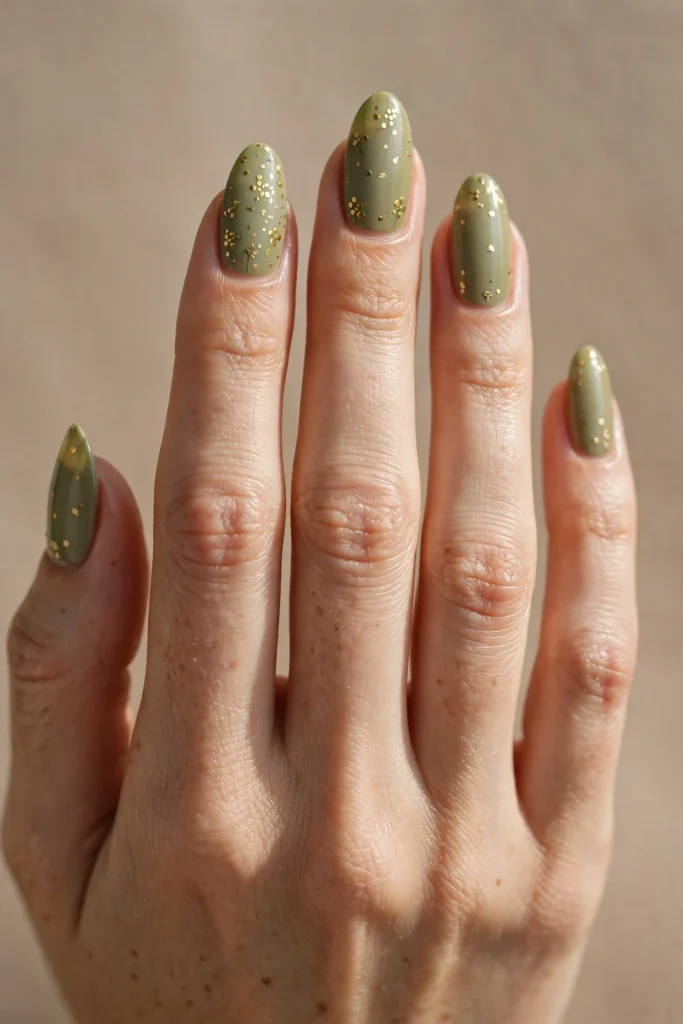
Stop 10, The Alpine Meadow.
Ecosystem: a high meadow just below the treeline, where hardy wildflowers grow low and close to the ground among short, tough alpine grass.
Design: a soft, muted olive-green base with tiny, scattered gold dots suggesting distant wildflowers dotting the meadow grass.
Trail difficulty: Easy, since small dots near the cuticle, the most protected zone on the nail, hold up well over time.
Gear note: use a bobby pin or dotting tool and vary the dot placement rather than spacing them evenly, since a genuinely natural meadow has no even, gridded pattern to its wildflowers.
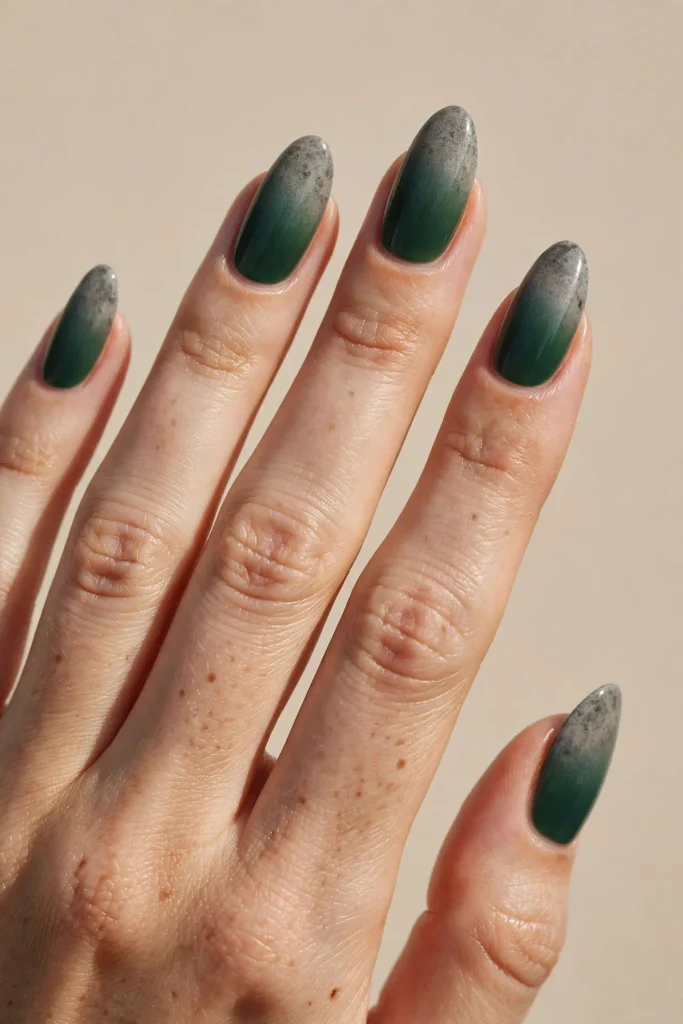
Stop 11, The Treeline.
Ecosystem: the exact boundary where trees stop growing entirely, gnarled and wind-bent evergreens giving way to bare, exposed rock above.
Design: a half-and-half nail, forest green covering the lower half from cuticle upward, transitioning to a bare, rocky gray covering the upper half toward the tip, with a soft, blended transition rather than a hard line.
Trail difficulty: Moderate, since the transition zone itself, right in the middle of the nail, is a genuinely high-wear area regardless of which two colors meet there.
Gear note: blend the transition with a makeup sponge worked in small circular motions right at the meeting point, rather than leaving a crisp line, to mimic how a real treeline thins out gradually rather than stopping abruptly.
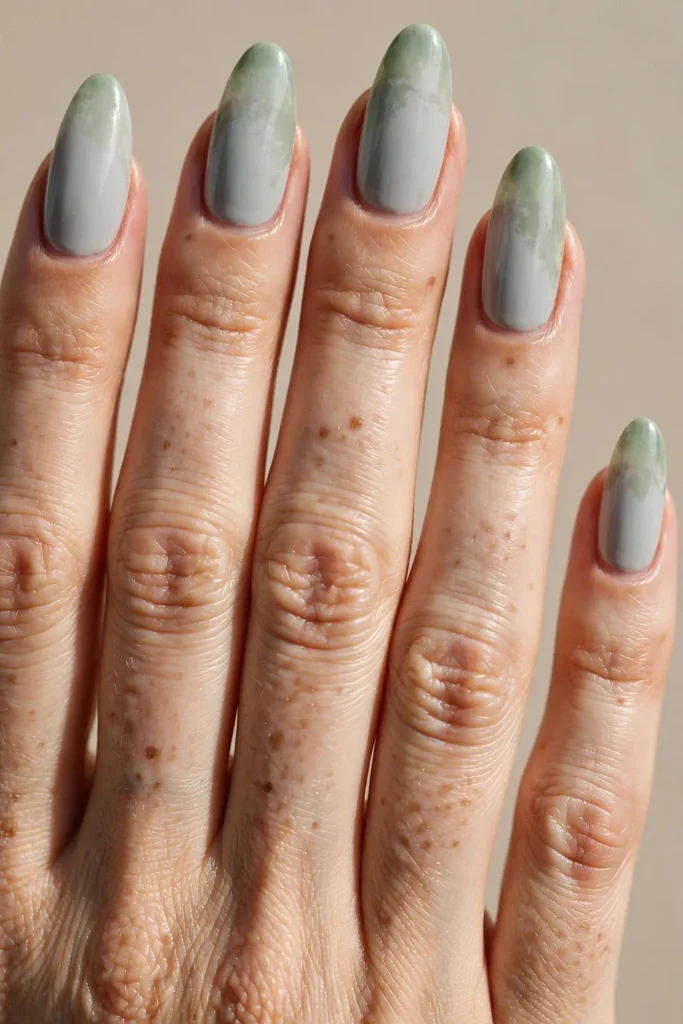
Stop 12, The Scree Field.
Ecosystem: loose, broken rock above the treeline, entirely gray, with only the faintest hint of green lichen clinging to a few remaining boulders.
Design: a cool, pale gray base with the faintest wash of sheer sage green applied unevenly over the top, like the last trace of green before the trail leaves it behind entirely.
Trail difficulty: Easy, since the muted, low-saturation combination hides wear better than a more saturated design would.
Gear note: this stop is worth including specifically for anyone who loves the idea of a green-adjacent manicure without wanting a color that reads as clearly, obviously green from across a room.
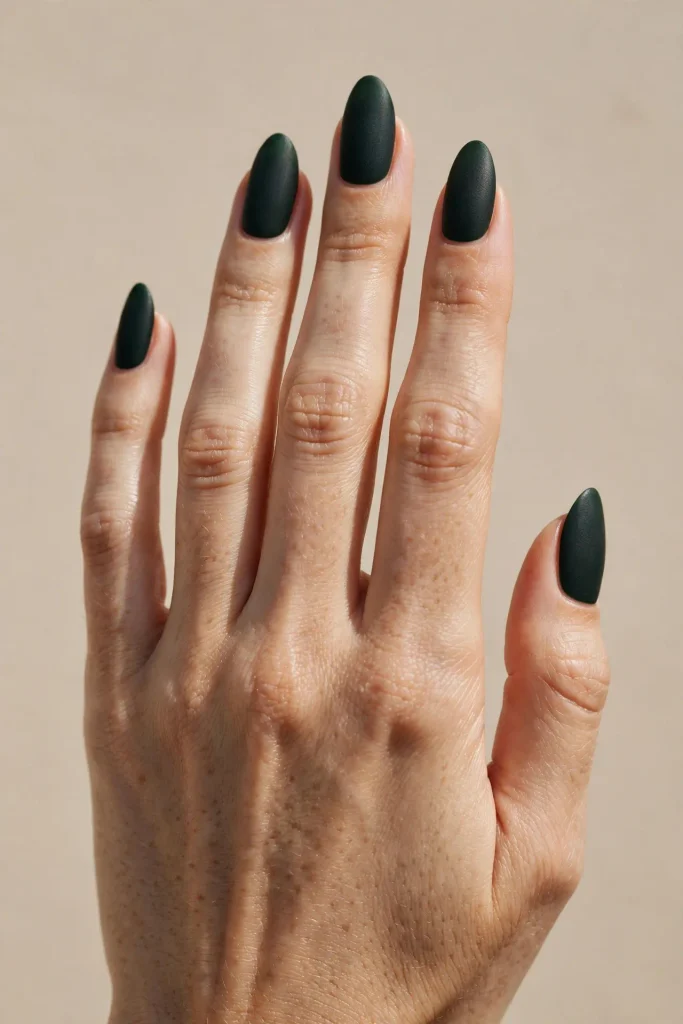
Stop 13, The Saddle.
Ecosystem: a lower point between two peaks, where wind funnels through and only the hardiest, deepest-rooted alpine plants survive, dark and tightly clustered close to the ground.
Design: a deep, nearly black-green base, matte, with the barest hint of texture, the darkest and most dramatic green on the entire trail.
Trail difficulty: Moderate, since matte black-adjacent tones can show fine scratches more visibly against their own dark, flat surface.
Gear note: pairs beautifully with black outfits and minimal jewelry, letting the near-black-green read as a sophisticated neutral rather than an obvious color statement.
Stop 14, The False Summit.
Ecosystem: a point on the climb that looks like the top but isn’t, exposed rock with essentially no plant life remaining, just the faintest cool undertone in the stone itself.
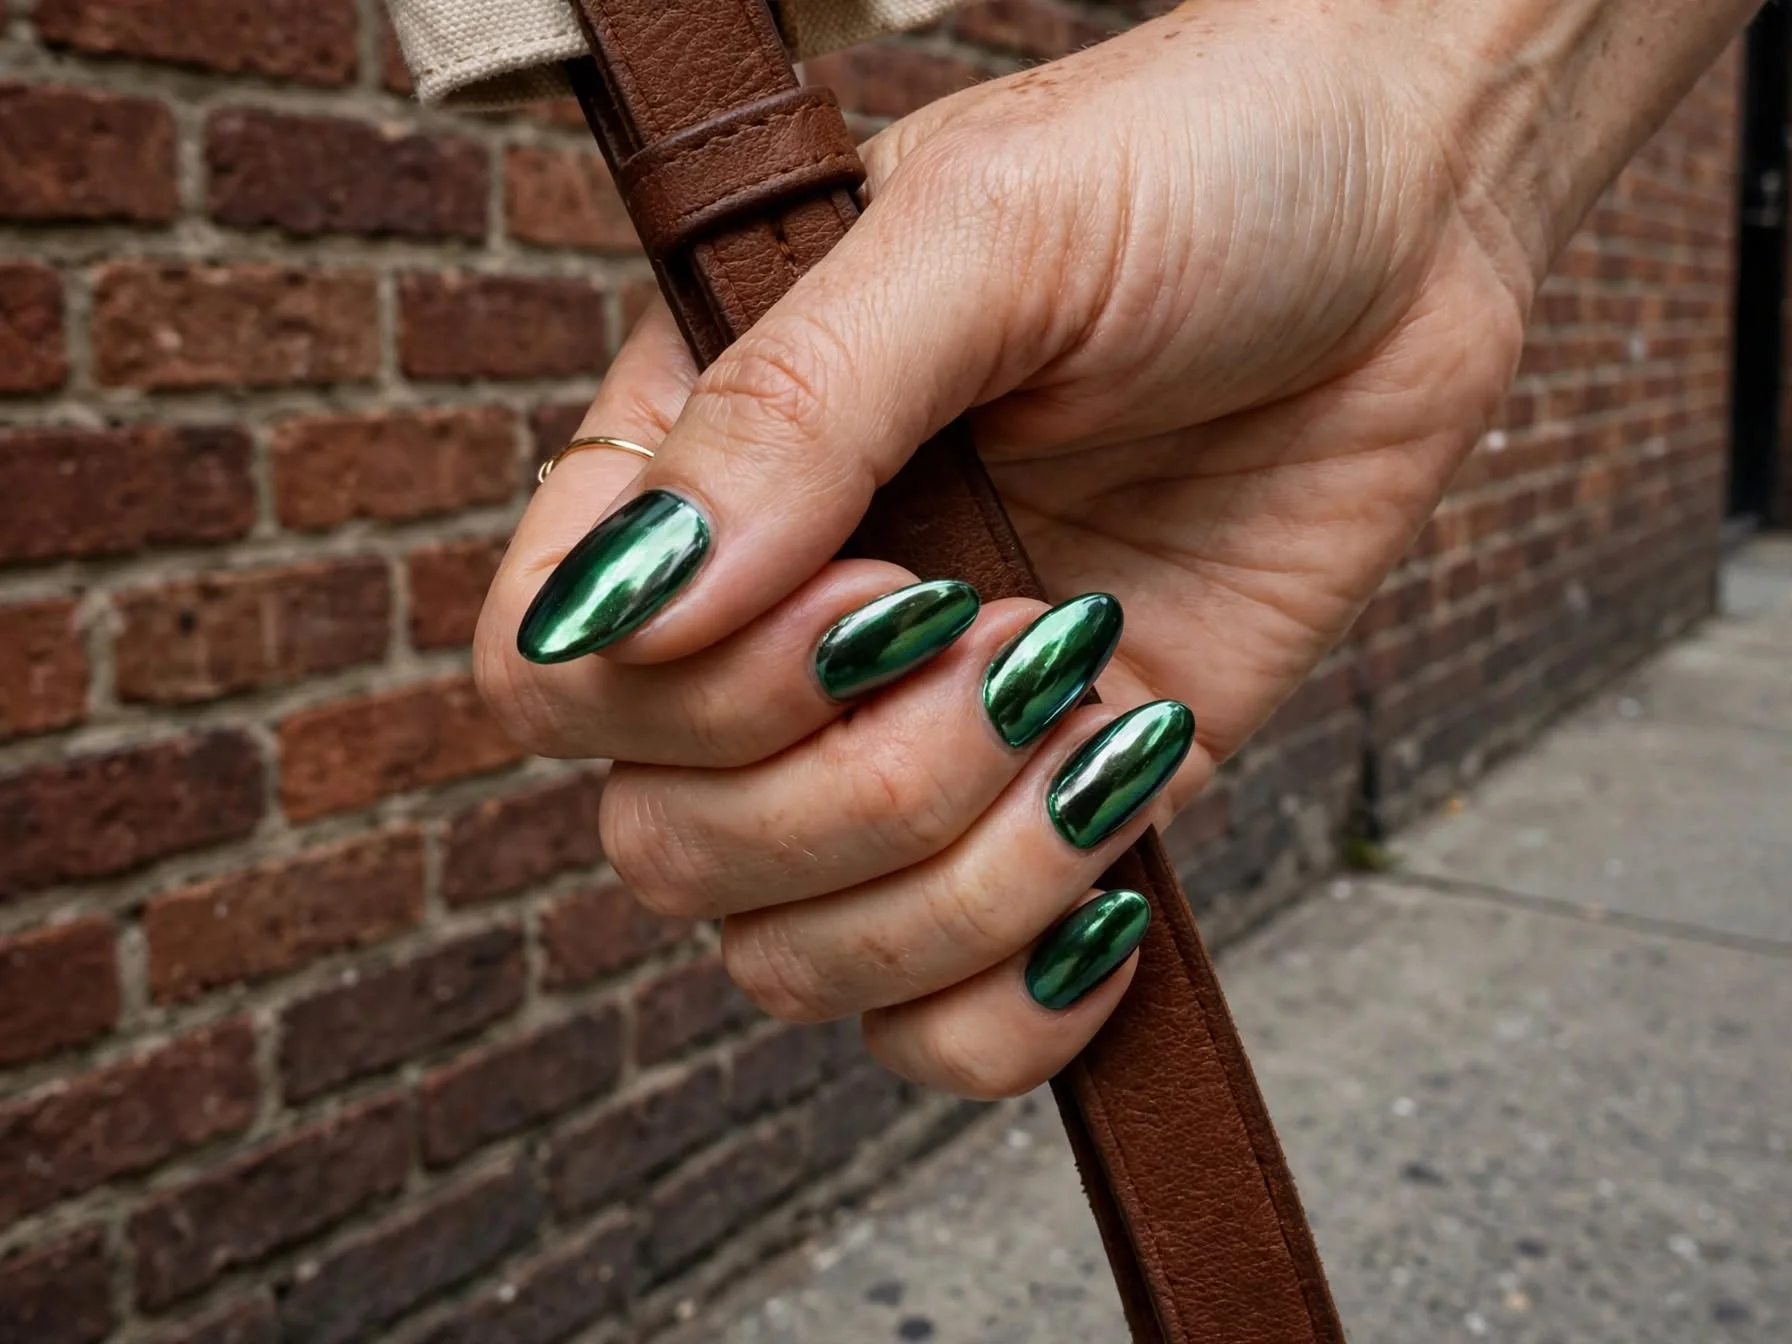
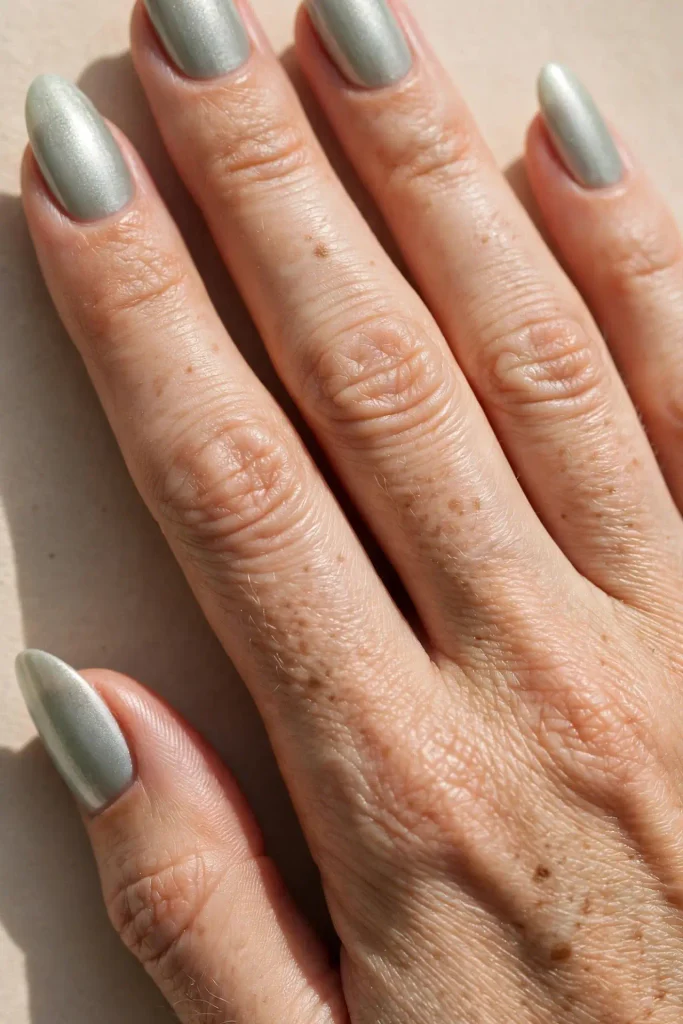
Design: a cool, pale gray-green chrome finish, essentially the palest, most minimal green on the whole trail, closer to a shimmer than a true color statement.
Trail difficulty: Moderate, since chrome finishes generally require a slightly more careful application process and show fine scratches more readily than a standard creme.
Gear note: this stop works as a genuine palate cleanser after the deeper, darker Stop 13, a light, quiet finish before the actual summit.
Stop 15, The Summit.
Ecosystem: the actual peak, bare rock, thin air, and the reward of the whole climb, no green remaining at all except the memory of everything passed on the way up.
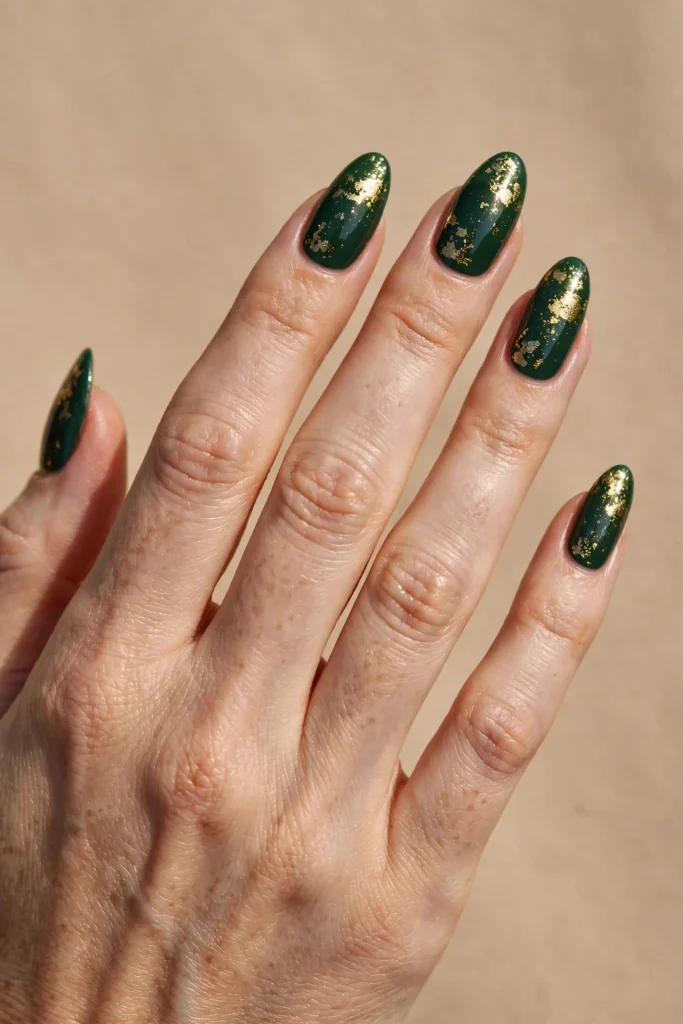
Design: a genuinely celebratory finish, a deep forest-green base from Stop 1 or Stop 8, but with gold foil flecks pressed on top, catching light the way the summit view itself does after a long climb.
Trail difficulty: Moderate, since gold foil accents require careful sealing to avoid catching and lifting at the edges.
Gear note: press the foil onto slightly tacky, not fully dry, top coat, and seal thoroughly, treating this stop as the reward it’s meant to be after working through the rest of the trail.
Something New: The Elevation Color Chart
Understanding how green genuinely shifts with elevation on a real trail makes choosing your own custom blend far more intuitive than picking randomly from a wall of polish bottles.
| Elevation | Real-World Green | Undertone | Nail Translation |
|---|---|---|---|
| Valley floor | Deep, wet moss | Cool, near-black | Deep forest creme |
| Meadow | Sage brush, tall grass | Neutral to warm | Muted sage-gray |
| Mixed forest | Fern, dappled canopy | Warm, yellow-leaning | Olive with gold accents |
| Pine stand | Evergreen needles | Cool, blue-leaning | Deep pine with silver shimmer |
| Alpine meadow | Low grass, wildflowers | Neutral, muted | Soft olive with gold dots |
| Treeline and above | Lichen, sparse rock | Cool, gray-leaning | Pale sage-gray, chrome |
Understanding this progression is useful even beyond the fifteen stops listed, since it explains why a deep forest green and a pale sage genuinely don’t clash despite both being called green, they simply sit at different elevations on the same natural color path.
The Undertone Compass
Green splits into warm and cool undertones just as dramatically as any other color family, and figuring out which direction suits you matters more with green than with almost any other shade.
If gold jewelry generally suits your skin, lean toward the warmer stops on the trail, Stop 3’s fern olive, Stop 6’s dappled olive, and Stop 10’s alpine meadow gold-dotted olive all sit in genuinely warm, yellow-leaning green territory. If silver jewelry generally suits you better, lean toward the cooler stops, Stop 7’s ridge trail, Stop 8’s pine stand, and Stop 13’s saddle all sit in cooler, blue-leaning or near-black green territory. If you’re genuinely unsure which direction flatters you more, Stop 1’s deep forest green and Stop 9’s lichen rock sage both sit close enough to neutral that they work reasonably well regardless of undertone.
Moss vs. Foliage: A Technique Comparison
Several stops on this trail rely on one of two genuinely different textural approaches, and knowing which is which helps you choose the right method before starting.
The moss technique, used at Stop 1 and Stop 4 specifically, relies on a deep, even base color with texture built through stippling or matte finishing, creating a sense of density and depth without any distinct pattern at all, the same way real moss reads as a solid, textured mass from a short distance rather than individual visible strands. The foliage technique, used at Stop 3, Stop 6, and Stop 9, relies on distinct, separate elements, dots, sponge patches, or fine lines, layered over a base color, creating a sense of individual leaves, spots of light, or scattered growth rather than one uniform mass. Choosing between these two approaches before starting a design saves considerable frustration, since attempting a foliage-style scattered pattern with a moss-style stippling brush, or the reverse, tends to produce a muddled result that reads as neither technique successfully.
Altitude Mismatch Troubleshooting
Sometimes a green that looked perfect on a specific elevation’s example photo reads completely differently once actually applied, and this is almost always a genuine altitude mismatch between the color chosen and your own skin’s undertone, not a flaw in the technique itself.
If a warm olive from the lower elevations, Stops 3 through 6, looks muddy or slightly sallow against your skin rather than rich and warm, you’re likely cooler-toned than the design assumes, and shifting up the trail toward Stop 7 or Stop 8’s cooler pine and ridge tones will likely read as noticeably more flattering. If a cool pine or sage from the higher elevations, Stops 7 through 12, looks flat or slightly gray-washed against your skin rather than crisp and cool, you’re likely warmer-toned than the design assumes, and shifting back down toward Stop 3 or Stop 10’s warmer olive tones will likely resolve the mismatch. This single adjustment, moving up or down the elevation chart rather than abandoning green entirely, resolves the vast majority of “green just doesn’t work on me” complaints.
Trailhead Outfit Pairing Guide
| Elevation Stop | Best Outfit Pairing |
|---|---|
| Stops 1, 4, 13 (deep, dark greens) | Black outfits, minimal jewelry, evening wear |
| Stops 2, 7, 12 (muted, gray-greens) | Monochrome neutrals, silver jewelry, office wear |
| Stops 3, 6, 10 (warm, gold-flecked olives) | Cream and camel tones, gold jewelry |
| Stops 5, 8, 9 (jewel and shimmer greens) | Denim, casual layering, everyday wear |
| Stops 11, 14, 15 (transitional and metallic finishes) | Statement pieces, special occasions |
Post-Hike Care
Green polish, particularly the deeper, more saturated tones from the lower trail stops, can leave a faint tint on natural nails if worn for extended periods without a proper base coat, the same way real hiking boots eventually pick up ground-in trail dust that needs proper cleaning rather than a quick wipe. Always apply a ridge-filling base coat before any of the deeper green stops specifically, and give your natural nails a short rest between manicures if you notice any lingering tint after removal. For the textured or matte finishes, Stops 4, 7, 9, and 13, reapply a thin top coat roughly halfway through the expected wear cycle, since matte and textured surfaces show natural oil buildup and dulling faster than a smooth glossy finish does.
Choosing Your Starting Stop
If you’re new to green nails entirely and want the safest, most universally flattering entry point, start at Stop 1 or Stop 2, the trailhead stops built specifically as low-risk, easy-wear introductions to the whole trail. If you already know green suits you and want something more textured or detailed, Stop 6 or Stop 10 offer genuine visual interest without sacrificing much durability. If you want the full, most dramatic green experience regardless of maintenance effort, Stop 13’s near-black saddle or Stop 15’s celebratory gold-flecked summit deliver the most visual payoff on the entire trail.
Quick Answers
What’s the most universally flattering green for someone unsure of their undertone?
Stop 1’s deep forest green or Stop 9’s lichen sage, both sitting close enough to neutral to work reasonably well regardless of warm or cool undertone.
How do I know if I should choose a warmer or cooler green?
Check whether gold or silver jewelry generally suits your skin better, then follow the Undertone Compass toward the corresponding warmer or cooler trail stops.
Why does the same “green” look different in different designs?
Green spans an unusually wide natural range, from near-black moss to pale sage to deep pine, and the Elevation Color Chart above maps out exactly how much genuine variation exists within what people casually lump together as one single color.
What’s the easiest textured green technique for a beginner?
The moss technique, Stop 1 or Stop 4’s approach, since even, all-over stippling is more forgiving of an unsteady hand than the more precise, separated elements the foliage technique requires.
One Last Thing
Green nails were never really one single color choice the way most people approach them. They’re an entire trail’s worth of variation, deep and wet near the valley floor, pale and windswept above the treeline, and choosing the right elevation for your own skin and mood matters more than choosing the right bottle off a shelf.
Start at the trailhead if green is new territory for you, follow the Undertone Compass if a green you’ve tried before didn’t quite work, and save the summit for a day that genuinely calls for it.
Which elevation are you starting your climb from: the mossy valley floor, the warm fern grove, or straight up toward the alpine treeline? Save this article for your next manicure appointment, and send it to a friend who’s always said green “just doesn’t work” on her without ever trying more than one single shade of it.