16 Fall Coffin Nails, Drafted Like Blueprints From an Architect’s Table
A coffin nail is the one shape that is genuinely defined by geometry rather than a soft, organic curve. It has a flat, squared-off tip and tapered, straight sides, which means it behaves more like a piece of architecture than a piece of nature. Get the angles wrong and the whole shape reads as sloppy, the same way a building with mismatched window lines reads as unfinished even if every individual material used was expensive.
So I drafted this post like an actual blueprint set. Sixteen designs, each one a building plan with a floor plan description of the color and pattern layout, a materials list of the actual polish and tools needed, and a load-bearing note on how durable the design is day to day. The extras cover the structural side of coffin nails specifically, the flat-tip angle, the length zoning, and the things that make the shape hold up rather than just look good on paper.
The Blueprints
Blueprint 1, The Minimalist Loft.
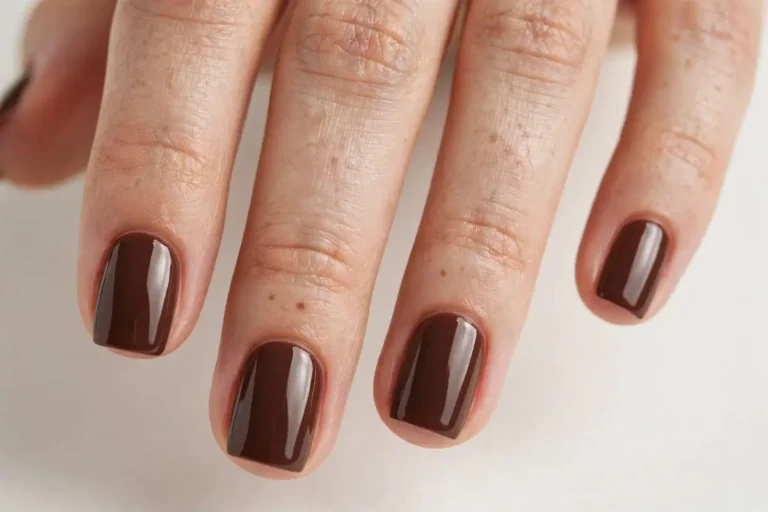
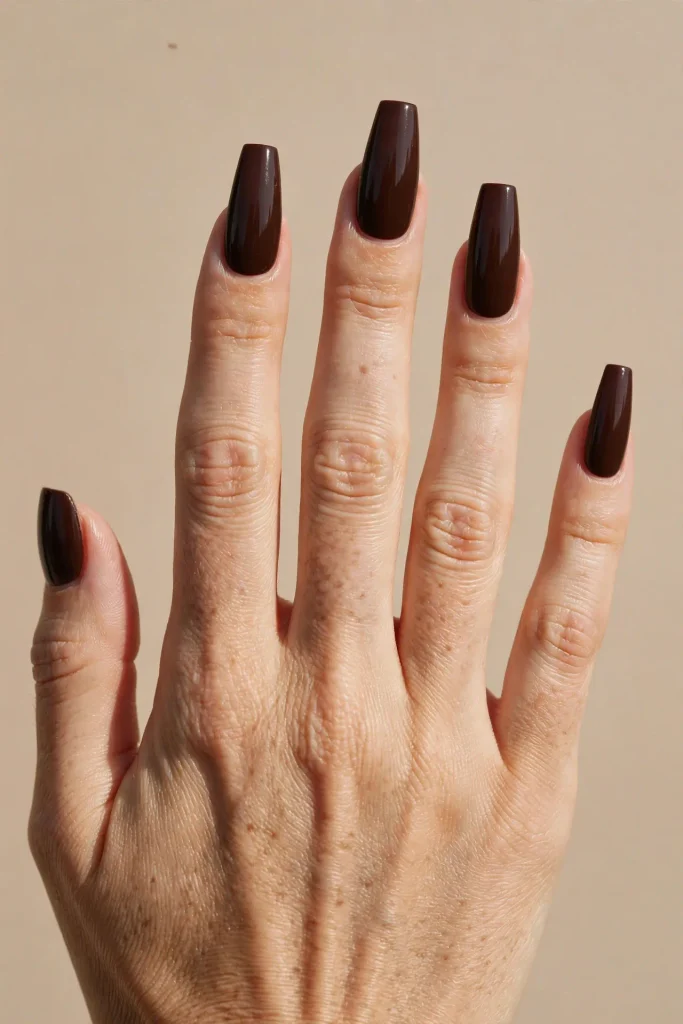
Floor plan: a single, flat, glossy chocolate-brown creme across the entire nail, no additional elements.
Materials: one bottle of deep brown creme polish, glossy top coat.
Load-bearing: excellent, since a flat solid color has no fine detail to chip or wear unevenly, making this the most structurally sound blueprint in the whole set.
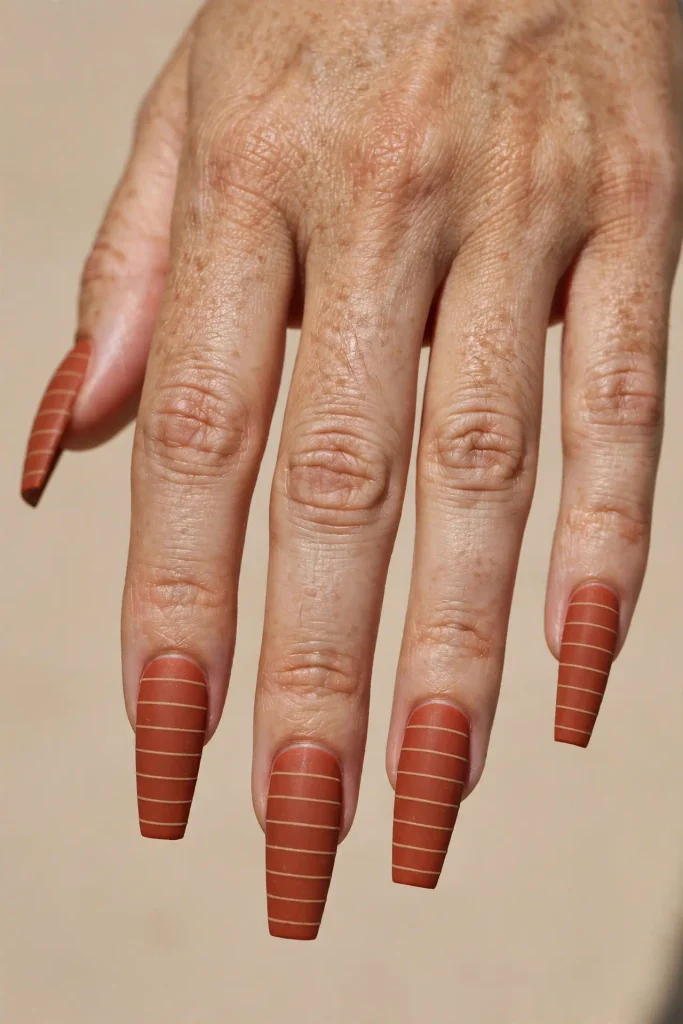
Blueprint 2, The Exposed Brick.
Floor plan: a rust-terracotta base with thin, horizontal tan lines spaced evenly down the nail, mimicking a brick wall’s mortar lines.
Materials: rust creme base, a striping brush or thin tape, tan polish for the lines.
Load-bearing: good, since the fine horizontal lines are more protected from tip-first impact than a design running the opposite direction would be.
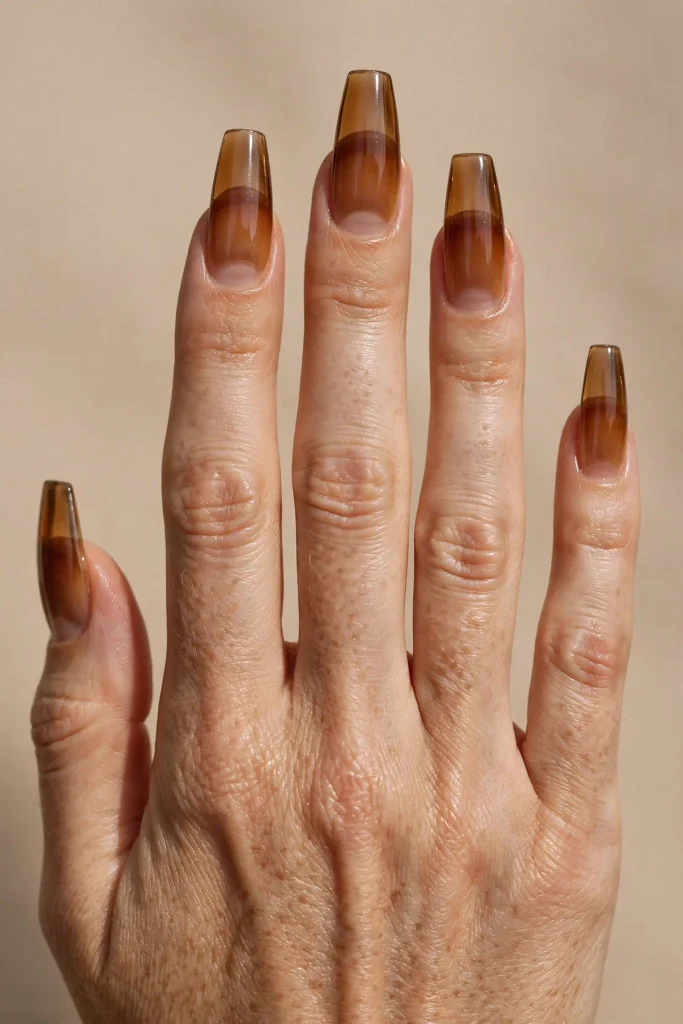
Blueprint 3, The Glass Curtain Wall.
Floor plan: a sheer, translucent amber-brown base built up in three thin layers, allowing the natural nail to show through slightly, mimicking the layered, semi-transparent look of a glass office building facade.
Materials: sheer amber-brown jelly polish, glossy top coat.
Load-bearing: fair, since sheer formulas generally show wear slightly sooner than opaque cremes, though the effect is worth the shorter cycle.
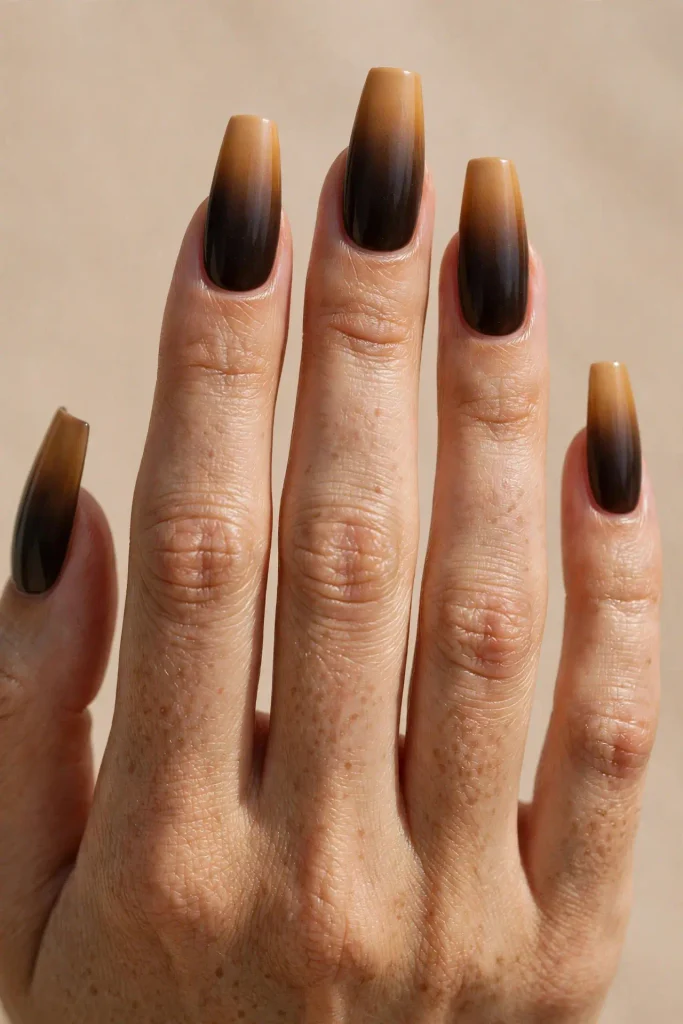
Blueprint 4, The Cantilever.
Floor plan: a dramatic ombre gradient from deep espresso at the cuticle fading into a lighter caramel at the flat tip, the color visually appearing to extend outward the way a cantilevered structure extends beyond its support.
Materials: espresso and caramel creme polishes, a makeup sponge for blending.
Load-bearing: good, since gradients naturally camouflage the regrowth line at the cuticle, extending the wearable life of the design before a fill is needed.
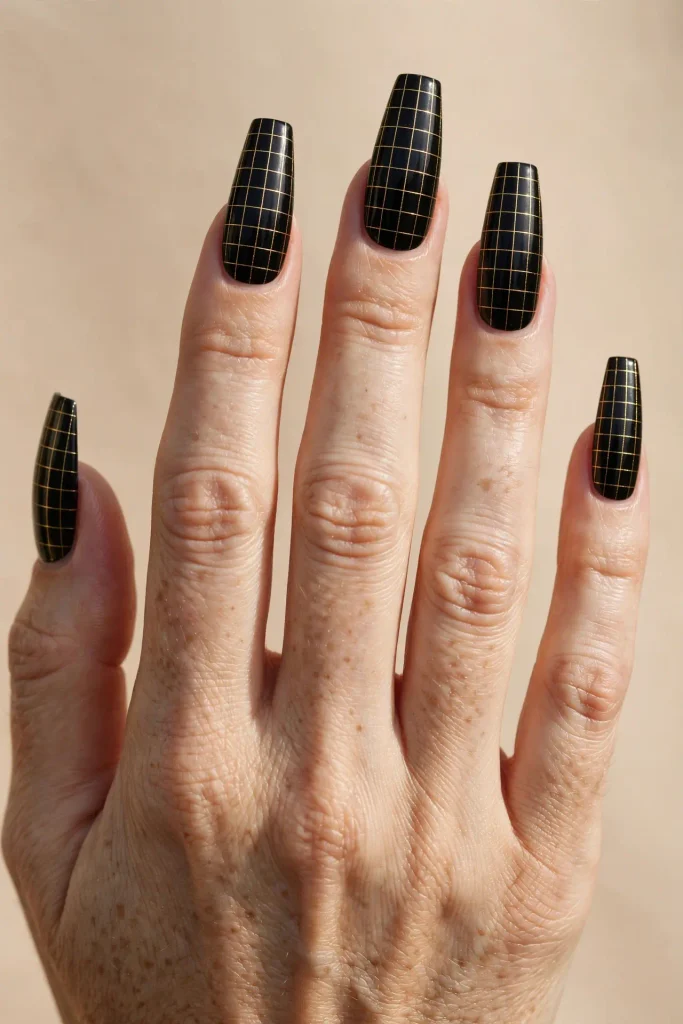
Blueprint 5, The Structural Grid.
Floor plan: a black base with a fine gold grid of thin crossing lines, evoking a building’s structural steel frame visible before the exterior cladding goes up.
Materials: black creme base, gold striping tape or a fine detail brush.
Load-bearing: fair, since intersecting fine lines have more edges exposed to chipping than a single-direction line pattern would.
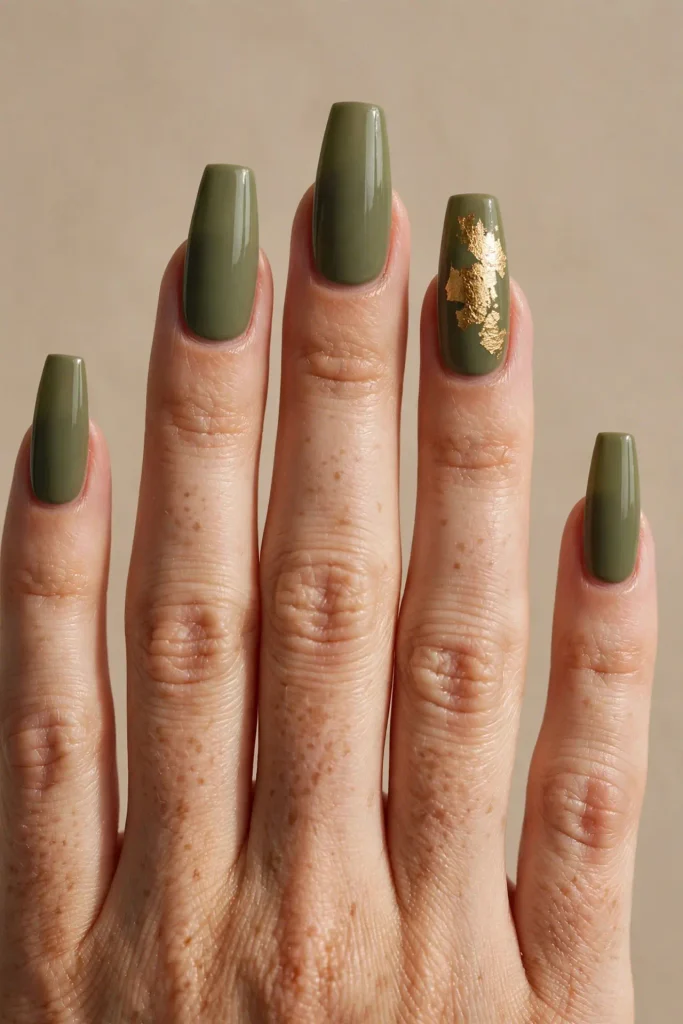
Blueprint 6, The Courtyard Garden.
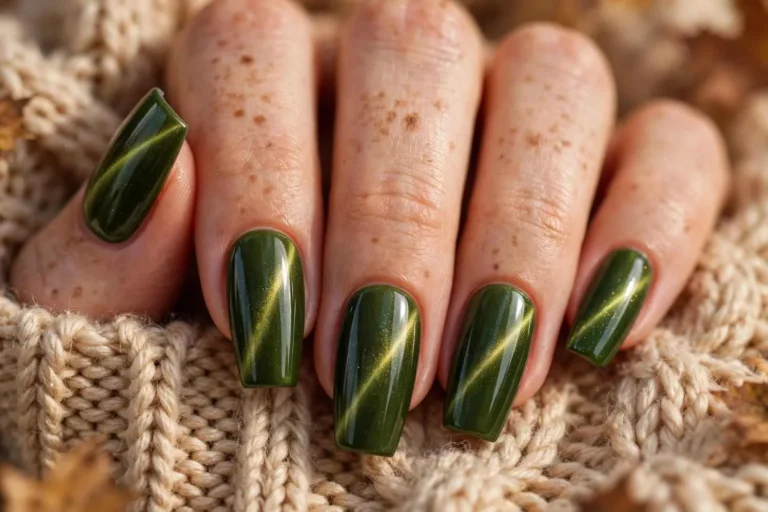
Floor plan: an olive-green base with a single hand-painted gold leaf accent positioned only on the ring finger, the rest of the nails left as plain, open green space.
Materials: olive creme base, a fine brush, gold polish for the leaf.
Load-bearing: excellent overall, since only one nail carries any fine detail while the remaining nine are a structurally sound flat color.
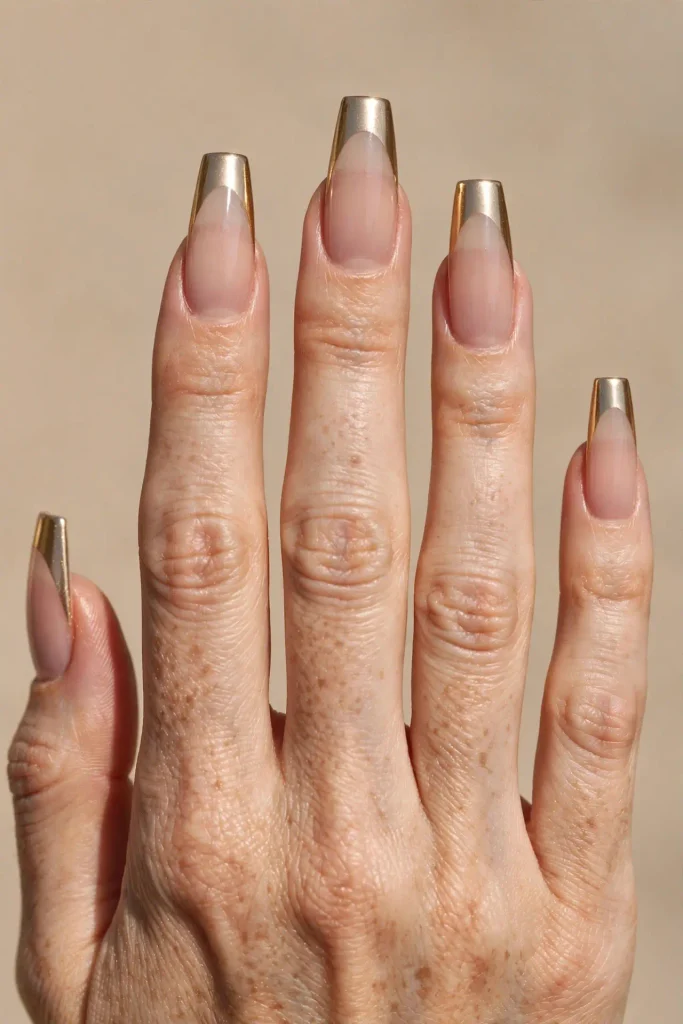
Blueprint 7, The Penthouse Terrace.
Floor plan: a warm champagne-gold chrome finish across the flat tip only, with the rest of the nail in a sheer nude, like a rooftop terrace catching the last of the light above a plainer building below.
Materials: sheer nude base, chrome powder, an unwiped gel top coat.
Load-bearing: good, since containing the chrome to just the tip area limits the surface prone to scratching compared to a full chrome coverage.
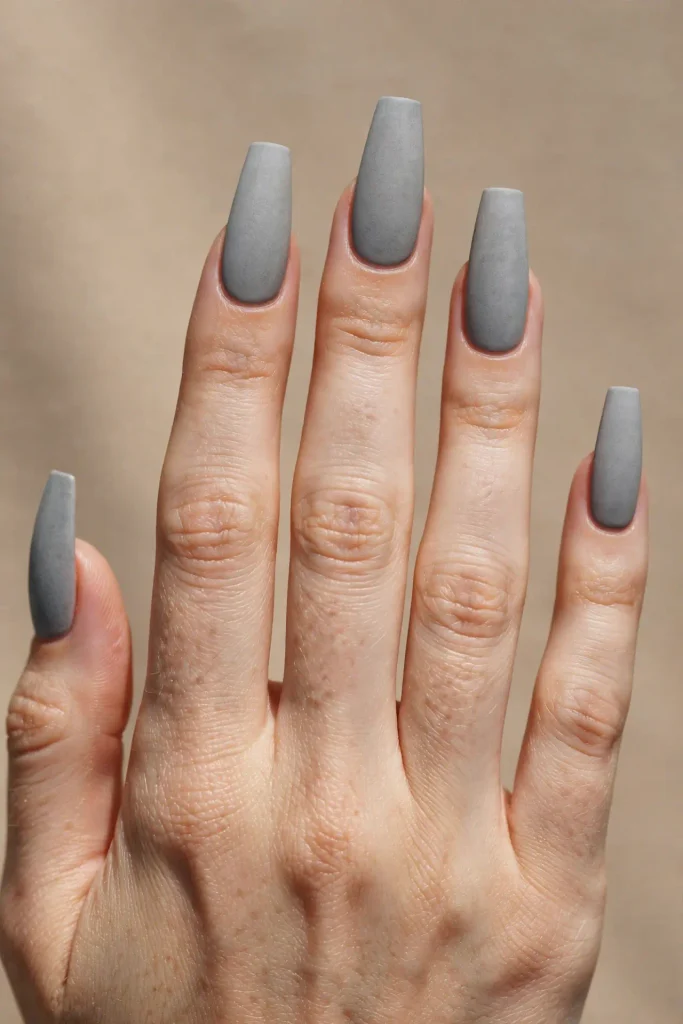
Blueprint 8, The Concrete Facade.
Floor plan: a matte, cool gray base with no additional pattern, the nail equivalent of raw, unfinished concrete left deliberately exposed rather than clad in a finishing material.
Materials: gray creme polish, matte top coat.
Load-bearing: excellent, though matte finishes require slightly more frequent top coat refreshing to maintain the intended raw, non-shiny look as the surface picks up natural oils over the week.
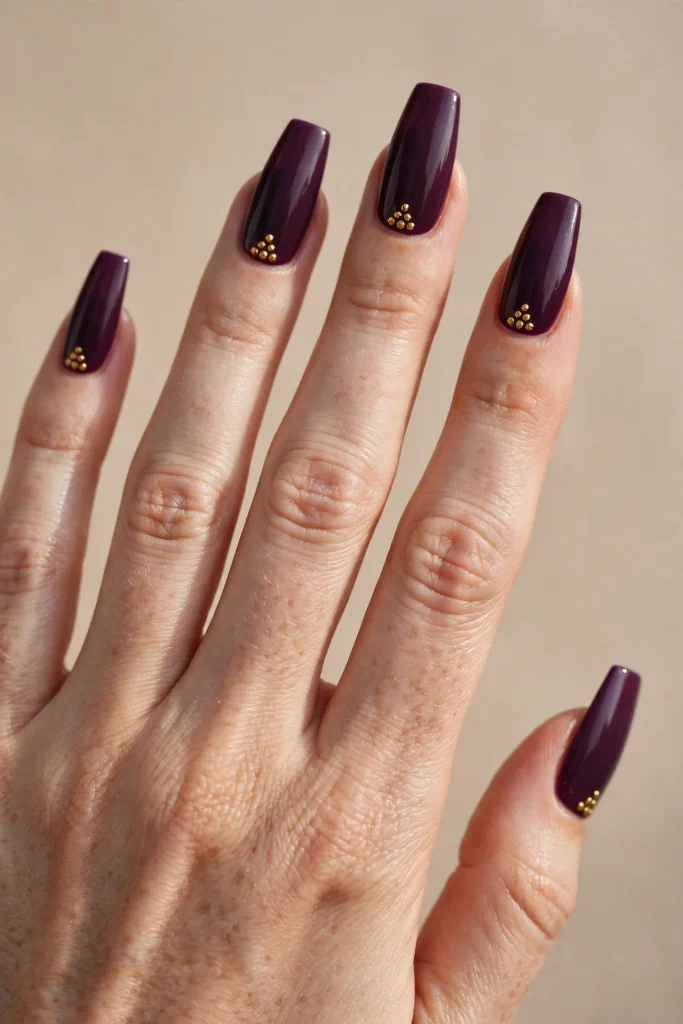
Blueprint 9, The Skylight.
Floor plan: a deep plum base with a single small cluster of gold dots near the cuticle on each nail, like light filtering down through a small skylight opening into an otherwise dark room.
Materials: plum creme base, a dotting tool, gold polish.
Load-bearing: good, since small, clustered dots near the cuticle are among the most protected placement zones on the whole nail, farthest from the tip-first contact that causes most chipping.
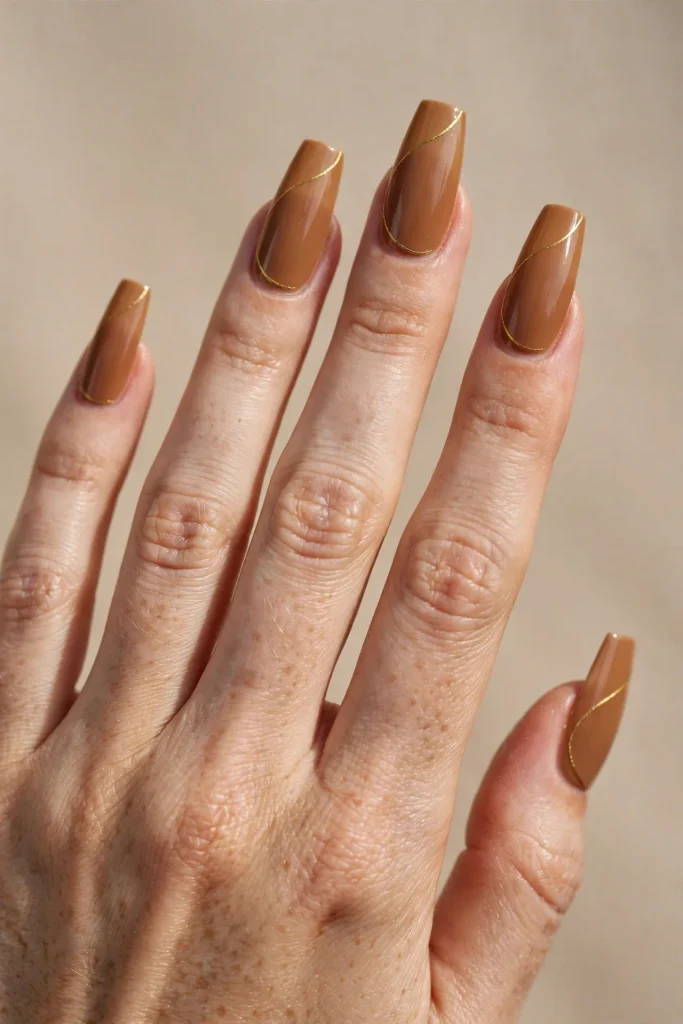
Blueprint 10, The Spiral Staircase.
Floor plan: a caramel base with a thin gold line spiraling from the cuticle to the flat tip in a gentle curve rather than a straight line, echoing the visual rhythm of a spiral staircase.
Materials: caramel creme base, a fine detail brush, gold polish.
Load-bearing: fair, since the line crosses the vulnerable tip area directly, making that crossing point the first spot likely to show wear.
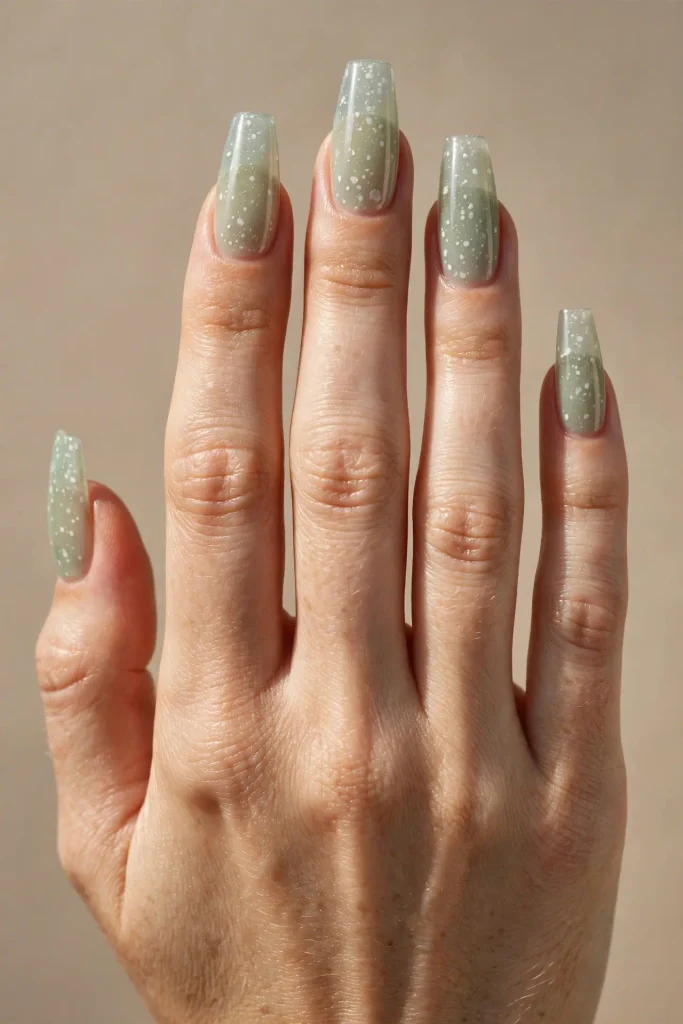
Blueprint 11, The Greenhouse.
Floor plan: a sheer, pale sage-green base with tiny, scattered white dots suggesting frost on greenhouse glass, a lighter, more delicate blueprint than most of the others in this set.
Materials: sheer sage jelly polish, a bobby pin or dotting tool, white polish.
Load-bearing: fair, since sheer light bases generally show the earliest signs of wear compared to deep, opaque colors.
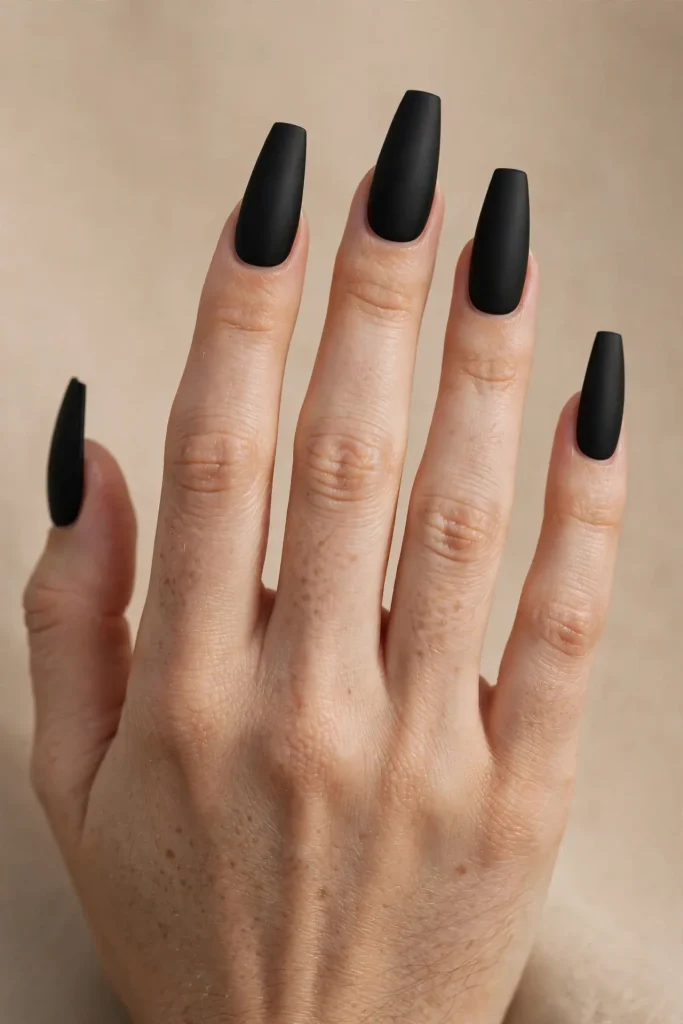
Blueprint 12, The Brutalist Block.
Floor plan: a single, deeply saturated matte black covering the entire nail, unapologetically plain, the nail equivalent of the deliberately raw, unornamented brutalist architecture movement.
Materials: black creme polish, matte top coat.
Load-bearing: excellent, matching Blueprint 8’s durability profile, since a solid matte color has no fine detail at all to fail first.
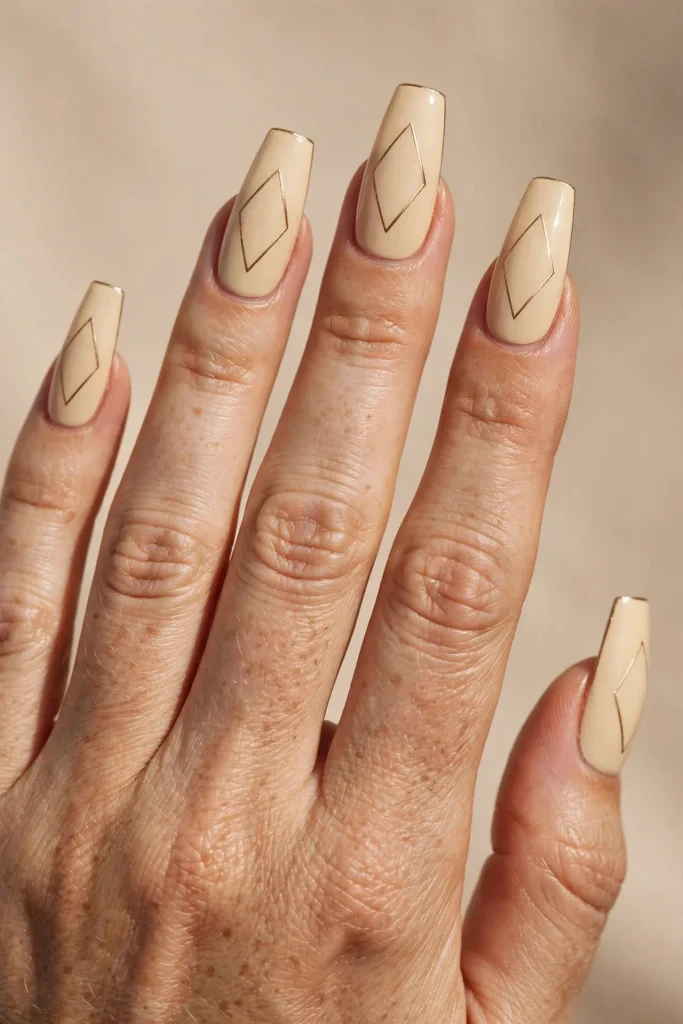
Blueprint 13, The Atrium.
Floor plan: a warm cream base with a large, open negative-space design, a thin gold outline forming an open geometric shape like a triangle or diamond near the center of the nail, with the interior left as bare cream rather than filled in.
Materials: cream creme base, a fine detail brush, gold polish.
Load-bearing: good, since a thin outline shape has less total surface area exposed to chipping than a fully filled-in pattern of the same size.
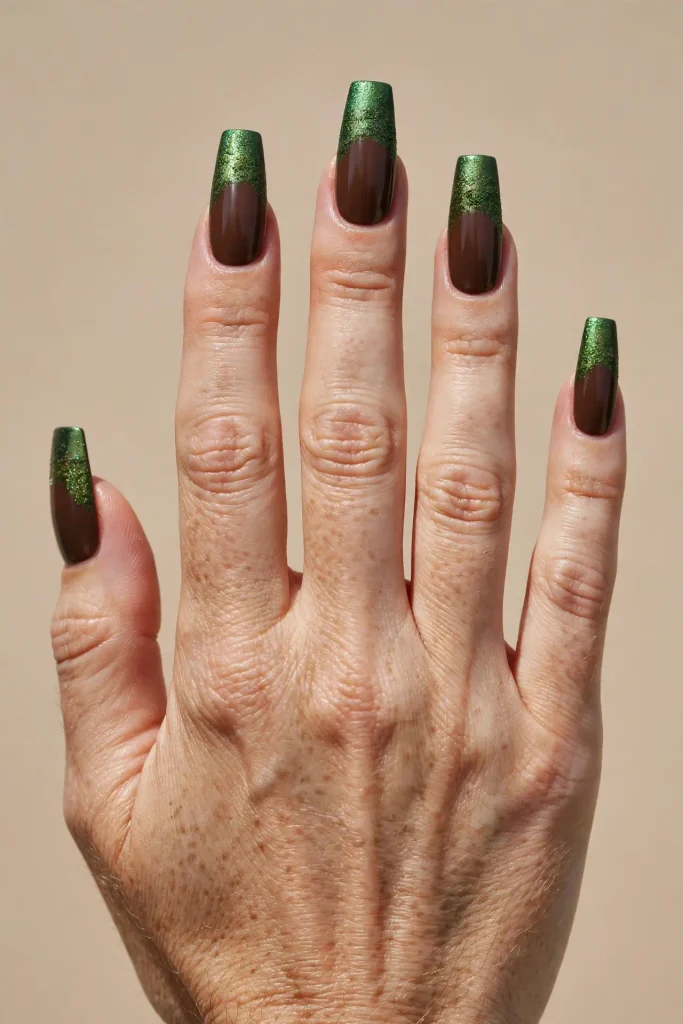
Blueprint 14, The Green Roof.
Floor plan: a chocolate-brown base with a textured, dimensional layer of forest-green and moss shimmer applied only across the top third of the nail near the flat tip, suggesting a rooftop garden installed above a plainer building.
Materials: chocolate creme base, green and moss shimmer polishes, a sponge for texture.
Load-bearing: fair, since textured, dimensional finishes near the tip are more exposed to daily wear than the same texture would be closer to the cuticle.
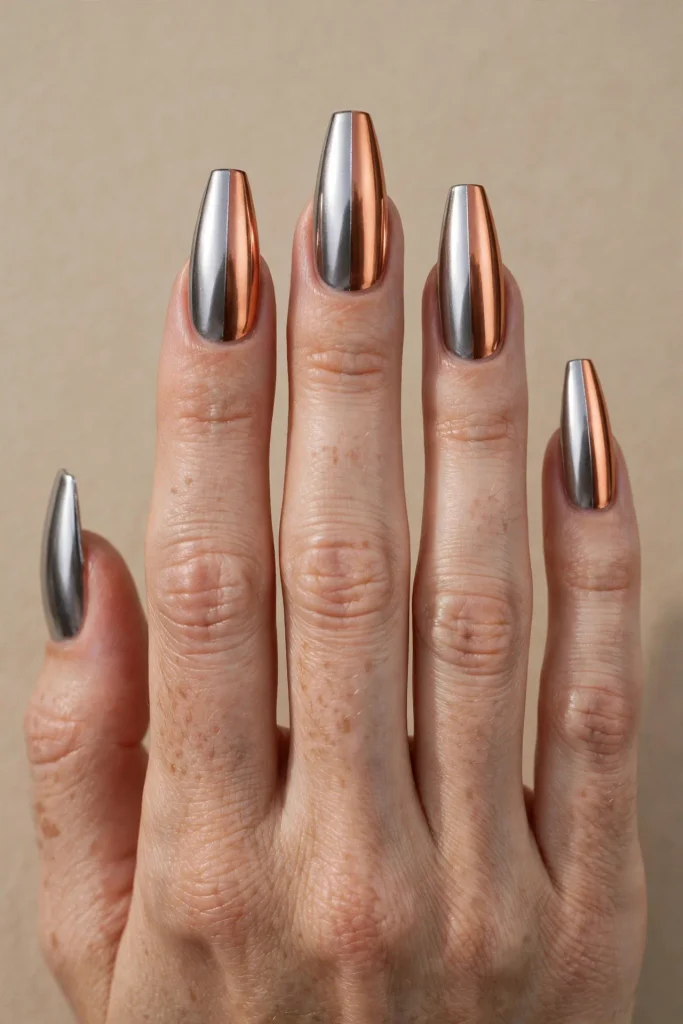
Blueprint 15, The Steel and Copper Facade.
Floor plan: a two-tone vertical split down the center of the nail, one half in a cool pewter chrome, the other in a warm copper chrome, meeting at a crisp center line.
Materials: two chrome powders, tape for masking the split line, unwiped gel top coat.
Load-bearing: good, provided the center seam is sealed thoroughly with top coat, since an unsealed seam between two different finishes is the most likely failure point.
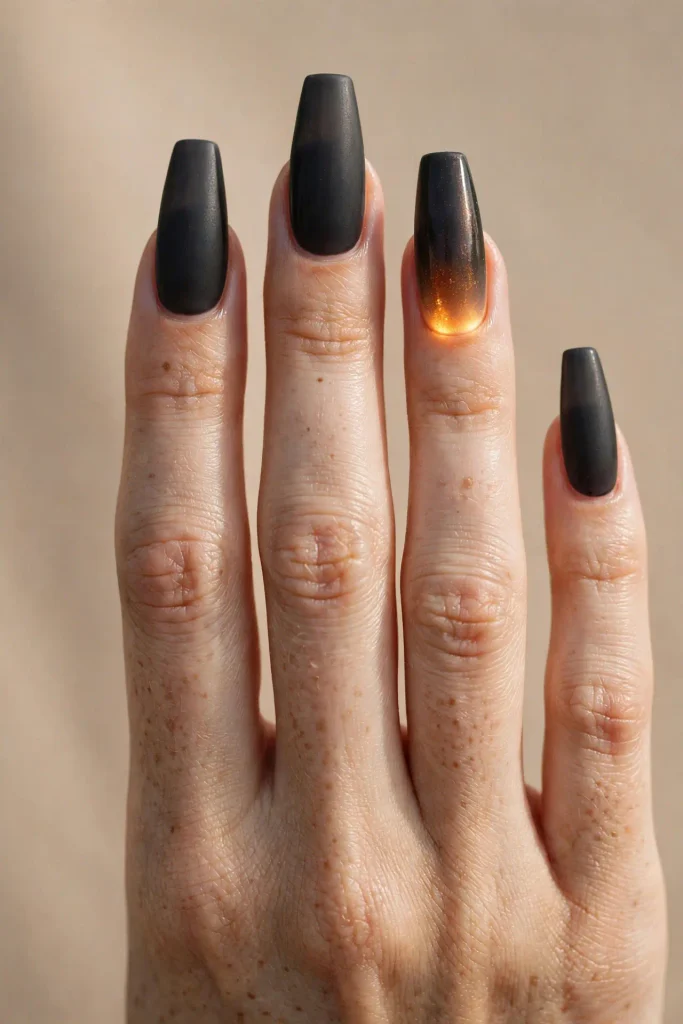
Blueprint 16, The Lantern.
Floor plan: a deep charcoal base with one nail featuring a small, warm amber glow effect at the cuticle, created by layering a translucent orange-gold shimmer over the charcoal in a soft, concentrated area, like a single lit window in an otherwise dark building facade at night.
Materials: charcoal creme base, translucent amber-gold shimmer polish, a small sponge.
Load-bearing: good, since the effect is contained to a single small area on a single accent nail rather than spread across the full, more vulnerable set.
Something New: The Flat-Tip Angle Guide
The single detail that separates a genuinely well-executed coffin nail from an amateur one is the angle and crispness of the flat tip itself, more than any color or pattern layered on top of it.
The tip should be filed at a true, deliberate right angle relative to the sides of the nail, not rounded off at the corners and not tapered to a narrower point, both of which are the two most common mistakes that quietly turn a coffin shape into something closer to a ballerina or ambiguous almond shape instead. When filing at home for maintenance between salon visits, file the flat top in one direction only, moving the file straight across rather than in a sawing back-and-forth motion, since a back-and-forth motion tends to round the sharp corners unintentionally over just a few maintenance sessions. Check the tip against a genuinely straight edge, a credit card or a ruler held flush against it, to confirm it’s actually flat rather than subtly curved, since a very slight curve is often invisible to the eye alone but becomes obvious once compared against a true straight line.
The Length-Zoning Chart
Coffin nails read very differently depending on overall length, and matching the length to your actual daily hand use matters more with this shape than almost any other.
| Length Zone | Description | Best Blueprints | Daily Practicality |
|---|---|---|---|
| Short coffin | Flat tip barely extends past the fingertip | 1, 8, 12, 13 | High, minimal interference with typing or daily tasks |
| Medium coffin | Moderate extension, the most common length | 2, 6, 9, 11 | Moderate, manageable for most daily activities |
| Long coffin | Significant extension well past the fingertip | 4, 5, 10, 15 | Lower, requires more care around typing, opening containers, and similar tasks |
| Extra-long coffin | Dramatic, runway-length extension | 7, 14, 16 | Lowest, best reserved for special occasions rather than daily wear |
Choosing a blueprint from a length zone that doesn’t match your actual daily hand demands is the single most common reason people abandon coffin nails after one set, rather than any issue with the shape or design itself.
The Structural Integrity Test
Before leaving the salon, or before considering an at-home application finished, run this quick check the way an inspector would walk through a finished building before sign-off. Press gently on the flat tip of each nail with light pressure from your thumb, checking for any flex or give, since a properly built nail, whether natural or with extensions, should feel solid rather than springy at the tip specifically. Run a finger lightly along the side walls, checking that the tapered edges feel smooth rather than catching on fabric, which indicates the filing wasn’t fully finished. Flex your fingers into a loose fist and back open several times, checking that no nail feels like it’s pulling or lifting at the cuticle, which would indicate a bonding issue likely to fail within days rather than holding for the expected wear cycle.
The Build-Order Sequence
Coffin nails, more than rounder shapes, benefit from a specific application order because the flat tip and sharp corners are unforgiving of any base layer imperfections. Begin with the nail already shaped into the coffin silhouette before any polish goes on at all, never attempting to file the shape after a full color has already been applied, since this risks removing color unevenly along the edges. Apply a ridge-filling base coat and let it cure completely, since the flat tip in particular shows base coat unevenness more obviously than a curved tip would. Apply your chosen blueprint’s base color in two thin coats, and for any blueprint involving a fine line or pattern crossing near the tip specifically, Blueprints 5 and 10 among others, wait the longest possible dry time before adding that detail, since the flat tip area is the most trafficked, high-friction zone on the entire nail and needs the most fully set base beneath it. Finish with a top coat applied in a single, confident stroke across the flat tip specifically, since multiple overlapping strokes in that small, flat area are the most common cause of visible brush marks on this shape.
The Client Blueprint Script
Bringing a genuinely precise description to a salon appointment matters more for coffin nails than most other shapes, given how much the final result depends on the tip angle specifically. Try something along these lines: “I’d like a true coffin shape, flat tip filed at a right angle, not rounded at the corners and not tapered to a point. I’d like a medium length, extending about this far past my fingertip,” indicating with your own nail or a reference photo, “and please show me the flat tip from a straight-on angle before we move to polish, so I can confirm the shape before anything else is applied.” This last request specifically, checking the bare shape before any color goes on, is the single most useful thing to ask for, since it’s far easier to correct an angle on bare nail than after a design has already been built on top of it.
Choosing Your Blueprint by Commitment Level
If you’re new to the coffin shape entirely and want the safest possible starting point, Blueprint 1 or Blueprint 8, the solid flat colors, let you get comfortable with the shape itself before adding any pattern complexity on top. If you’re comfortable with the shape and want to add detail without sacrificing durability, Blueprint 6 or Blueprint 9, both containing their detail to a small, protected area, offer a genuine middle ground. If you want the full architectural statement and don’t mind a shorter wear cycle between touch-ups, Blueprint 15 or Blueprint 5, the two most detail-dense plans in the whole set, deliver the most visually complex final result.
Maintenance Between Fills
Because the flat tip is the first area to show wear regardless of which blueprint you choose, plan a light maintenance check around the halfway point of your expected wear cycle rather than waiting for a full fill appointment. Gently buff any slightly rough or uneven spot along the flat tip edge with a fine-grit file, moving in one direction only, and follow with a thin refresh layer of top coat across the tip specifically. This single small habit meaningfully extends the clean, structural look of a coffin set well beyond what the same design would achieve with no mid-cycle attention at all.
Quick Answers
What’s the most durable coffin nail blueprint for daily wear?
Blueprint 1 or Blueprint 12, the solid flat colors, since they have no fine detail or pattern to chip unevenly ahead of the base color itself.
How do I keep the flat tip from rounding off between salon visits?
File straight across in one direction only rather than back and forth, and check the shape periodically against a genuinely straight edge like a card or ruler.
What length coffin nail is most practical for someone who types often?
The short coffin zone, since it minimizes interference with daily tasks while still reading clearly as the coffin shape rather than a shorter, more ambiguous silhouette.
Why do coffin nails chip differently than rounder shapes?
The flat tip creates a distinct, high-friction edge that takes the brunt of daily contact, unlike a rounded or tapered tip that distributes contact across a curved surface instead of one flat plane.
One Last Thing
A coffin nail succeeds or fails on its geometry before a single drop of polish ever gets involved, the same way a building succeeds or fails on its structural bones before the finishes go in. Get the flat tip genuinely flat, get the angle genuinely square, and nearly any blueprint from this whole set will read as clean and intentional.
Start with a solid, low-maintenance blueprint if the shape itself is new to you, bring the client script to your next appointment if you want a technician’s full attention on the angle specifically, and let the more detailed plans wait until the foundation itself feels solid.
Which blueprint are you drafting first: the minimalist loft, the structural grid, or the dramatic cantilever? Save this article for your next salon appointment, and send it to a friend whose coffin nails always seem to lose their sharp shape within the first week.