15 Summer Toe Nails: Because Sandals Are Watching
Let’s be honest: toe nails spend most of the year in hiding. Then summer arrives, the sandals come out, and suddenly your feet are public. And here’s the thing nobody says out loud — a great pedicure changes how you carry yourself. You walk differently in sandals when your toes look good. It’s science. (Okay, it’s psychology. Same thing.)
Toe nails play by different rules than fingernails. The big toe is the canvas — it’s where art lives. The little toes are the supporting cast. These fifteen ideas are organized the way pedicures actually work: big toe statements, coordinated full sets, and the finishing details that pull it all together.
Big Toe Statements
The big toe is the only toe with real estate for art. These five make it count.
1. The Big Toe Bloom

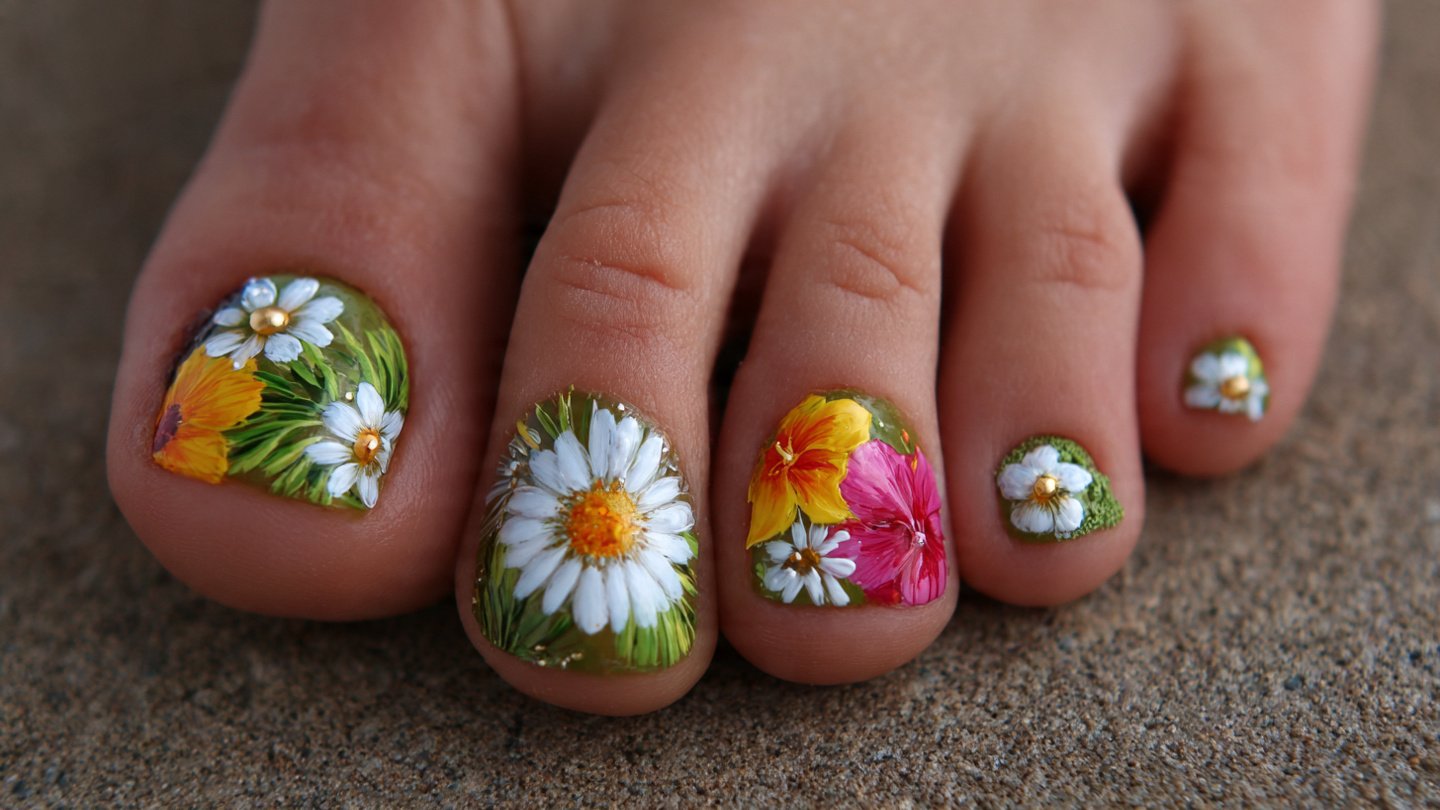
A single hand-painted flower — hibiscus, plumeria, or daisy — blooming across the big toe, with the other toes in a matching solid. The flower should be sized to the toe: bold enough to read from sandal-distance, simple enough to stay chic. White petals with a yellow center over coral is the classic; pink on nude is the subtle version.
The beauty of this design is its balance — one artistic moment surrounded by calm. It draws the eye exactly where you want it and lets the smaller toes rest. Keep the flower slightly off-center for a natural, organic feel rather than a stamped look.
Pedicure tip: ask your tech to paint the flower after the base color is fully dry or cured — wet bases drag, and a dragged petal is very hard to fix at this scale.
2. Modern French Pedicure

The timeless white tip, updated: keep the tip thin and crisp on the big toes, with sheer pink or nude across all ten. The modern version skips the thick, chalky tips of the 2000s — today’s French pedi is sheer, clean, and barely-there elegant. It’s the pedicure equivalent of a white shirt: never wrong.
What makes it modern is restraint. The base should be translucent enough to see the natural nail, and the white should be bright but thin. On the smaller toes, the “tip” is often just a clean edge — and that’s fine.
Pedicure tip: French pedicures show regrowth fastest at the cuticle — book a touch-up at three weeks, or choose gel to stretch it to five.
3. The Single Gem

One small crystal — just one — placed at the base of each big toe over a solid color. Deep red with a clear crystal, navy with silver, black with gold: the gem becomes jewelry. It’s the smallest possible 3D, and somehow the most luxurious.
The restraint is the entire design. A single gem reads as intentional and expensive. Placement matters enormously — centered just above the cuticle, where it catches light when you walk.
Pedicure tip: have the gem set in builder gel, not just top coat — toes take more impact than fingers, and builder gel is the only anchor that survives summer.
4. Sunset on the Big Toe

A miniature sunset painted across each big toe — horizontal bands of yellow, orange, pink, and purple melting into each other, with the other toes in a coordinating solid. It’s tiny landscape art, and it’s irresistible in sandals. The bands should blend softly; this is about glow, not stripes.
This design works because the big toe is the perfect tiny canvas for a horizon — wide enough for bands, small enough to stay charming. Pair it with a solid coral or nude on the other toes.
Pedicure tip: sponge-blend the bands rather than painting them — sponging creates the soft glow that makes sunsets look real, and it’s more forgiving than brushwork.
5. The Evil Eye Toe

The protective evil eye — concentric circles of white, light blue, and deep blue — painted on each big toe over a nude or white base. It’s meaningful, graphic, and very Mediterranean summer. The design is simple geometry, but the symbolism gives it depth.
Keep the eye centered and the circles even; the design’s power is in its precision. The other toes stay clean in the base color — one eye per foot is the classic placement.
Pedicure tip: use a dotting tool in three sizes for perfect concentric circles — freehand circles wobble, and wobble breaks the talisman’s spell.
All Ten, Coordinated
Sometimes the statement is uniformity: ten toes, one perfect color, zero distractions. These are the shades that carry a whole pedicure.
6. Cherry Red, Always

The definitive pedicure color — bright, classic cherry red on all ten toes. It’s the shade that launched a million pedicures, and it endures because it’s perfect: vibrant against tanned skin, timeless with every sandal, and cheerful without trying. Some classics are classic for a reason.
Application matters more than usual here because red shows everything — push cuticles back fully, keep coats thin, and clean the edges meticulously. The payoff is a pedicure that looks expensive for weeks.
Pedicure tip: red is the worst stainer of all pedicure shades — never skip base coat on toes, where nails are more porous from heat and sweat.
7. White Hot

Crisp, clean, opaque white on all ten toes — the brightest pedicure in existence. White toes against tanned skin is one of summer’s great contrasts: fresh, modern, and strikingly clean. It goes with everything and photographs beautifully.
The challenge is keeping it clean — white shows every chip and every speck of dirt. Gel is strongly recommended for white pedicures; it resists the yellowing that regular white polish suffers in summer.
Pedicure tip: white pedicures and self-tanner are best friends — the contrast makes both look better. Apply tanner first, let it develop, then get the pedi.
8. Coral Shimmer
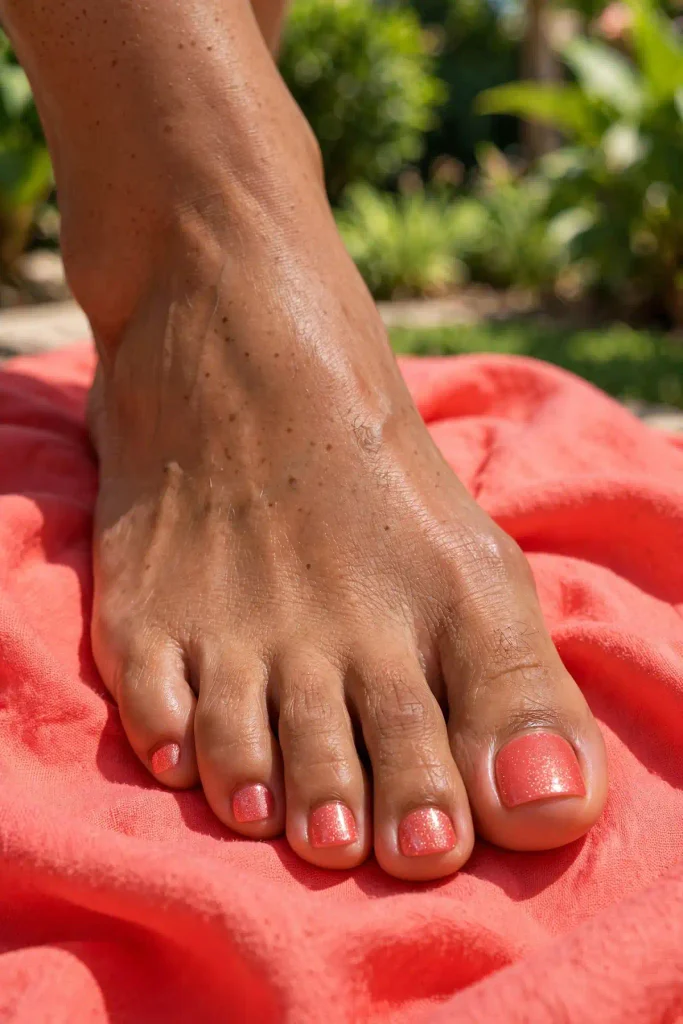
Coral loaded with fine shimmer — warm, glowing, and alive. The shimmer gives plain coral a dimension that flat crème lacks, catching sunlight with every step. It’s festive without being flashy, and the warmth flatters every skin tone.
This is the crowd-pleaser of pedicure shades: nobody dislikes it, it suits every sandal, and it hides minor imperfections in the shimmer. Two coats, glossy top coat, done.
Pedicure tip: shimmer pedicures are the most forgiving for DIY — the sparkle disguises uneven application, making this the best at-home choice for beginners.
9. Sky Blue

A clear, cheerful sky blue crème on all ten — playful, fresh, and unmistakably summer. Blue toes are a statement of joy: they say you’re here for the season and you’re not taking anything too seriously. On tanned feet especially, the contrast is gorgeous.
Blue is also practical — it hides chips better than white and stains less than red. Keep it in the pastel-to-medium range; deep navy toes read more fall than summer.
Pedicure tip: blue polish can stain toenails greenish without base coat — double up on base for blues, and don’t leave them on past four weeks.
10. Nude Glow

A sheer, glossy nude that makes toes look healthy and polished without visible color — the “no-makeup” pedicure. It’s the choice for minimalists, professionals, and anyone who wants groomed feet without a color commitment. The gloss is essential: without it, sheer nude just looks like bare nails.
The shade must match your skin’s undertone — warm peachy nude for warm skin, pinky beige for cool. Done right, it’s invisible polish with visible effect: feet that look cared for, effortlessly.
Pedicure tip: nude glow pedicures are perfect for the in-between — when you’re between bold colors, this keeps toes looking intentional with zero effort.
The Finishing Details
The little things that elevate a pedicure from “done” to “detailed.” Add these to any base for instant polish.
11. Glitter Fade on the Big Toes
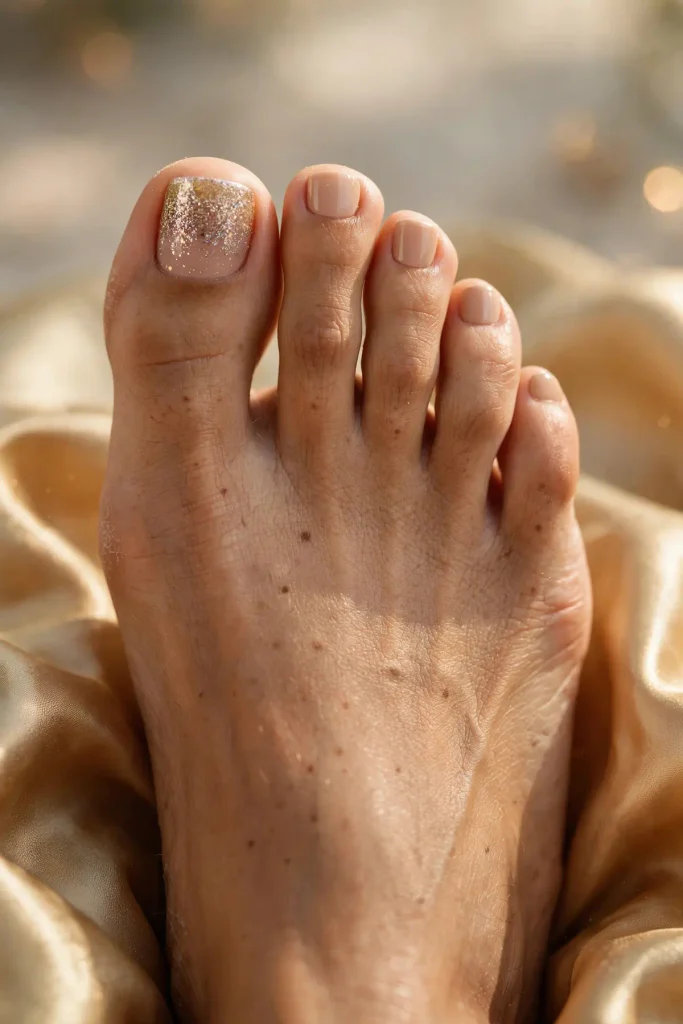
Glitter concentrated at the base of the big toes, fading toward the tip — like the nail is dissolving into sparkle. Gold over nude, silver over white, iridescent over sheer pink: the fade keeps it elegant where full glitter would shout. The smaller toes stay solid in the base color.
This is the party pedicure that still works on Monday — the glitter is contained, the effect is contained, and the sparkle reads as festive rather than flashy. Seal with two coats of top coat for glassy smoothness over the glitter texture.
Pedicure tip: apply glitter with a sponge rather than the brush — dabbing concentrates the sparkle at the base and creates the fade naturally, with far less cleanup.
12. Metallic Pairing

Chrome or metallic polish — gold, silver, rose gold — chosen to match your anklet or toe ring. It’s the coordinated-jewelry approach to pedicures: the nails become part of the accessory story. Metallics on toes look expensive because they catch light with every step.
The key is matching undertones: warm gold polish with gold jewelry, silver with silver. Keep the application flawless — metallics show every ridge, so buff the nail surface first.
Pedicure tip: metallic pedicures last longest in gel — regular metallic polish chips fast on toes, but gel metallics survive the whole sandal season.
13. Dainty Dots

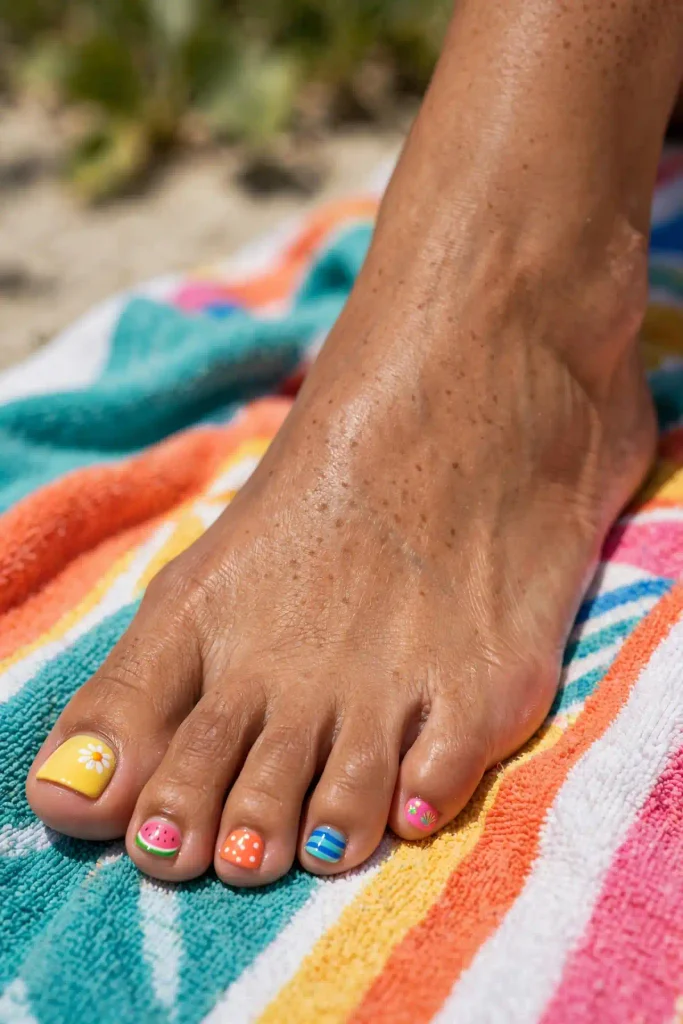
A single tiny dot on each toe — gold on nude, white on coral, black on sheer — minimalist and charming. It’s the smallest possible nail art, and on toes it’s perfect: the small canvas makes even a dot feel like a design choice. Uniform dots read as intentional; vary the placement slightly for playfulness.
This is the ideal first nail art for pedicure skeptics — nearly invisible from a distance, delightful up close. It also hides regrowth brilliantly, since there’s no edge or pattern to outgrow.
Pedicure tip: a dotting tool is the only tool you need, and dots are the easiest art that exists — this is the gateway design for DIY pedicures.
14. Two-Tone Toes

Big toes in one color, the other eight in another — the classic pedicure contrast. Cherry big toes with nude smalls, white big toes with coral smalls, black big toes with gold smalls: the combinations are endless. It’s simple, graphic, and endlessly customizable.
The contrast is what makes it work — pick colors with real difference, or it just looks like a mistake. This is also the most practical art pedicure: if the big-toe design chips, you only redo two nails, not ten.
Pedicure tip: paint the small toes first and the big toes last — you’ll be fresher for the detail work, and the contrast color gets your best effort.
15. Ombré Across the Toes
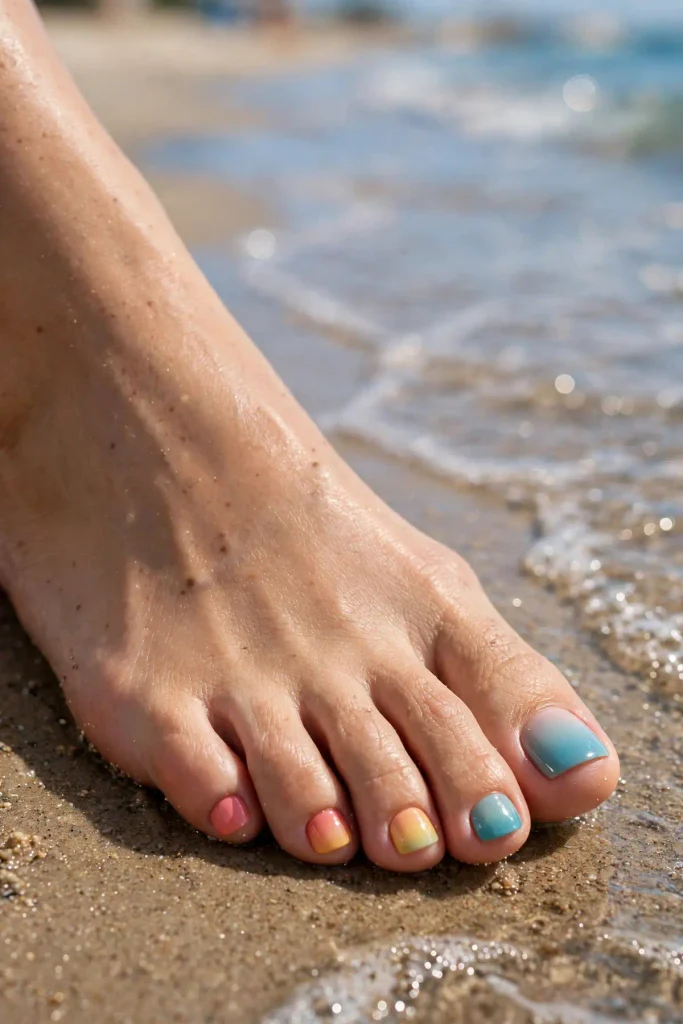
A gradient that flows across all ten toes — lightest on the pinky toes, deepest on the big toes (or the reverse). Each toe is one step in the gradient, creating a fade effect across the whole foot. Pink-to-red, nude-to-coral, blue-to-navy: the family should share undertones.
This is the most artistic full-pedicure design here, and it’s surprisingly easy — each toe is just a solid color, and the gradient emerges from the sequence. Plan the order before painting; lay the bottles out left to right like a palette.
Pedicure tip: use five polishes in the same color family rather than mixing custom shades — pre-matched families blend seamlessly, and you avoid the muddy middle that ruins DIY gradients.
Why Toes Deserve the Attention
Feet are the most neglected canvas in beauty — let’s change that. The sandal effect is real: when we feel groomed, we carry ourselves differently — and nothing says “groomed” in summer like a fresh pedicure. Toes age visibly: sun, sandals, and barefoot summers are hard on feet; regular pedicures aren’t vanity, they’re maintenance. The practical truth: toenails grow slower and chip less than fingernails, so a pedicure lasts longer per dollar than almost any beauty service.
The At-Home Pedicure Ritual
A salon-quality pedi at home, step by step. Soak (10 min): warm water with a splash of oil or soak salts softens everything — this is non-negotiable prep. Shape: clip straight across (never curved — curved toenails ingrow), then file the edges smooth; leave a millimeter of white. Cuticles: push back gently after soaking; never cut toenail cuticles aggressively, they protect against infection. Exfoliate: a foot scrub or pumice on heels and soles — the pedicure isn’t just nails. Moisturize: rich cream massaged in, then wipe nails clean with polish remover before painting (lotion under polish causes peeling). Paint: base coat, two thin color coats, top coat — with toe separators between toes while drying. The drying rule: toes take longer than fingers because they’re thicker — give them a full hour before shoes, and wear open sandals for the rest of the day.
Making Your Pedi Last All Summer
Toenail polish outlasts fingernail polish naturally — here’s how to maximize it. Gel for longevity: a gel pedicure lasts 4–6 weeks versus 2–3 for regular polish; for sandal season, it’s worth it. Sunscreen on feet: the tops of feet burn fast and peeling sunburn ruins pedicures — SPF on feet is non-negotiable. Sand management: rinse sand off rather than rubbing — sand is abrasive and dulls top coat. Shoe strategy: tight shoes chip toe polish; rotate open sandals during the first 48 hours after a pedi. The refresh: a fresh top coat at week three revives shine and seals micro-chips — two minutes for two more weeks. When to redo: when regrowth at the cuticle becomes visible (usually week 4–5 for regular polish) — toes hide regrowth well, so you can stretch it.
Summer Toe Nail Questions
How often should I get a pedicure in summer?
Every 4–6 weeks for gel, every 2–3 for regular polish. Summer’s sand, sun, and sandals are harder on feet, so don’t stretch past six weeks — dry cuticles and overgrown nails undo the whole effect.
Can I wear dark toe polish in summer?
Absolutely — deep shades on toes read chic year-round, and they make tanned feet look stunning. The “no darks in summer” rule never applied to pedicures; navy, black cherry, and espresso toes are all summer-appropriate.
What’s the best pedicure color for wide feet?
Darker and deeper shades visually slim — navy, deep red, and espresso are flattering. Nude shades that match your skin also elongate. Avoid stark white if you’re self-conscious; it emphasizes width.
How do I prevent ingrown toenails?
Cut straight across, never curved or too short — leave the corners intact. Don’t dig at the corners, wear shoes with room in the toe box, and see a professional at the first sign of redness rather than performing bathroom surgery.
Put Your Best Foot Forward
Fifteen ideas, three pedicure chapters, one summer of great-looking feet. Whether you’re a big-toe statement maker, an all-ten coordinator, or a finishing-details devotee — your toes are ready for sandal season.
Soak, shape, paint, and step out. The sandals are waiting, the sun is out, and your feet are about to be the best-dressed part of you.
Which pedicure chapter is yours — the big toe statements, the coordinated ten, or the finishing details? Save this list for your next pedi appointment, and send it to the friend who “doesn’t do pedicures” — she’s one sandal season away from converting.