17 Simple Christmas Nails So Chic, Nobody Will Believe You Did Them at Home
One December, I tried to paint a tiny reindeer on my thumbnail at 11:30 p.m. The result looked like a potato with antlers. My sister laughed so hard she almost dropped her hot chocolate. That was the night I learned an important holiday lesson: simple Christmas nails can look far more stylish than a design that needs three brushes, four hours, and the steady hands of a surgeon.
This list is for real women with gifts to wrap, parties to attend, and cookies that somehow keep disappearing. These 17 ideas move from solid colors you can finish fast to small details that look surprisingly fancy. Most work on short natural nails, and every look can be adjusted for almond, square, round, or oval shapes. No nail-art degree required. If you can paint a dot, a line, or one smooth coat, you are ready.
The Five-Minute Wonders
These first looks prove that one beautiful color can carry the whole manicure. Careful prep, thin coats, and a glossy finish do more than ten busy decorations ever could.
1. Classic Cherry Red
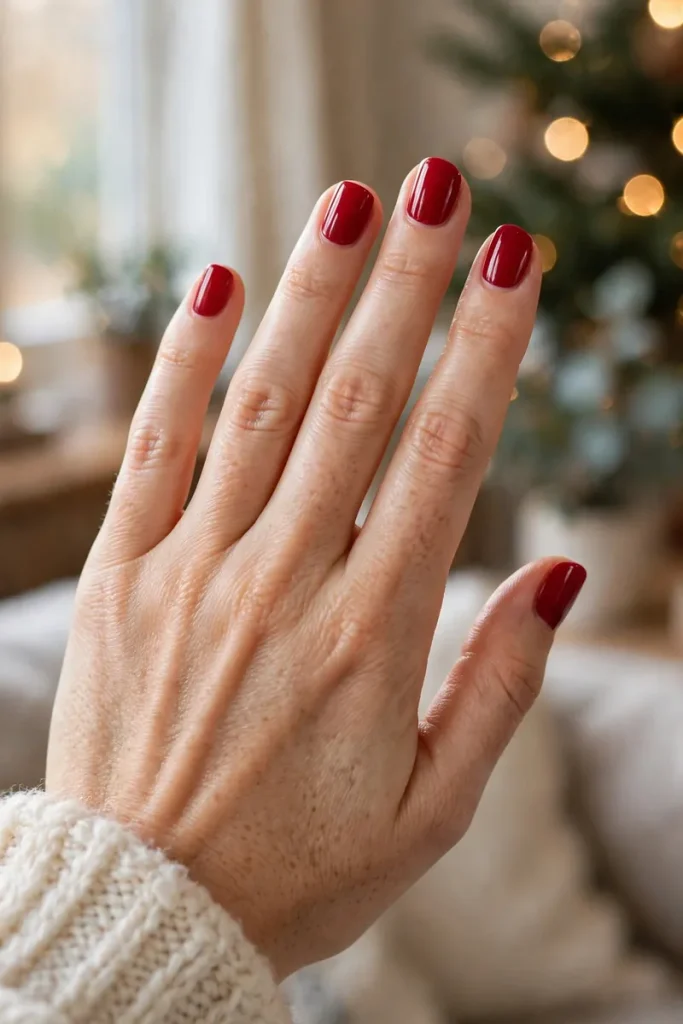
Cherry red is the little black dress of Christmas manicures: dependable, flattering, and always right for the occasion. File your nails into a soft rounded shape, apply base coat, and use two thin layers of bright red. Cap the free edge with color and top coat so chips are less likely to appear while you wrap gifts.
I once painted plain red nails after an ambitious glitter design went wrong, and I liked the rescue manicure more than the original plan. It looked cheerful with pajamas and polished with a party dress. When December feels too busy, red is not the boring choice. It is the smart one.
2. Milky White

Milky white nails have the soft look of fresh snow without any complicated snowflake art. Choose a sheer, warm white rather than a bottle that looks like correction fluid. Apply two or three very thin coats and let each one settle. The slight see-through finish keeps the color smooth and natural.
This manicure matches every outfit, from a red sweater to a silver party top. It also grows out gently because the shade is close to your natural nail. If one coat looks streaky, do not panic. Milky polish often becomes even and dreamy after the next coat and a glossy top layer.
3. Deep Forest Green
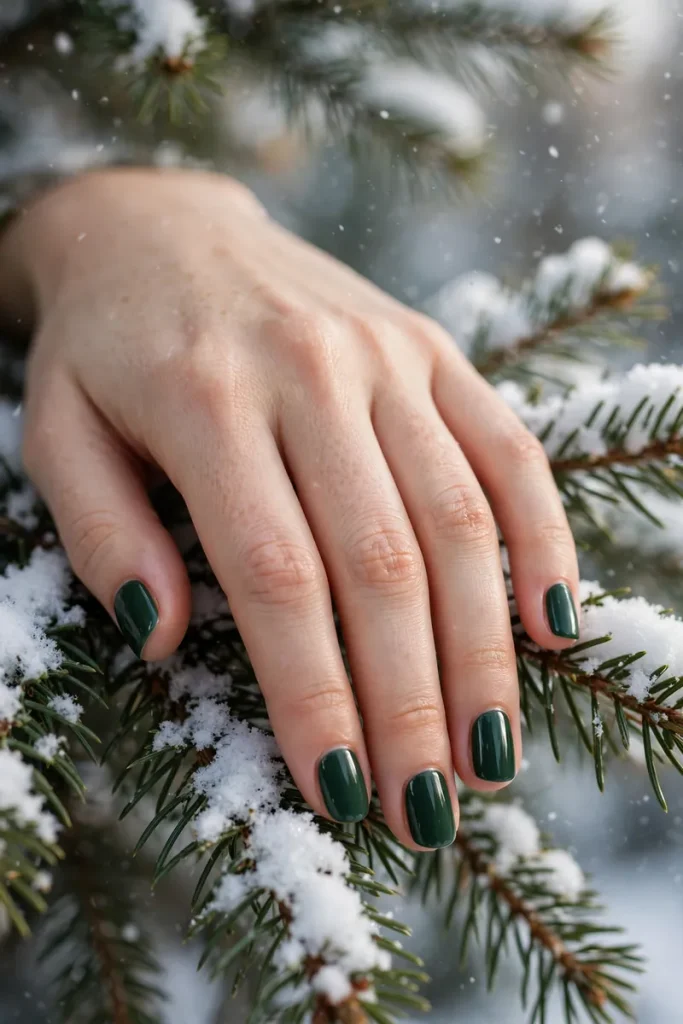
Forest green feels festive without shouting “Christmas!” across the room. It is rich, calm, and especially pretty beside cream sweaters and gold jewelry. Use a protective base coat because dark green can stain. Then apply two thin coats, cleaning the edges with a small brush dipped in remover.
The color does all the decorating for you, so resist the urge to add ten more things. A high-shine top coat makes it look deep and glassy. On short square nails, it feels modern; on almond nails, it feels elegant. Either way, your hands will look ready to hold a fancy mug of cocoa.
4. Nude with One Gold Dot
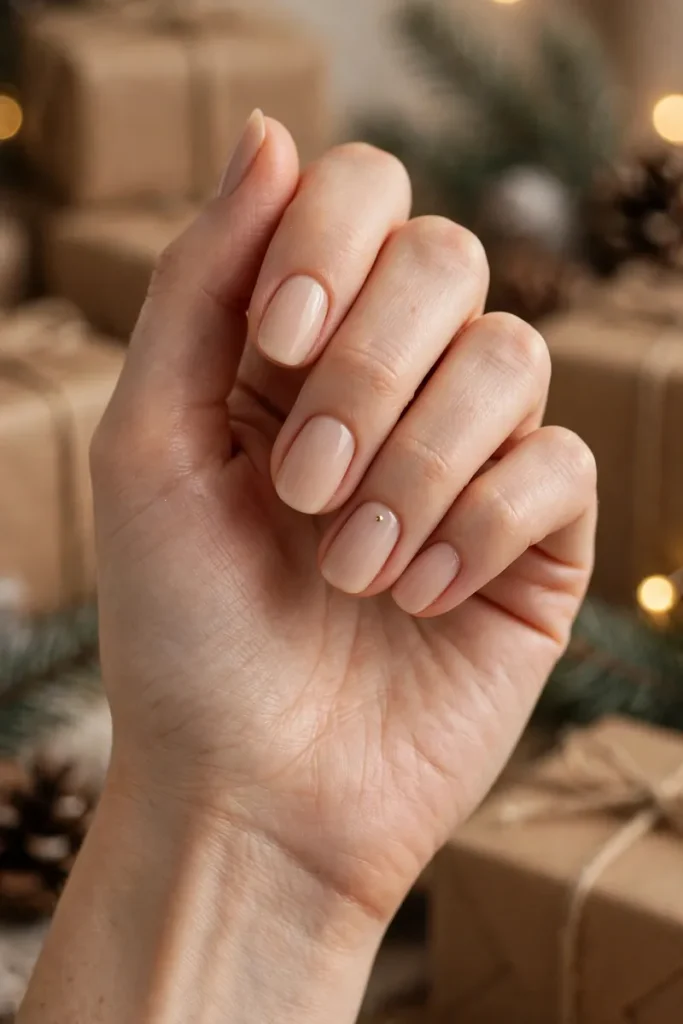
A sheer nude base and one tiny gold dot on each ring finger may be the easiest nail art ever. Use a dotting tool, the round end of a bobby pin, or a toothpick. Place the dot near the cuticle, let it dry, and seal it with top coat. That tiny flash of gold looks like a miniature ornament.
This is perfect for anyone who wants holiday nails that still feel office-friendly. It also works well when you have only ten quiet minutes before guests arrive. The secret is leaving plenty of open space. The dot feels special because it is small, not because it brought twelve glittery friends.
Two Minutes, Zero Effort
These looks use one easy detail to change the mood. The design stays clean, and you can decorate only one or two nails if your patience has already left for winter break.
5. Red French Tips
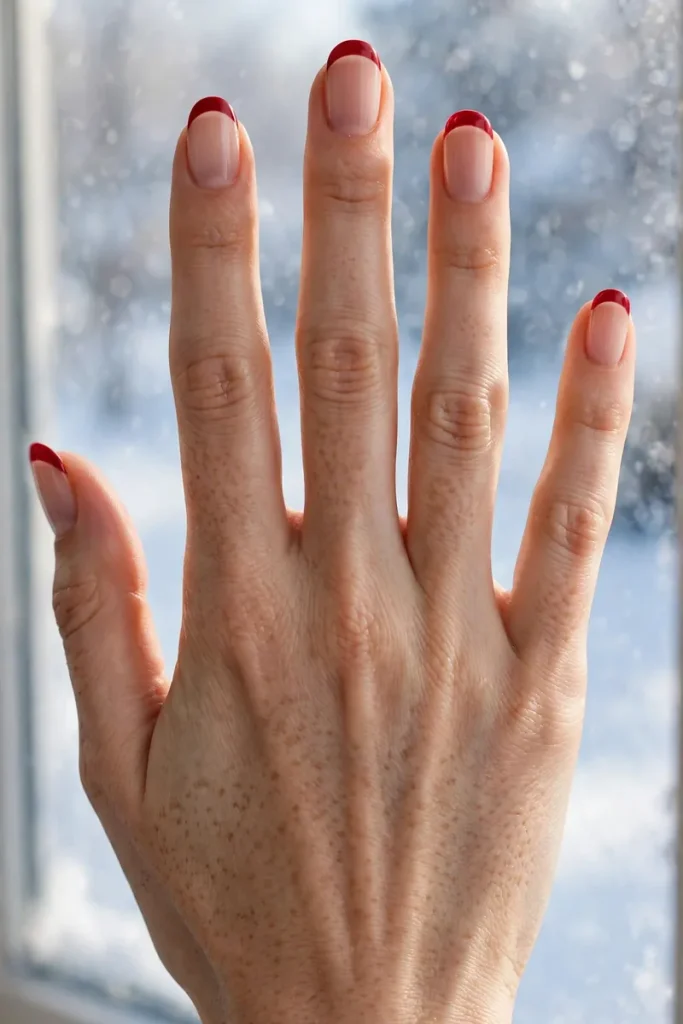
Swap white French tips for red ones and the classic manicure instantly feels festive. Start with a sheer pink base. Use nail guides if you want a sharp curve, or paint the tips freehand for a softer look. Keep the red line slim on longer nails and slightly wider on short nails.
I wore this style to a holiday lunch after painting it beside my morning toast. Two friends asked where I had my nails done. I accepted the compliments without mentioning the toaster. Glossy top coat smooths the edge and gives the simple red detail a clean salon finish.
6. White Nails with a Tiny Red Heart
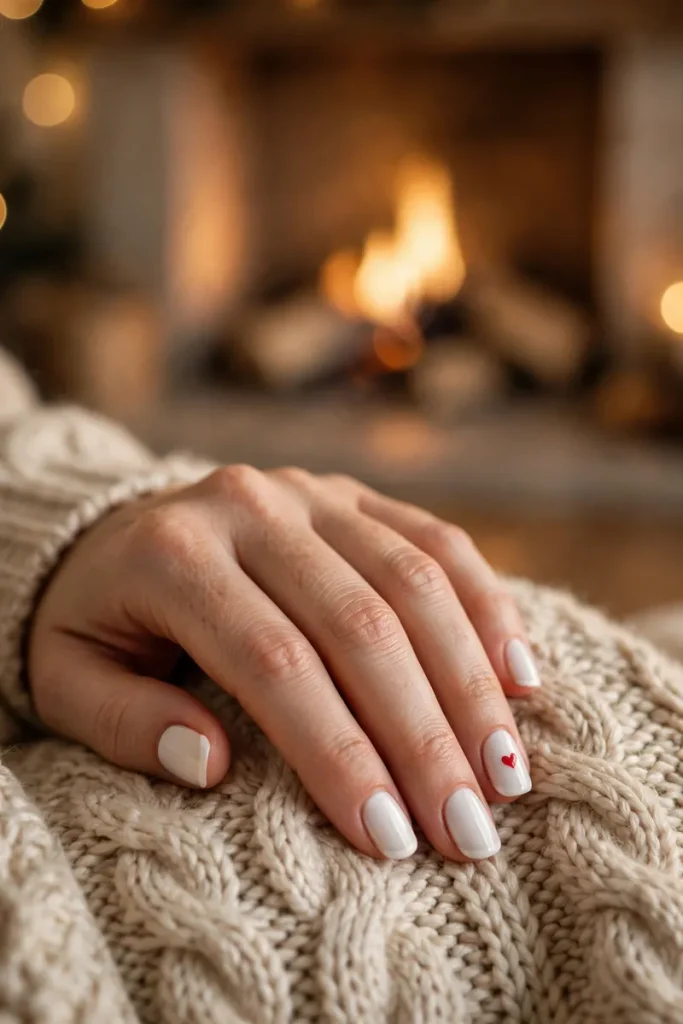
Paint your nails creamy white, then add one tiny red heart to an accent nail. Make two small red dots side by side and pull them downward with a toothpick to form the point. If your heart leans a little, call it handmade charm. Perfect shapes are overrated during cookie season.
The red heart adds warmth without turning the whole manicure into a theme park. It is sweet for Christmas and still wearable after the holiday. Keep the heart near one corner or close to the cuticle so the design feels modern. Let it dry fully before adding top coat, or it may streak.
7. Black with One White Snowflake
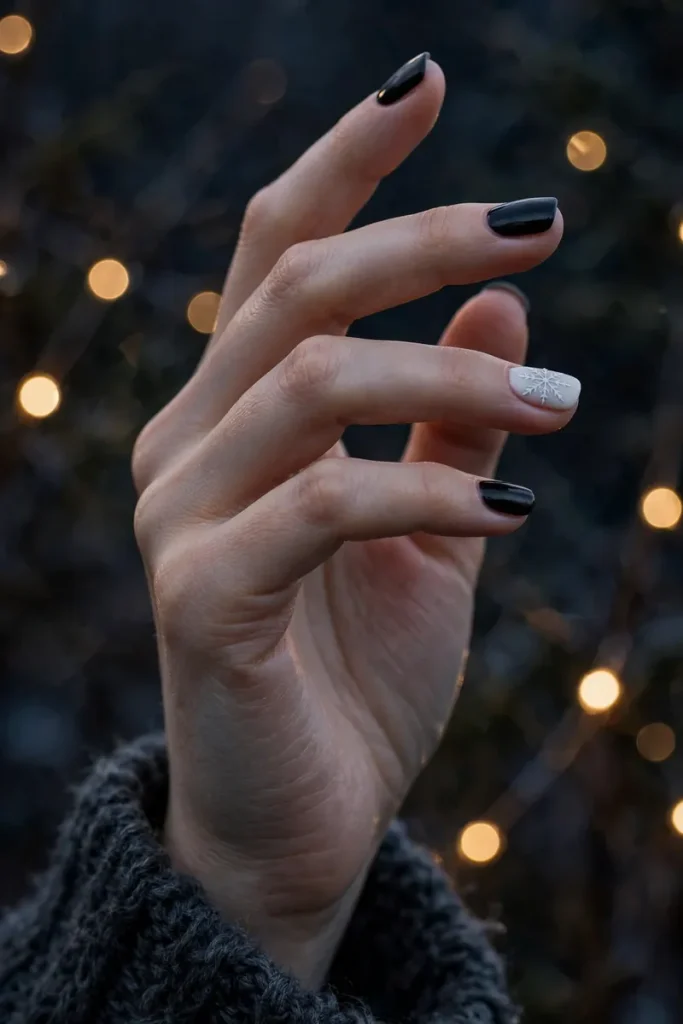
Black polish gives a tiny white snowflake a dramatic background. Paint most nails glossy black, then draw a small snowflake on one accent nail. Begin with three thin lines that cross in the center and add short branches. A snowflake sticker is an easy shortcut if your lines tend to wander.
This look is festive without using red or green, making it perfect for women who love a darker winter style. I tried drawing five snowflakes once and ended with what looked like tiny spiders. One snowflake is safer, faster, and much more chic. Add top coat only when the white detail is dry.
8. Gold Glitter Accent Nail
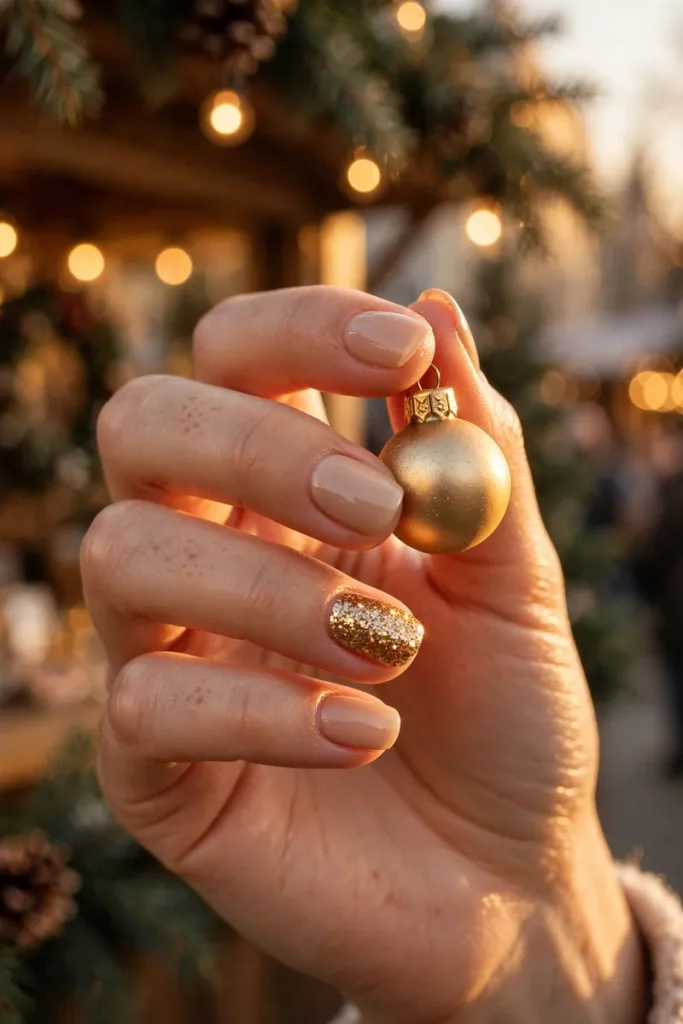
A nude manicure becomes party-ready when one nail is covered in fine gold glitter. Choose a dense sparkle polish so you need only two coats. Paint the remaining nails in a warm beige or sheer pink. The soft base keeps the accent nail bright without making the whole hand feel busy.
Glitter has a talent for appearing in places you never painted, including your face three days later. Put a paper towel under your hand and work slowly. For easier removal, hold remover-soaked cotton on the glitter nail for several seconds before wiping. Until then, enjoy that tiny holiday spotlight.
9. Matte Red with White Dots
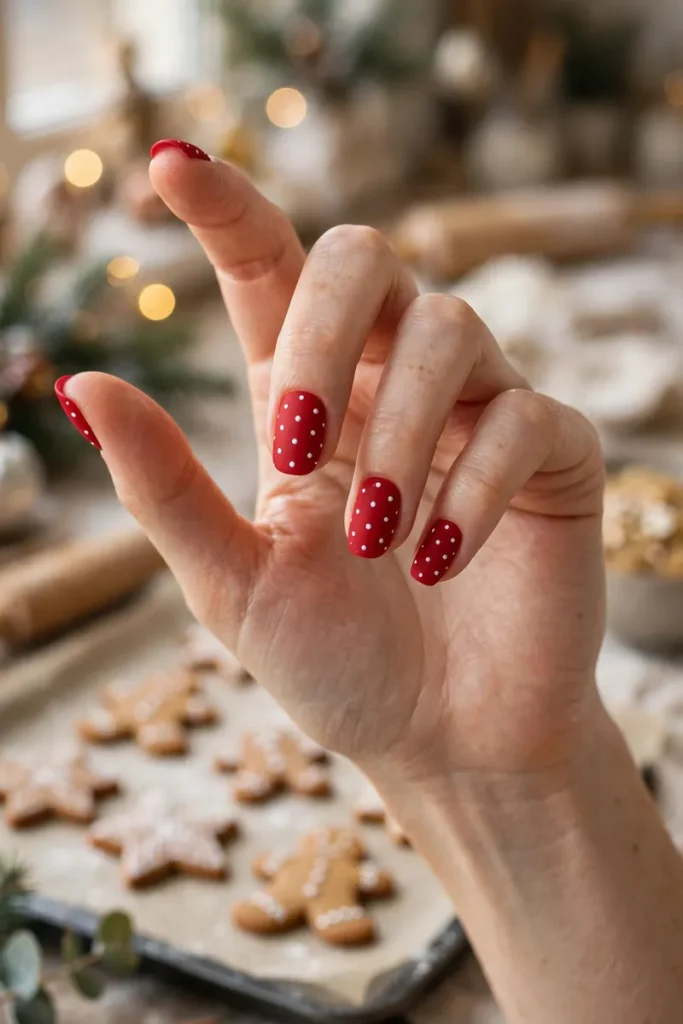
Apply two coats of red, finish with matte top coat, and add a few small white dots. Keep the dots scattered rather than perfectly lined up. They can suggest snow, confetti, or the powdered sugar that somehow lands on every dark sweater in December.
Use a toothpick for tiny dots and a bobby pin for larger ones. You can decorate every nail or only the ring fingers. The matte background makes the simple pattern feel soft and cozy. Wipe nails with alcohol before painting because matte polish shows oil more easily than glossy polish.
Cute, But Make It Minimal
This group adds color and shine while keeping each hand balanced. Think one stripe, one metallic nail, or one candy detail instead of a full North Pole mural.
10. Glossy Burgundy
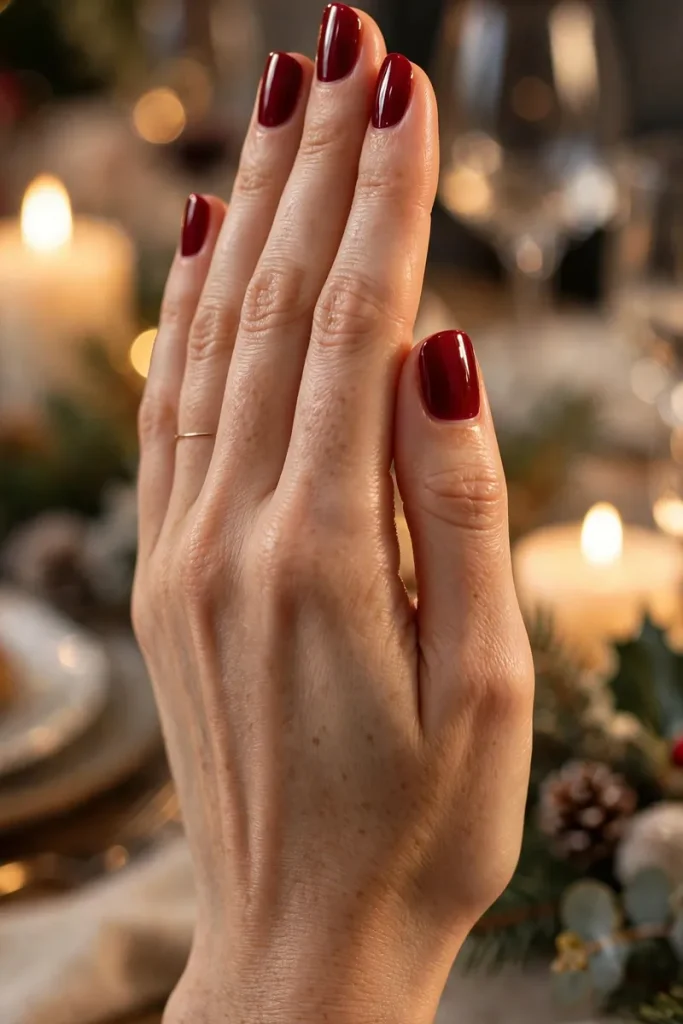
Burgundy is red’s moodier older sister. It feels warm, rich, and polished for a candlelit dinner. Apply a stain-blocking base coat, two thin color layers, and a glassy top coat. Leave a tiny clean gap around the cuticle to make the finished manicure look neat and professional.
This shade works beautifully on short nails and pairs with gold, silver, or rose-gold jewelry. It is also forgiving when your outfit changes at the last minute. I have worn burgundy with a green dress, a black jumpsuit, and an ugly Christmas sweater. Somehow, it behaved better than I did.
11. Cream with a Thin Green Stripe
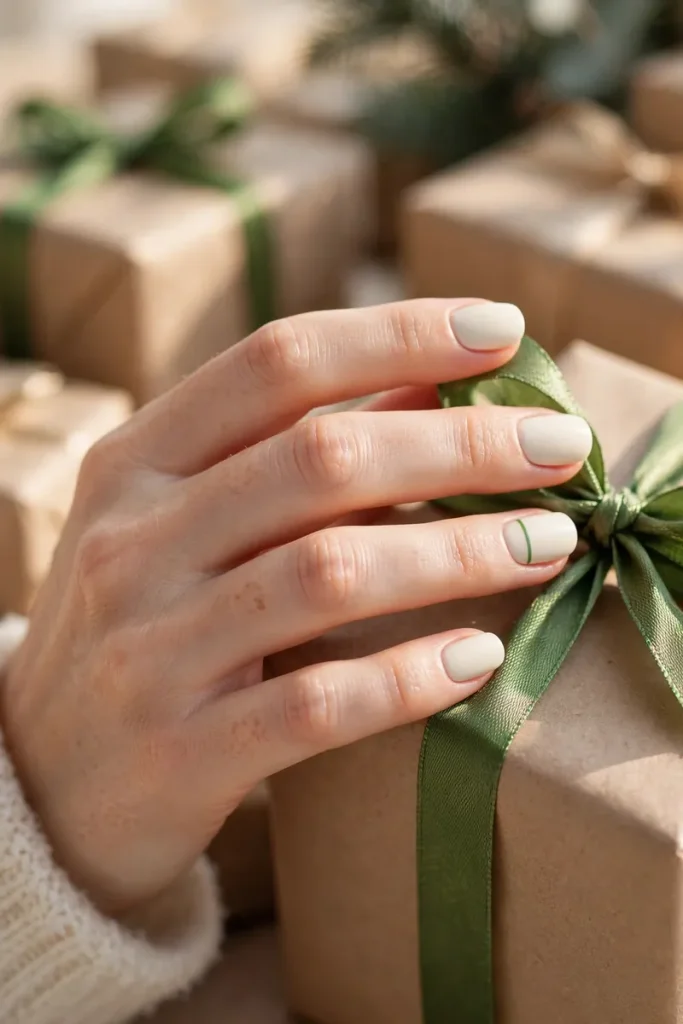
Begin with a warm cream base, then paint one slim forest-green stripe across or down an accent nail. A striping brush makes the line easy, but narrow nail tape works too. Remove tape while the green polish is still slightly wet, then wait before sealing the design.
The stripe is simple enough for beginners but gives the manicure a fresh graphic look. Place it in a different spot on each accent nail if you like a playful style. Keep the remaining nails plain cream. The design feels festive because of the color, not because it is covered in tiny decorations.
12. One Silver Chrome Accent
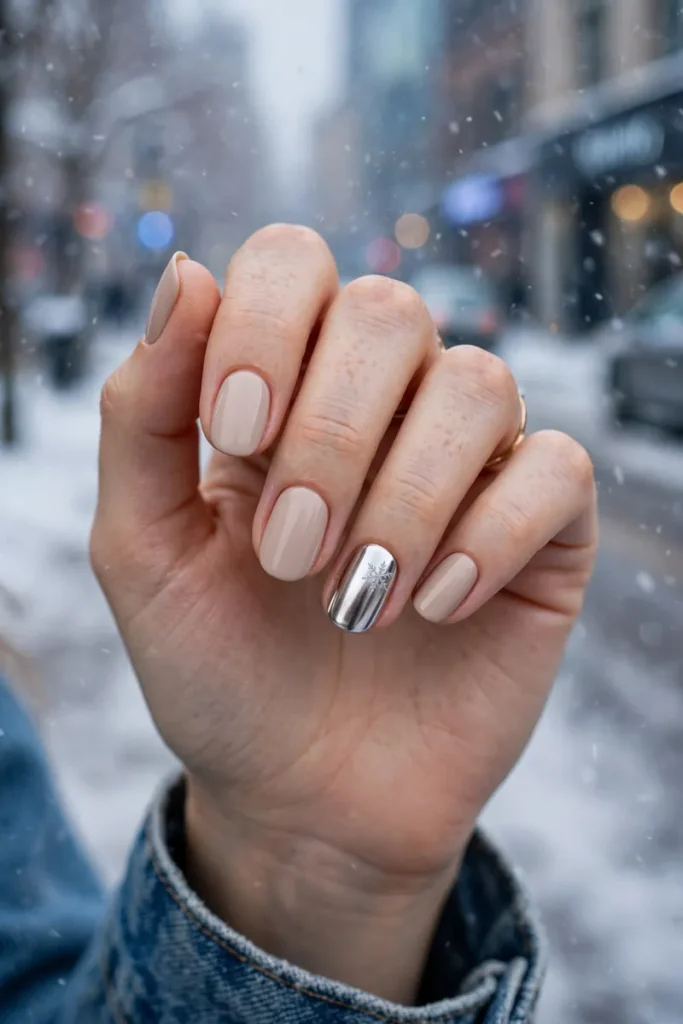
Silver chrome can look bold, so using it on one nail creates a perfect balance. Paint most nails pale gray, nude, or soft pink, then make one accent nail metallic. Chrome powder gives the brightest mirror finish, while silver polish offers a quicker, easier version for home.
The shiny nail reflects tree lights and looks wonderful beside silver rings. It also carries the manicure straight into New Year’s Eve. Keep the shape smooth and the surrounding colors quiet. One chrome accent says “holiday party.” Ten chrome nails may say “I can signal airplanes,” which is also a choice.
13. Candy Cane Stripe Accent
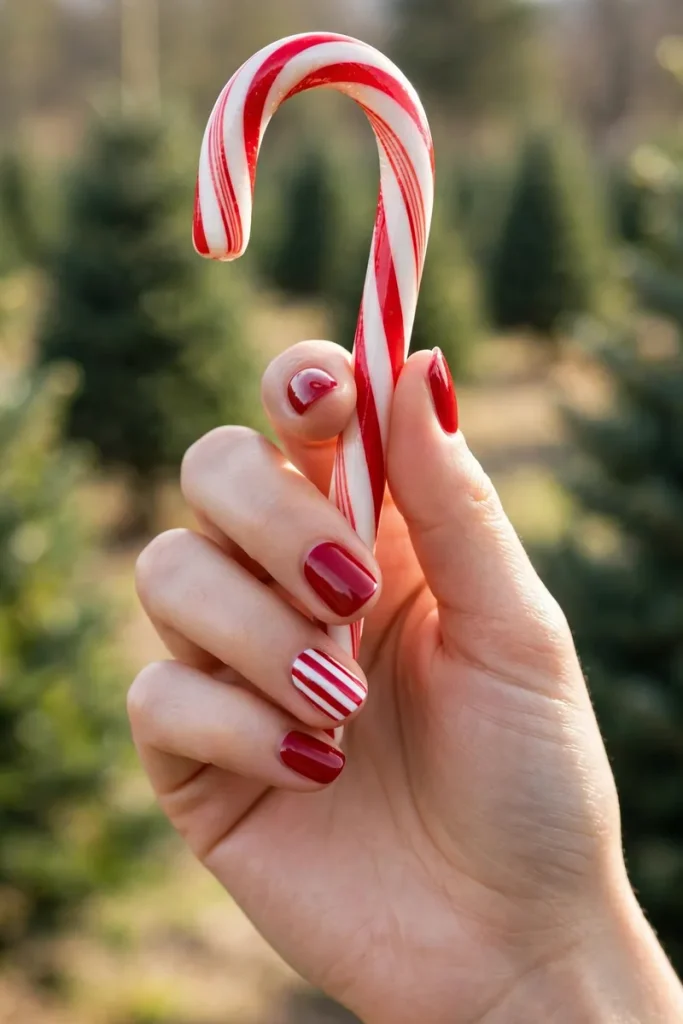
Paint most nails solid red, then add white diagonal stripes to one accent nail. Two or three clean stripes are enough. A thin brush or nail tape helps guide the lines. Do not keep adding stripes until there is no red left; peppermint designs look cutest when they have breathing room.
My first attempt had so many lines that it looked like a tiny traffic map. The second was much better because I stopped early. This design brings obvious Christmas fun without asking you to decorate all ten fingers. A glossy top coat gives the stripes a smooth candy-like finish.
14. Emerald with Gold Foil Tips
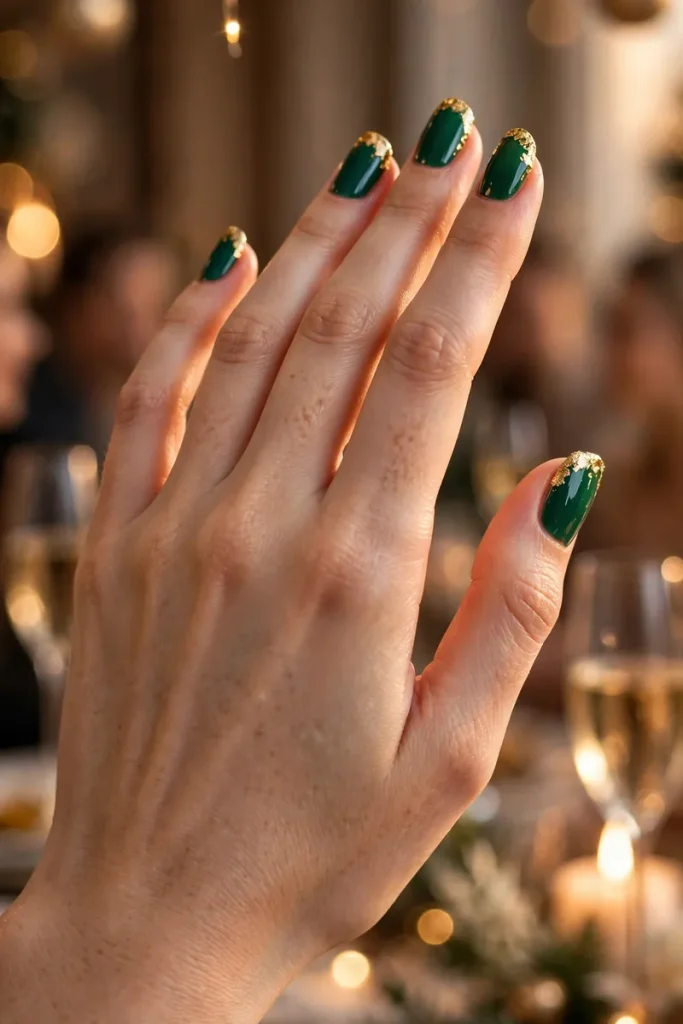
Deep emerald nails feel luxurious on their own. Press a few tiny pieces of gold foil near the tip of one or two nails to make them special. The foil should look scattered, not perfectly even. Use tweezers or a damp wooden stick, then seal every edge with top coat.
This combination reminds me of wrapped gifts under warm tree lights. It looks detailed, but the uneven foil actually makes the process easier. If one piece lands sideways, it becomes part of the design. Pair the manicure with a simple gold ring and let your hands do the sparkling.
The “Wait, You Did Those Yourself?” Ones
These final ideas look impressive in photos, yet each one uses a simple shape or an easy fade. They are perfect when you have a little more time but still want a calm manicure night.
15. Soft Pink with White Stars
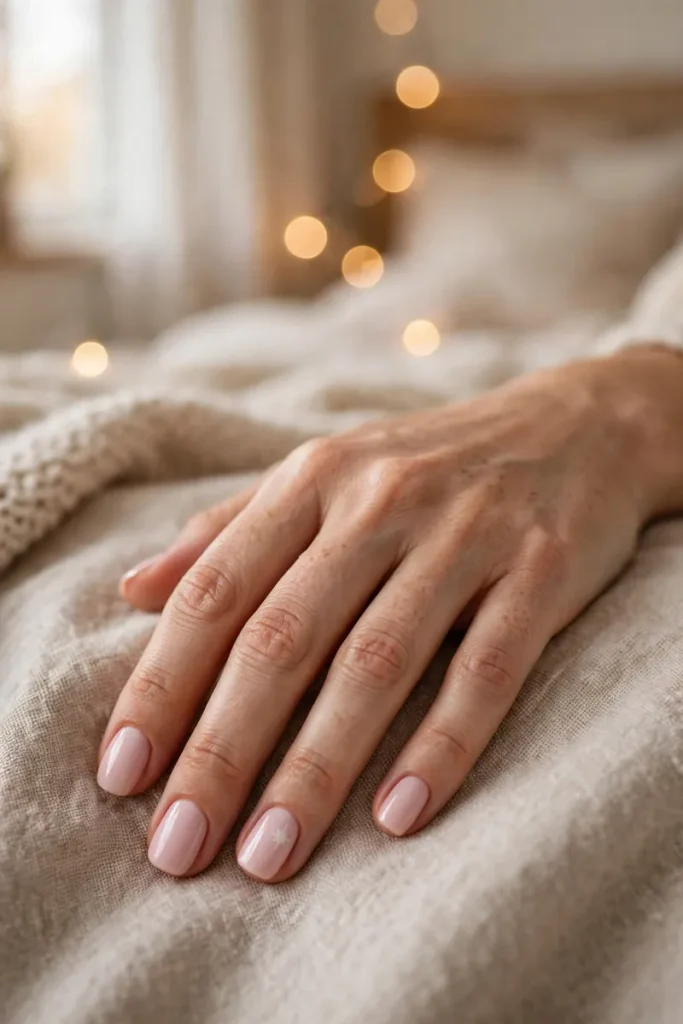
A pale pink base keeps white stars light and dreamy. Add one small star to two or three nails using a fine brush. Make a tiny plus sign, then add shorter diagonal lines through the center. You can also use star stickers if painting small shapes makes you hold your breath.
Leave the other nails plain so the stars have room to glow. This design feels Christmas-ready without relying on traditional colors, and it looks pretty with soft sweaters and pearl jewelry. If a star is slightly uneven, add a tiny dot nearby. Suddenly it is a whole night sky, not a mistake.
16. Navy with Tiny Gold Stars
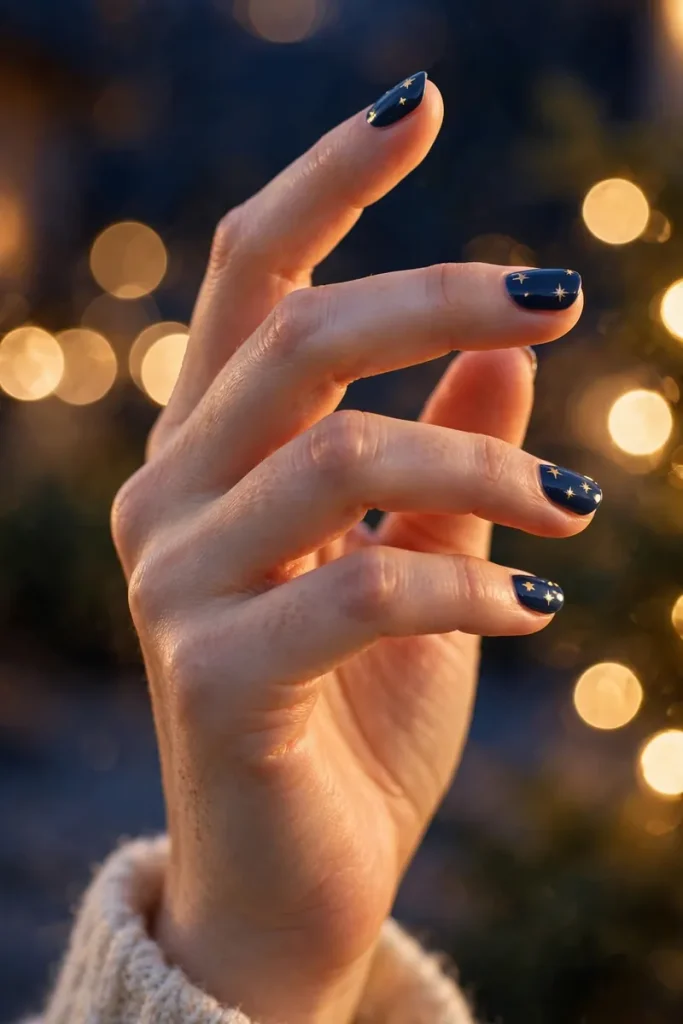
Dark navy creates a beautiful night-sky background for tiny gold stars. Paint two thin navy coats, then place a few gold stickers or dots on the ring fingers. Keep the stars small and spaced apart. Too many can crowd the nail and hide that gorgeous deep-blue base.
This manicure feels festive, elegant, and a little unexpected at a room full of red nails. It is especially lovely for an evening party. Finish with a thick glossy top coat so the stickers lie flat. When the lights catch the gold, your manicure will look far more difficult than it really was.
17. Nude-to-Gold Glitter Ombre

Begin with a nude base, then dab gold glitter onto the tips with a small makeup sponge. Keep the sparkle dense at the edge and lighter toward the middle. Repeat only where needed. The soft fade hides uneven borders, which makes this design friendlier than a sharp glitter French tip.
I used this look for a holiday party after changing outfits three times. It matched every option and photographed beautifully while I held a glass of sparkling cider. Apply two layers of top coat to smooth the glitter. The final result feels glamorous enough for New Year’s Eve but still easy enough for a quiet night at home.
A Simple Finish That Makes Every Design Last
Before painting, wash your hands, dry them well, and wipe each nail with a little alcohol or remover. Apply base coat, then use thin color layers instead of one thick coat. Thick polish may feel faster, but it stays soft longer and collects dents the moment you reach for your phone. I know because my phone case has ruined more manicures than I care to admit.
Run top coat across the free edge of each nail to help seal the color. Add cuticle oil after everything is dry, and use it daily to keep the skin around your nails soft. Wear gloves for dishes and cleaning. If a tiny chip appears, cover it with a dot, star, or touch of glitter. December is busy; clever repairs count.
Most of all, choose the idea that fits your real schedule. A solid color can look every bit as festive as detailed art. One stripe can be enough. One star can tell the whole story. Your Christmas manicure should make you smile, not make you miss the movie while everyone else eats the snacks. Keep it simple, make it yours, and let the holiday lights provide the rest of the sparkle.