18 Kids Christmas Nails Too Cute for the Family Photo
Here is my honest take: kids christmas nails should not be tiny copies of adult nail art.
Little nails are small, hands wiggle, and patience runs out fast, so designs need big shapes and quick polish.
Every idea below uses regular peel-off polish, takes minutes, and still reads clearly in the Christmas photos.
I judge a kids’ design by one test: can it survive a juice box, a jumper sleeve and a full-speed cuddle? If it needs a perfectly still hand, it fails. Every design on this list passes.
Find Your Pick in 10 Seconds
Match the mood to a number and start there — every design uses peel-off polish and repeats one simple shape.
- Two colours and done in minutes: trim tips in idea 1, the checkmark in idea 7 and the beard in idea 6.
- Animal fans: the unicorn in idea 2, the walrus in idea 3 and the beaver in idea 13.
- The funny crew: a Brussels sprout in idea 8, a lump of coal in idea 10 and the dinosaur in idea 18.
- Santa’s biggest fans: the belt in idea 4, the boots in idea 12 and the spectacles in idea 17.
- Party-day sparkle without loose bits: the party hat in idea 11.
18 Kids Christmas Nail Designs to Paint at Home
1. Santa Coat Trim Tips in Red and White
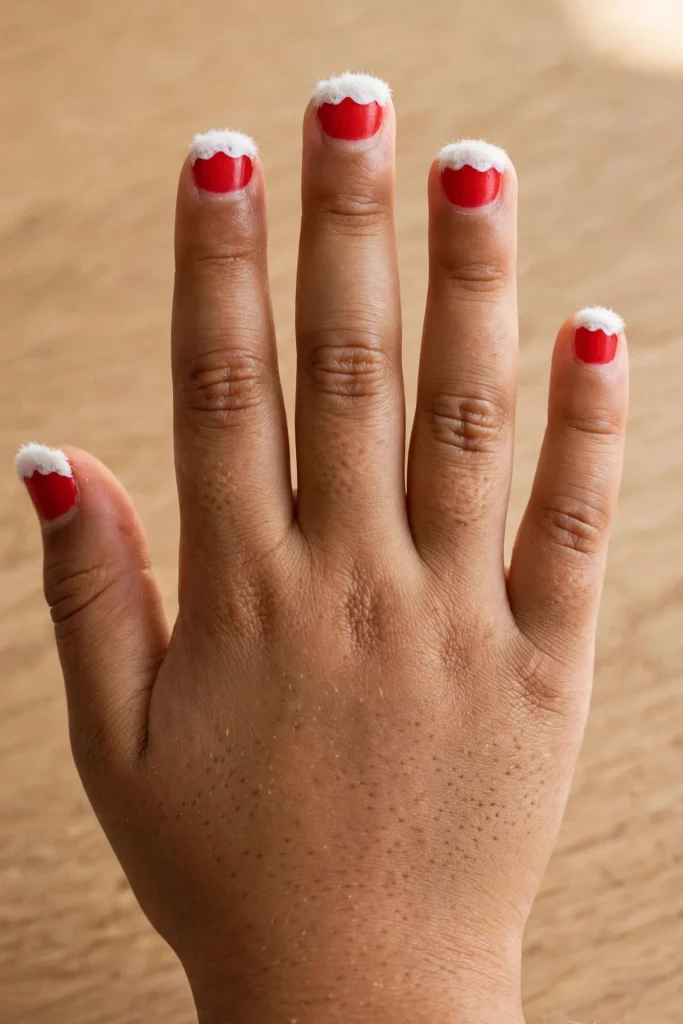
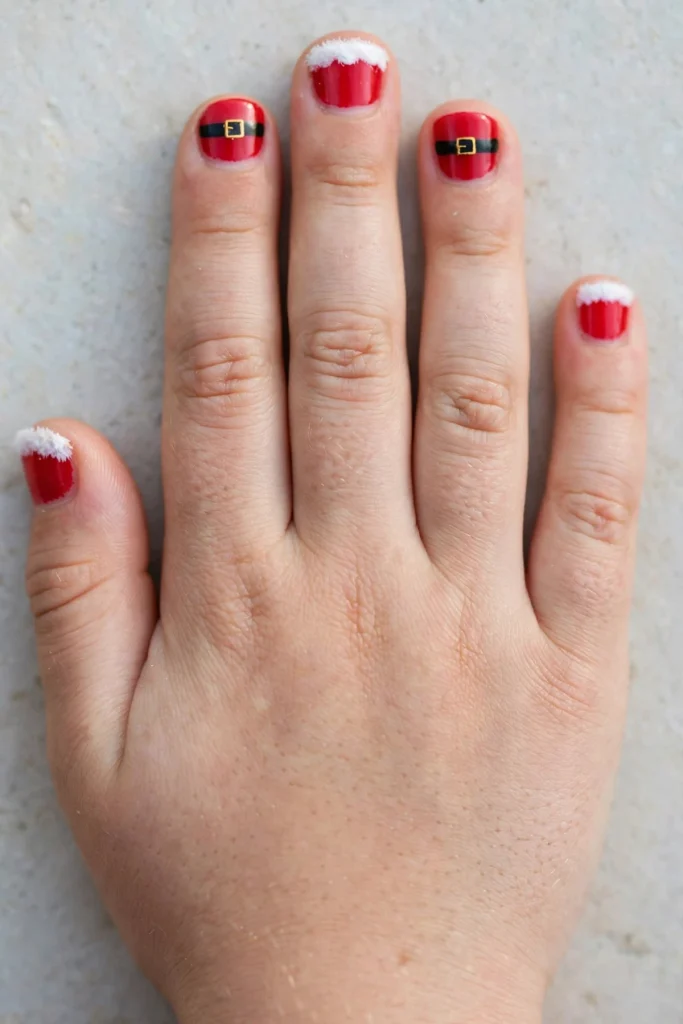
Paint the whole nail a true Santa red, then drag a wavy white band across each tip, like the fur trim on his coat. Two colours, about six minutes for both hands, and an Easy difficulty for parents. The wavy edge is the forgiving part: a shaky line just looks like fluffier fur, so there is no straight-edge stress. Keep the white band chunky rather than thin, because thin lines vanish on very short nails. One thin coat of red first, then the white, stops the colour looking patchy.
2. A Christmas Unicorn With a Gold Horn
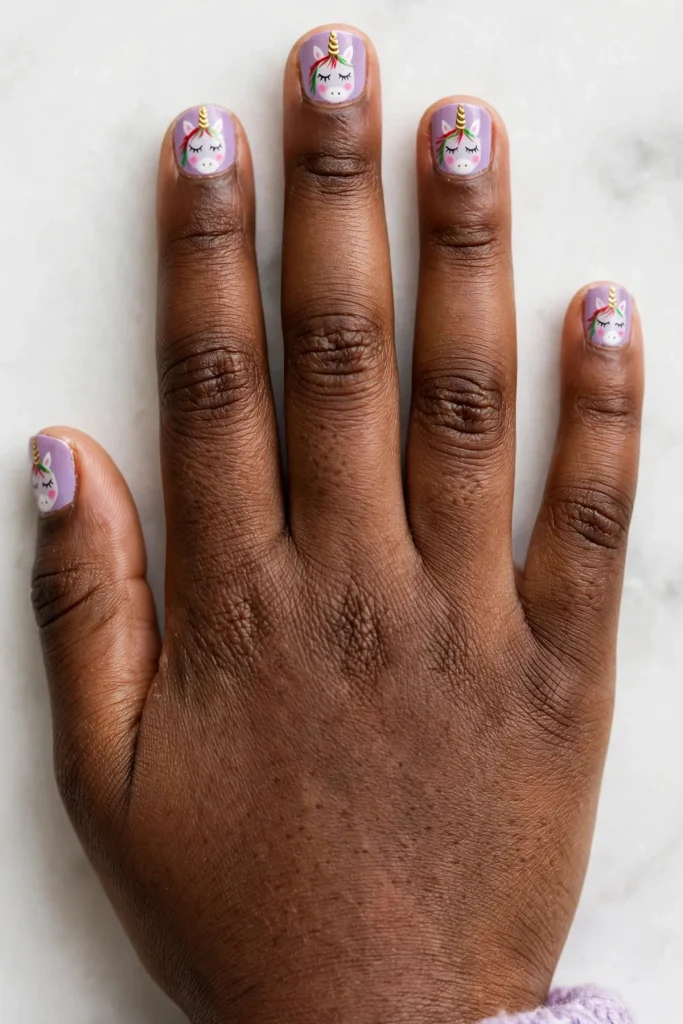
This suits you if your child has moved past Santa and into full unicorn season. The face sits on a soft lilac base: a white oval face, one gold horn, and quick red and green strokes for the mane. Four colours and about ten minutes, so call it Medium for parents. Paint the horn first while patience is high, then the face around it. A dot of pink on each cheek finishes the face without fiddly detail, and the mane strokes can be as messy as real hair.
3. A Walrus Face With Two Big Tusks
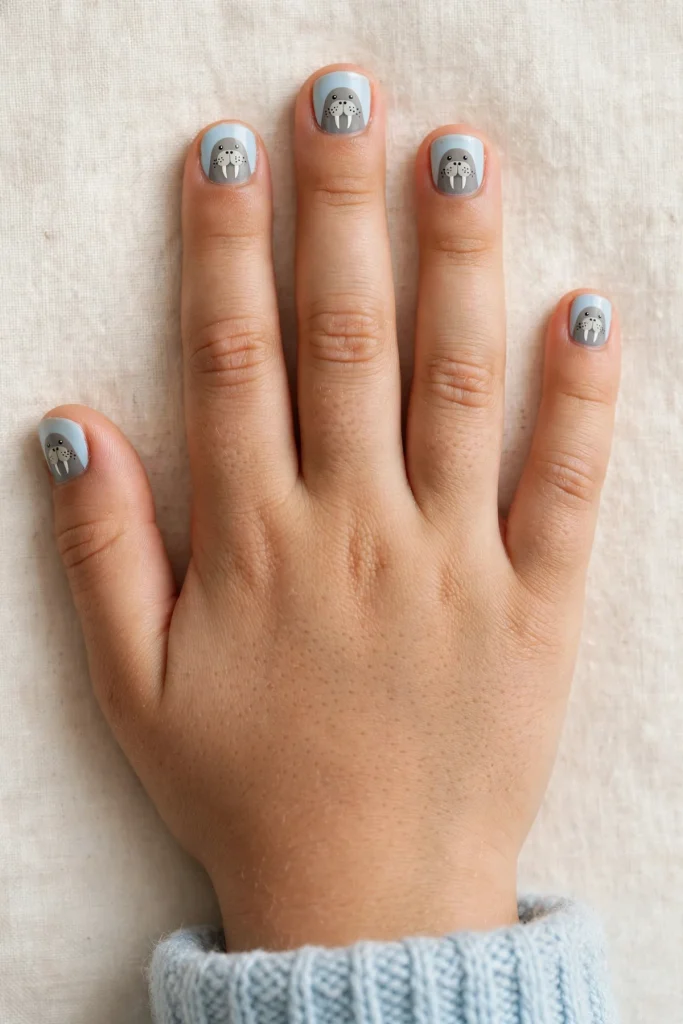
Icy blue makes a friendly background for the roundest face on this list. Build it in three calm steps:
- Start with a grey-brown circle that fills most of the nail.
- Add a cream muzzle low on the circle, then two white tusks hanging down.
- Dot two black eyes and three whisker dots on each side of the muzzle.
Four colours, roughly eight minutes, Medium for parents. The tusk step is the one kids watch closest, so save it for last and let them count the whiskers while the polish settles.
4. Santa’s Belt With a Gold Buckle
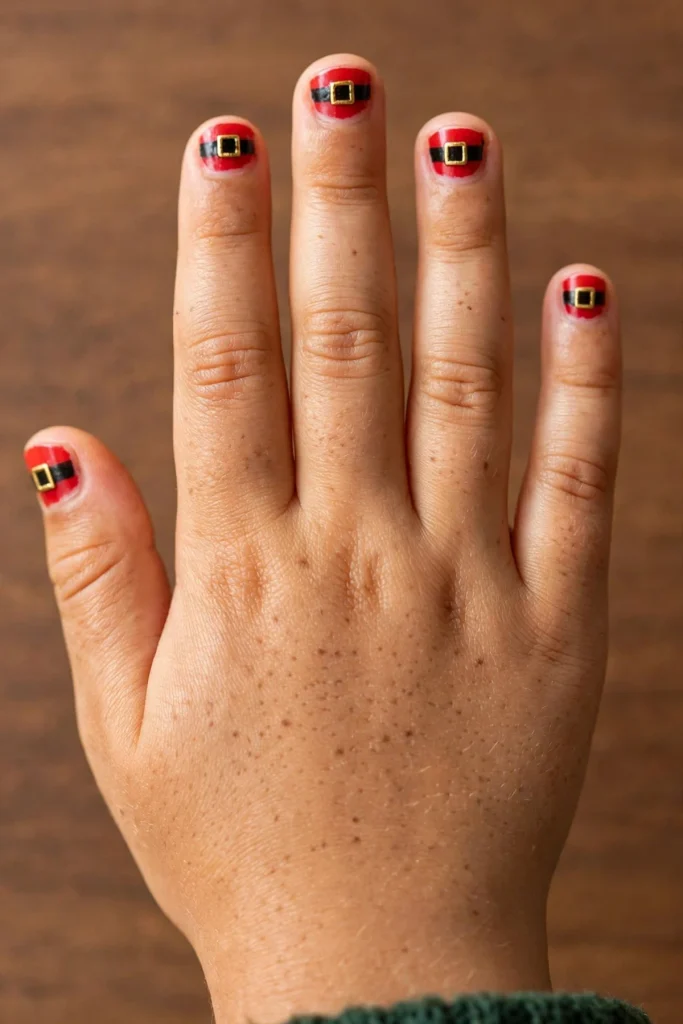
The common mistake here is painting the gold buckle first and smudging it with every layer after. The fix is order: red base, a black band across the middle, then a gold square outline left empty in the centre. Three colours, about seven minutes, Easy. A buckle drawn as four short gold lines reads better on small nails than one wobbly square. If the black band wobbles, widen it slightly, and a chunky belt looks deliberate, while a thin uneven one just looks tired.
5. A Carrot Left Out for the Reindeer
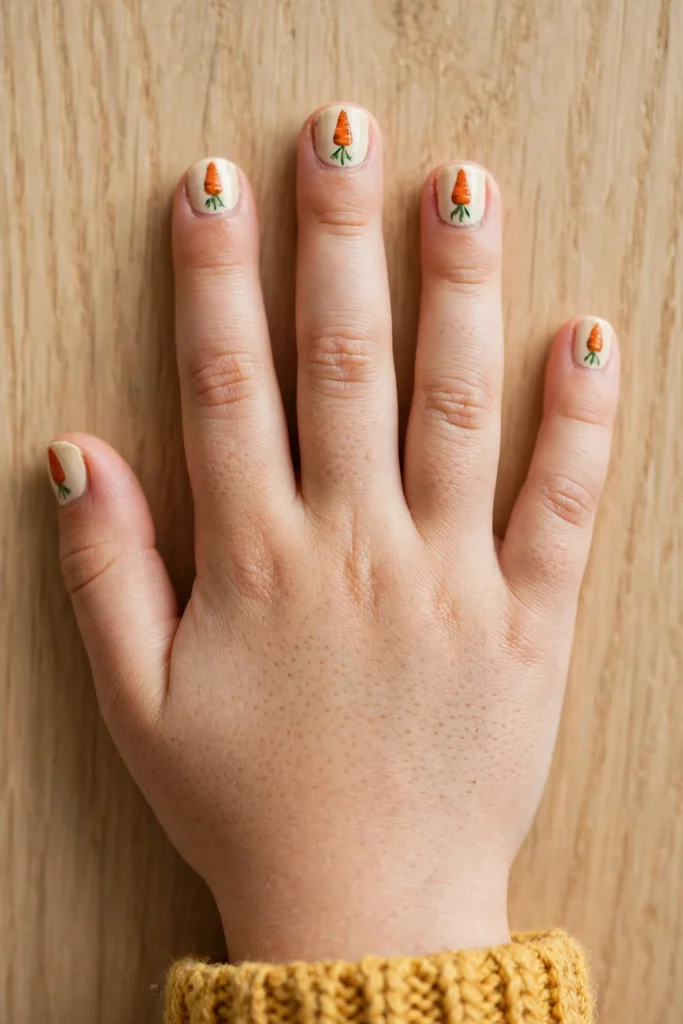
Somebody has to feed the reindeer, and this is the design kids explain to every visitor. On a cream base, paint one bold orange carrot with its tip toward the fingertip, with three short green strokes at its base for the leaves. Three colours, about six minutes, Easy. A carrot is mostly one triangle, so it suits wobbly hands and short nails better than most food art. Angle each carrot a little differently across the hand; a slightly wonky row looks playful, not wrong.
One carrot on every nail starts more conversations at the school gate than any snowflake I have come across.
That is the real test of a kids’ design, by the way. If a five-year-old can explain it in one sentence, the shape is big enough.
6. Santa’s Beard in Big White Swirls
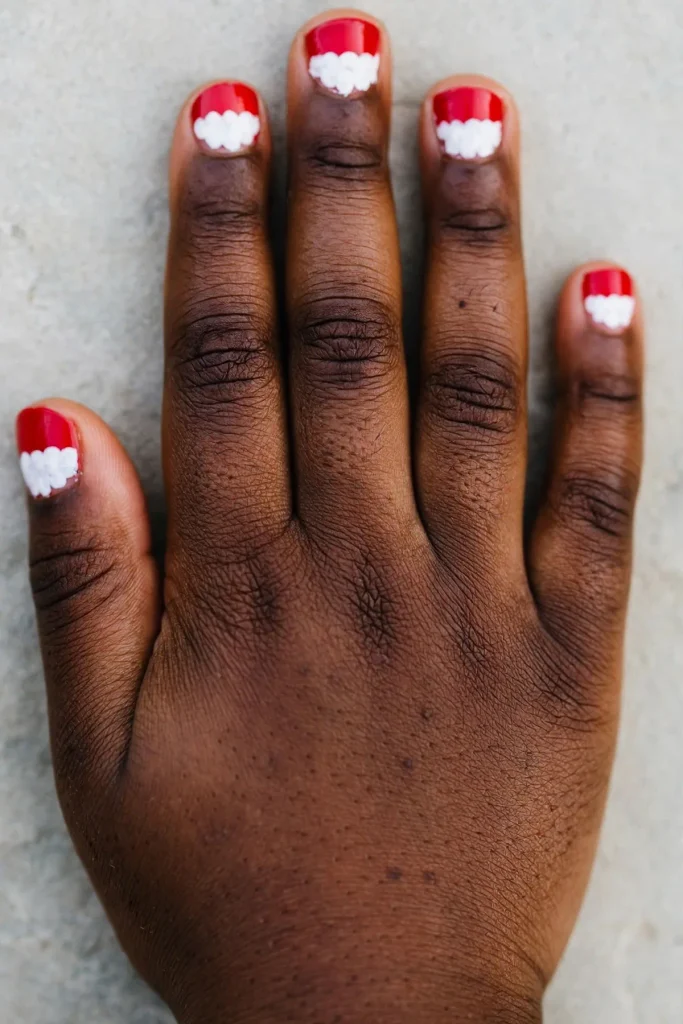
Red nails, one big white beard. Swirl a scalloped white shape across the lower half of each nail and leave the red showing at the top like his hat band. Two colours, five minutes, Easy — the fastest Santa on the list. Thick scallops beat thin ones here, because little nails swallow fine detail, and a beard that covers half the nail still reads from across the room.
7. A Nice List Checkmark That Says It All
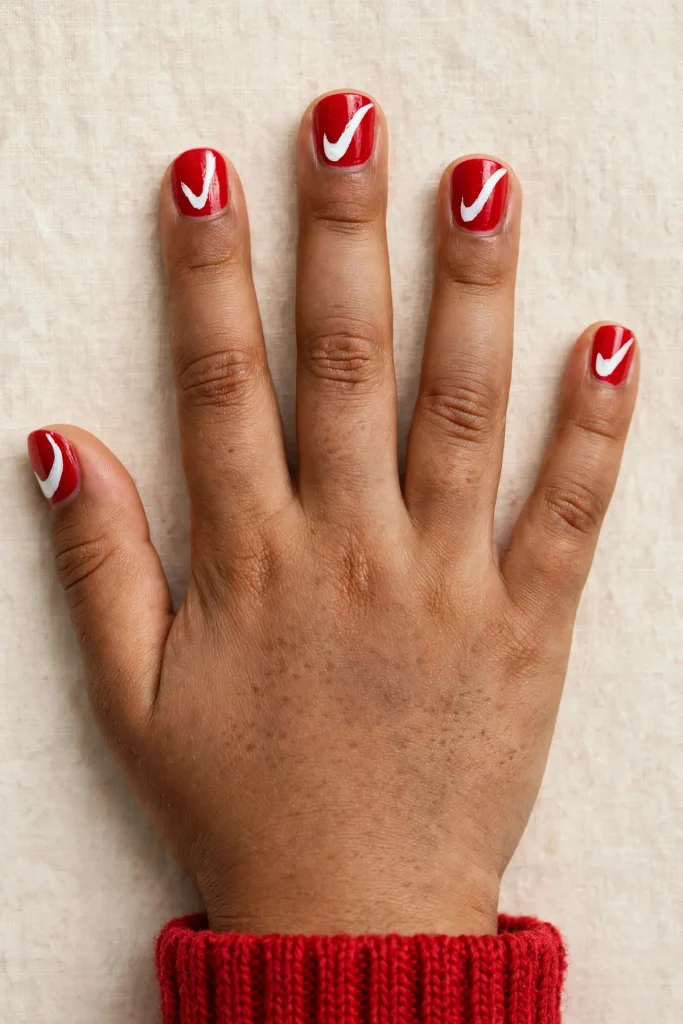
This suits you if somebody at home has been very good this year and mentions it often. One bold white check across a red nail says it all, with no tiny details to line up. Two colours and about four minutes, the quickest design here, Easy for tired parents. Make the check thick and slightly oversized; a timid thin check disappears at photo distance. It also works as the emergency design when the first plan runs out of sitting time.
8. The Brussels Sprout Nobody Wanted
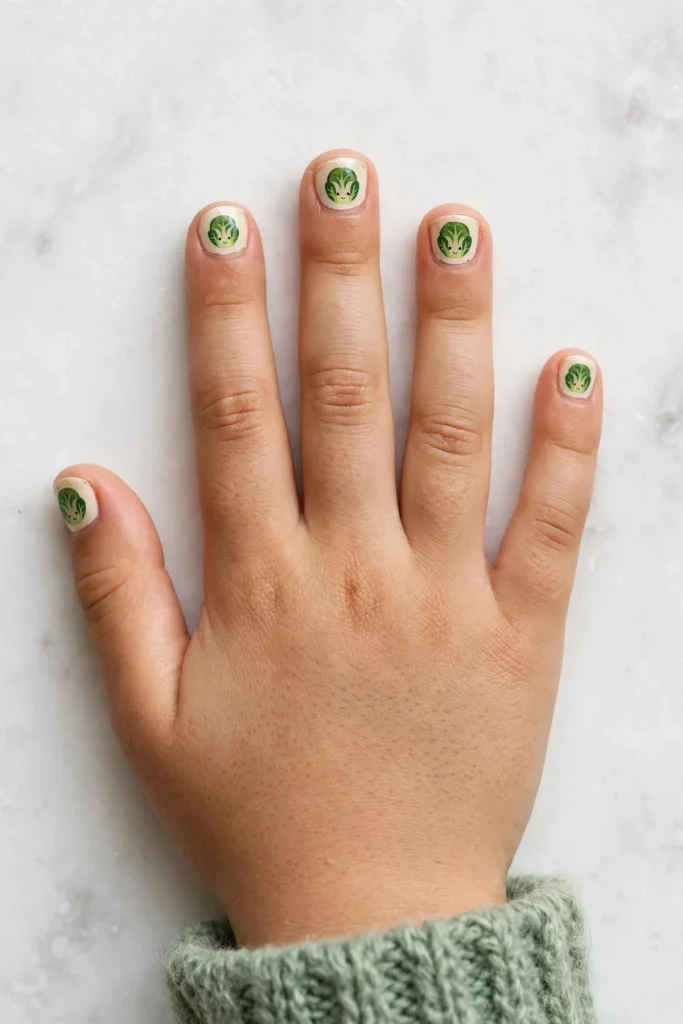
The sprout gets no love at dinner, so give it a starring role on nails. On a cream base, paint a round green sprout with two curved leaf lines and, if patience allows, a tiny dot smile. Three colours, about seven minutes, Easy. Curved leaf lines forgive a shaky hand far better than straight edges do. A slightly darker green outline makes the sprout pop in photos, and one sprout per nail keeps the joke clear instead of busy.
9. A Christmas Turkey With Drumsticks
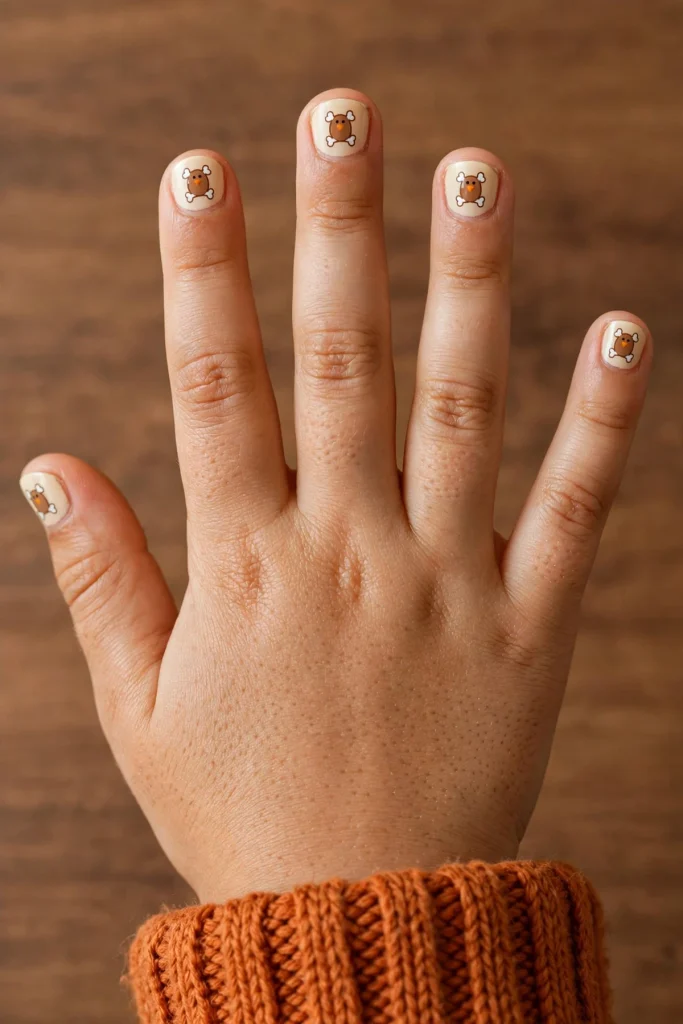
A soft cream base keeps this little turkey friendly rather than farmyard. Build him in three steps:
- Paint a round brown body that fills the middle of the nail.
- Add little white drumstick bones at all four corners of the body.
- Dot two tiny eyes and add a small orange beak triangle.
Three colours, about eight minutes, Medium for parents. The drumsticks do the storytelling, so keep them bold and skip feathers entirely — feather detail is where this design usually falls apart on short nails.
Halfway reminder: peel-off polish forgives almost everything. A smudge today is a fresh start after bath time, not a disaster.
10. A Sparkly Little Lump of Coal
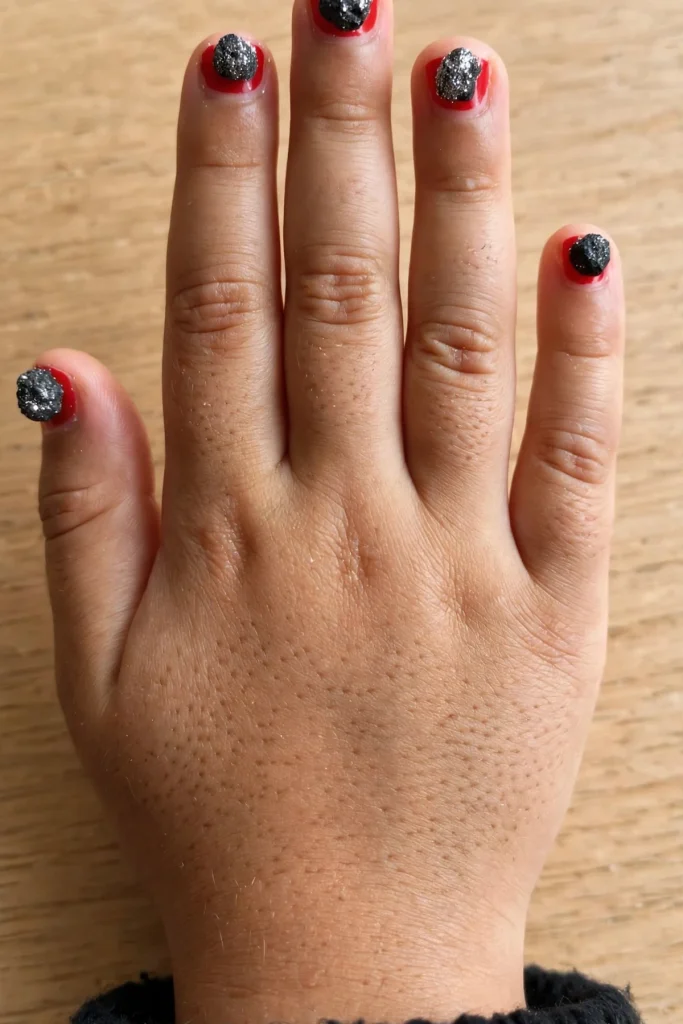
The mistake with coal is painting plain black blobs, which end up reading as mistakes themselves. The fix is sparkle: a lumpy black shape on red, then a few silver glitter dots pressed on top while the black is still tacky. Three colours counting the glitter topper, about six minutes, Easy. Lumps are supposed to be uneven, so this is the one design where a wobbly outline improves the joke. Keep glitter to the coal only, so it peels off in one piece later.
11. Party Hats With Pompoms
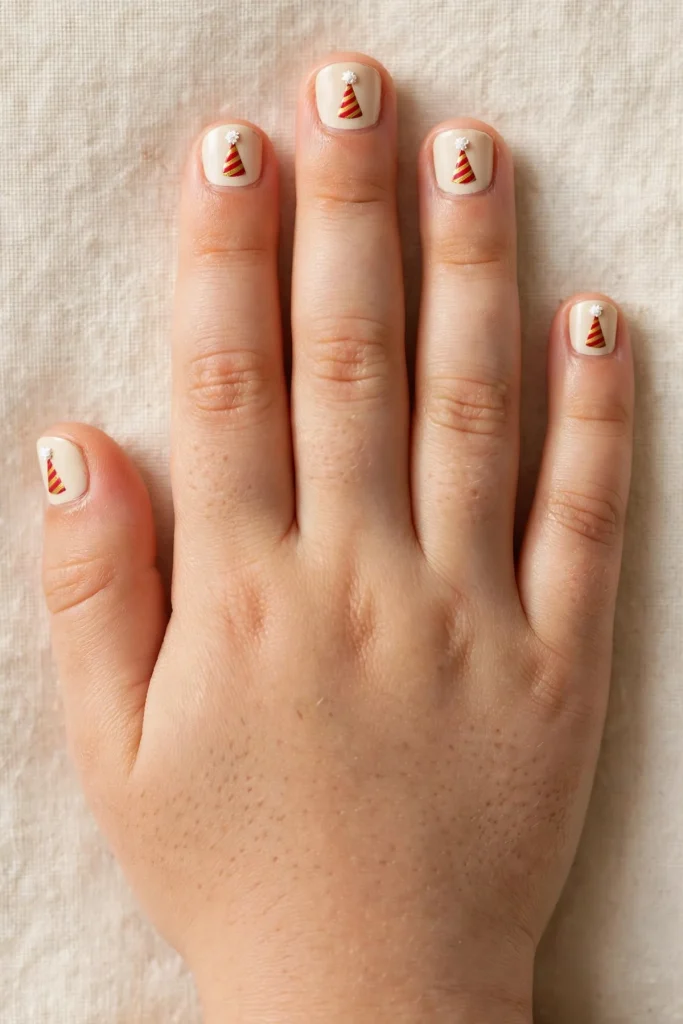
New Year energy, one week early. On a cream base, paint a cone hat in red and gold stripes with one white pompom dot on the point. Three colours, about seven minutes, Easy. Stripes painted as two diagonal bands are quicker than fiddly horizontal lines, and they sit better on short nails. If the cone leans a little, lean into it — party hats are rarely straight by the end of a party anyway. A gold band at the bottom of the cone hides the join neatly.
12. Santa’s Boots, Ready to Land
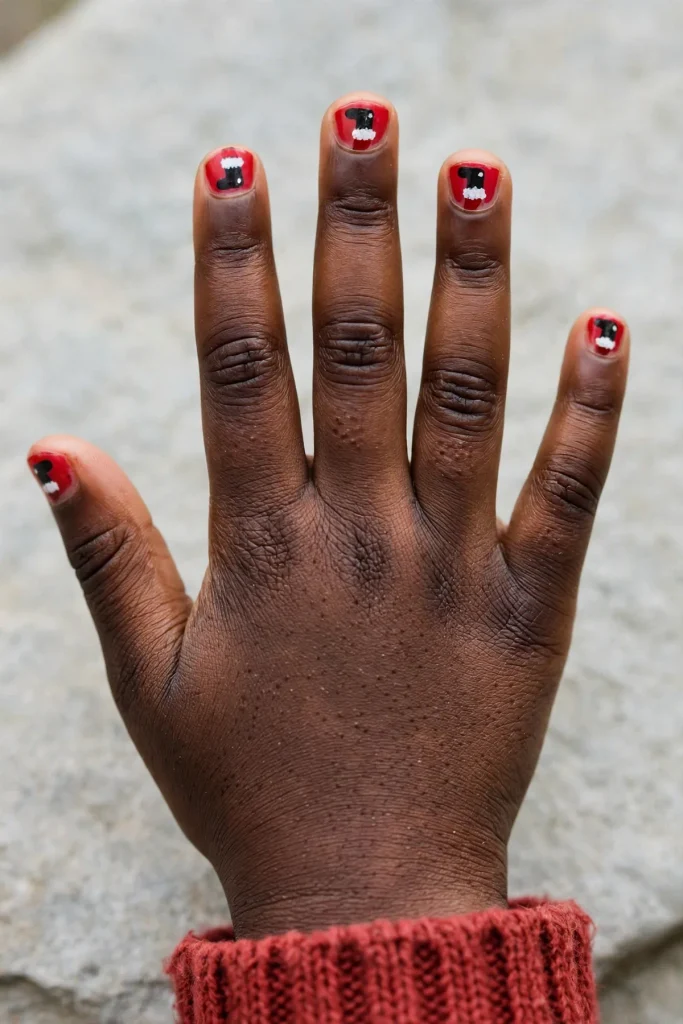
This suits you if your child loves the part where Santa lands with a thump. On a red base, paint a black boot shape low on the nail with a chunky white cuff band across its top. Three colours, about seven minutes, Easy. Draw the boot as one simple L-shape rather than a detailed shoe; the white cuff does the recognising. Boots pointing the same way across all five nails look tidy, and tiny direction changes just look like dancing.
13. A Beaver With Very Proud Teeth
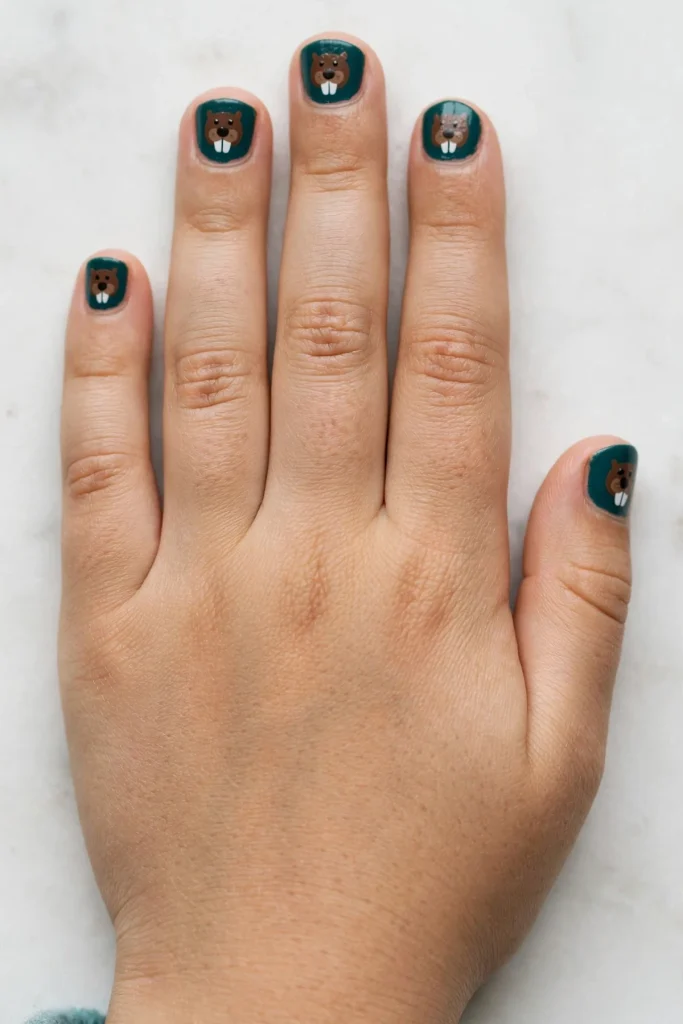
Teal nails set off the cheeriest teeth in the animal kingdom. A round brown face, a dark dot nose, and two big white front teeth hanging side by side in the middle. Four colours, about eight minutes, Medium. The teeth are the whole design, so paint them last, big and proud, once everything else has settled.
With kids’ nails, the design they can describe is the design they will sit for. Teeth they can count to two? That one works.
If teeth feel like a stretch on the smallest nails, paint the face smaller and give the teeth the room instead. Nobody remembers the face; everybody remembers the teeth.
14. Reindeer Hoof Prints in Fresh Snow
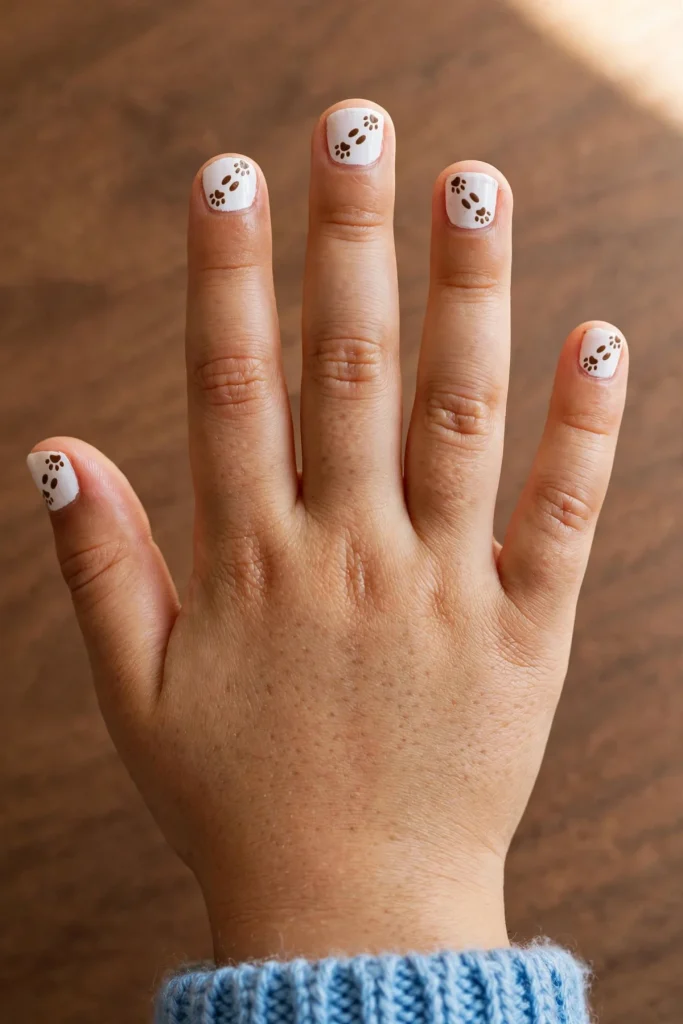
White nails become fresh snow for a trail of tiny visitors. Work in three easy steps:
- Leave the white base fully dry so the prints stay crisp.
- Stamp pairs of small brown ovals, two by two, trailing diagonally up each nail.
- Add one smaller print on the thumb, as if somebody turned around.
Two colours, about five minutes, Easy. A cotton bud dipped in polish stamps rounder prints than a brush, and uneven spacing looks like real wandering, which is exactly the story kids tell about it.
15. A Milk Bottle Left Out for Santa
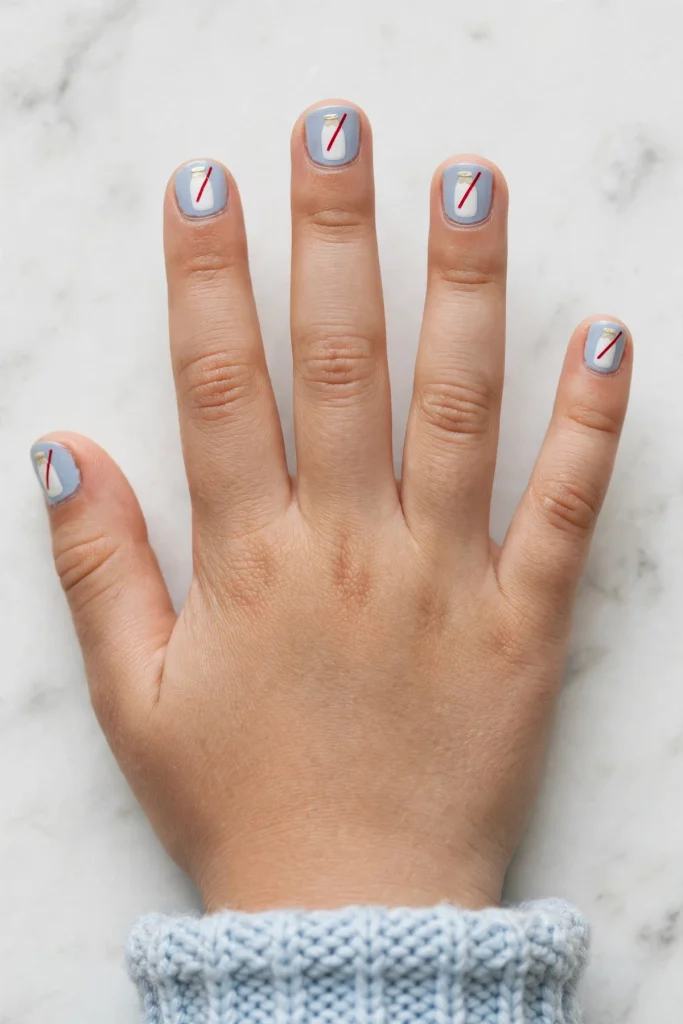
On a pale blue base, paint a plump white bottle with a cream band for the foil top and one red diagonal line for the straw. Four colours, about eight minutes, Medium for parents. The bottle is one rounded rectangle, so it suits short nails that cannot fit detailed scenes. Keep the straw line bold; at photo distance it is the stripe that says this is a treat, not a plain white shape. A tiny white dot highlight on the bottle adds a glassy feel for free.
16. A Cheeky Elf Face With Pointy Ears
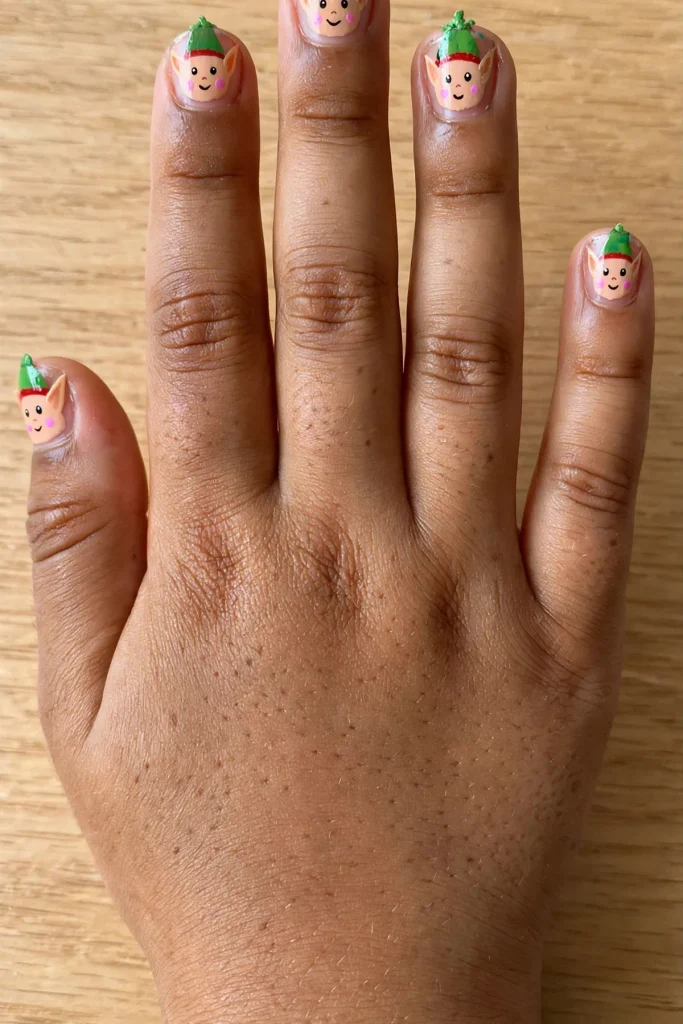
The mistake with elf faces is starting with tiny ears that vanish into the background. The fix is scale: a peach face filling the nail, two big pointy ears at the sides, and a green pointed hat band across the cuticle edge. Four colours, about ten minutes, Medium. Paint the hat band first so the face has a frame, and keep eyes as two simple dots. Rosy cheek dots hide a multitude of wobbles and make the whole face read friendlier in photos.
17. Santa’s Spectacles in Gold
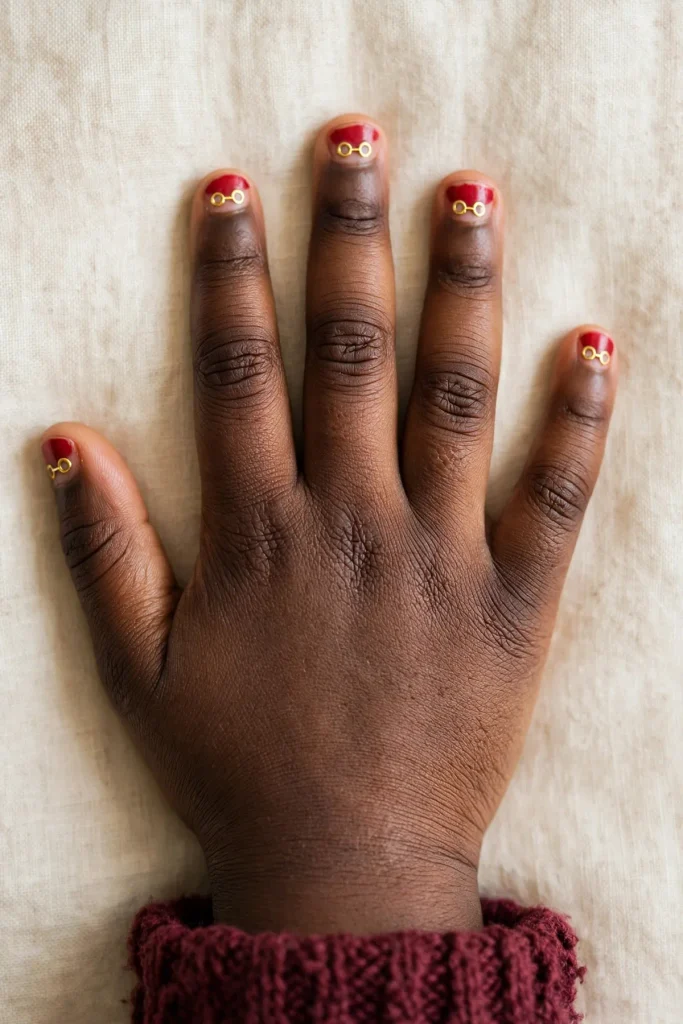
This suits you if your house takes the Santa sighting very seriously. On a red base, draw two round gold spectacles with a tiny bridge line, low on the nail where his eyes would peer over them. Three colours counting the gold, about six minutes, Easy. Two circles from a dotting tool beat freehand rings every time, and slightly uneven circles just look hand-drawn and sweet. Leave the rest of the nail plain red so the glasses stay the joke.
18. A Dinosaur Wearing a Snow Cap
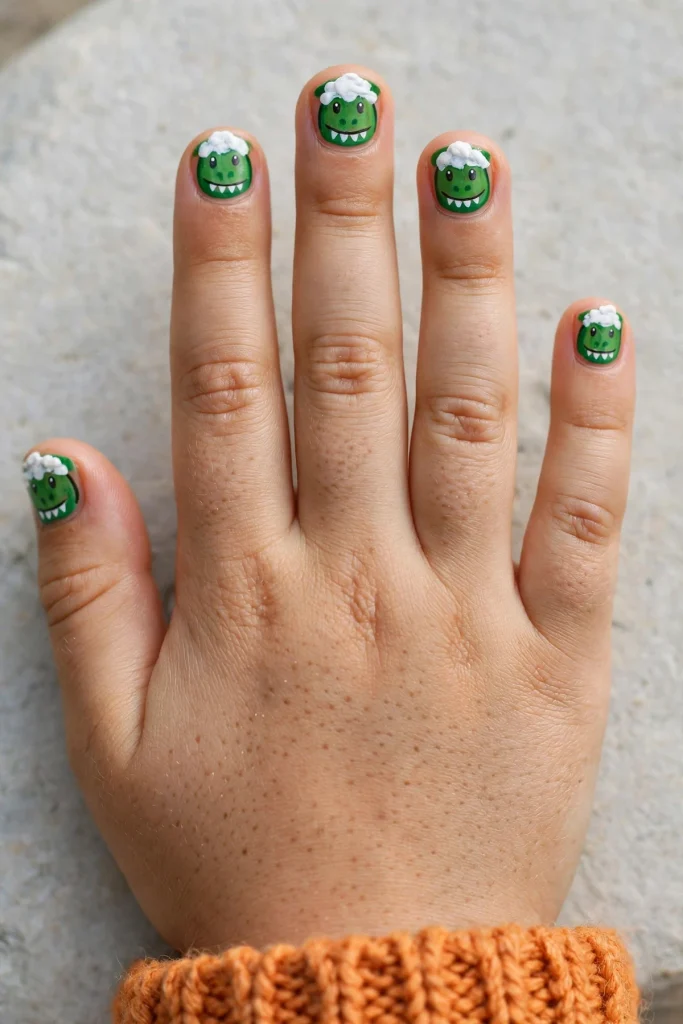
Green dinosaurs celebrate too. Paint a bold green dino face with a row of tiny white teeth triangles along the jaw, then blob a lumpy white snow cap on top of his head. Three colours, about eight minutes, Medium. The snow cap hides the hardest part — the top of the head — under one forgiving white blob. If your dinosaur ends up smiling by accident, keep it; a friendly dinosaur is very on-brand for a five-year-old.
The Two-Nail Rule: Designs a Wiggly Kid Can Actually Sit For
Here is the pacing trick that saves every design on this list: do not aim for ten nails in one sitting. Paint two nails, then stop for a snack, a song or a full lap of the room. Two more, another break. Every design here repeats one single shape, so pausing halfway still looks finished — nail three matches nail one whenever you get back to it.
Start with the thumbs, because thumbs are what kids hold up in photos and show grandparents first. If attention runs out completely, the thumbs carry the design and the rest can be finished after the next break, even the next day. Peel-off polish makes this easy to restart, since a tired nail can be lifted off and redone in seconds.
Match the Design to Your Minutes and Their Age
A quick guide for picking on a busy December evening. Shorter sitting times suit younger kids; faces suit kids who can hold a hand steady for a few minutes at a time.
| Design | Good from age | Sitting time | Parent effort |
|---|---|---|---|
| Nice list checkmark (idea 7) | About 3 | Under 5 minutes | Easy |
| Santa coat trim tips (idea 1) | About 3 | About 6 minutes | Easy |
| Santa’s beard (idea 6) | About 4 | About 5 minutes | Easy |
| Reindeer hoof prints (idea 14) | About 4 | About 5 minutes | Easy |
| Walrus face (idea 3) | About 5 | About 8 minutes | Medium |
| Christmas unicorn (idea 2) | About 5 | About 10 minutes | Medium |
Buying Peel-Off Polish Without the Guesswork
For kids, shop the peel-off shelf, not the salon shelf. Water-based peel-off polish is made to lift away without remover, soaking or special lights, which is exactly what little nails need. Skip salon systems and anything that needs curing under a light. Those belong to adult salon products, with removal to match.
A starter set needs fewer colours than you think: red, white, green, gold and black cover most of this list, plus one fun base like lilac or pale blue. Add a cheap dotting tool, or use the flat end of a hair grip for dots and prints. If your child’s skin is sensitive, paint one test nail first and check the skin around it later that day before doing the full set.
Taking It Off Gently: Little-Nail Care That Stays Kind
Peel-off polish comes away most easily after a warm bath, when it has softened. Lift one corner with your own fingertip and peel slowly across the nail. Do not pry at the edges with tools, and do not pull if it resists. If a patch sticks, soak the hand in warm water a little longer and try again. Picking and prying at the natural nail is what causes sore, flaky tips, so patience here matters more than anywhere else.
Keep kids’ nails short and softly rounded, and let an adult do all trimming and filing, since little fingers move at exactly the wrong moment. Wash hands before painting so polish grips clean nails, and skip polish altogether on any nail where the skin around it looks sore or broken. Between sets, a plain kid-friendly hand cream keeps small hands comfortable in cold weather.