14 Polka Dot Christmas Nails That Steal Every Photo
Most polka dot christmas nails fail before the second dot dries, because the dots go on with no plan and land wherever they want.
A dot design is really a spacing design; once the spacing behaves, even the simplest set looks deliberate.
Below are fourteen dot-built designs, from easy oversized polka to layered dot work, each with its shape, timing and finish.
Dots are the design I reach for when a set needs to look planned without a full art session. One dotting tool and two colours can carry a whole hand.
Common Mistakes With Polka Dot Christmas Nails
Most dot disasters come from three small habits, each with a simple fix.
- Dots too big for the nail: an oversized dot swallows a short nail. Match the dot to the nail width; start with the micro dots in idea 9 if your nails run short.
- Dotting over a tacky base: wet polish drags and dots smear into tails. Let the base dry fully first, or pick a gel design like ideas 5, 9 and 12, where each layer cures hard.
- Spacing by guesswork: random gaps make even neat dots look messy. Plan a formation first, like the straight rows in idea 7 or the lattice in idea 11.
Fourteen Dot-Built Designs Worth Copying First
1. Classic Oversized Polka on Glossy Red
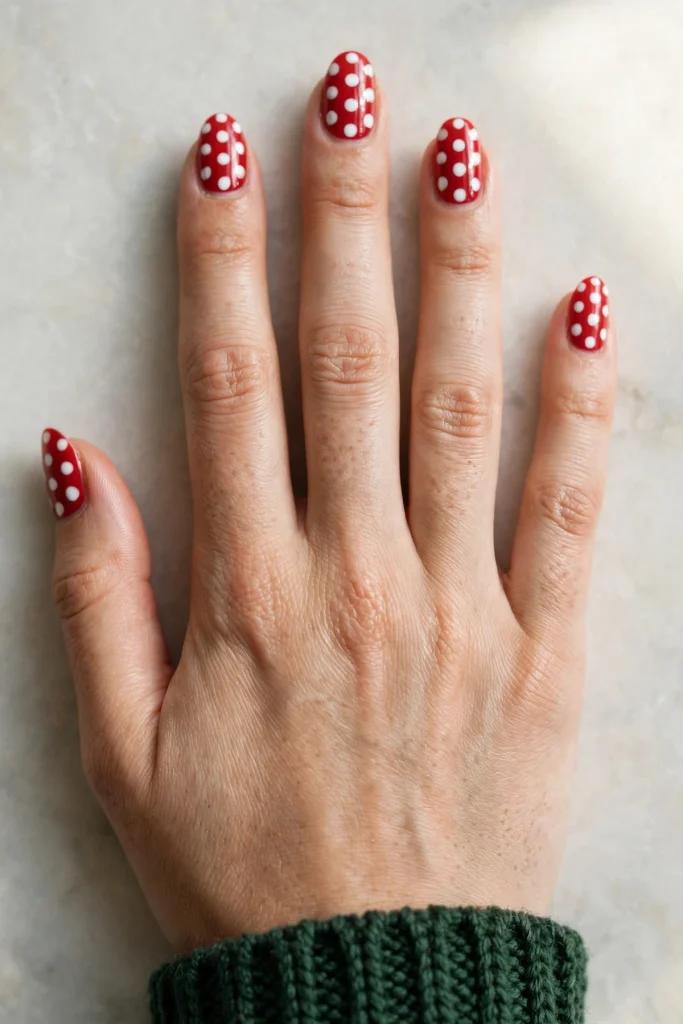
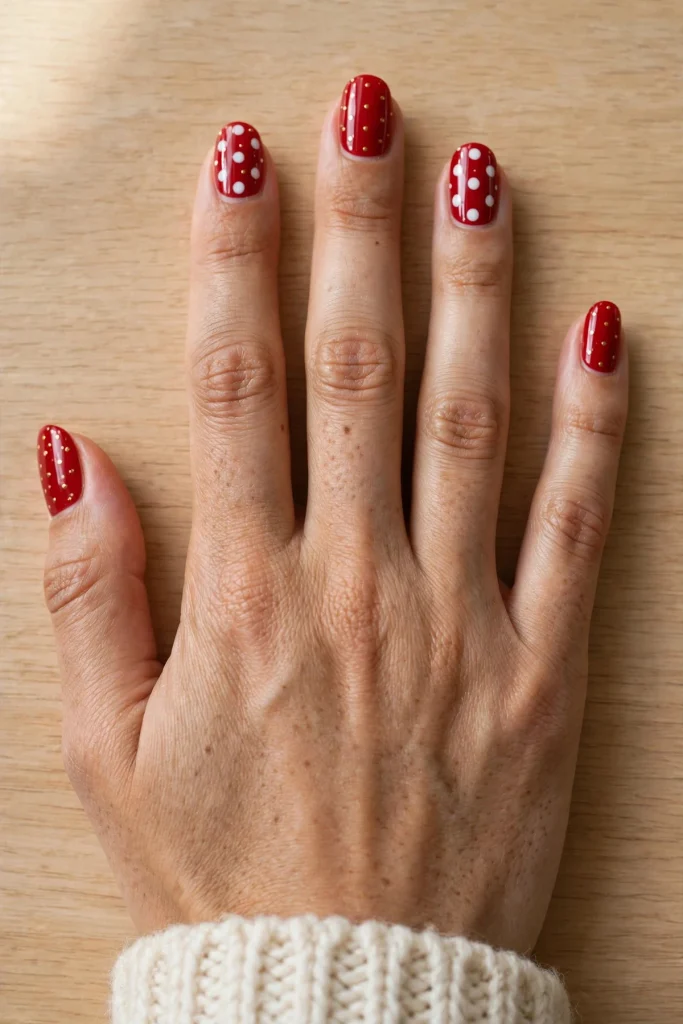
Big white polka dots in a neat, regular grid over a glossy red base. This is the set I would save first for dots that read festive from across the room. The dots sit large and confident, so the pattern suits almond nails of a medium length, A salon visit runs about forty-five minutes, the finish is high gloss, and regular polish handles it well. Difficulty sits at Easy: every dot is one confident press of the tool.
Spacing note: Leave a gap of about half a dot between dots, or the grid starts to look busy in photos.
Photo note: Red and white contrast photographs true in warm indoor light, no filter needed.
2. Dot-in-Dot Layers on a Cream Base
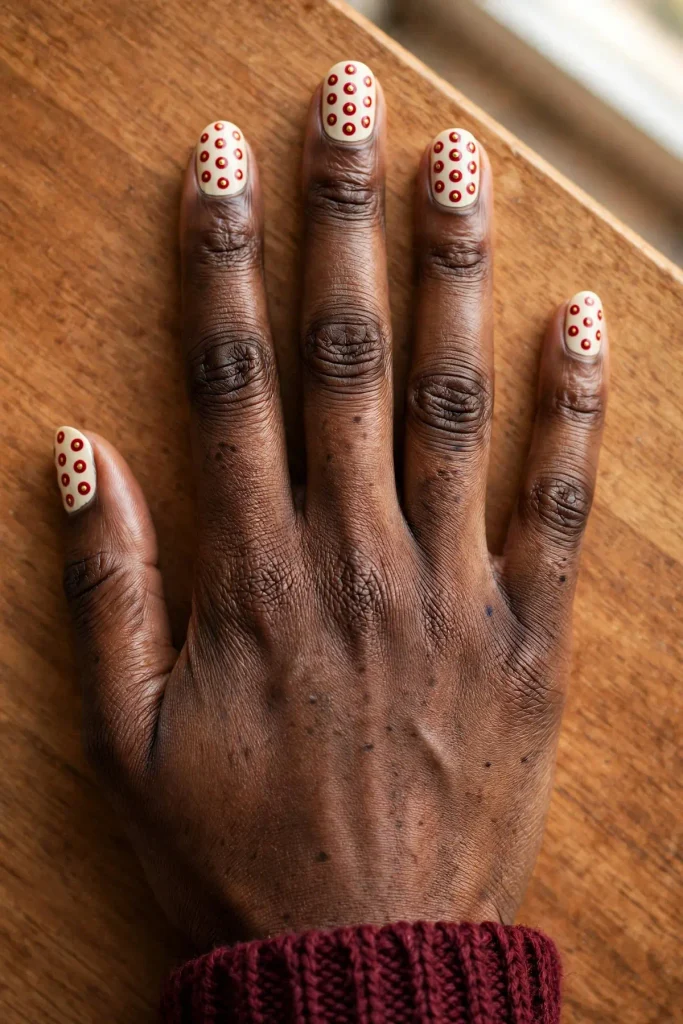
Start with the cream base, place a full red dot, let it settle, then press a smaller gold dot into its centre. That layered build is the whole design, repeated across oval nails of a medium length. It looks more detailed than it is: two colours live in every dot. Salon time is about an hour, the finish is glossy, and regular polish is fine. Difficulty is Medium, purely for the patience the second layer asks for.
Layer note: The gold centre should be about half the width of the red dot under it, or the red turns into a thin ring.
Swap idea: Trade the gold centre for deep green and the set leans classic, less party.
3. A Descending Gold Dot Cascade on Deep Green
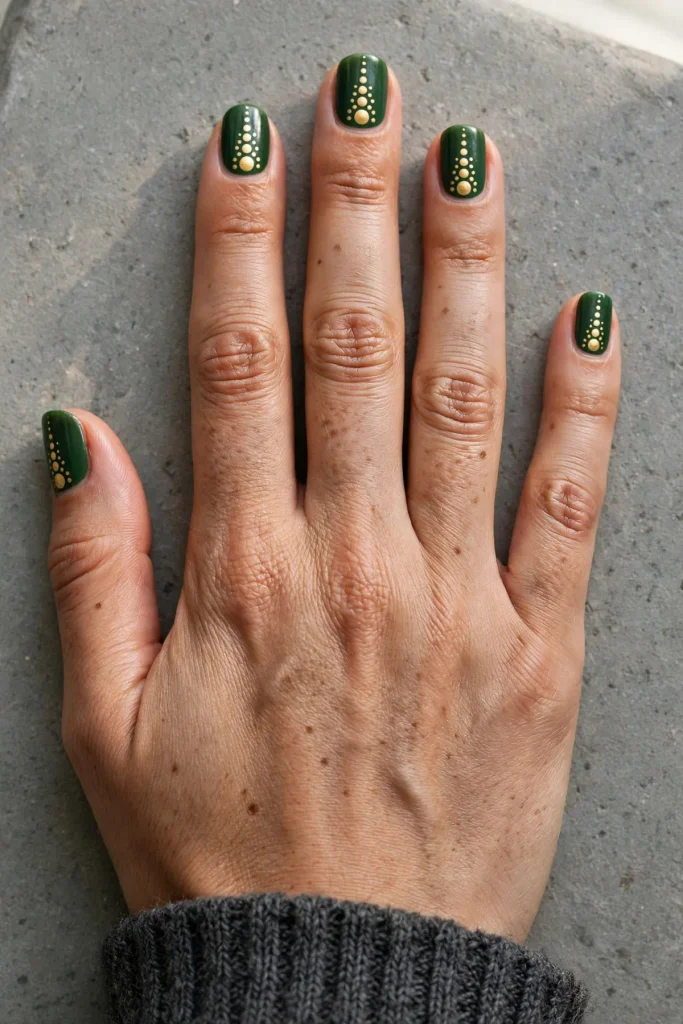
Deep green nails where gold dots start large near the cuticle and shrink step by step toward the tip, like a slow pour. The gradient does all the decorating. It suits squoval nails that are short to medium. Expect about an hour in the chair, a glossy finish, and regular polish throughout. Difficulty is Medium. Build it in three passes:
- Place the largest dots first, one row near each cuticle.
- Reload less polish each row, so the dots shrink naturally.
- Finish with the tiniest dots at the tip and seal with top coat.
Gradient note: Four rows per nail is the sweet spot. Three looks sparse; five crowds the tip.
Watch out: An overloaded tool makes the first row blobby. Wipe the tip and reload less than feels right.
4. A French Edge Traced in Red Dots
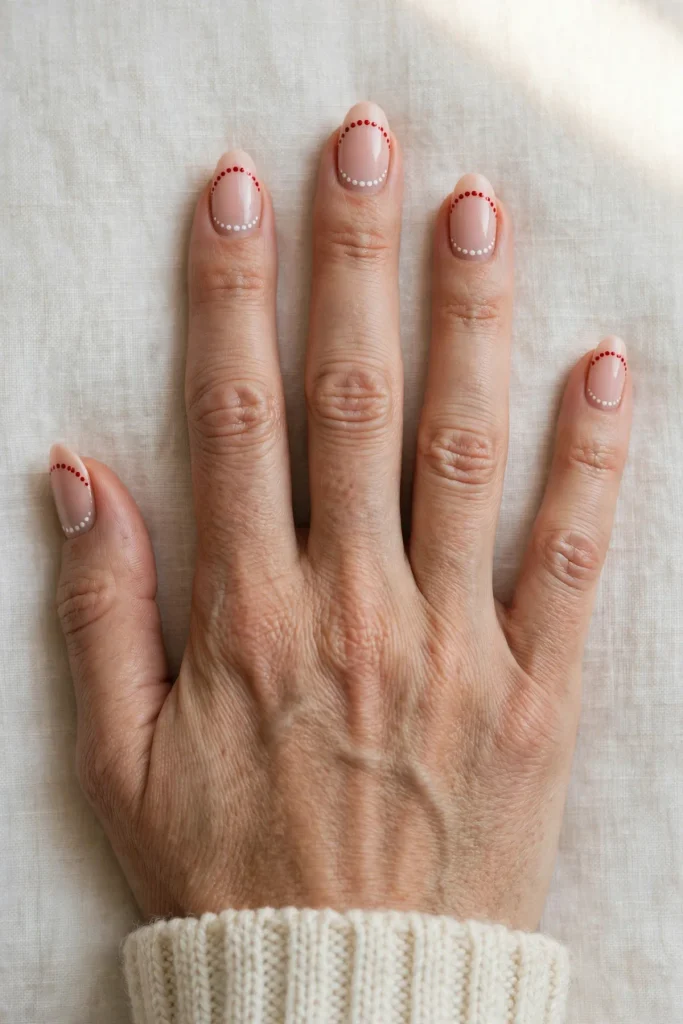
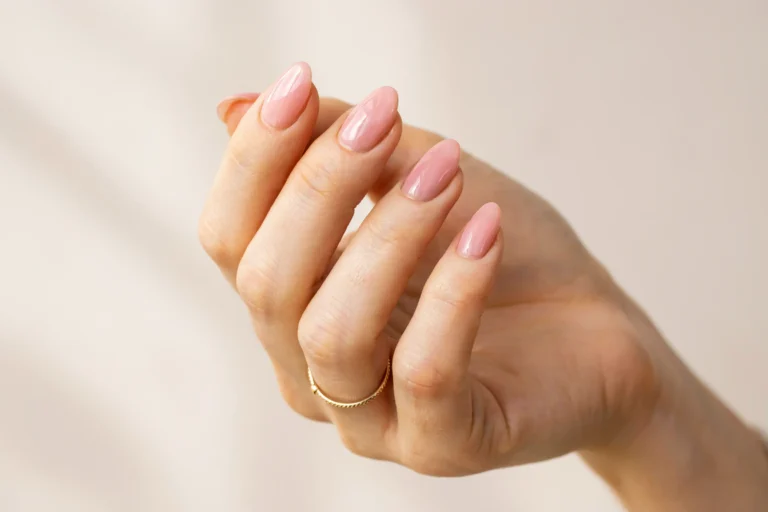
A soft nude-pink base where the French smile line is drawn with red dots instead of a painted band, tiny white dots running beneath it. The result reads like a French manicure that got festive quietly. It suits short almond nails most. Salon time is about fifty minutes, the finish is glossy, and regular polish does the job. Difficulty is Easy to Medium.
“A dot border works like a frame on a picture. It makes a plain base look finished without covering it.”
Edge note: Place the corner dots first, then fill between them; anchoring the ends keeps the curve even.
Tip: If a dot lands off the line, lift it with a damp cleanup brush before it dries instead of painting over it.
5. White Dot Drift Tips on Navy, in Gel
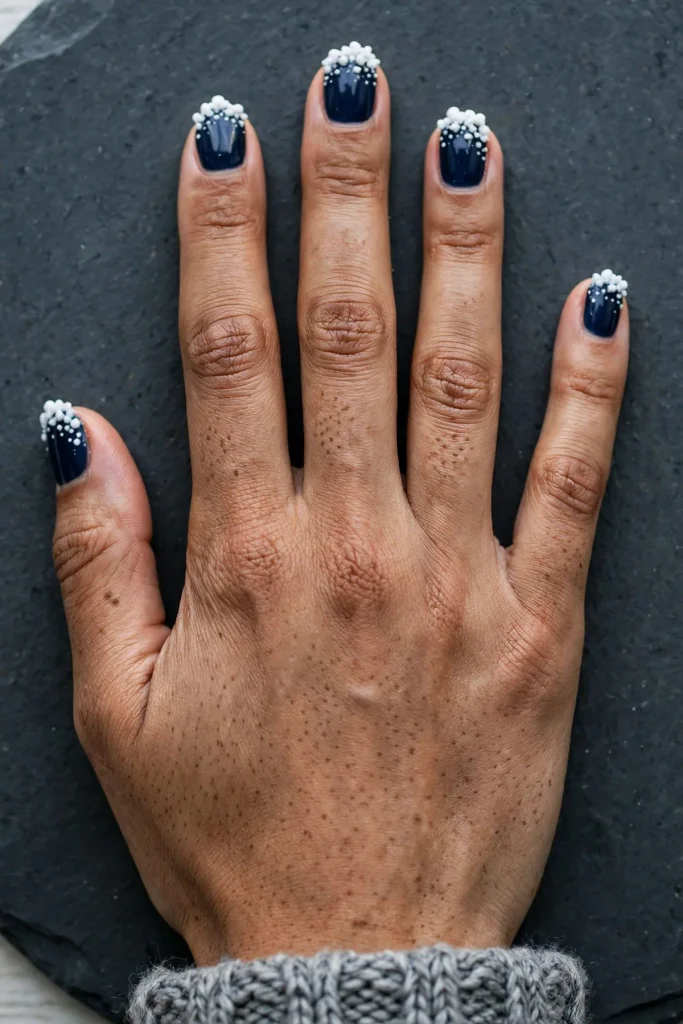
Deep navy nails with clusters of white dots piled softly across the tips, like little drifts gathering where a French tip would sit. The clusters vary in height, which keeps the set soft rather than stamped. This one is gel from base to top coat, so it needs a gel kit and a lamp; the white gel keeps the dots opaque in one pass. It suits short squoval nails, takes about an hour and fifteen minutes, and the finish is glossy. Difficulty is Medium.
Gel note: Cure the base colour fully before dotting; dots on uncured colour can slide as they cure.
Shape note: Keep the drift low on short nails, no higher than a third of the nail, or the navy gets lost.
6. A Scalloped Dot Border at the Cuticle
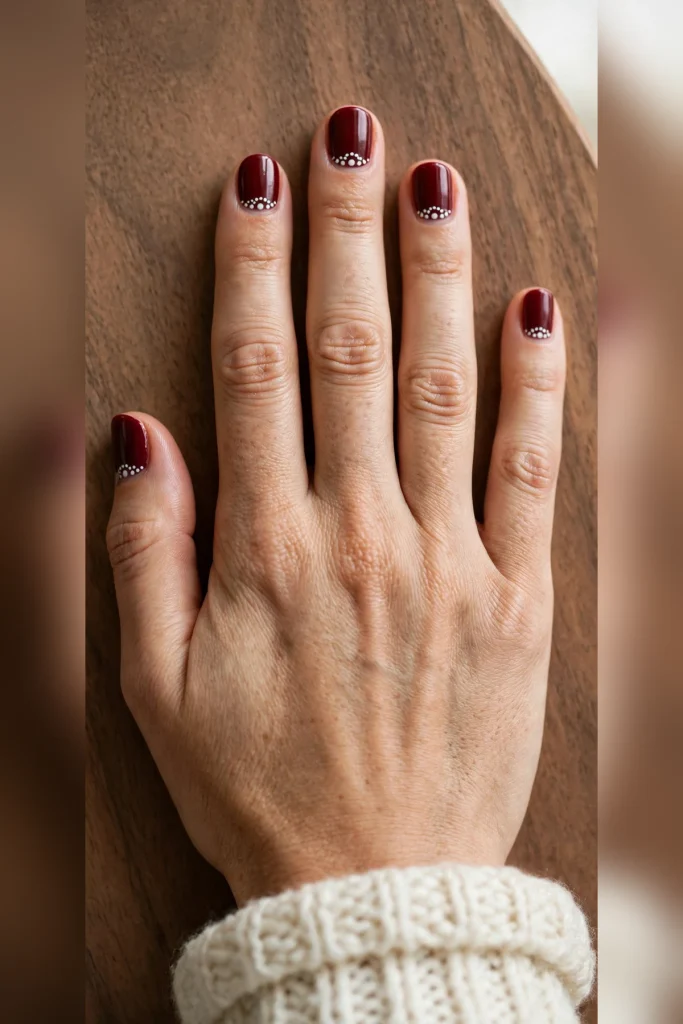
Rich burgundy nails with white dots looped along the cuticle in a scalloped edge, like the trim on a festive collar. Sitting at the base, it leaves the rest of the nail calm and hides grow-out well. It suits oval nails of a short to medium length, takes about forty minutes in a salon, and regular polish is all it needs. The finish is glossy and Difficulty is Easy, since the scallops forgive an uneven hand.
Cuticle note: Keep dots a hair away from the skin; dots touching the cuticle flood as polish settles.
Swap idea: Gold dots on the same burgundy base read warmer, better for evening plans.
7. Straight Diagonal Rows of Tiny White Dots
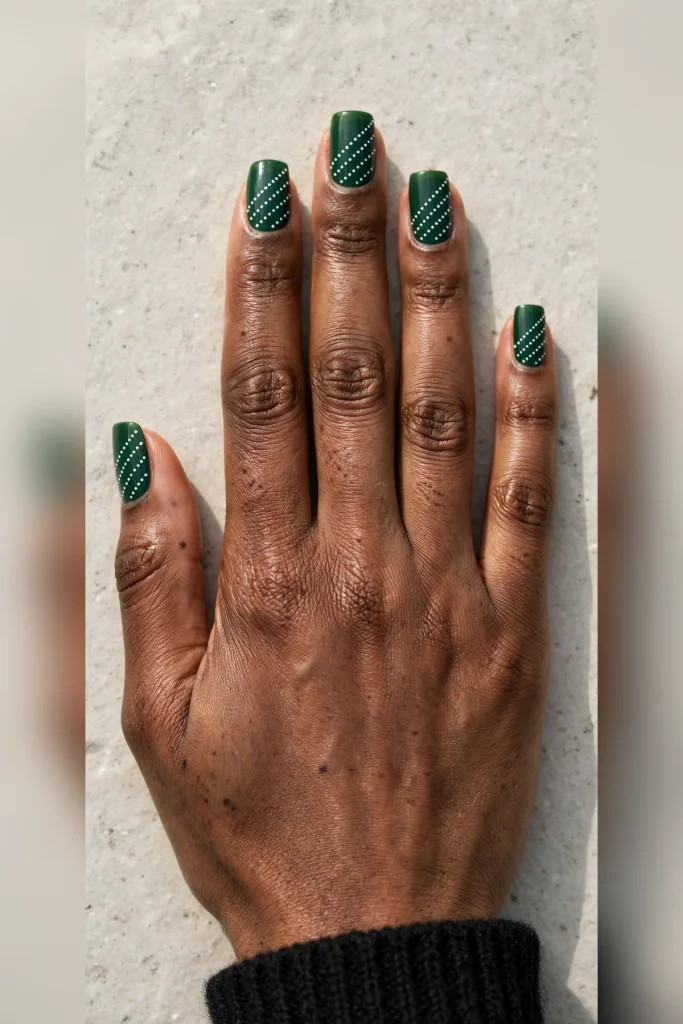
Forest green nails covered in neat diagonal rows of tiny white dots, like stitching on a quilt. The rows give the set its order, and the small dot size keeps it refined rather than spotty. It suits square nails of a medium length. Salon time is about an hour, the finish is glossy, and regular polish works. Difficulty is Medium; rows of patience are the real material here.
Row note: Work one nail fully, then copy its row angle onto the next before the polish dries.
Watch out: Rows drift when you rush; a slower hand beats a faster wobbly one.
Halfway reminder: rest both forearms flat on the table while you dot. Steady elbows make rounder dots than talent does.
8. Gold Dot Halo Rings on Ivory
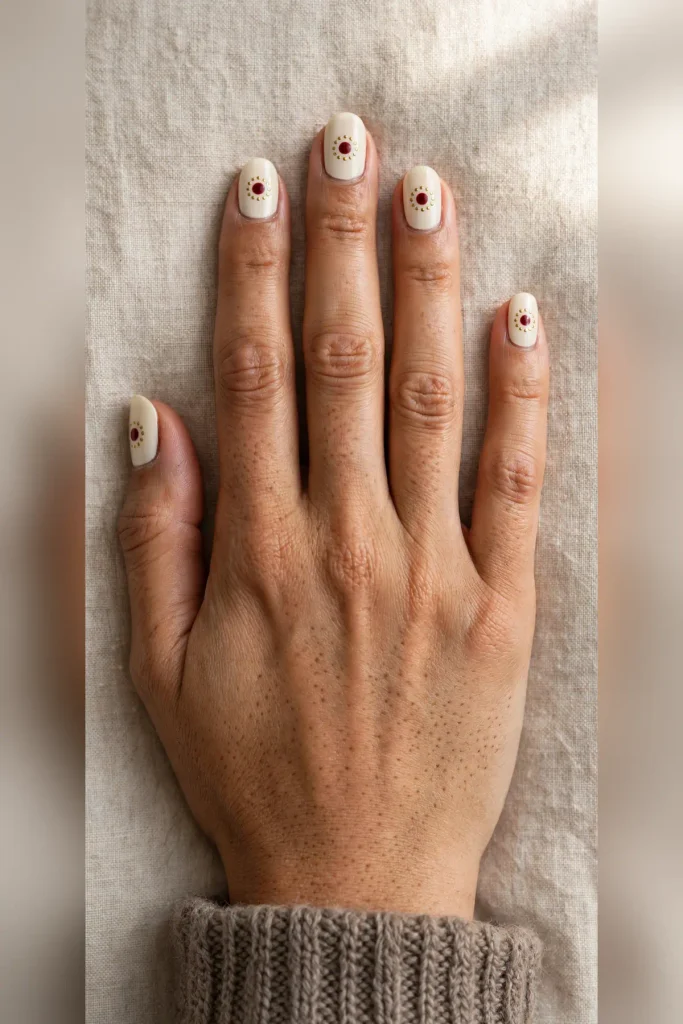
Ivory nails where each nail carries one deep red centre dot circled by a ring of tiny gold dots, like a small halo of light. The single halo per nail keeps the set calm and formal. It suits almond nails of a medium length, takes about an hour and a quarter in a salon, and regular polish is fine. The finish is glossy. Difficulty is Medium, leaning careful, because the ring has to close neatly. Place the red centre first, let it dry, then walk the gold dots around it.
Ring note: Eight to ten tiny dots close a ring cleanly; fewer leaves gaps the eye goes straight to.
Photo note: The halo reads clearest in daylight photos, where the gold ring lifts off the ivory base.
9. Silver Micro Dot Speckle on Deep Plum, in Gel
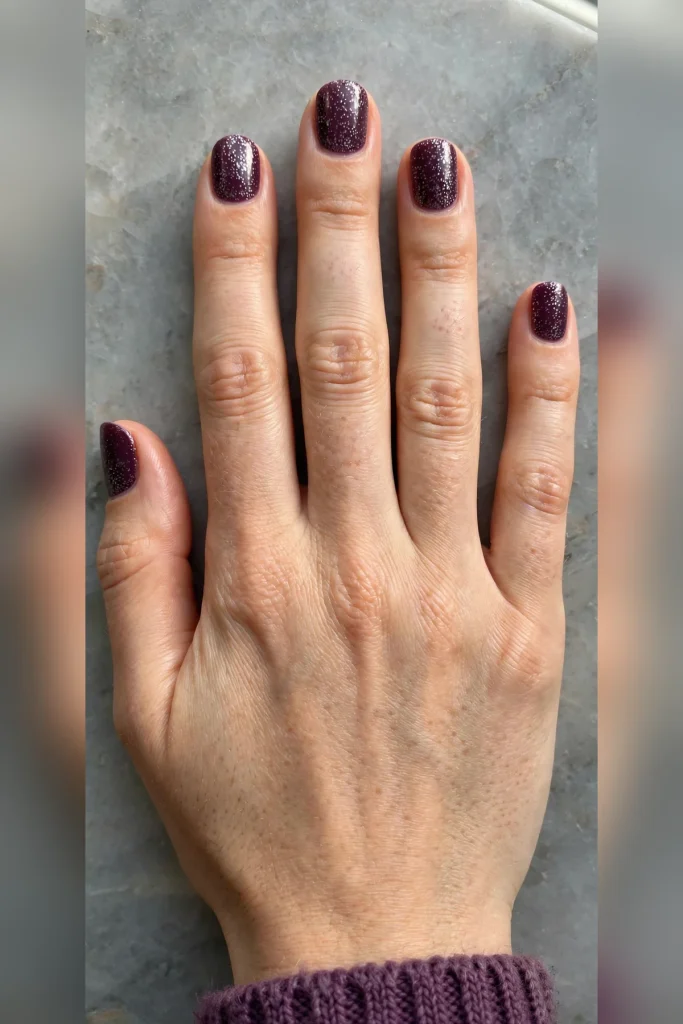
Deep plum nails dusted with fine silver micro dots spread evenly like frost settling. There is no single big dot here; the speckle field is the design, and it forgives dots that do not match exactly. This is a gel design and needs a gel kit and lamp, since the silver dots cure flat in a gel layer. It suits short squoval nails, takes about an hour, and the finish is glossy. Difficulty is Medium, mostly for keeping the density even.
Gel note: Cure the speckle layer fully before top coat, so no dot stays tacky.
Density note: Aim for the same sprinkle on the thumb as on smaller nails; thumbs often end up sparse.
10. Split Nails With Negative-Space Dots
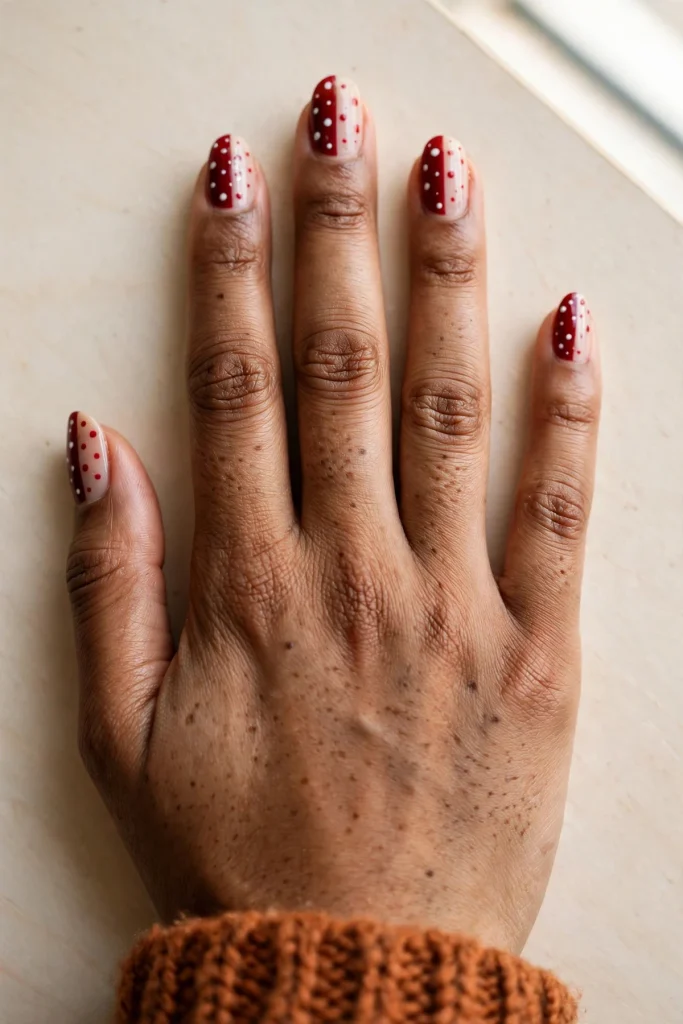
Each nail is split down the middle: one half deep red with white dots, the other bare with red dots, so the dots swap colours at the line. The bare half does half the styling. It suits almond nails of a medium length, takes about an hour and ten minutes, and regular polish works with a steady freehand. The finish is glossy and Difficulty is Medium.
“Negative space is the quiet half of this design. The bare nail does as much work as the painted half.”
Line note: Paint the coloured half first and let it dry before dotting the bare half.
Tip: Tape gives the cleanest split for a first try; peel it off while the polish is still slightly wet.
11. A Gold Dot Lattice on Very Dark Green
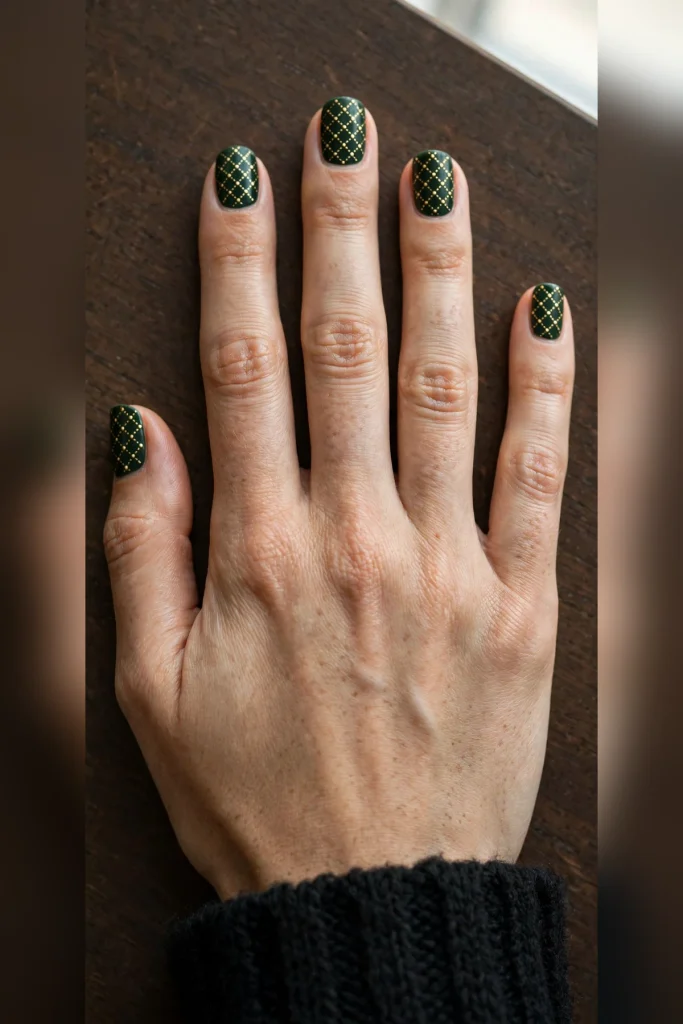
Very dark green nails with gold dots placed in a diagonal lattice grid, each dot sitting where the lines of a trellis would cross. No lines are painted; your eye connects the dots and draws the lattice. It suits square nails of a medium to long length, takes about an hour and a quarter in a salon, and regular metallic polish handles the dots. The finish is glossy and Difficulty is Medium. Build it in passes:
- Dot the four corners of an imaginary square first.
- Add the centre dot, then the edge dots between corners.
- Repeat the grid toward the tip, spacing matched.
Grid note: The thumb needs its own wider grid; stretching the finger grid across it looks off.
Swap idea: Silver dots on the same dark green base read cooler and suit silver jewellery.
12. A Graduated Dot Fade on Sheer Pink, in Gel
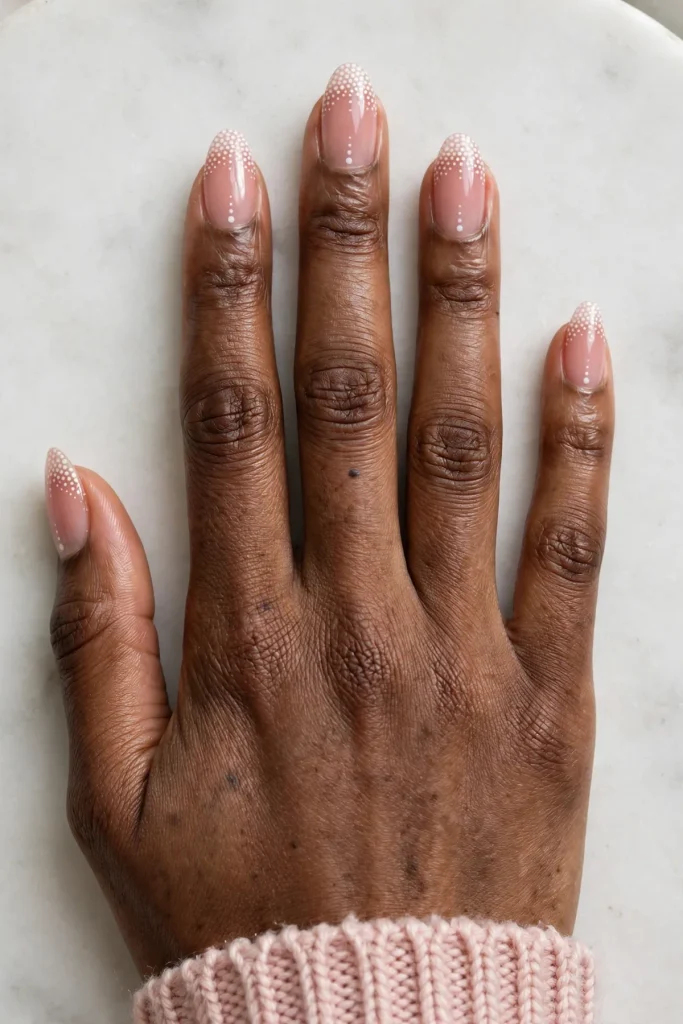
Sheer pink nails where white dots gather at the tip and thin out toward the cuticle, like early snowfall settling. The fade keeps most of the nail bare, so the set feels light. This design is gel and needs a gel kit and lamp, because the sheer base and the dots cure in separate thin layers. It suits almond nails of a medium length, takes about an hour and fifteen minutes, and the finish is glossy. Difficulty is Medium.
Fade note: Count dots per zone as you go: a full row at the tip, half as many mid-nail, a few strays near the cuticle.
Cure note: Thin layers cure cleaner; two light passes beat one heavy pass.
13. A Two-Tone Polka Mix in Red and Green
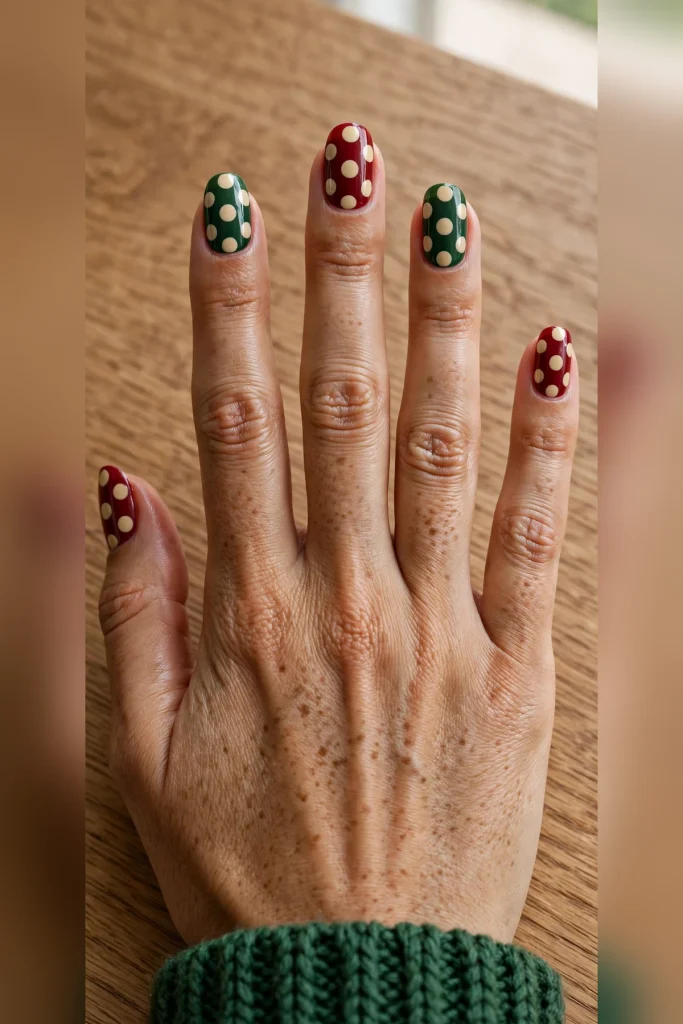
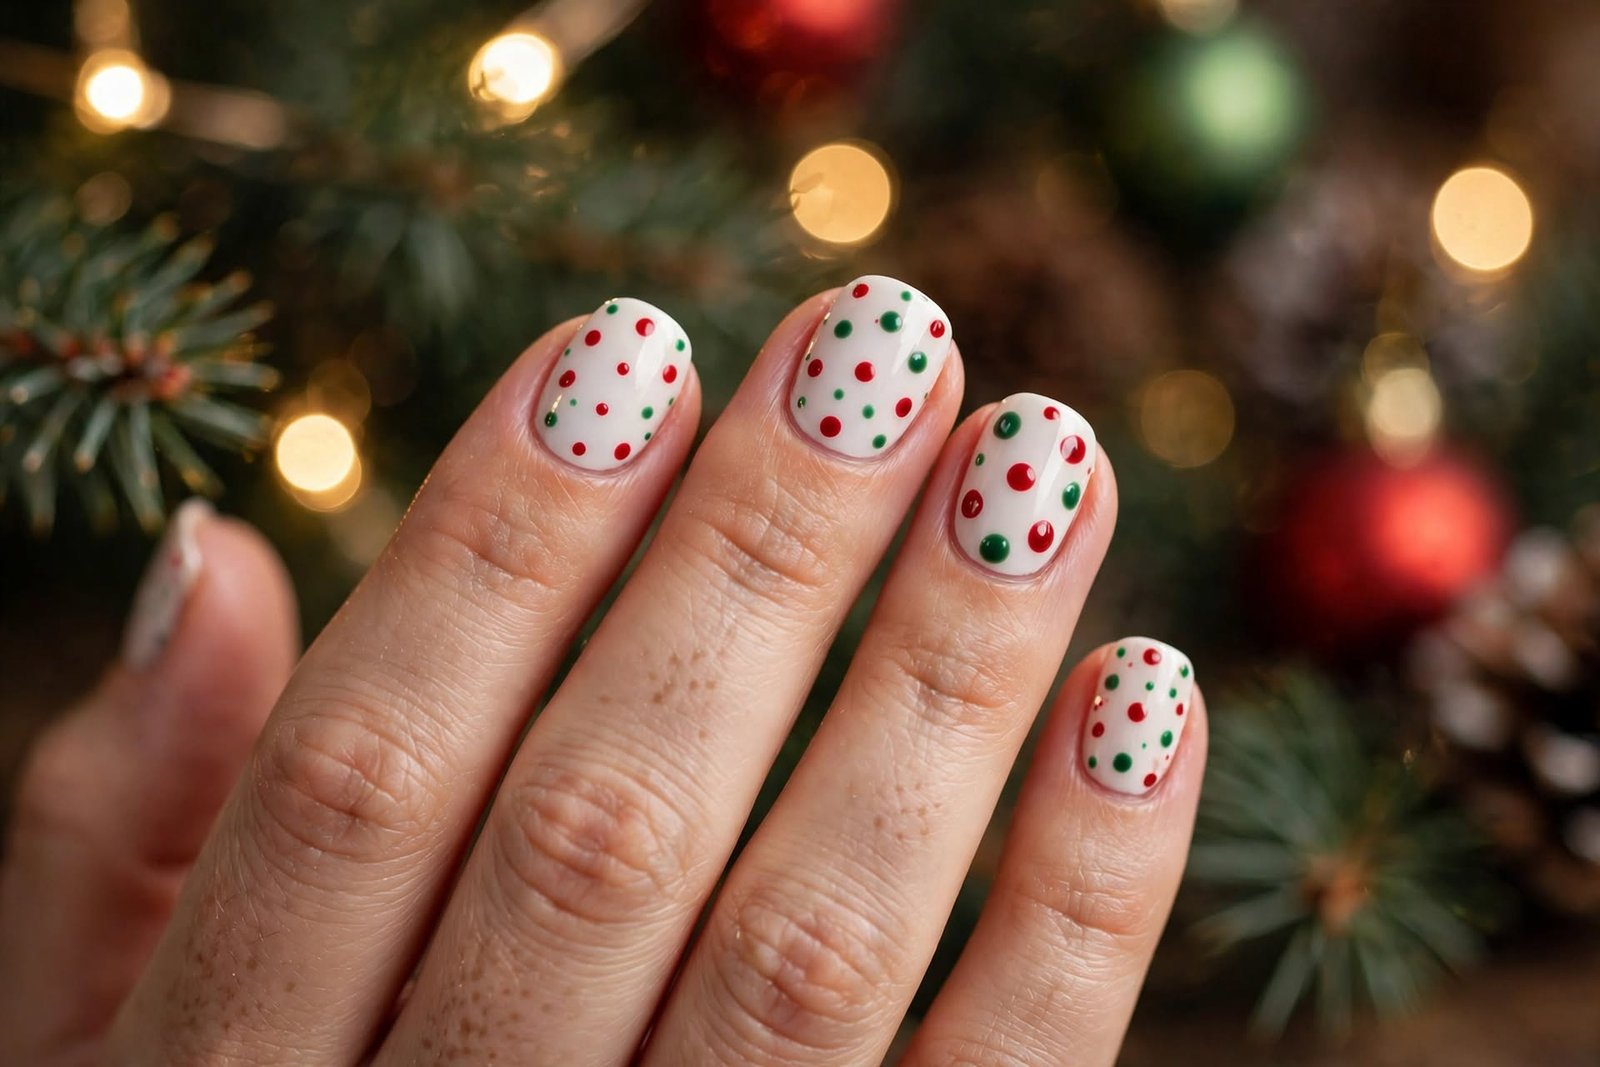
Alternating deep red and deep green nails, every one carrying the same big cream polka dots, so the set mixes cleanly. The shared dot size and colour ties the two bases together. It suits oval nails of a medium length, takes about fifty minutes in a salon, and regular polish does everything here. The finish is glossy and Difficulty is Easy. This suits you if you cannot choose between the two classic Christmas colours.
Mix note: Keep the cream dots the same size on both colours, or the set looks like two different manicures.
Watch out: Cream dots over green can look faint in one coat; give green nails a second press.
14. A Gold Dot Burst at the Cuticle
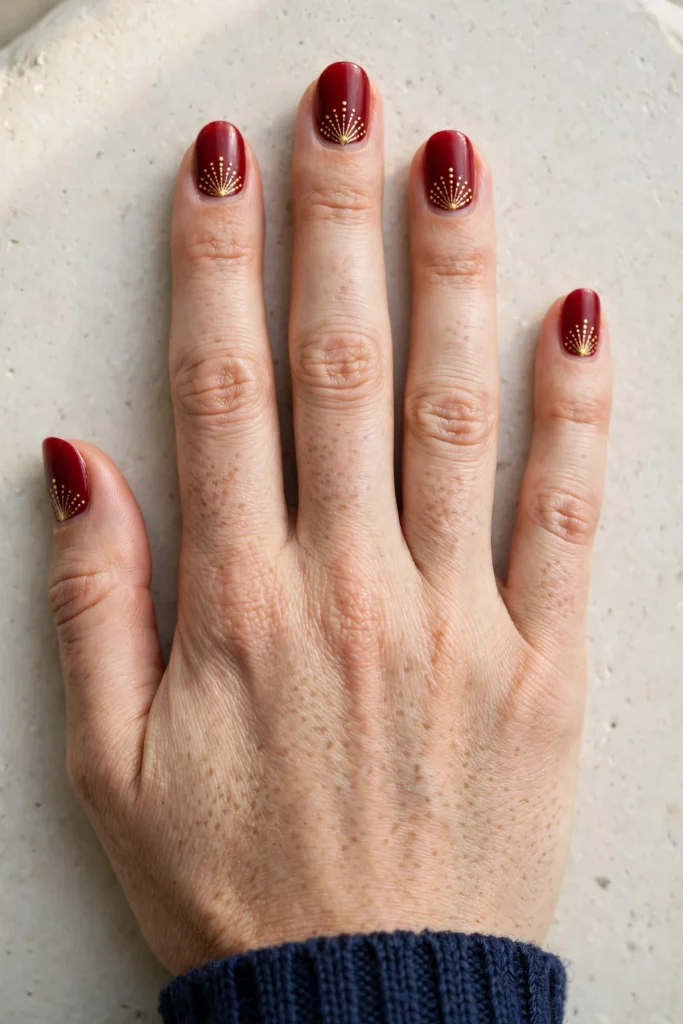
Deep red nails where short rays of gold dots fan out from the centre of the cuticle on each nail, like a small firework caught early. The burst stays low at the base, so most of the nail stays deep red and the gold reads as a detail. It suits almond nails of a medium length, takes about an hour in a salon, and regular metallic polish is fine. The finish is glossy and Difficulty is Medium. Start each ray with its end dot, then fill back toward the base.
Burst note: Five rays per nail is plenty; more turns the base into a blob of gold.
Final note: Keep the fan centred on both hands; matching fans look planned in two-hand photos.
Dot Size Is the Whole Design: A Spacing Rule That Works
Most dot designs that disappoint were not badly painted; they were badly sized. A wide dot makes a short nail look shorter; a tiny one disappears on a long nail. My rule is simple: a classic polka dot should measure about a quarter of the nail’s width, and the gap between dots about half a dot. Medium nails take three dots across, short nails take two bigger dots or a field of micro dots, and long nails can stretch to four across without crowding.
Test the size before the set, not during it. Dot once onto paper, hold it beside your nail, and judge the fit there. If it looks right, reload the tool the same way for every dot after. Consistent loading is the unglamorous secret: the same amount of polish makes the same dot, and the same dot repeated is what turns dots into a design.
How to Brief a Nail Tech for Dots
Bring a photo of the exact formation you want, not just a colour. Dots are a pattern, and “spotty” means different things to different people. Name the dot size out loud, small as a pinhead or wide as a pea, and say where the pattern should sit heaviest: tip, cuticle or spread evenly. Ask for the thumb to be checked before the set ends; thumbs often get a rushed pattern. For a gel design, say so when you book, so lamp time is in the appointment.
Doing Dots at Home: The Tool Drawer Version
A dotting tool with two ends covers nearly every design here: the wide end for classic polka, the fine end for rows, lattices and speckle. Without one, a bobby pin’s flat end makes a medium dot and a toothpick handles micro dots. Dot a full practice row on baking paper first; two minutes of practice saves a redo. Keep a small brush and remover beside you for lifting mistakes while wet. The gel designs in ideas 5, 9 and 12 need a lamp at home too.
Keeping Dot Designs Crisp for Longer
Start with a proper base coat; dots lift faster at the edges without one. A fresh top coat every few days keeps dot edges sealed and the gloss even. For gel designs, do a patch test with new gel products before a full set, and do not peel gel off when it lifts; peeling takes nail surface with it. Gel removal belongs with a professional, or with proper remover and patience — not force. Gloves for washing up genuinely extend a dotted set; hot water softens polish edges first.