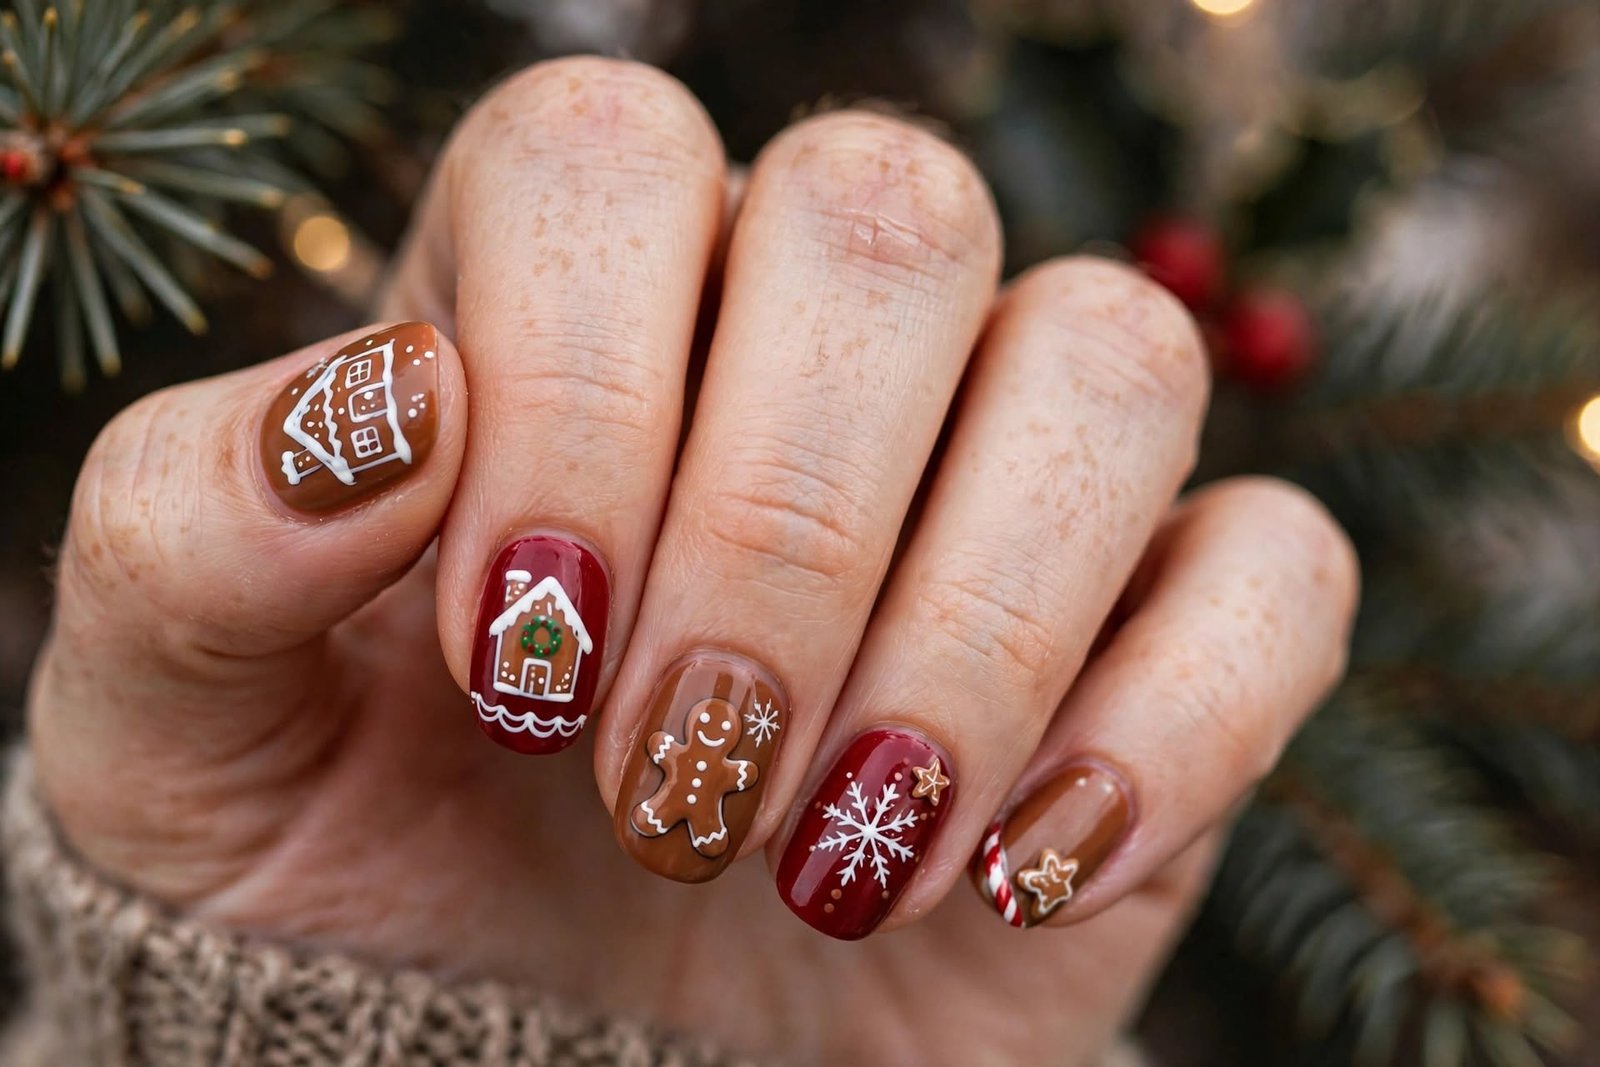
15 Gingerbread Christmas Nails Too Cute to Eat
Somebody leans over at the checkout, stares at your hands, and asks if those tiny houses are real icing. That is the charm of gingerbread christmas nails: they turn an ordinary manicure into a whole bakery story.
This list stays inside the gingerbread world, from cookie families to a full bakery window, so every nail reads like it came off one baking tray.
The bakery window set is my soft spot here. It asks for a steady hand and a free afternoon, and in return it gets noticed everywhere, even by people who swear they do not look at nails.
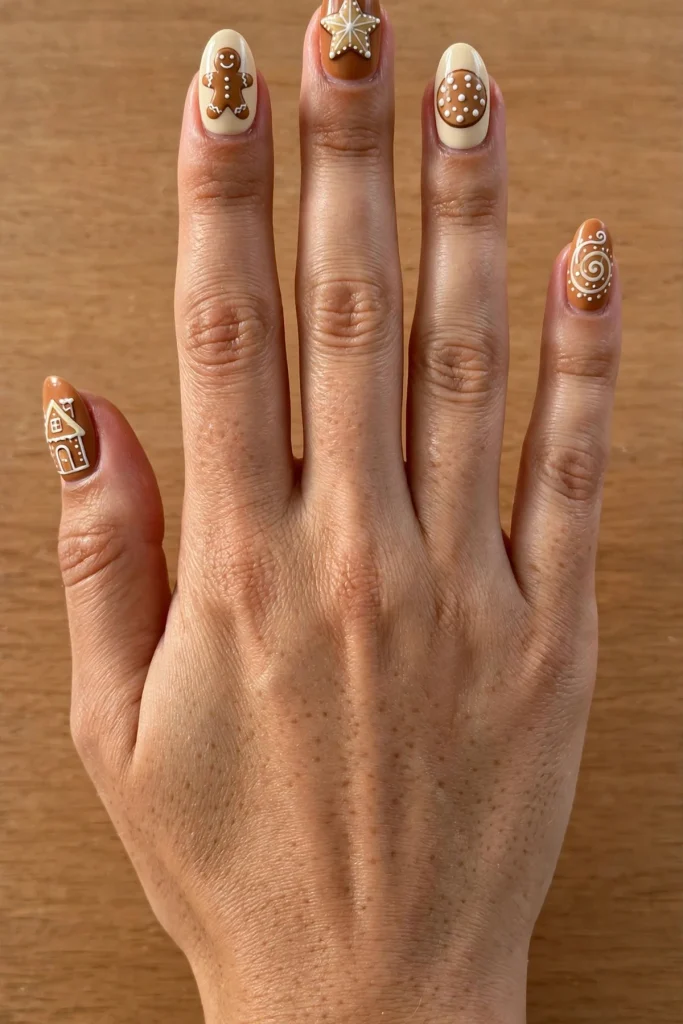
Before You Choose Your Gingerbread Set
Three quick checks before you book or start painting:
- Check your nail length. Short nails? The piped icing in idea 4, the spice jars in idea 7 and the candy path in idea 12 read clearly on a shorter canvas.
- Check your time. Full scenes like the village in idea 1, the bakery window in idea 2 and the mushroom cottages in idea 13 are slow art; simpler sets sit further down.
- Check your kit. Ideas 2, 9 and 13 are gel builds that need a lamp, so treat them as salon sets if you use regular polish.
Pick the set that fits your nails and your week, not the one that only works in a photo.
The Fifteen Gingerbread Sets
1. A Whole Gingerbread Village, One House Per Nail
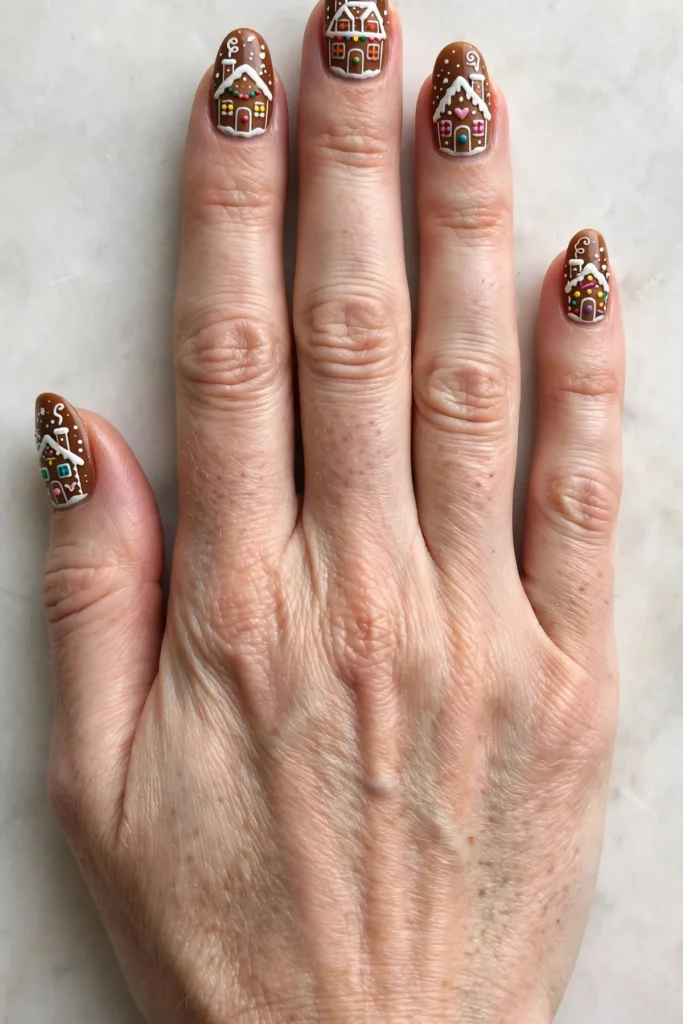
Paint a warm ginger-brown base, then line up a tiny house on every nail, each one different: a steep roof here, a round candy door there, a chimney puffing a curl of white icing smoke. Medium almond nails give the rooftops room to sit without crowding, and a glossy top coat keeps the candy dots looking like hard sugar. Salon time runs close to two hours, and difficulty sits at Medium, because the houses are simple shapes, just layered. My one tip: vary the roof heights across the hand. A mixed skyline reads like a real village street, while five matching houses can look stamped on.
2. The Bakery Window With Its Little Striped Awning
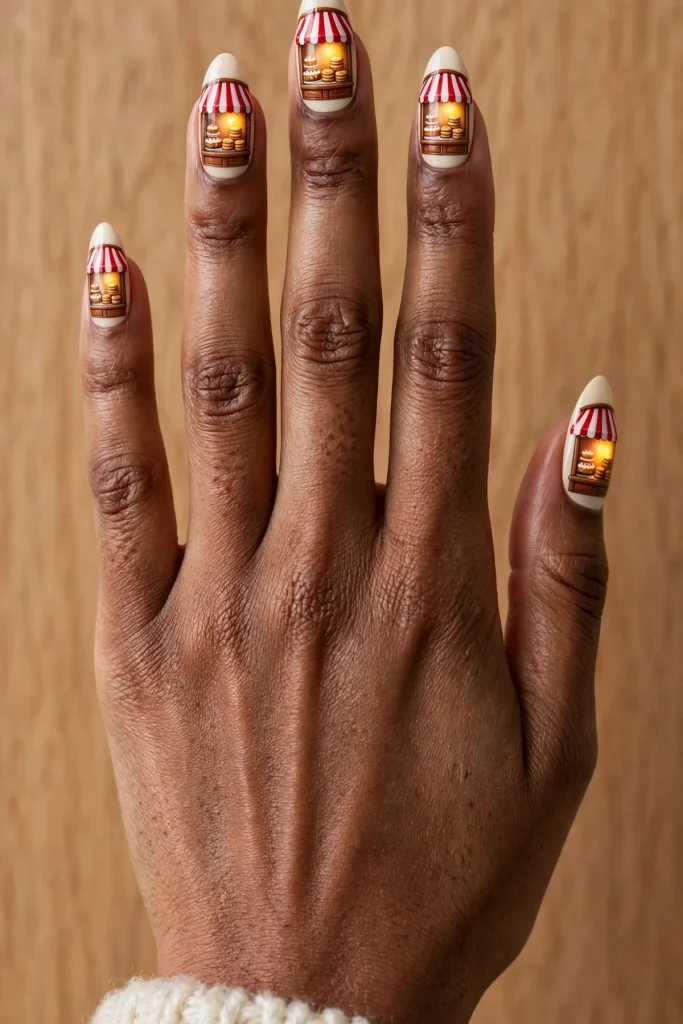
This one suits you if a manicure is your favourite kind of theatre. Every nail becomes a shop window: red-and-white awning stripes along the top, a brown frame, and tiny cakes and cookie stacks glowing behind the glass. It needs long almond or soft coffin nails, because the awning eats space fast. The detail is built in gel layers, so it needs a gel kit and a lamp, and a salon visit can stretch past two and a half hours. Difficulty: Expert. Book it for a week when photos matter, not the night before a trip.
3. A Gingerbread Cookie Family Holding Hands
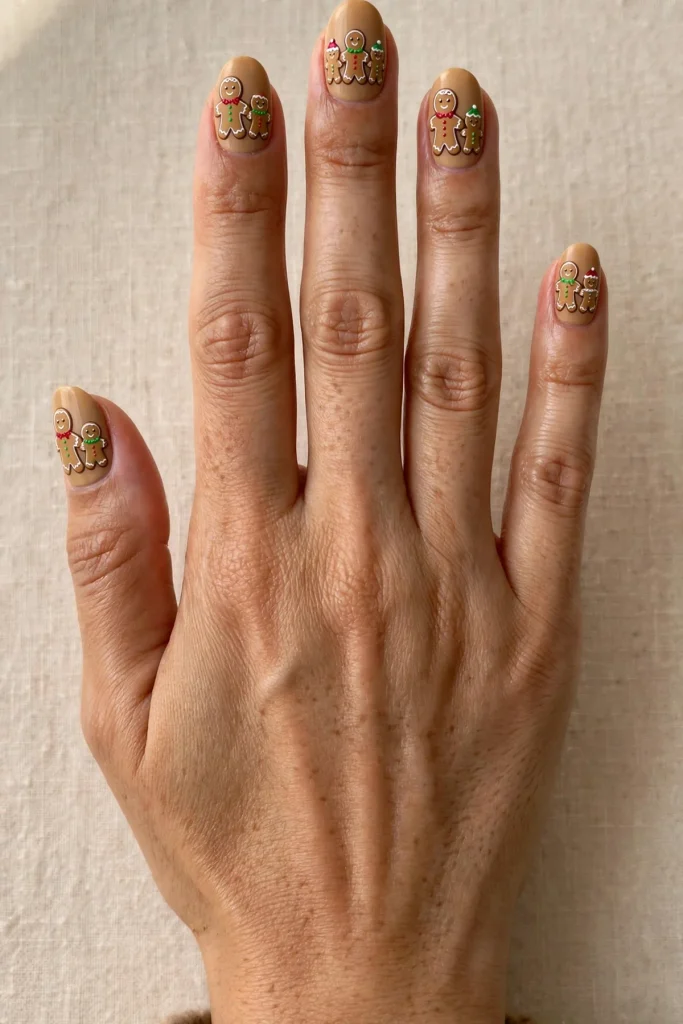
A warm tan base keeps this set sweet rather than busy. The figures do the talking, and they go on in three steps:
- Paint the grown-up cookies first, one tall figure on each of the middle nails.
- Add the smaller figures beside them, so the family groups naturally across the hand.
- Pipe every outfit in a different colour and finish with dot eyes and small smiles.
Medium oval nails suit the figures, salon time is about ninety minutes, and a satin finish keeps the set soft. Difficulty: Medium. Line the little arms up so the figures hold hands, and the hand reads as one family portrait.
4. Royal Icing Piping on a Ginger-Brown Base
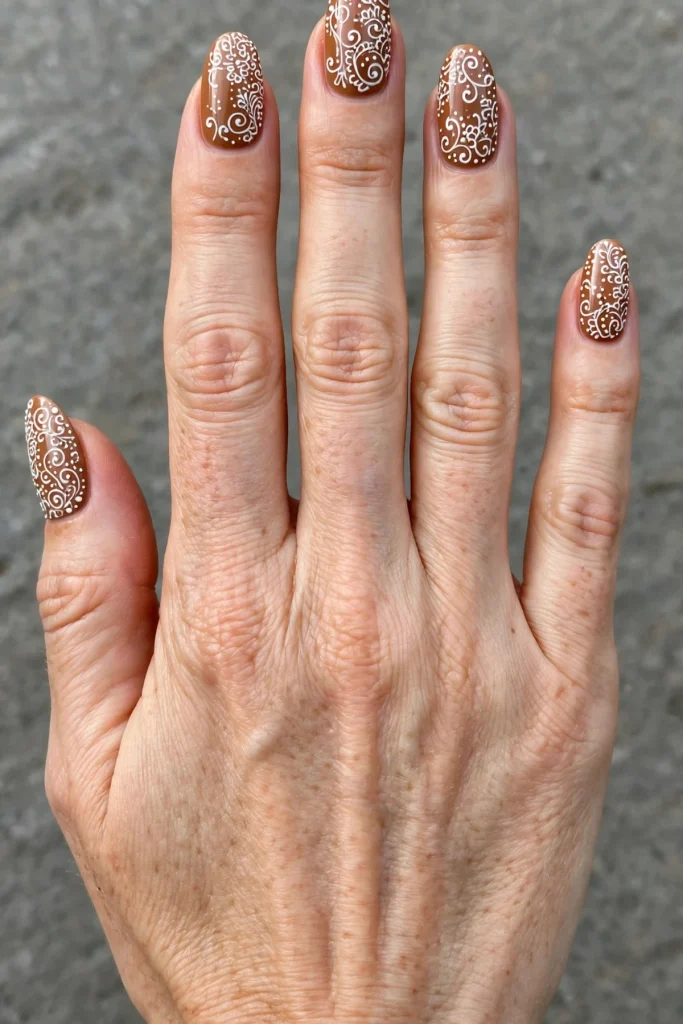
The common mistake here is piping with lines that are too thick. On a nail, thick lines blur into blobs and the delicate effect is gone. The fix is a thinner line and a slower hand: drag the brush gently, let the polish settle, and keep the scrolls small. Warm ginger-brown under glossy white piping is the whole design, so it flatters short nails as easily as medium almond ones. Salon time is about an hour, the finish is high gloss, and difficulty is Medium. Keep the pattern on one nail slightly simpler. The contrast makes the detailed nails look finer.
5. Cookies Peeking Out of the Jar
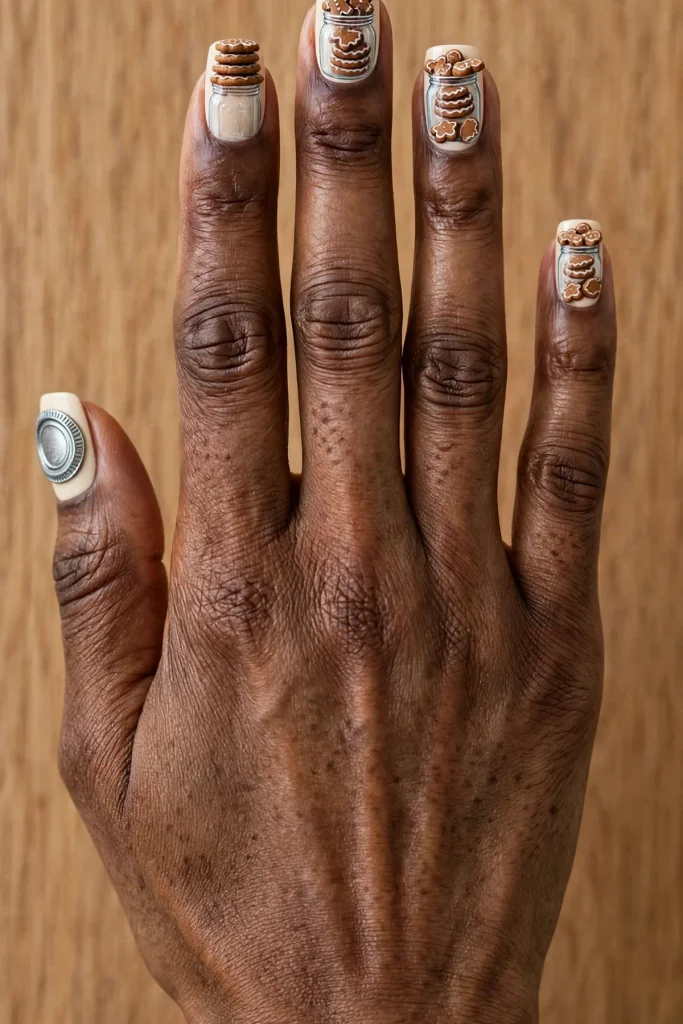
Picture the jar on a bakery shelf: rounded glass, cookies stacked inside, a plump one balanced on top. Painted across a hand, the jar body sits on the middle nails while loose cookies fill the rest, each with its own icing face. Medium square nails give the jar its straight sides, salon time is around ninety minutes, and a glossy finish sells the glass. Difficulty: Medium.
A cookie jar set lives or dies by the thumb. Give the thumb the lid and the finest cookie, and the whole hand tells the story at a glance.
One more detail: keep the jar outline pale grey rather than black. Glass should whisper, not shout.
6. Rolling Pin, Flour Dust and Cookie Cutters
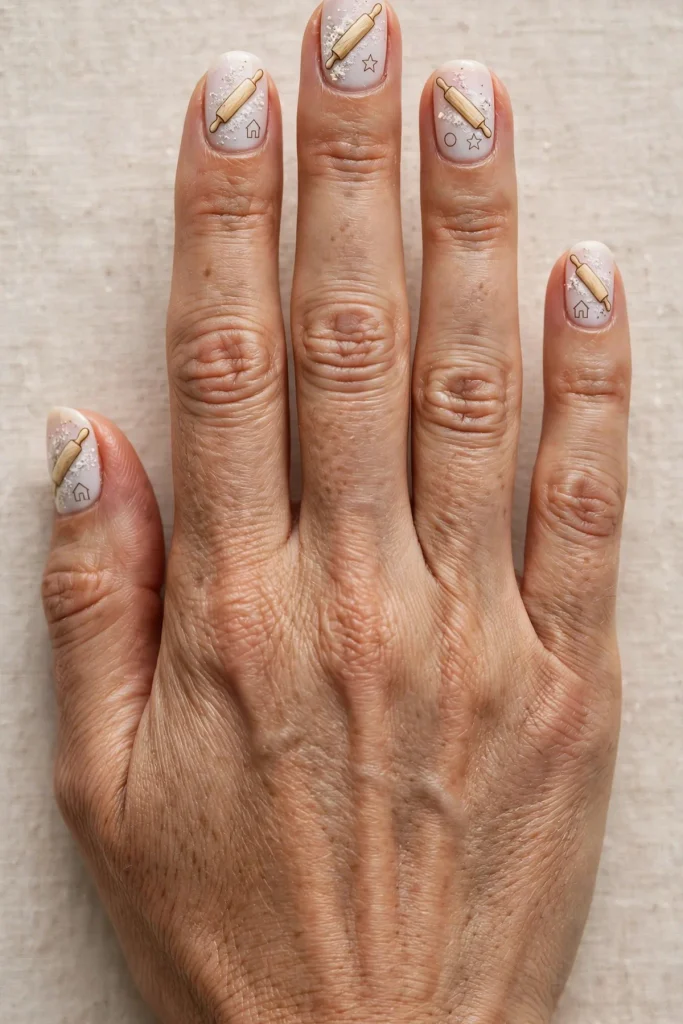
Flour-white nails, a light wooden rolling pin painted at an angle, and a dusting of speckles that reads as flour on a worktop. Tiny cookie-cutter outlines (a star, a circle, a little house) finish the story. Short oval nails suit it, the finish is satin, salon time stays under an hour, and difficulty is Easy. This is the set I point beginners to first.
7. Ginger Root and Little Spice Jars
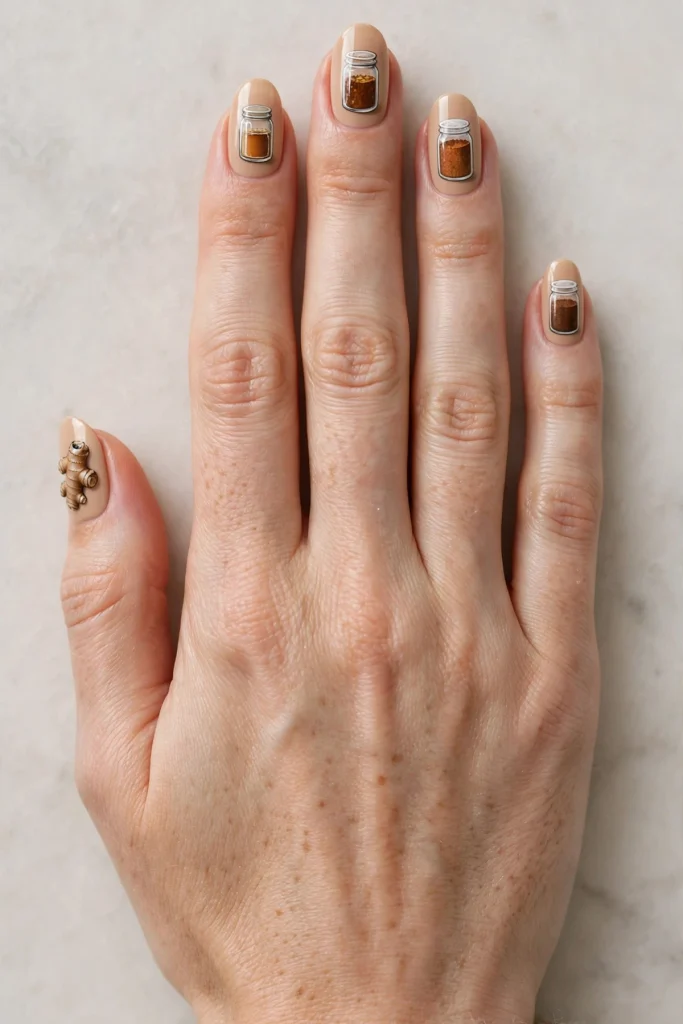
This suits you if your Christmas style leans earthy and calm. Small glass jars of amber, rust and cinnamon-brown sit in a row, with a knobbly piece of ginger root beside them. The palette is all warm neutrals, so the set sits happily with office dress codes and gold jewellery. Medium almond nails, a glossy finish and about an hour in the chair. Difficulty: Easy. Ask for the jar lids in two slightly different metallic shades. That tiny mismatch makes the shelf look collected over time, not copied from a chart.
8. A Bouquet of Gingerbread Cookies on Sticks
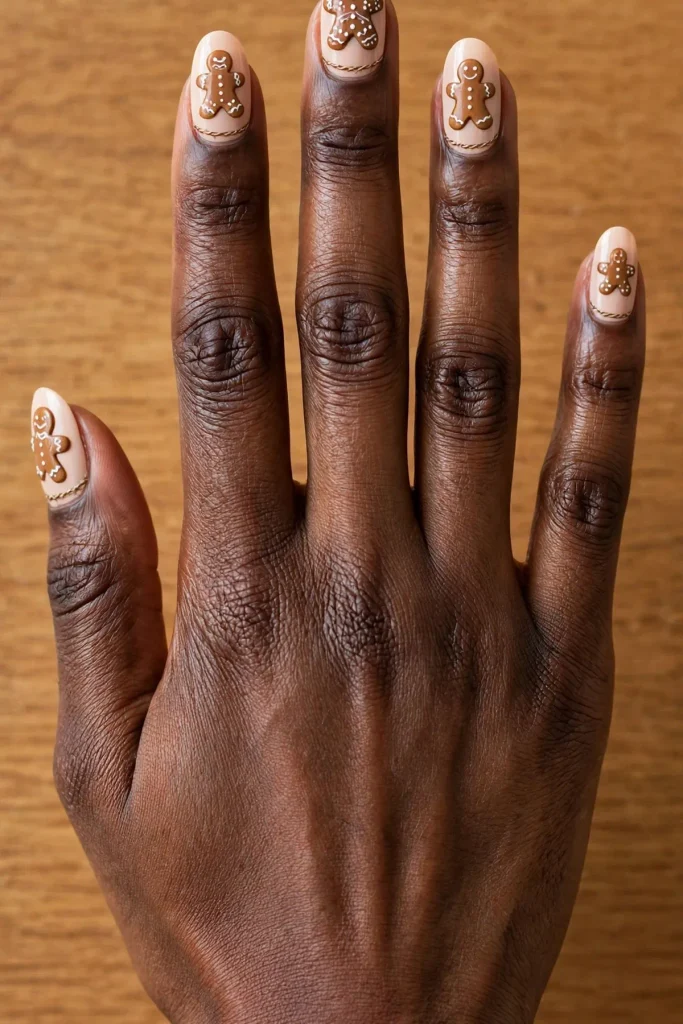
Cookies on sticks, gathered like flowers — this set photographs beautifully from every angle. Build it in three steps:
- Paint the thin stick lines first, angled so the cookies fan out across the hand.
- Add a round or star-shaped cookie at the top of every stick.
- Finish with twine lines wrapped at the base and tiny icing dots on each cookie.
Medium almond nails give the fan room, salon time is around ninety minutes, finish glossy. Difficulty: Medium. Stagger the cookie heights; a flat row looks like a fence, a staggered one like a bouquet.
Halfway tip: gingerbread art photographs beautifully against plain wood or linen. A busy tablecloth swallows the fine icing lines.
9. The Piping Bag, Caught Mid-Squeeze
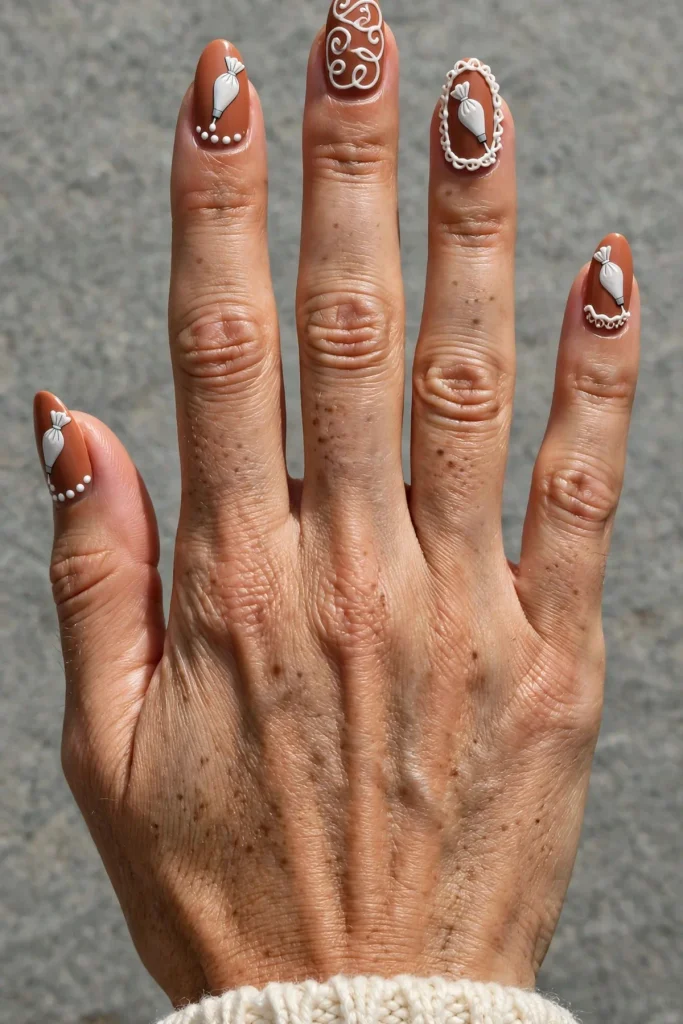
The mistake with this design is starting cold on your own nails. Piping needs a warmed-up hand, so the fix is five minutes of practice dots on a spare tip first, then the real nails. Every nail shows a white piping bag mid-squeeze, with borders at different stages: dots on one, swirls on the next, a finished frame on the ring finger. The raised icing is gel, so the set needs a gel kit and a lamp at home. Medium almond nails, about ninety minutes, glossy finish, difficulty Medium. That half-finished look is the charm — it catches a baker’s eye every time.
10. Cookies Cooling on the Rack
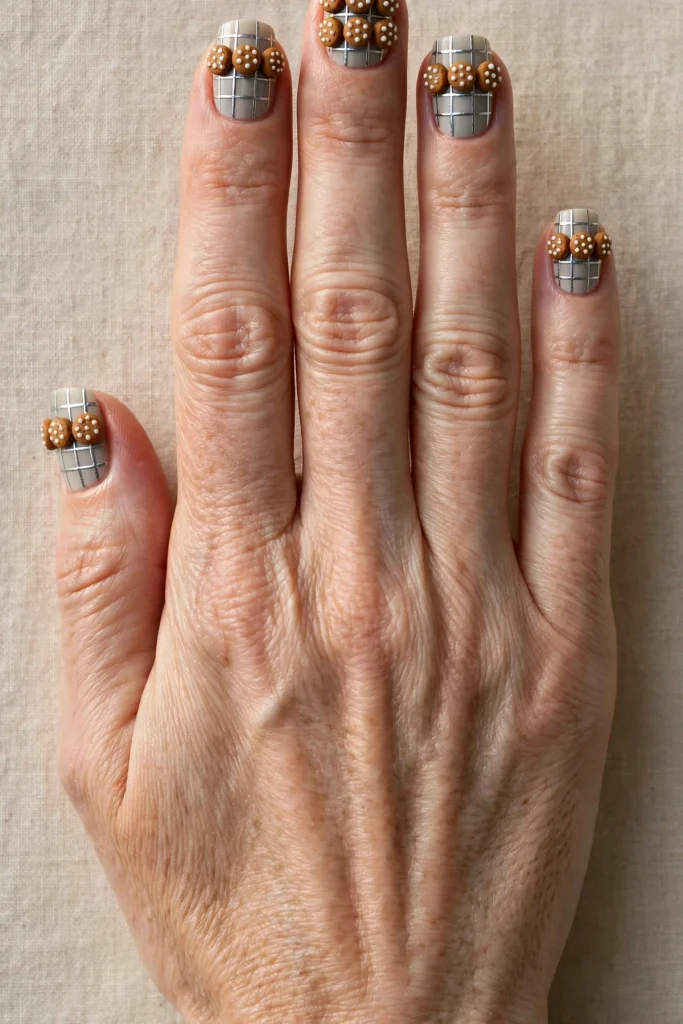
Silver-grey grid lines cross every nail like a wire rack, and small round cookies sit in rows on top, each dotted with white icing. It is a quiet design that rewards a close look. Short-to-medium square nails suit the grid well, a satin finish keeps the metal soft rather than mirror-bright, and salon time is about an hour. Difficulty: Easy. Leave one cookie looking unfinished, with just a single dot of icing. That small gap makes the whole rack feel real.
11. The Baker’s Apron With a Cookie Pocket
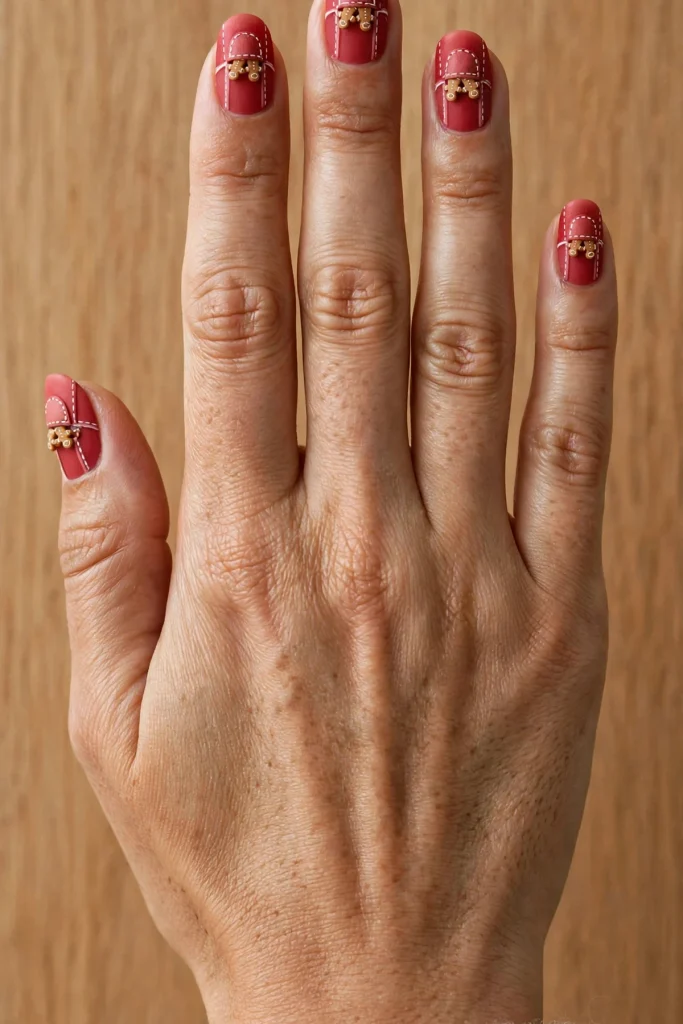
A soft red base becomes the apron, white stitch lines draw the straps and seams, and one deep pocket holds three tiny cookies. It is playful without shouting. Medium oval nails, a glossy finish, about ninety minutes in the salon, difficulty Medium.
An apron pocket full of cookies is the detail people remember a week later. Silly up close, neat from across the room, and it does not fight with an outfit.
Keep the pocket low on the nail, near the tip. A pocket painted too high reads as a random square, and the apron idea gets lost.
12. A Picket Fence and a Winding Candy Path
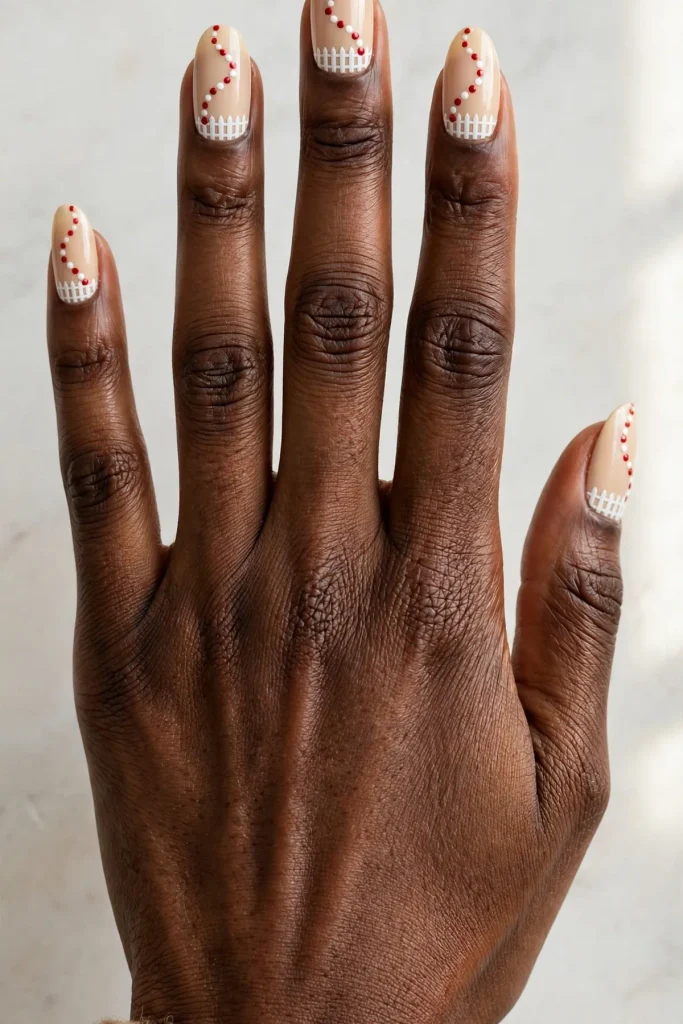
Short nails usually get swamped by full scenes, but this design shrinks gracefully: a white picket fence runs along the base of every nail, and a winding path of red and white candy dots leads to one tiny cottage door on the middle finger. Medium almond or shorter oval nails both work, the finish is glossy, and salon time is about an hour. Difficulty: Easy. Keep the path winding in the same direction across the whole hand, so the eye can walk it from pinky to thumb.
13. Gingerbread Mushroom Cottages
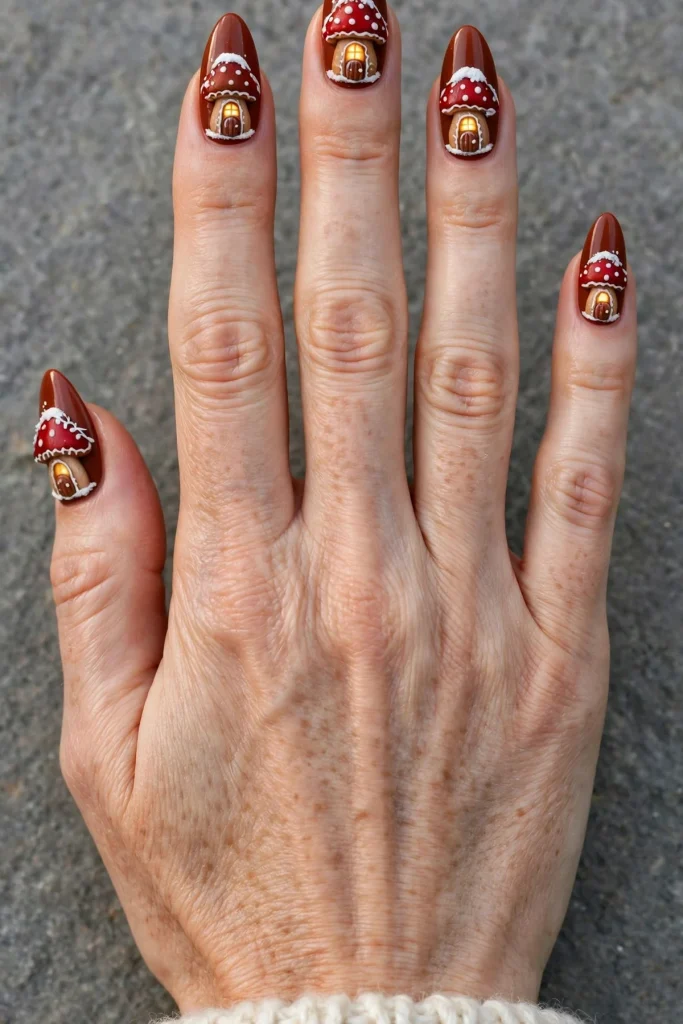
Fairy-tale, but make it gingerbread: squat little cottages wearing red mushroom-cap roofs. Gel builds the rounded caps, so this set needs a gel kit and a lamp, and it goes on in three steps:
- Shape the cottage walls in warm brown on long almond nails.
- Add the rounded caps in red gel and let the white spots sit slightly proud.
- Finish with round doors, warm glowing windows and a dusting of icing snow.
Salon time can pass two and a half hours, and difficulty is Expert. It is a lot of nail, and the set people ask to see twice.
14. The Little Cookie Car With Candy Wheels
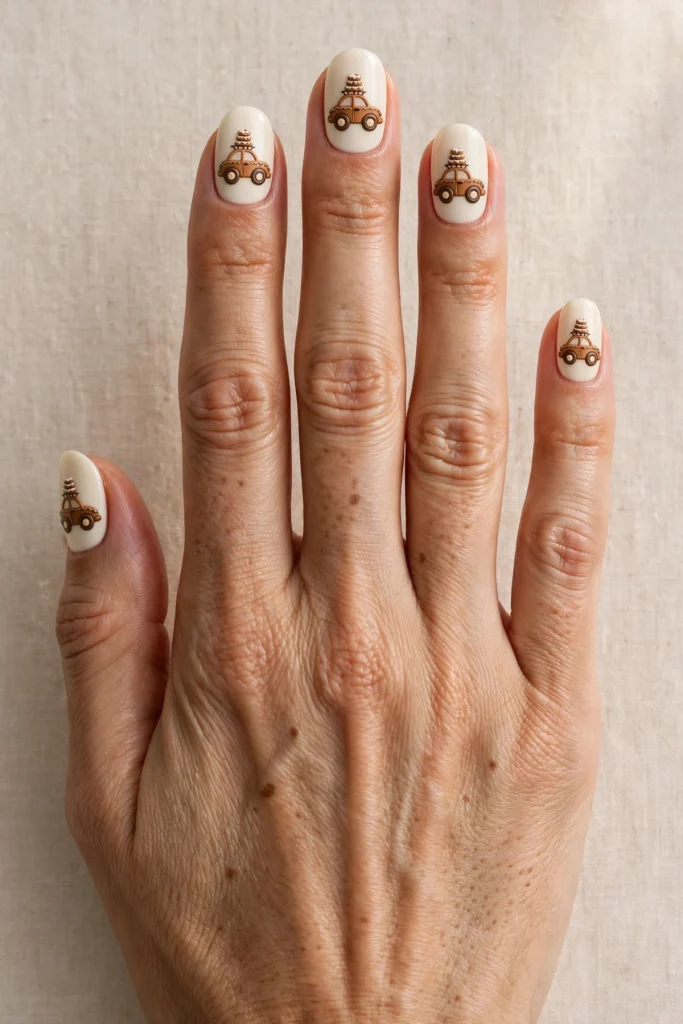
The common mistake with novelty cars is shrinking the wheels until they read as smudges. Fix it with two big wheels on every car and one pale dot for each hub. The gingerbread-brown car carries a stack of iced cookies on its roof rack, across a soft cream base. Medium oval nails keep it cute rather than cartoonish, salon time is about ninety minutes, the finish is glossy, and difficulty is Medium. Point every car in the same direction: a tidy convoy reads better than traffic.
15. Fresh From the Oven, Still Glowing
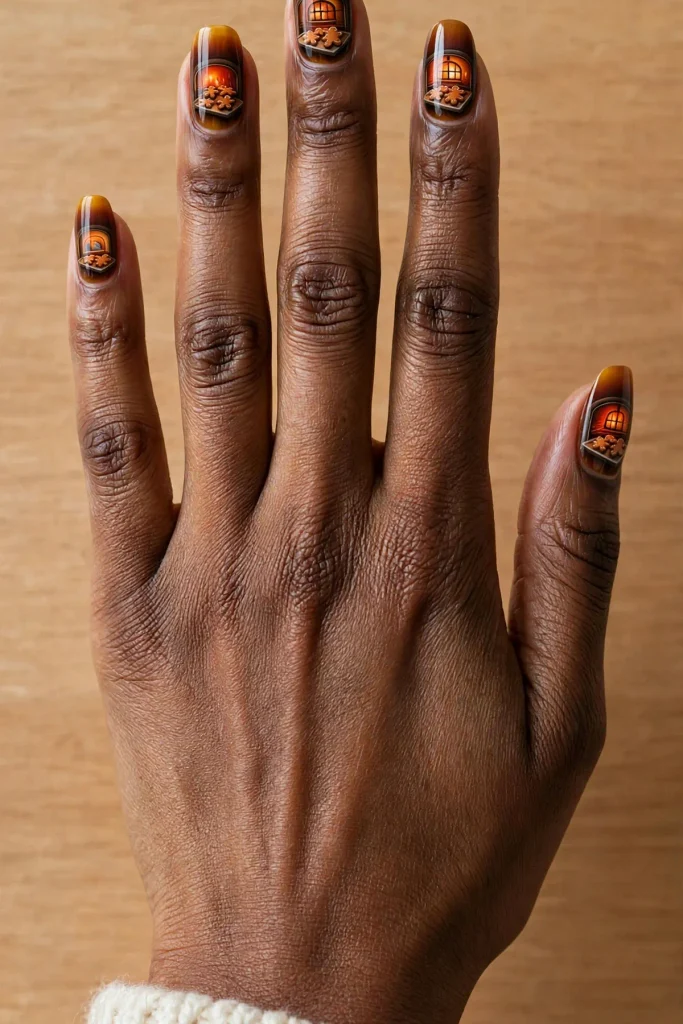
Warm amber melts into deep brown at the tips, an oven door frames the middle nails, and inside the glow sits a tray of cookies mid-bake. It is the coziest closer I know for this theme. Medium almond nails hold the gradient well, a glossy finish deepens the oven light, and salon time is about ninety minutes. Difficulty: Medium. Keep the glow low on each nail, like heat rising, and the little cookies stay the stars.
Icing Lines That Stay Crisp: How Gingerbread Detail Is Built
Crisp icing is not about having a steadier personality. It is about order. The base colour goes down first and dries or cures fully, because piping onto a tacky base is exactly where wobbly lines are born. Detail comes next in thin passes: outlines before fills, dark before light, and the tiniest dots last. With gel, a short flash cure between layers locks each line before the next one lands, which is how the bakery window keeps its straight frames. With regular polish, patience does the same job, and two thin coats beat one thick one. A flat brush cleans up edges better than extra polish does. The top coat matters more than people think: float it over the art instead of dragging it, or a perfect scroll becomes a smudge. Ask your tech to seal one nail and check it under the lamp light first — one soft line caught early saves the whole set.
Picking Your Gingerbread Palette
Three palettes carry most of this list. The classic mix of ginger brown, cream icing and one true red suits a wide range of skin tones and reads Christmas from across the room. The soft mix swaps the red for blush and tan, and it often works well on fair skin that finds strong red a little harsh. The deep mix leans on dark chocolate brown and warm amber; on deeper skin tones those shades glow rather than disappear, and the white icing pops harder against them. Whichever you pick, keep the icing one consistent white across the set. Mixed whites make the cookies look like they came from different bakeries.
What to Tell Your Nail Tech Before You Sit Down
Bring one clear photo of the set you want, not a collage of five different ones. Say which nail carries the biggest scene, usually the middle finger, and which nails can stay simpler if time runs short. Mention gel early if your pick is idea 2, 9 or 13, because lamp time changes the booking. Be honest about your length limit too: a good tech will shrink a scene for short nails rather than squeeze it until it blurs. If you type all day, say so at the start, not at the till.
Salon Scenes vs At-Home Versions: Time and Budget
Full scenes are the splurge of this list — not mainly in money, but in hours. The village, the bakery window and the mushroom cottages ask for long appointments, so they suit one special set per season. The piping, spice jars, cooling rack and candy path sit at the other end: about an hour each, simple tools, a gentler bill. At home, your budget goes further on basics you will reuse: a fine detail brush, a dotting tool, three good browns and one true white. Skip the rest until those feel easy in your hand.
Trying Gingerbread Nails at Home
Start where the shapes forgive you: the rolling pin set in idea 6, the spice jars in idea 7, the cooling rack in idea 10 and the candy path in idea 12 are the honest beginner picks. Work one hand fully before starting the other, and keep a clean-up brush within reach. Ideas 2, 9 and 13 are gel builds. They need a gel kit and a lamp, so treat them as salon sets unless you already cure gel at home. Regular polish handles everything else here with patience, thin coats and a steady rest for your painting hand.
Keeping Cookie Art Intact Through the Holidays
Start with a proper base coat — it protects your natural nail and gives the browns something to grip. If you wear gel and your skin is reactive, do a patch test first, and do not peel lifting gel off, because peeling takes nail plate with it. Gel sets should come off professionally, or at least with a proper remover routine, not by force. Long soaks are not the shortcut they look like: they dry the nail out and soften fine detail at the edges. Gloves for the washing up, oil for the cuticles, and your cookies should survive the season.
Gingerbread Nail Questions, Answered
Can gingerbread nails work on short nails?
Yes. Pick the sets that shrink well: the piped icing in idea 4, the rolling pin in idea 6 and the candy path in idea 12 suit shorter nails, and a good tech can scale the village down too.
How long does a detailed gingerbread set take in the salon?
A full scene like the bakery window or mushroom cottages usually runs two to three hours; simpler sets sit closer to one hour. Book the long ones early in December, when chairs fill fast.
Can I paint gingerbread nails with regular polish?
Most of them, yes. Ideas 2, 9 and 13 are gel builds that need a gel kit with a lamp, so those are salon sets for most people. The other twelve work in regular polish with thin coats and drying time between layers.
How do I keep white icing lines from going wobbly?
Let the base dry fully first, then work with a barely loaded brush, your painting hand resting on the table. Thin lines dragged slowly stay crisp; thick rushed lines are the ones that wander.
What is the safest way to remove a gel gingerbread set?
Have it removed professionally if you can. At home, use a proper remover routine and patience. Do not peel, pry or force it — that is how the natural nail underneath gets damaged.