17 Slick Back Curly Hairstyles, Grouped by the Product That Holds Them
The first time I tried to slick back my curly hair, I used a regular hair gel, a fine-tooth comb and far too much confidence. Within an hour, my “sleek” hairline had turned into a halo of frizz, and the back of my head was dusted with tiny white flakes. My best friend, whose curls are much tighter than mine, laughed and showed me her secret: the right product, a soft brush and a silk scarf.
Since then, slick backs have become one of my favorite ways to wear my curls. They’re polished, bold and perfect for days when my curls need a little help. But I’ve learned that the product you use changes everything, from how sleek the front looks to how your curls behave in the back.
So I’ve grouped these 17 slick back curly hairstyles by the product that holds them. For each style, you’ll see what happens up front and in the back, plus a few real stories from my curly friends and me.
Why Slicking Back Curly Hair Is Different
Curly hair doesn’t behave like straight hair when you smooth it down:
- Shrinkage can pull the hair back toward its natural curl shape.
- Frizz often appears along the hairline as the day goes on.
- Hold needs to be stronger to keep curls smooth.
- Curl definition can be affected where hair is pulled tight.
The right product and technique solve almost all of these problems.
Strong-Hold Gel Styles
Strong-hold gel gives the sleekest, longest-lasting finish. It’s perfect for special events and very defined styles.
1. The Slicked-Back High Puff
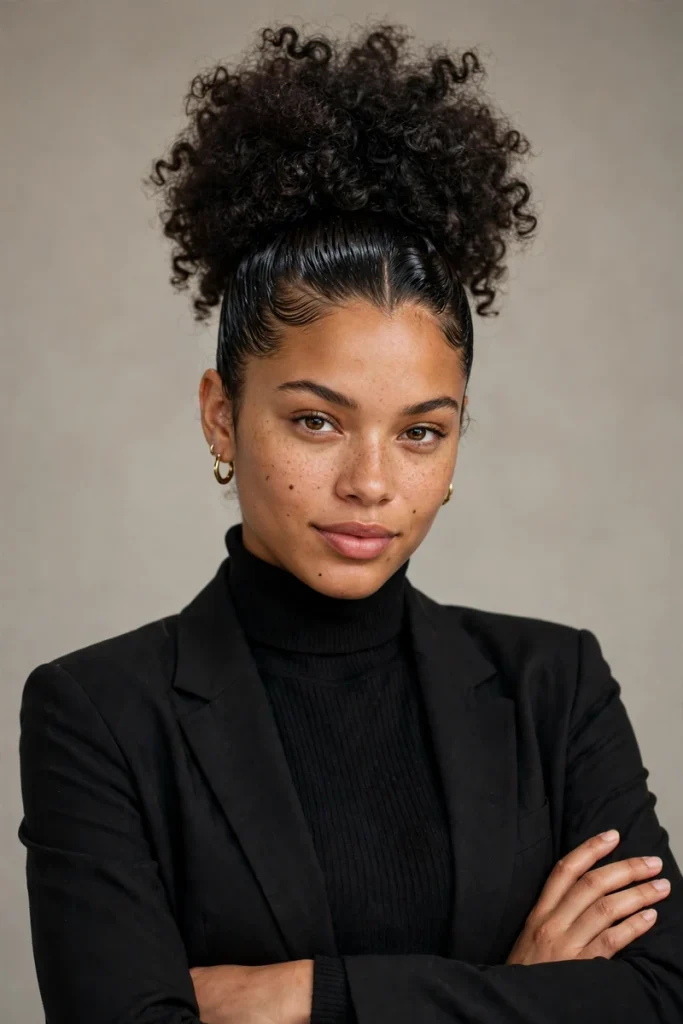
Up front: hair smoothed tightly back with strong gel, creating a glossy, sleek line.
In the back: curls gathered into a full, high puff at the crown.
This is my best friend’s signature look. She wears it to work, weddings and the gym, and says it looks as fresh at 6 p.m. as it did at 7 a.m.
2. The Sleek Low Curly Bun
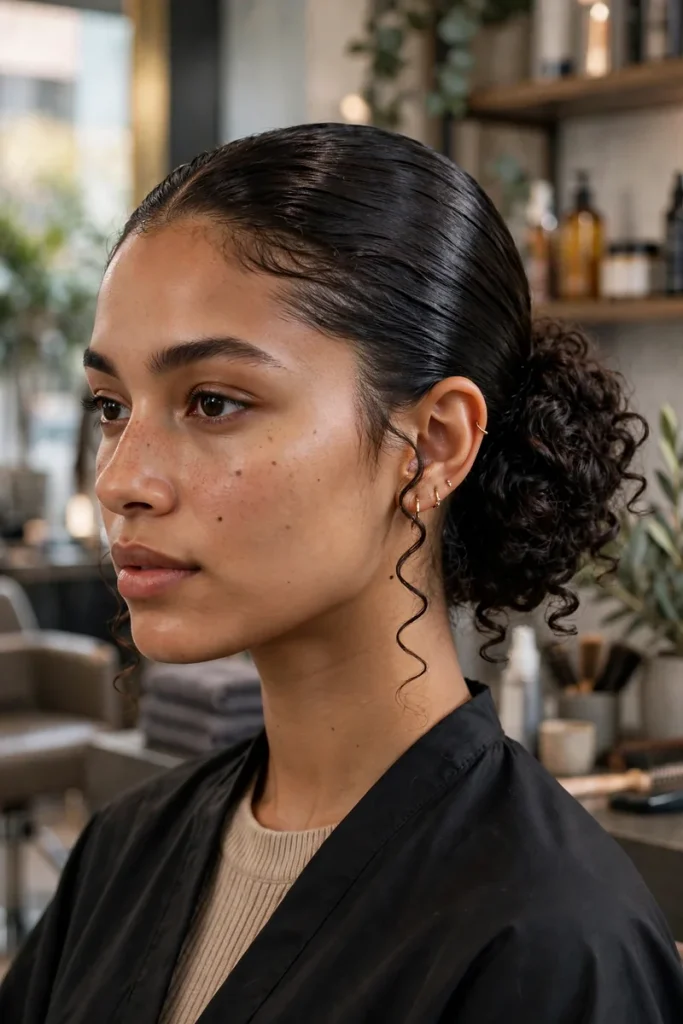
Up front: a smooth, glossy slick back with a center part.
In the back: curls twisted into a low, round bun at the nape of the neck.
It’s polished, elegant and perfect for formal events.
3. The High Slicked Curly Ponytail
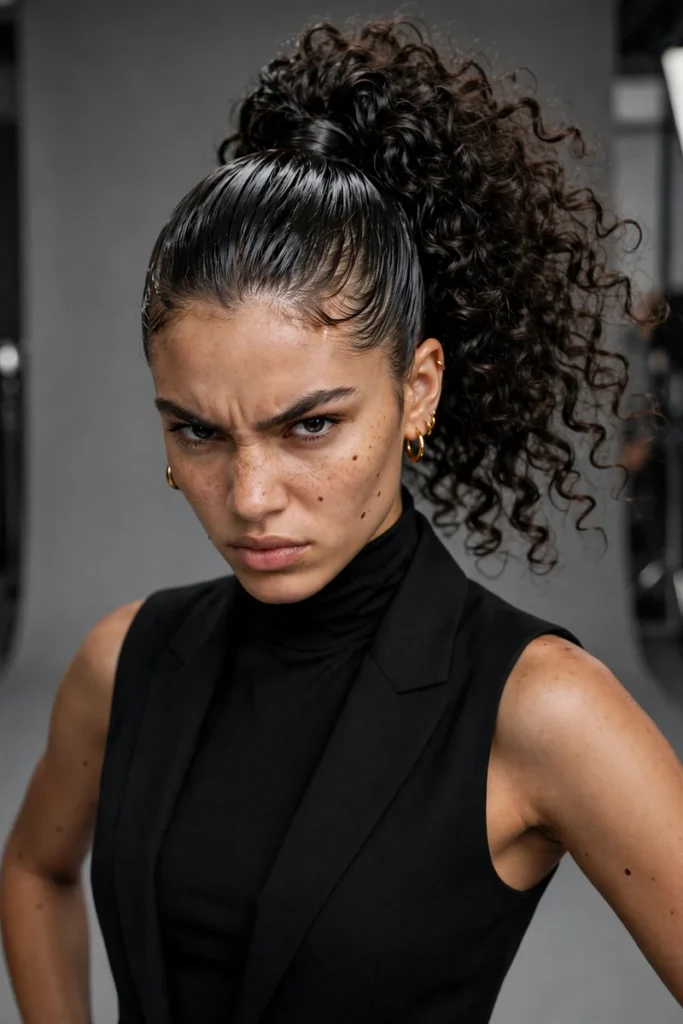
Up front: hair brushed up and back into a sleek high ponytail.
In the back: a voluminous ponytail of springy curls.
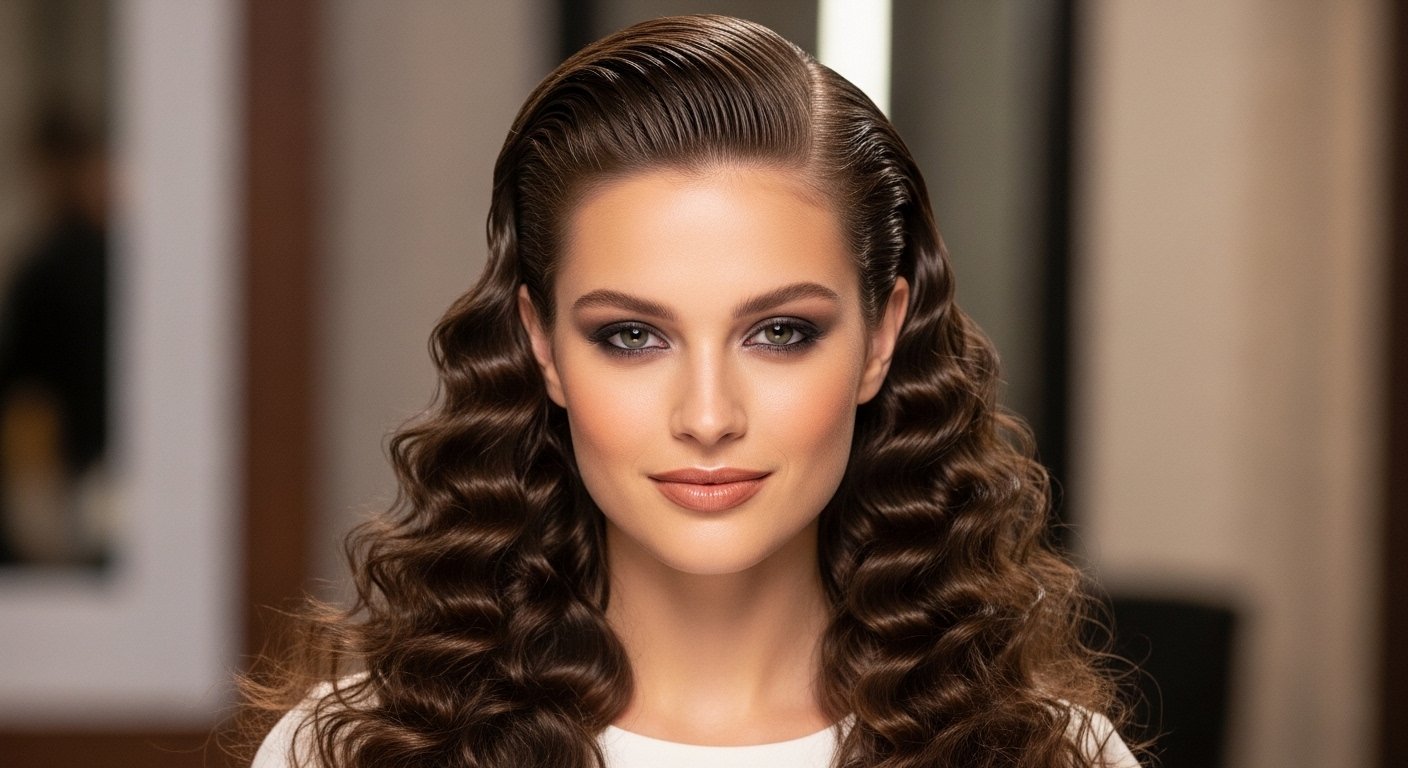
4. The Wet-Look Slick Back With Loose Curls
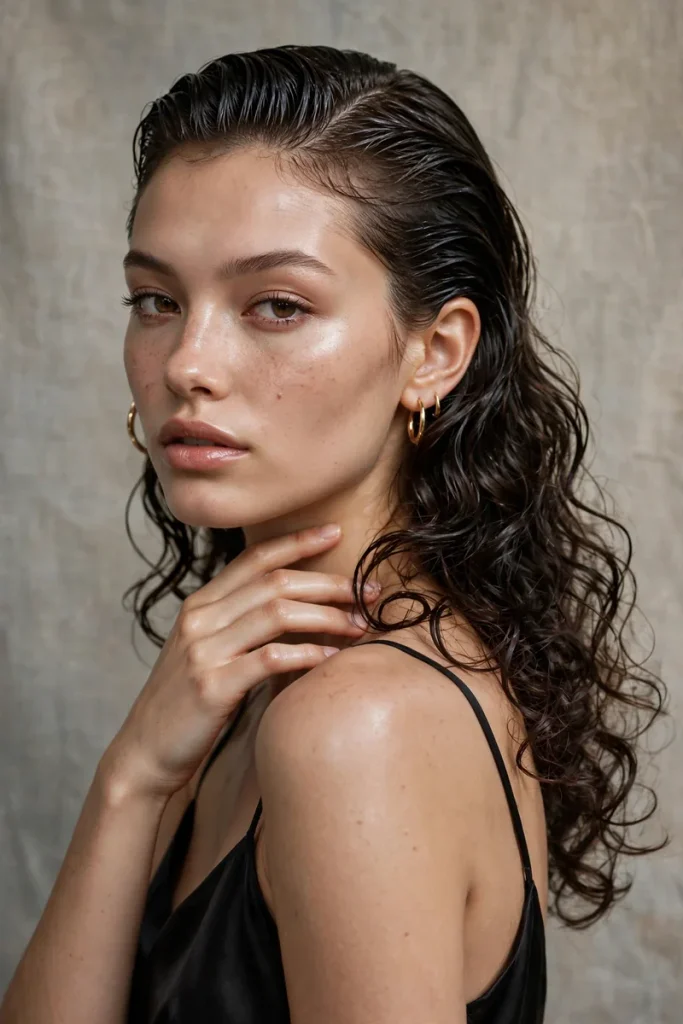
Up front: a glossy, wet-look slick back from the hairline to just behind the ears.
In the back: curls left loose and free behind.
It’s editorial, bold and lets your curls do the talking.
5. The Slick-Back Half-Up
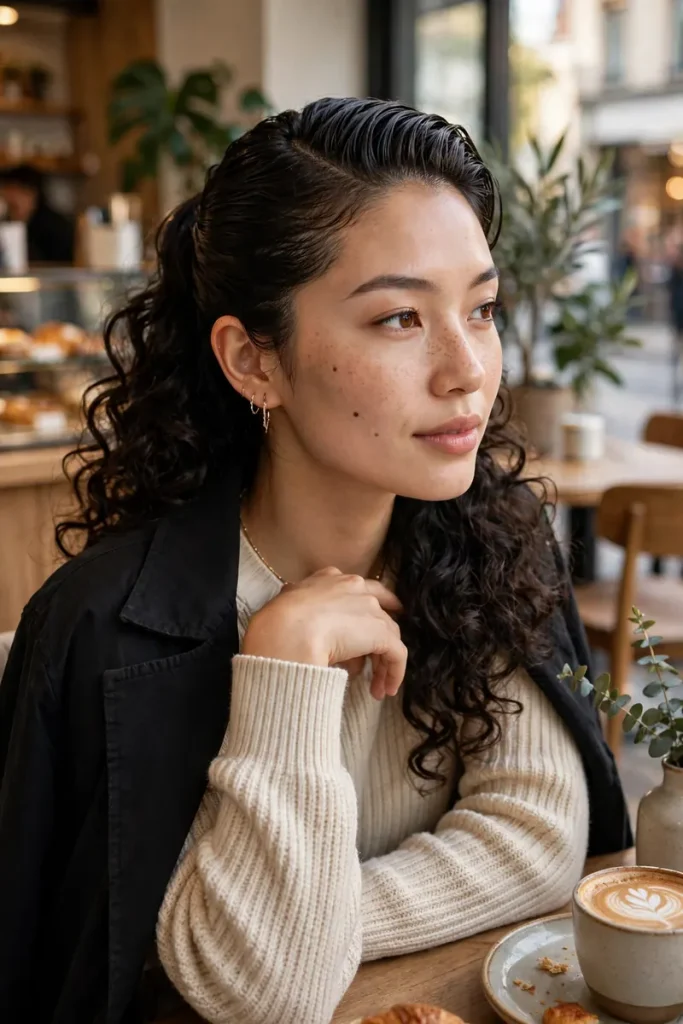
Up front: the top half of your hair slicked back with gel and secured at the crown.
In the back: the rest of your curls left down.
Edge Control Styles
Edge control is a thick, styling gel designed to smooth and shape the hairline. It’s perfect for laying edges and creating swoops.
6. Swooped Edges With a Slick Ponytail
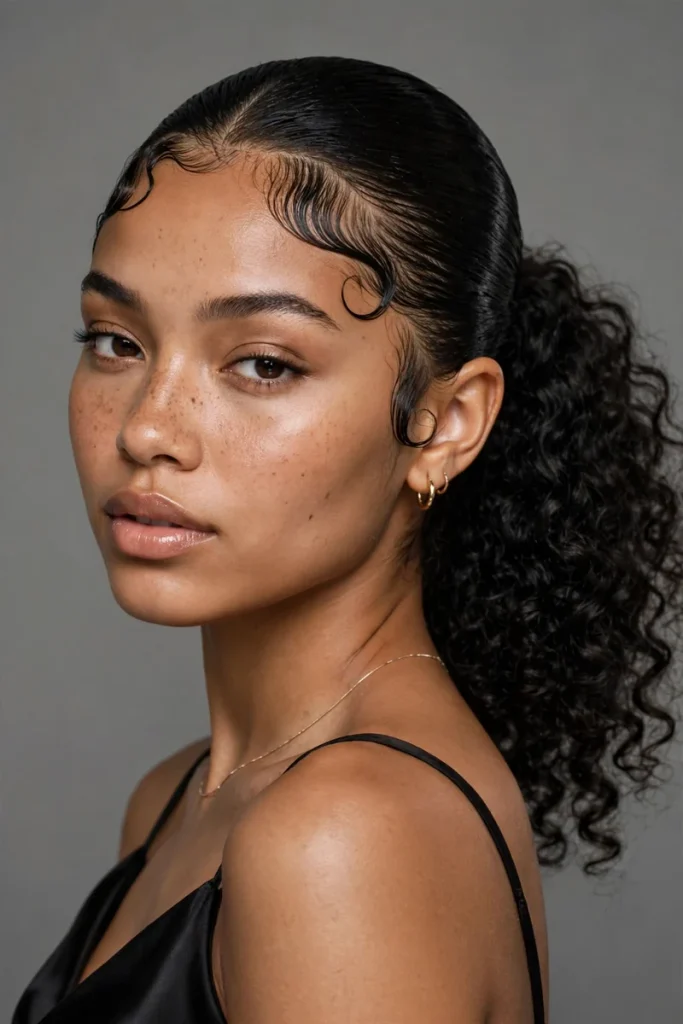
Up front: smooth edges styled into soft swoops and curves along the hairline.
In the back: a slicked ponytail of curls.
My cousin spent a whole summer perfecting her swoops with an edge brush. By August, she could do them in under two minutes without a mirror.
7. The Middle-Part Slick With Two Curly Puffs
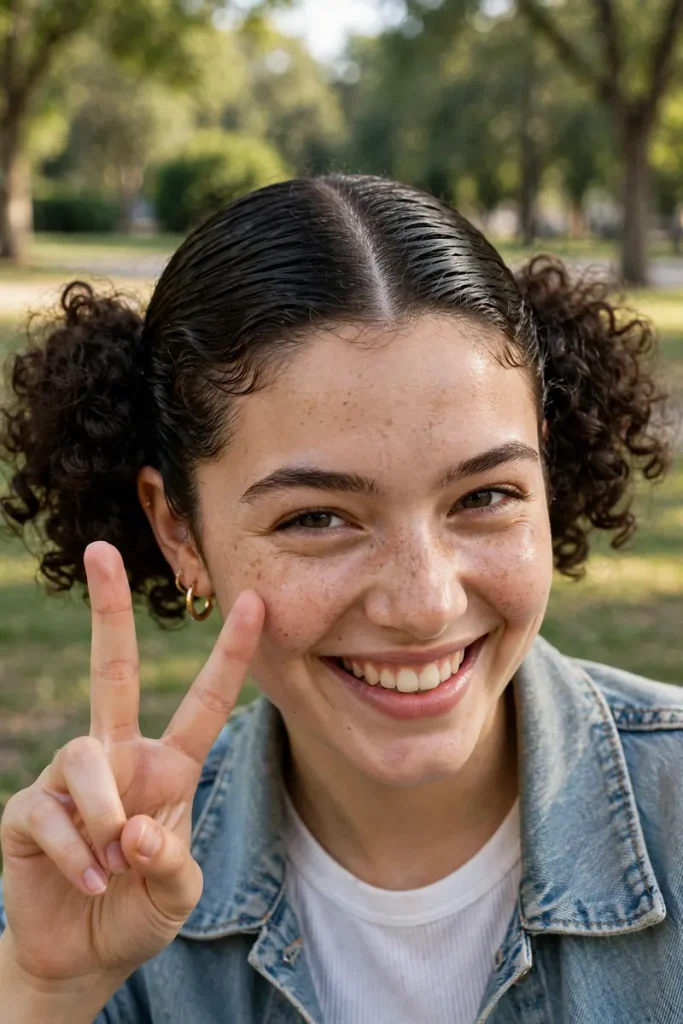
Up front: a crisp middle part, with each side slicked back using edge control.
In the back: two curly puffs on either side of the head.
8. The Side-Part Slick With a Low Curly Ponytail
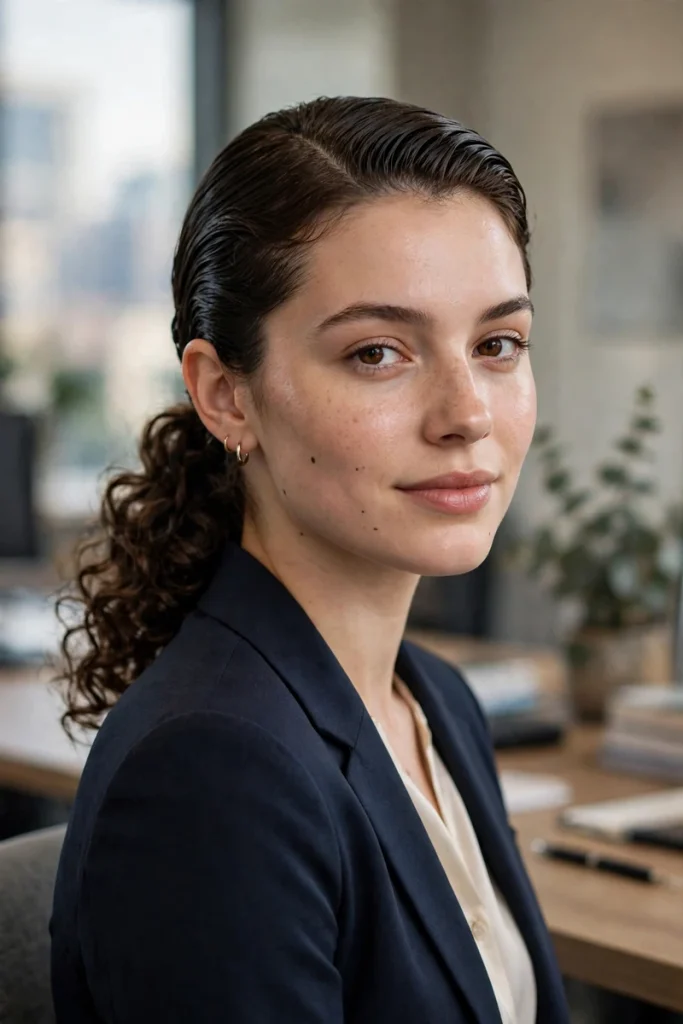
Up front: a deep side part with smooth, laid edges.
In the back: a low ponytail of curls swept over one shoulder.
Cream and Pomade Styles
Curl creams and pomades offer softer hold. The result is a slick back that’s smooth but still touchable.
9. The Soft Slick Back With Curly Bangs
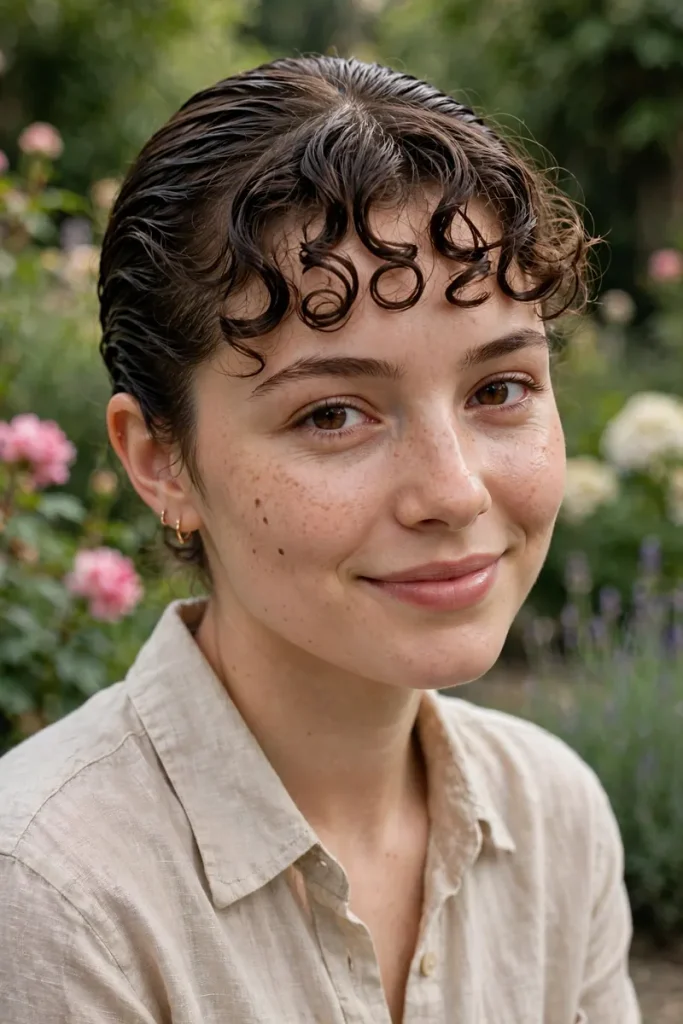
Up front: the sides gently smoothed back with a cream, leaving a few curly bangs at the front.
In the back: curls gathered loosely at the nape.
10. The Invisible Headband Look
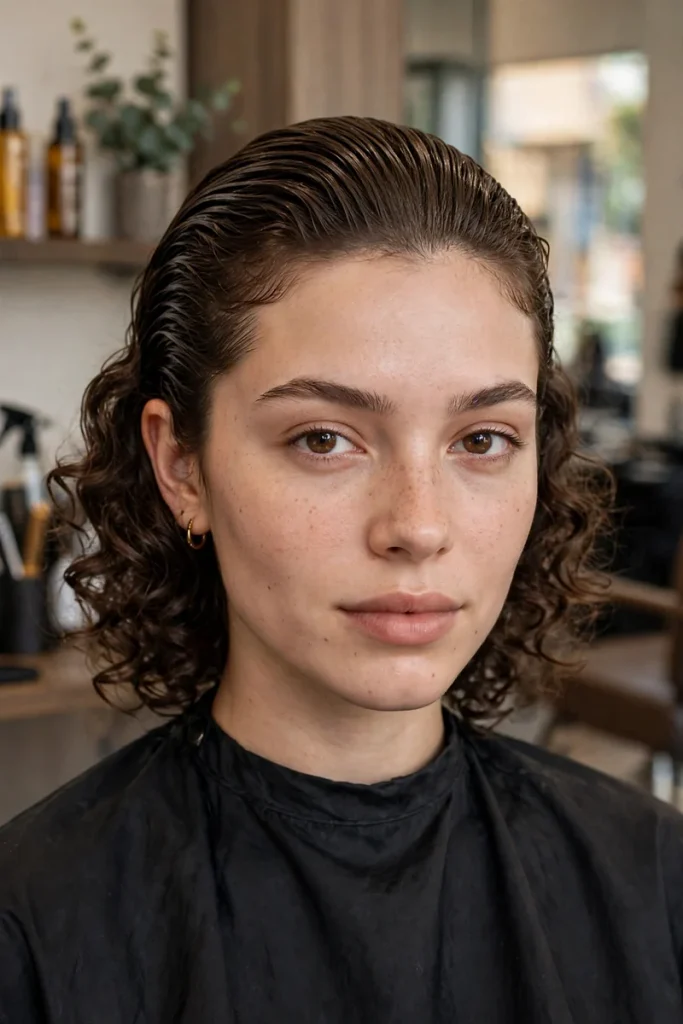
Up front: the front few inches of hair smoothed back with pomade, as if you’re wearing a headband, but without one.
In the back: curls left loose and full behind the smoothed section.
It’s softer and more relaxed than a full slick back.
11. Slicked Sides With a Curly Mohawk
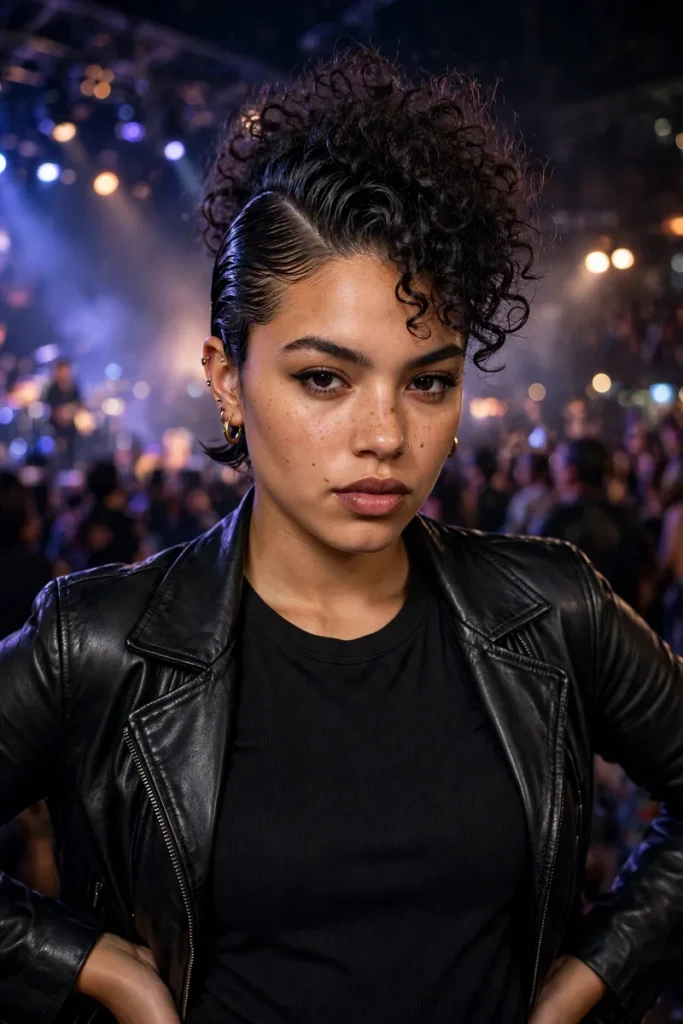
Up front: the sides slicked back and pinned flat.
In the back: a strip of curls along the center of the head, from front to back, creating a curly mohawk.
A friend wore this to a music festival, and she said it was the first time she’d ever been stopped by strangers asking for hairstyle tips.
Mousse Styles
Mousse gives light, flexible hold. It’s perfect for shorter curls and softer, more natural slick backs.
12. The Slicked-Back Curly Bob
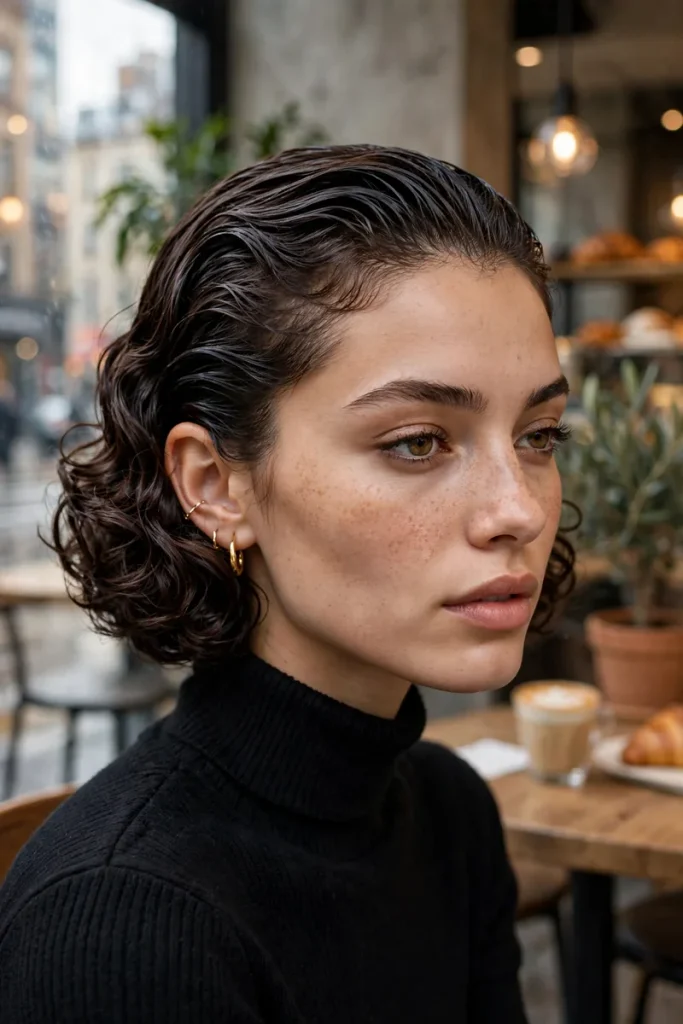
Up front: a short curly bob brushed back from the face with mousse.
In the back: curls falling naturally around the ears and nape.
13. Pinned-Back Curls on Short Hair
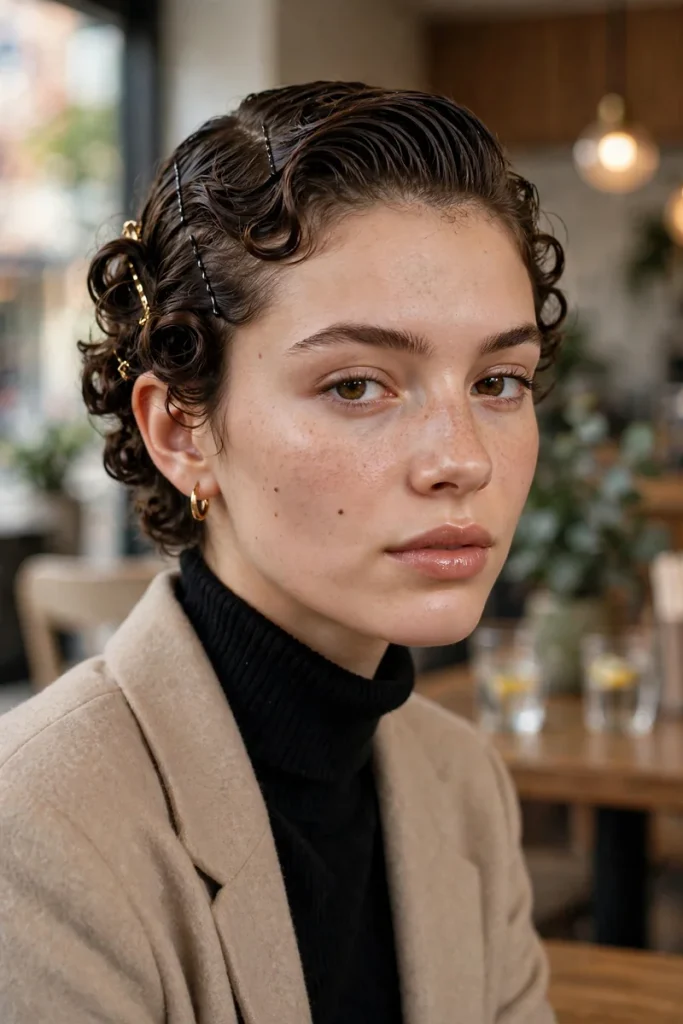
Up front: the top smoothed back with mousse and pinned with a few clips.
In the back: short curls left loose.
It’s a great way to slick back short curly hair that isn’t long enough for a bun or ponytail.
14. The Slicked Crown With Curls Behind the Ears
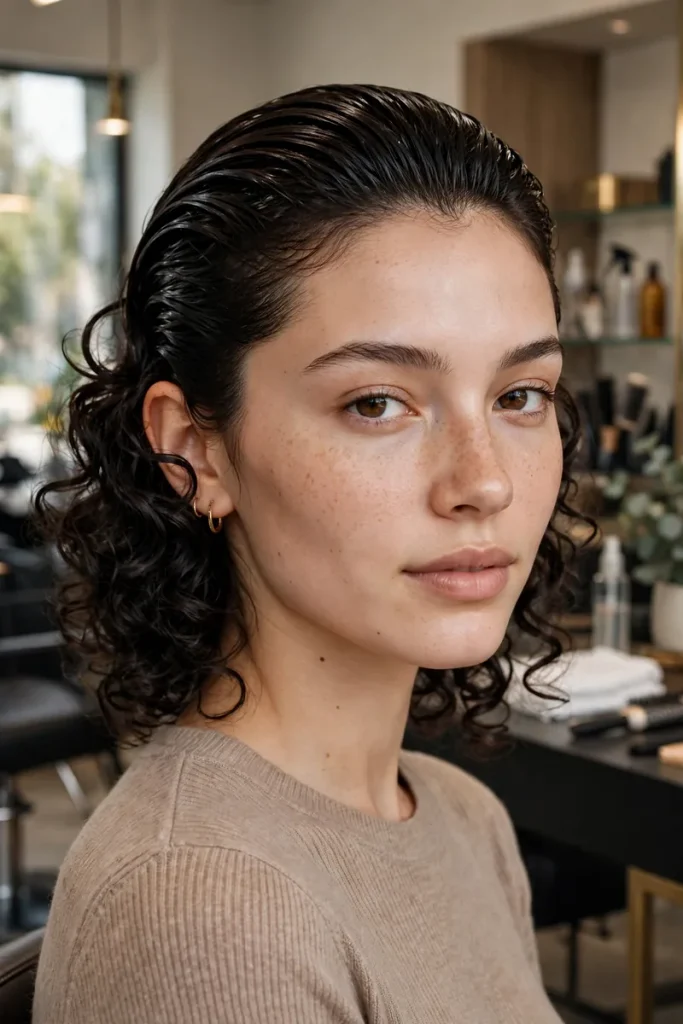
Up front: the crown slicked back with mousse.
In the back: curls tucked behind your ears and falling down.
Slick Backs With Braids and Accessories
Add detail and personality to your slick back.
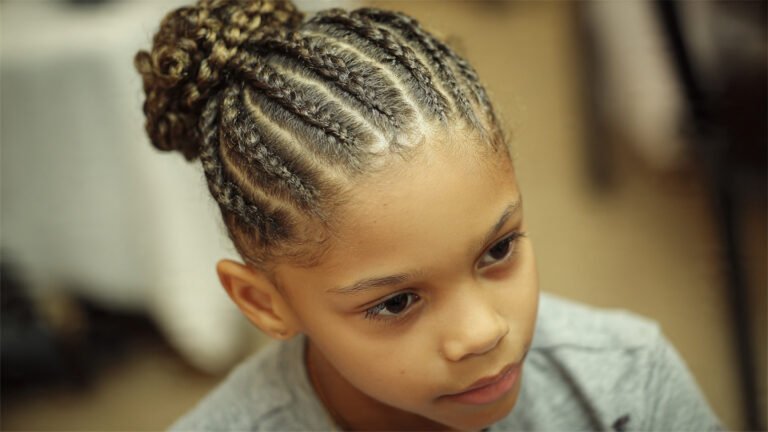
15. Braided Front Into Two Curly Puffs
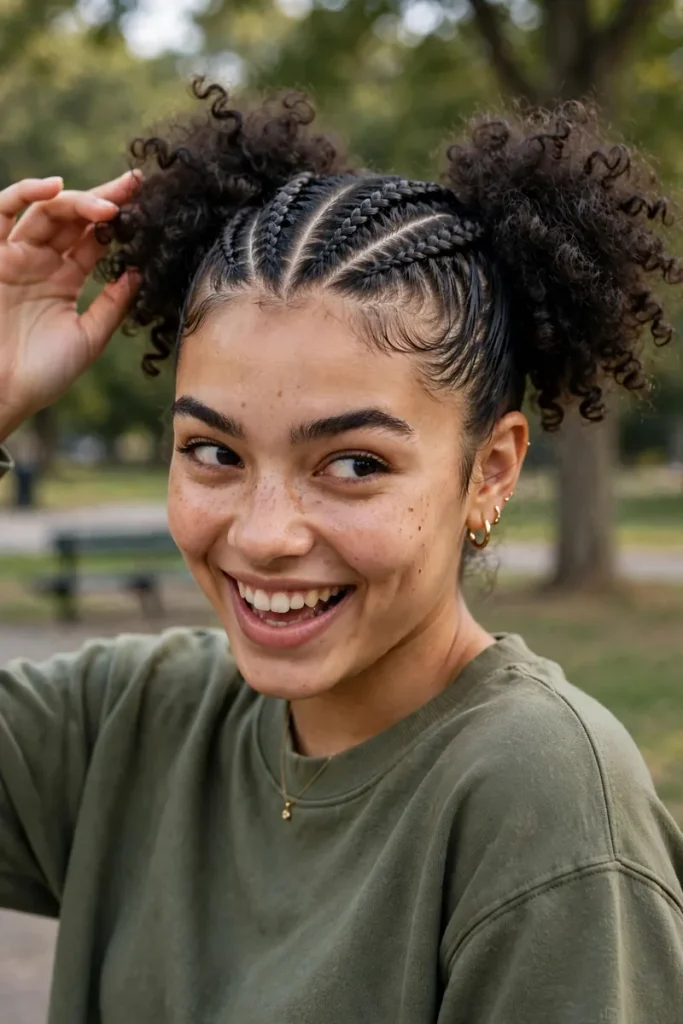
Up front: two small braids or cornrows from the hairline, slicked with gel.
In the back: two curly puffs where the braids end.
16. The Slick Back With a Scarf Tie
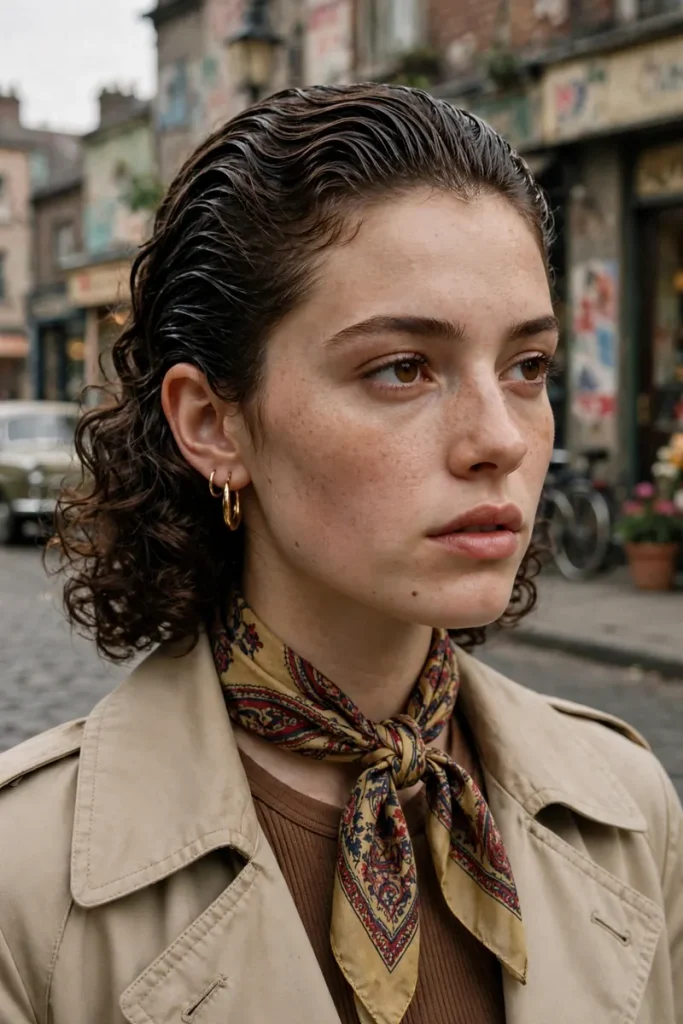
Up front: a smooth slick back.
In the back: a silk scarf tied around the base of a ponytail or puff, with the ends hanging down.
17. The Slick Bun With Pearl Pins
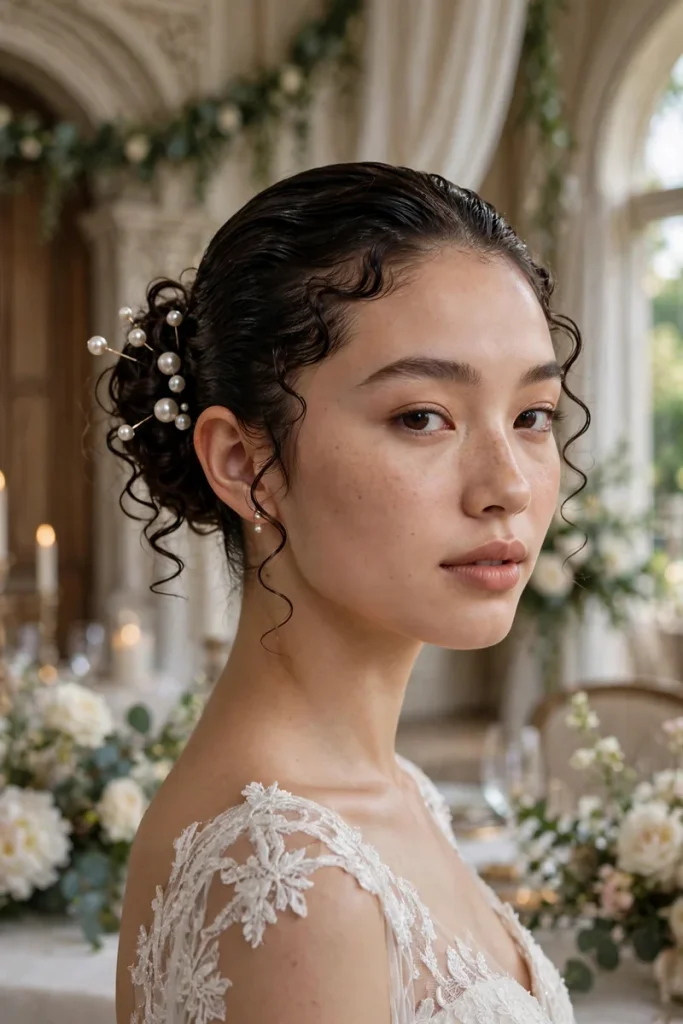
Up front: a sleek slick back.
In the back: a curly bun decorated with small pearl pins.
I wore this to my cousin’s wedding, and three people asked whether I’d had it done at a salon. I hadn’t. It took fifteen minutes.
Wet vs. Dry Slicking
- Slicking damp hair gives a smoother, sleeker finish, because curls are easier to stretch and shape when wet.
- Slicking dry hair creates a fluffier, softer finish, with more volume at the back.
For the sleekest look, apply your leave-in conditioner and gel to damp hair.
Tools That Make a Difference
- A soft bristle brush or boar bristle brush: smooths hair without causing frizz.
- An edge brush: a small, toothbrush-like brush designed for laying edges.
- Soft hair ties: to avoid breakage.
- A silk or satin scarf: for setting your slick back.
The Silk Scarf Setting Trick
This trick, which my best friend taught me, changed my slick backs forever:
- Slick your hair back with your chosen product.
- Tie a silk or satin scarf tightly around your hairline.
- Leave it on for 10 to 15 minutes while you do your makeup.
- Remove the scarf. Your hair will be smooth, flat and set in place.
The scarf presses your hair down while the product dries, giving a much smoother finish.
How to Avoid White Flakes and Crunch
White flakes often appear when products don’t mix well or when too much gel is used. To avoid them:
- Use less product than you think you need.
- Apply gel to damp hair, not dry hair.
- Check that your leave-in and gel work well together. Some combinations can cause flaking.
- Let your hair dry completely before touching it.
- Scrunch out any crunch gently once it’s dry.
Protecting Your Edges
Slick backs can put stress on your hairline if you wear them tightly every day. To protect your edges:
- Don’t pull too tightly.
- Use soft hair ties without metal.
- Change your style regularly.
- Massage your hairline gently with a light oil to keep it moisturized.
Removing Gel at Night
Heavy gel can make hair dry and stiff if you leave it in. At the end of the day:
- Rinse with warm water to soften the gel.
- Co-wash with a conditioner to remove product gently.
- Detangle carefully with your fingers.
- Moisturize with a leave-in conditioner before bed.
Final Thoughts
Slick back curly hairstyles are polished, confident and incredibly versatile. Once you choose the right product, from strong gel to soft mousse, and master a few simple tricks, you can create everything from a sleek bun to a bold curly mohawk.
Start with your favorite product, try the silk scarf trick, and have fun experimenting.
Which slick back style are you trying next? Let me know in the comments below.