16 Classy Christmas Nail Ideas That Look Expensive but Feel So Easy
Last December I was wrapping gifts at my kitchen table, tape stuck to my sleeve, when I looked down at my plain red nails and felt a little sad. They were pretty, sure. They just did not feel like Christmas at all.
My sister came in with a mug of cocoa, saw my hands, and said, Ruth, your nails need some joy. She was right.
That is what this list is about. Not plain colors with one cute nail tucked in. Real Christmas nail art on every single nail, so your whole hand looks festive from any angle.
Every idea below covers all five nails on your display hand, and the same design on the other hand too. Classy, yes. Simple and plain, no.
Snowy Whites and Soft Sparkle
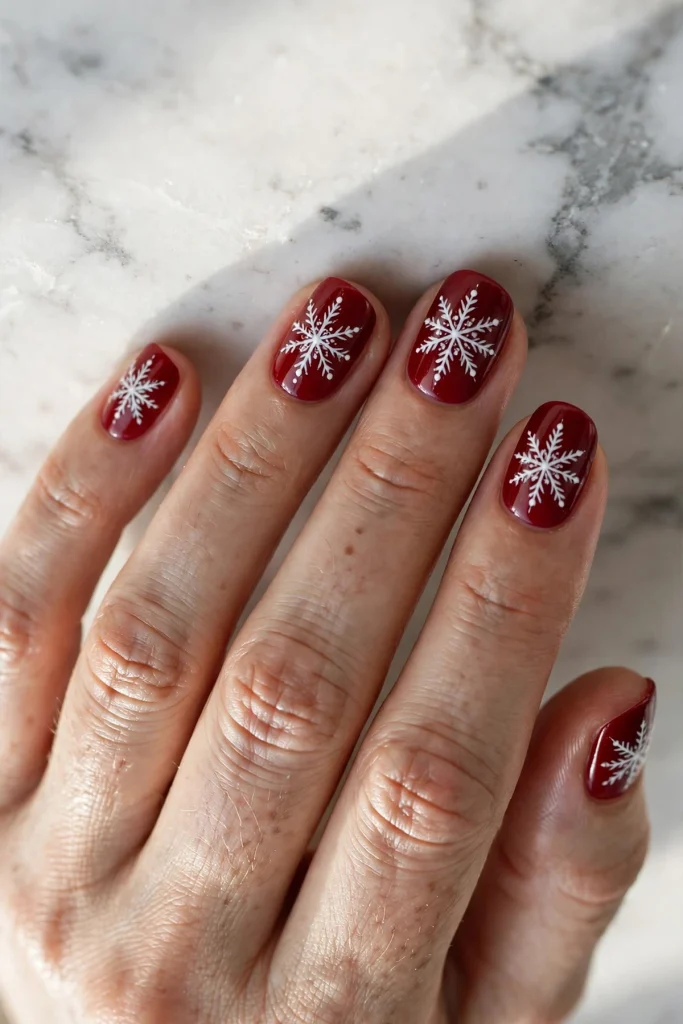
1. White Snowflakes on Deep Red
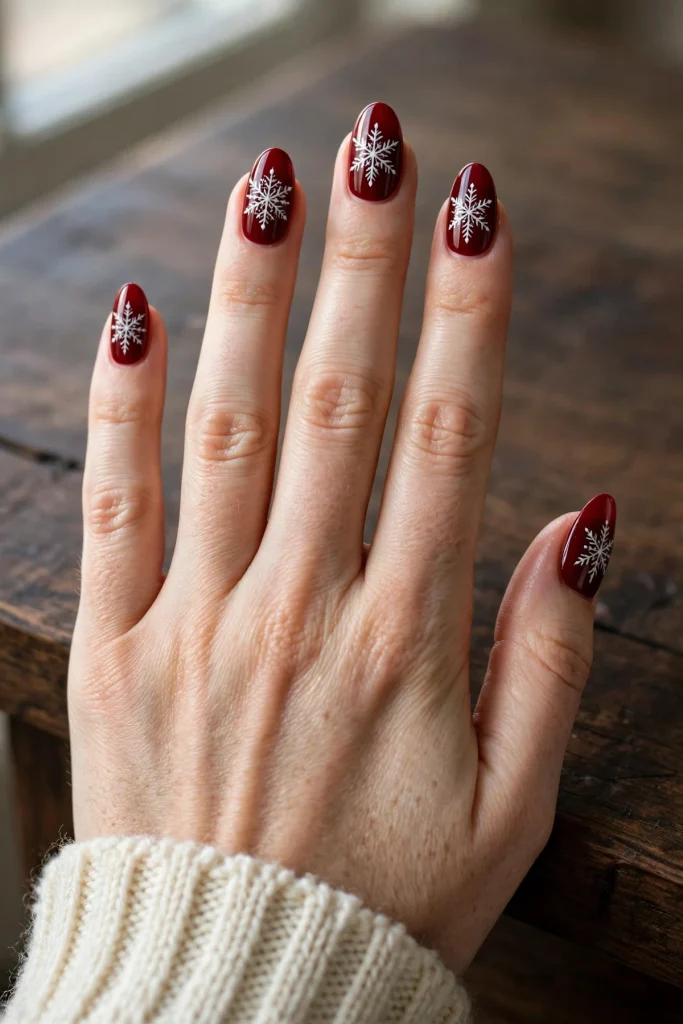
Start with two coats of a deep, warm red. Not bright cherry, more like cranberry. That rich base makes white paint pop like snow on a red door.
On every nail, paint a white snowflake right in the center, then add tiny dots and small lines around it. The snowflake design is repeated on all nails, thumb to pinky, so no nail is left plain.
A fine brush or a snowflake stamp both work. Stamps are faster at home and look neat on short, squarish nails. At a salon, hand-painted flakes on medium almond nails look soft and pretty.
With gel, this lasts a good two weeks, perfect for Christmas dinner. One mistake to avoid: thick white paint. It blobs fast. Use thin lines and let the first coat dry.
2. Frosty Snowfall on Midnight Blue
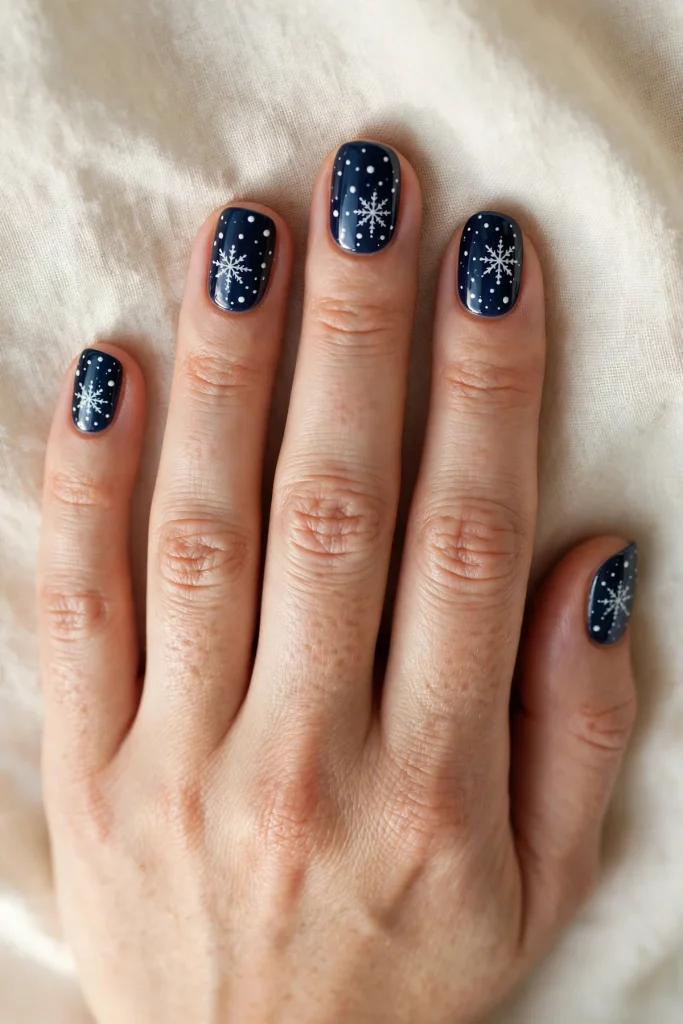
Picture a quiet night sky, and you have this one. The base is midnight blue, deep and calm, and it looks lovely on cool skin tones.
White dots of different sizes fall across each and every nail, like snow coming down. Add one small six-point flake near the tip of every nail too, so the snowfall design covers all nails in the same soft pattern.
You only need a dotting tool for this. Dip, dot, dip, dot. It is one of the easiest ideas here for beginners, and short round nails carry it well because the dots follow the curve.
Regular polish gives you about five to six days. Gel stretches it to two weeks or more, lovely for a winter party. Please do not skip top coat here. Without it, the tiny white dots wear off the tips first.
3. Santa Hat Tips
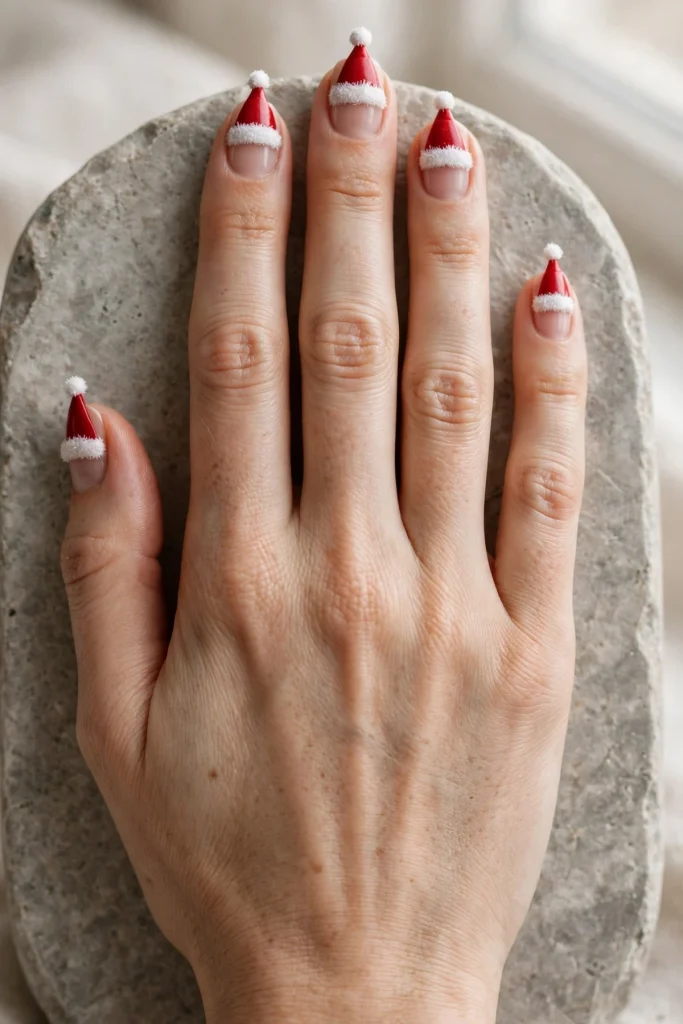
Can we talk about how cute a French tip looks when it turns into a little hat? Instead of a plain white tip, the tip becomes red, with a fluffy white band under it.
Yes, on every nail. Each nail gets its own red Santa hat tip, a white fuzzy trim line, and one tiny white dot like a pom-pom near the corner. The full set of nails looks like a row of little hats, and it makes people smile.
Keep the base nude or soft pink so the hats stand out. This suits medium square or coffin nails best, since you need a bit of tip space. A salon does the trim line cleanest, but nail guides help a lot at home.
Expect seven to ten days from a gel set, great for office parties. Avoid making the red tip too long, or the hat looks stretched.
4. Red Bows on Cream
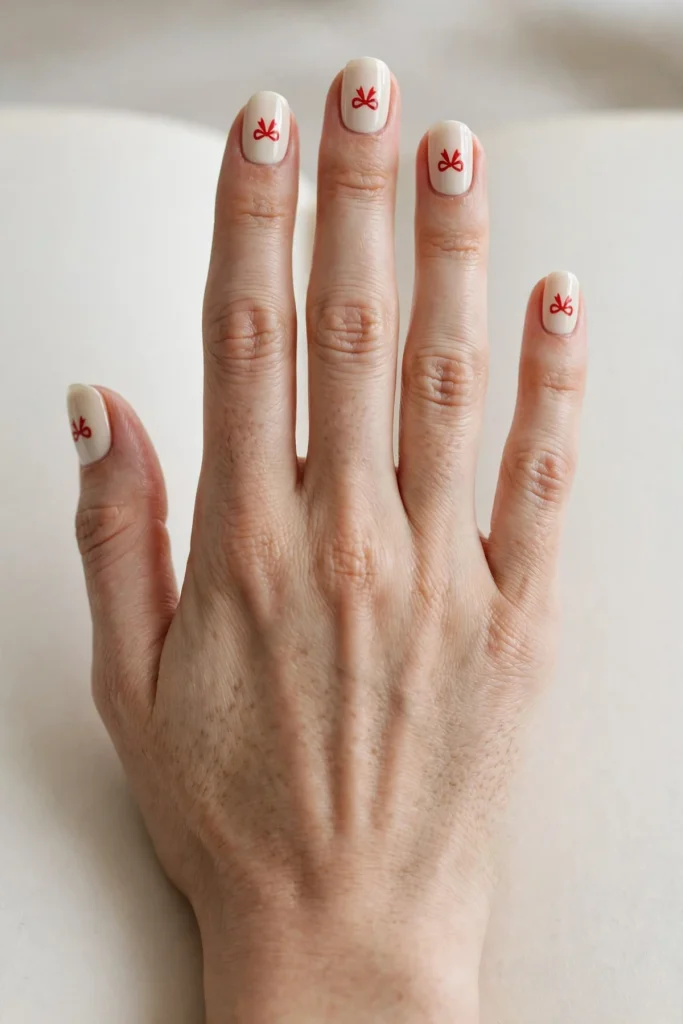
My friend wore this to a cookie swap last year and three people asked for her nail tech’s name. The base is a warm cream color, soft as eggnog, and it flatters almost everyone.
A small red bow is painted in the middle of all nails, not just one. Every nail carries the same neat bow, with two tiny ribbon tails and a dot in the center. Together the nails look like little wrapped gifts.
A thin detail brush does the bow in four quick strokes. If your hand shakes, bow stickers pressed flat and sealed well can pass at home. Medium oval nails give the bow enough room without crowding.
This set lasts about a week in regular polish, longer in gel, lovely for a cookie swap. The common mistake is placing bows too close to the cuticle. Leave a small cream gap so the bow looks clean.
The Classic Christmas Patterns
5. Candy Cane Stripes
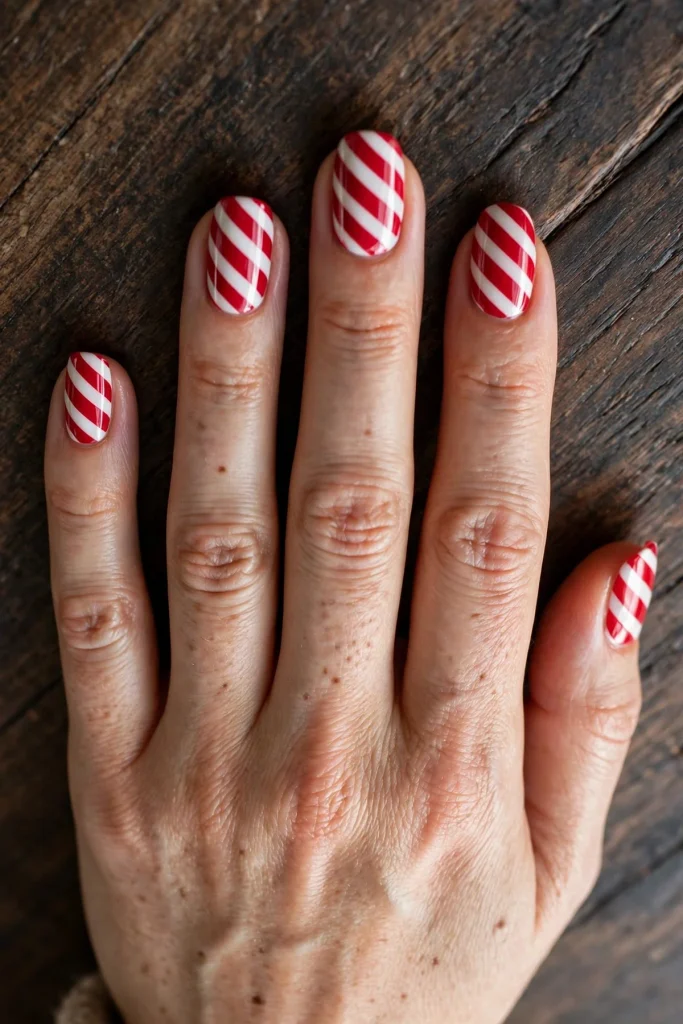
Some patterns never get old, and this is one of them. Paint the whole nail white first, let it dry well, then add diagonal red stripes over the top.
The stripes go on every single nail, corner to corner, so your whole hand reads candy cane the moment someone sees it. No plain nails hiding in the set. Each nail gets three or four stripes, spaced evenly.
Striping tape makes the lines sharp at home. Freehand works too if you use a long, thin brush and turn the finger, not just the brush. Short to medium square nails show the pattern best.
With a glossy top coat, it shines like real candy and lasts seven to nine days, great for casual parties. Do not rush the white base. If it is still tacky, the red will bleed into pink streaks.
6. Christmas Plaid
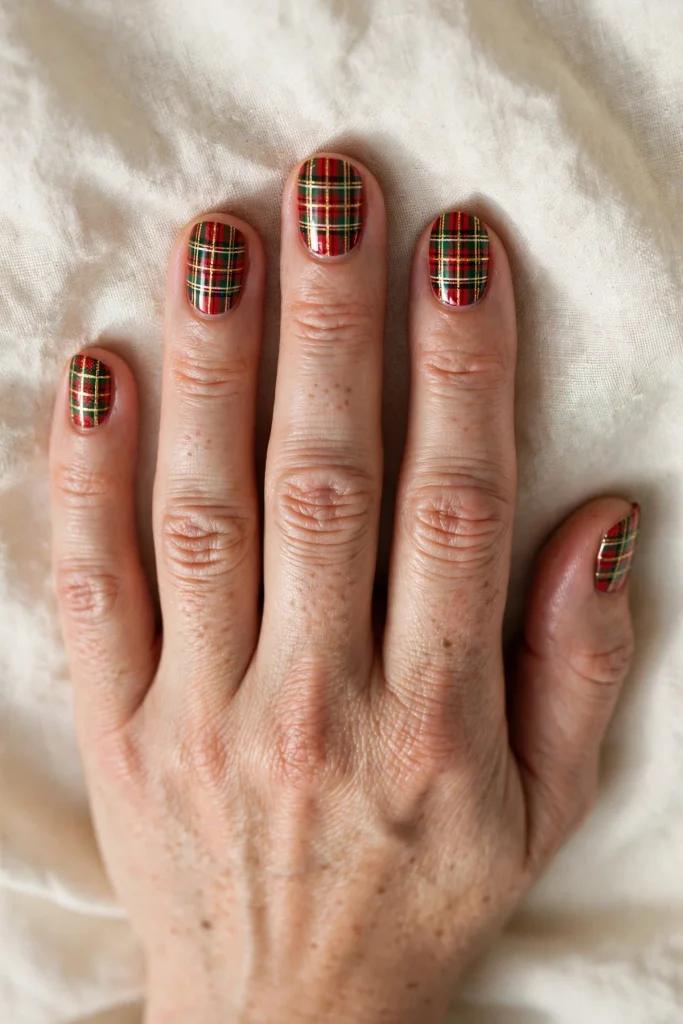
If you own a cozy flannel shirt, you already love this pattern. The base here is a soft beige or light taupe, which keeps the plaid calm and classy.
Thin red and green lines cross over each nail, making the same checked plaid on all nails. Add one fine gold line through the middle of every nail if you want a little glow in candlelight. The design is on the full set, start to finish.
Plaid takes patience. A salon visit is worth it for crisp lines, though striping brushes and a steady table work at home. Almond and oval nails suit it well because the lines follow the length.
Gel plaid easily lasts two weeks, perfect for Christmas market trips. The mistake I see most is using lines that are too thick. Thick lines eat the base color and the plaid looks heavy.
7. Peppermint Swirls
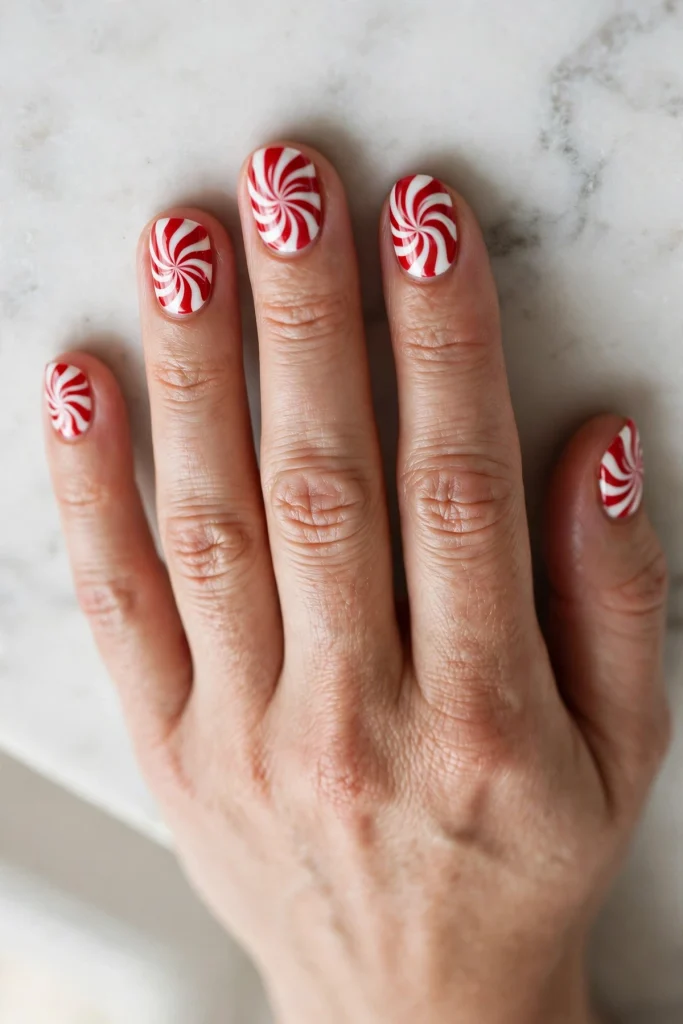
Here is a fun one that still looks neat. Think of those round peppermint candies from a glass jar at your grandma’s house.
On all five nails, a white base gets red swirls that spin out from one corner of each nail. Every nail has its own full swirl, so the peppermint design covers the whole hand, not just one feature nail.
A fine brush and a slow hand do the job. Paint the swirl in one smooth curve, then add two smaller curves beside it. Nail stamping plates with a swirl pattern are a smart shortcut for home.
This looks best on round or oval nails, short to medium. In gel it holds for about two weeks without fading, sweet for family photos. Avoid a matte top coat here. Peppermint needs shine, or the swirl can look flat and chalky.
8. Holly Leaves and Berries
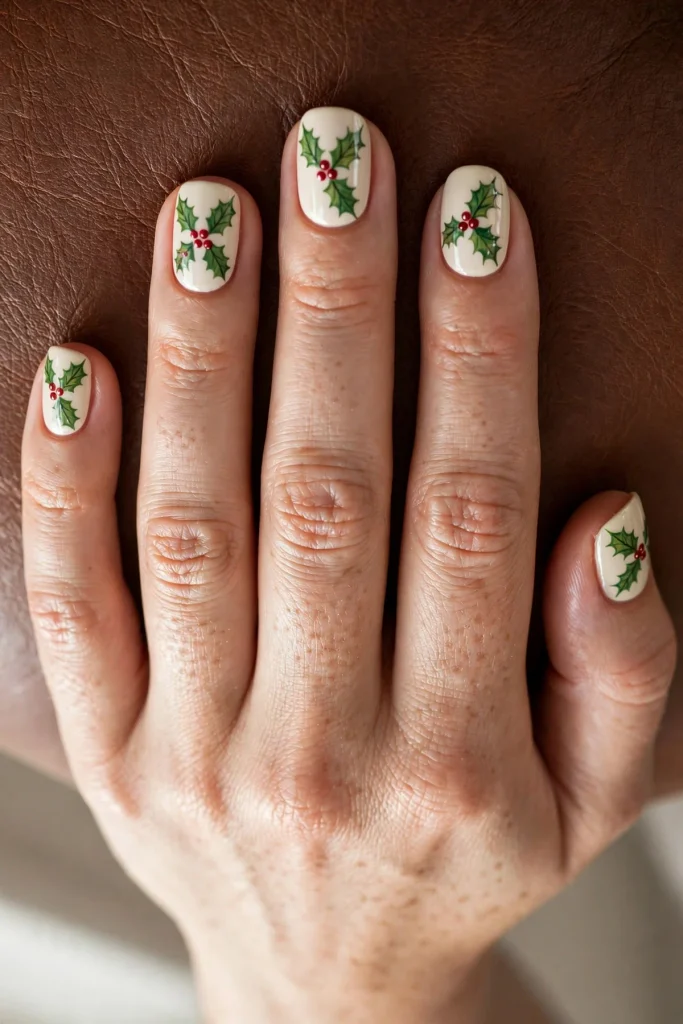
Before you scroll past thinking holly is hard, hear me out. Two small green leaves and three red dots. That is the whole picture, and anyone can learn it in one try.
Paint that little holly sprig on every nail, near the top corner of each one, over a soft nude or pale pink base. All nails carry the leaves and berries, so the green and red show across your whole hand.
A dotting tool makes the berries in seconds. The leaves are just two short, pointed ovals with a fine brush. Short nails are perfect for this because the sprig sits small and tidy.
Count on six to eight days with regular polish and a good top coat, good for church or work. One thing to skip: dark green polish that looks black indoors. Pick a true leaf green.
Little Christmas Pictures, Done Classy
9. Tiny Christmas Trees
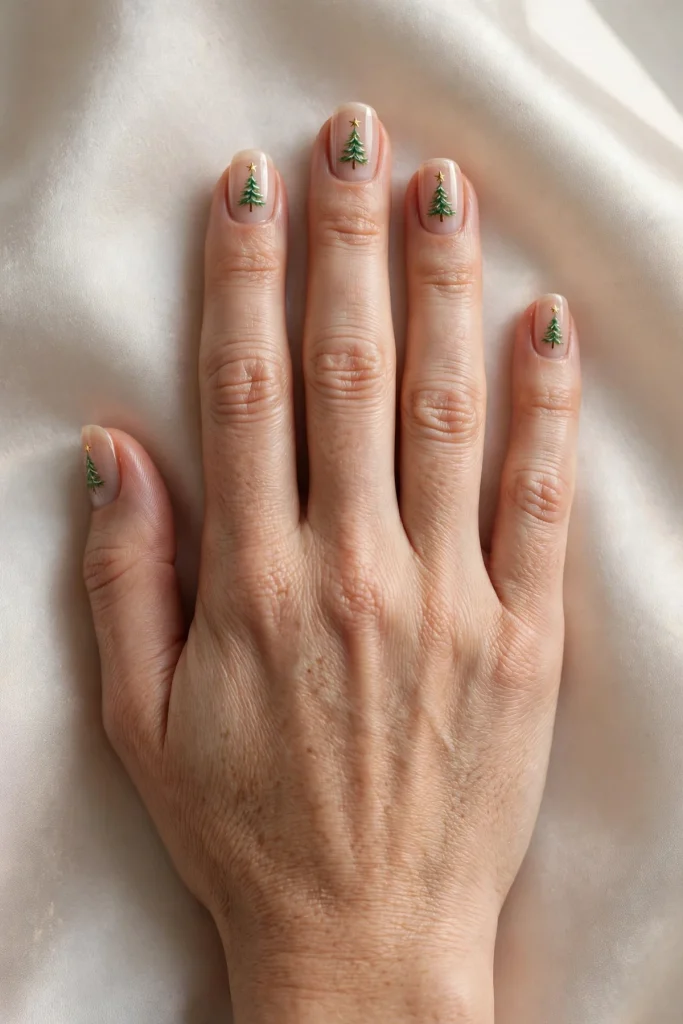
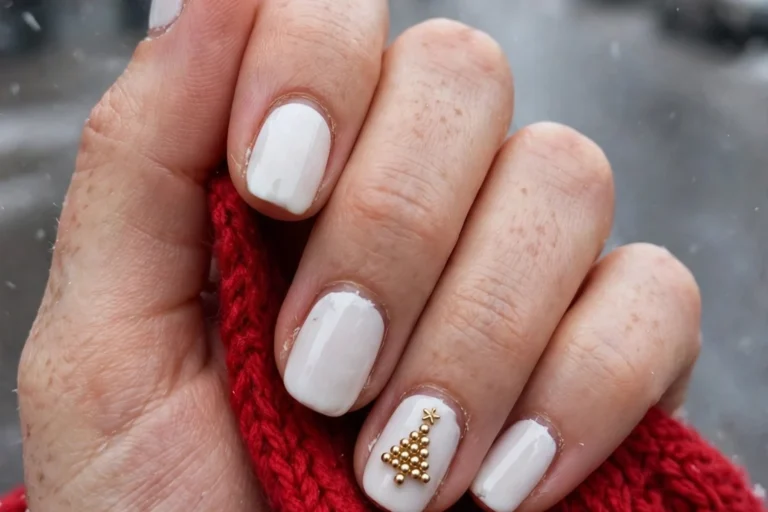
A row of tiny trees on your fingertips sounds bold, but done small, it looks sweet and clean. Start with a pale gold or soft champagne base that glows a little.
A small green triangle tree, with a tiny gold star on top, stands in the center of every nail. The tree design repeats on all nails, thumb included, so your hand looks like a little pine forest in the best way.
Salons use a fine brush for the branches. At home, tree stickers or stamping plates give the same neat shape. Medium almond nails give the tree height, but short nails work if the tree stays small.
Gel keeps the tiny stars bright for up to two weeks, perfect for Christmas Eve. Do not add snow, lights, and gifts on top. One tree per nail is enough. Keep it simple and it stays classy.
10. Reindeer Faces With Gold Antlers
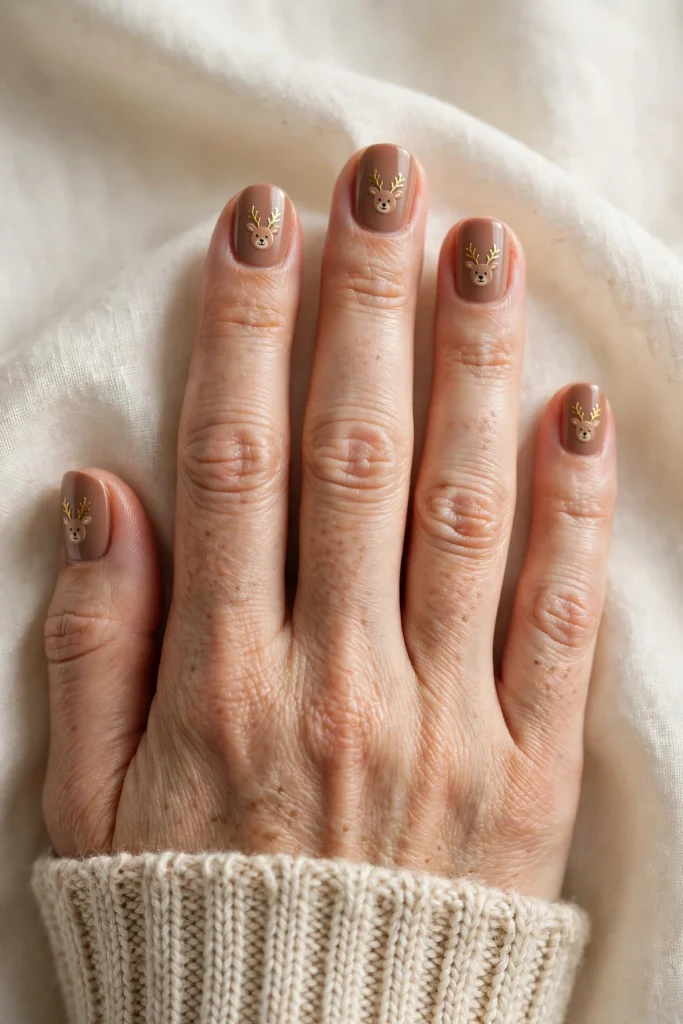
Okay, this is the idea my nieces beg for every year. A sweet little reindeer face, painted in warm brown, with antlers in soft gold.
And yes, the reindeer goes on each and every nail. Every nail has the full face, two gold antlers, tiny black eyes, and a small red nose. All nails match, so the whole set tells the same cute story.
This is salon work for most of us, unless you are very steady with a detail brush. The face sits best on medium oval or almond nails with a nude base behind it.
A gel set lasts ten days to two weeks, even with gift wrapping duty, great for family parties. The mistake to avoid is oversized antlers. If they hit the nail edge, the face looks squished.
11. Gold Ornaments on Burgundy
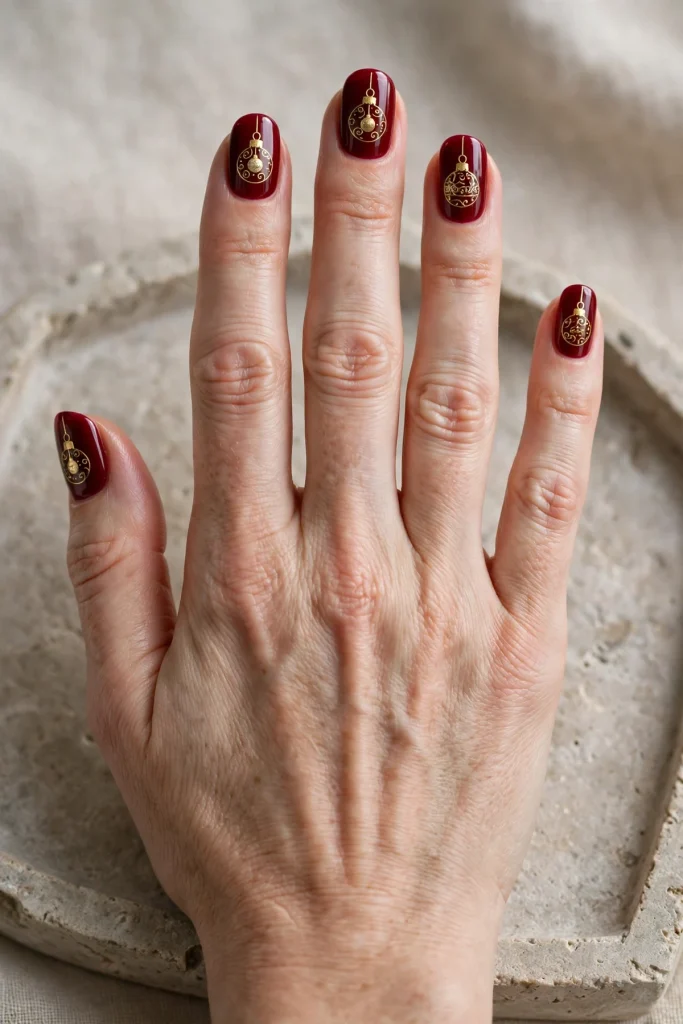
Burgundy and gold together always remind me of a quiet, fancy Christmas dinner. The base is a rich burgundy wine shade, deep but not dark.
Round gold ornaments hang from a thin line at the top of all nails. Each nail gets its own hanging bauble design, with a small highlight dot so the gold looks round and shiny. The ornament art covers every nail in the set.
Metallic gold polish and a dotting tool make the baubles easy at home. Draw the string line first, then dot the ball under it. Medium to long almond nails let the ornament hang nicely.
This is a strong two-week gel look, and it loves velvet dresses and gold earrings for evening events. One warning: cheap gold polish can turn dull fast. Seal it well, and add a fresh top coat after a few days.
12. String Lights
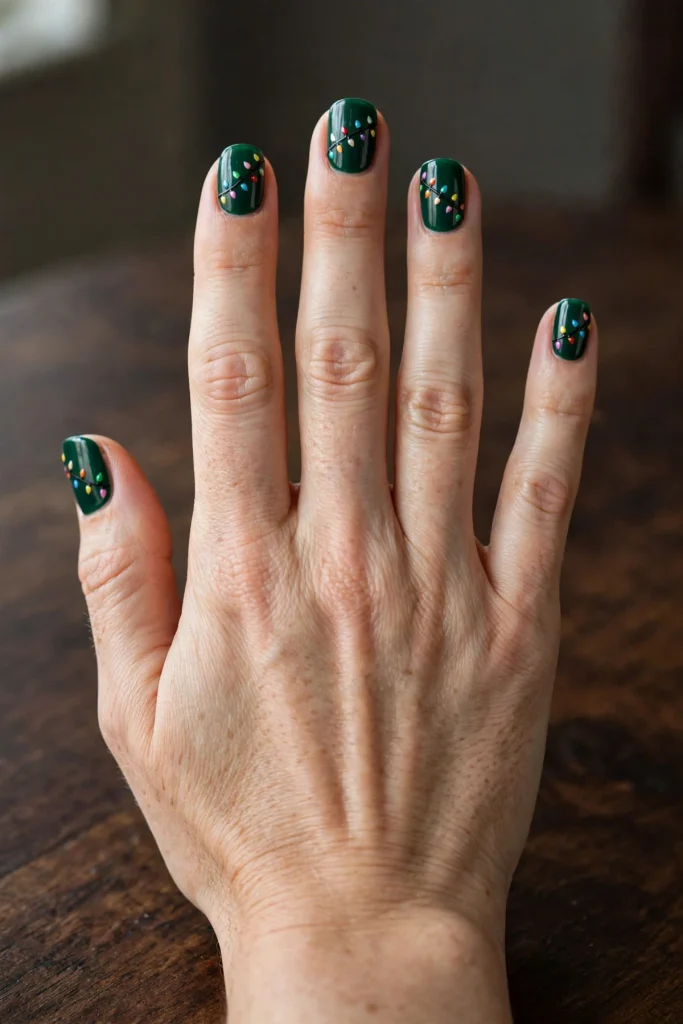
Want the happiest nails in the room? This is the one people notice across a table. The base stays dark, either deep green or soft black, so the lights glow.
A thin black curved line runs across every nail, and tiny bulbs in red, gold, green, and warm white hang along it on each nail. The string light design is painted on all nails, so both hands sparkle like a trimmed tree.
Use a fine liner brush for the wire and the smallest dotting tool you own for the bulbs. It is doable at home with patience, and salons do it fast. Short square nails look adorable with one short string per nail.
Expect about a week in regular polish, fun for sweater parties. Do not use too many bulb colors. Four colors max, or it stops looking classy.
Rich Colors With Christmas Written All Over Them
13. Gingerbread Nails
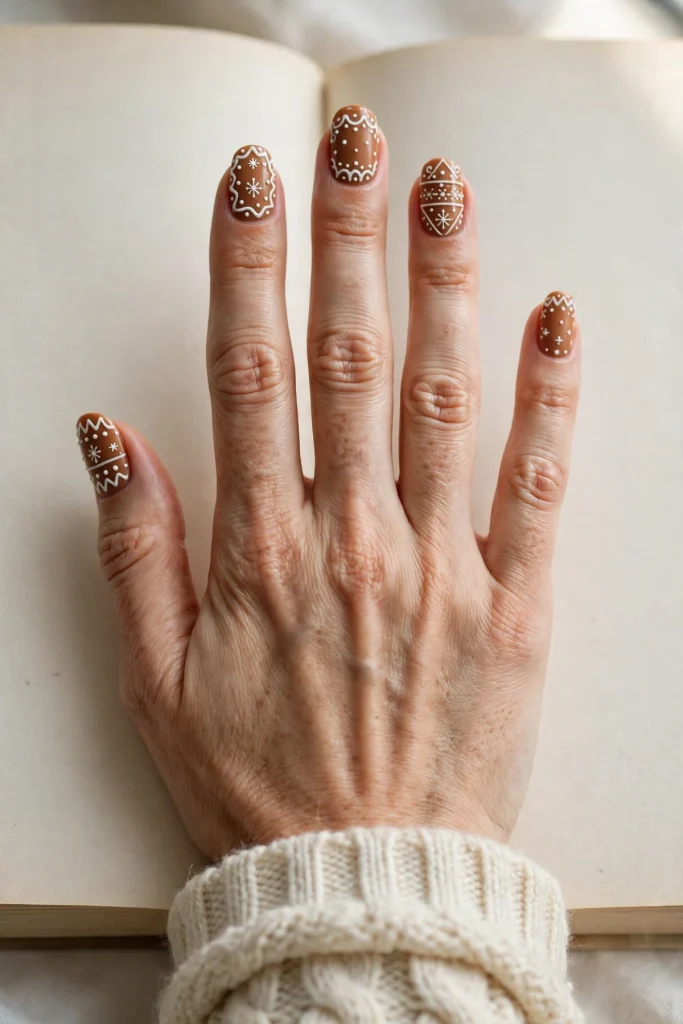
The base here smells like Christmas in my head, even if polish has no scent. It is a warm gingerbread brown, like a fresh cookie right out of the oven.
White icing lines frame every nail, with tiny white dots and a small heart or star piped in the center of each nail. The icing art is on all nails, just like cookies lined up on a tray, each one decorated.
A piping look comes from a fine brush and slightly thick white polish. Go slow around the edges first, then add the center detail. This works on short to medium round nails, and a salon can make the icing look very real.
In gel, it lasts around two weeks, perfect for cookie exchanges. Avoid glossy brown that is too dark. If the base looks like dark chocolate, the white icing will not read gingerbread.
14. Gold Stars on Emerald
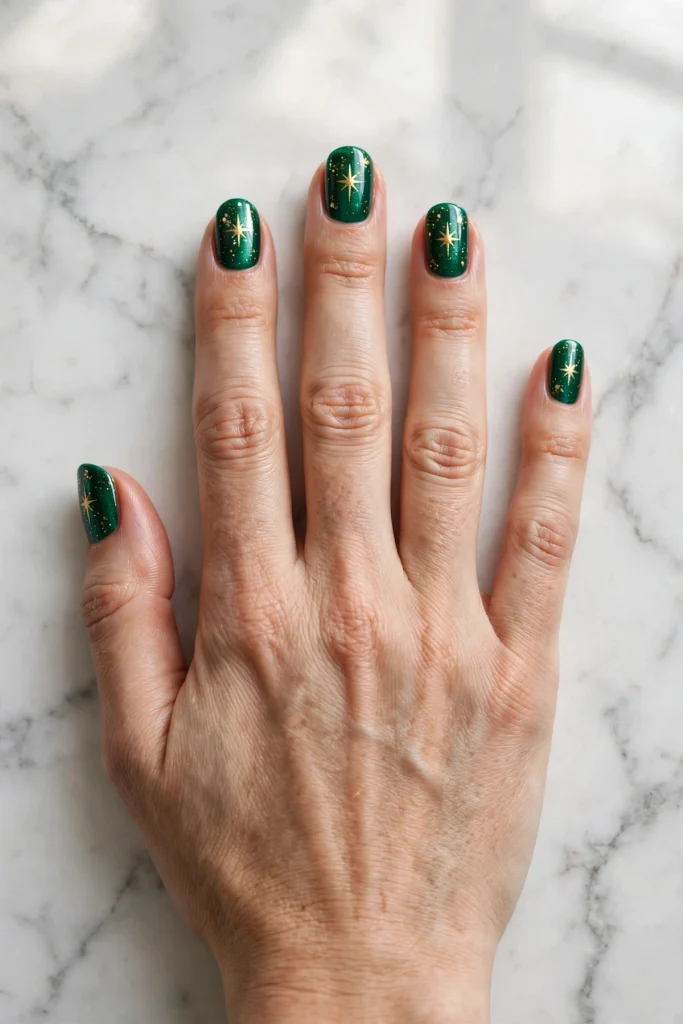
Emerald green already feels rich, but plain green is not enough for this list, right? The stars are what make it Christmas.
Small gold stars are scattered across each nail, big one near the center, tiny ones around it, on every nail in the set. All nails carry the star design over the emerald base, so the whole hand glitters softly when it moves.
Star stickers are the easy home route, and they look sharp if you press the edges down well. Hand-painted stars with a fine brush suit longer almond nails and salon visits.
Gel gives you a solid two weeks of shine, great for New Year’s Eve too. The mistake I made once was using chunky glitter stars. They caught on my sweater all night. Flat stars only, friend.
15. Santa Suit Nails
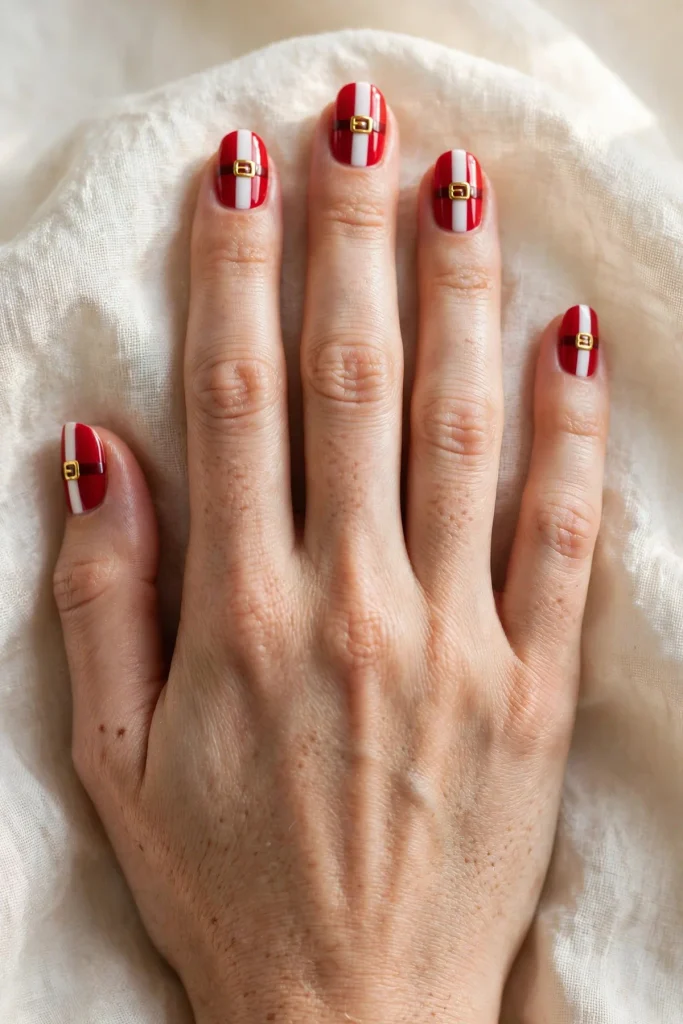
Let me paint you the picture. A bright, happy red base. Down the middle of the nail, a white fluffy stripe. Across the center, a black belt with a tiny gold buckle.
That full Santa suit design goes on every single nail. Each nail is its own little suit, belt and all, so all nails match and nobody can miss the theme from across the room.
Tape helps keep the belt line straight at home. Salons freehand it in minutes. The design needs a bit of length, so medium square or almond nails show the buckle best.
Plan on seven to ten days with gel, less if you are hard on your hands, a hit at office parties. Do not make the white stripe too wide. If it takes over the nail, the belt gets lost and the suit falls apart.
16. Christmas Wreaths
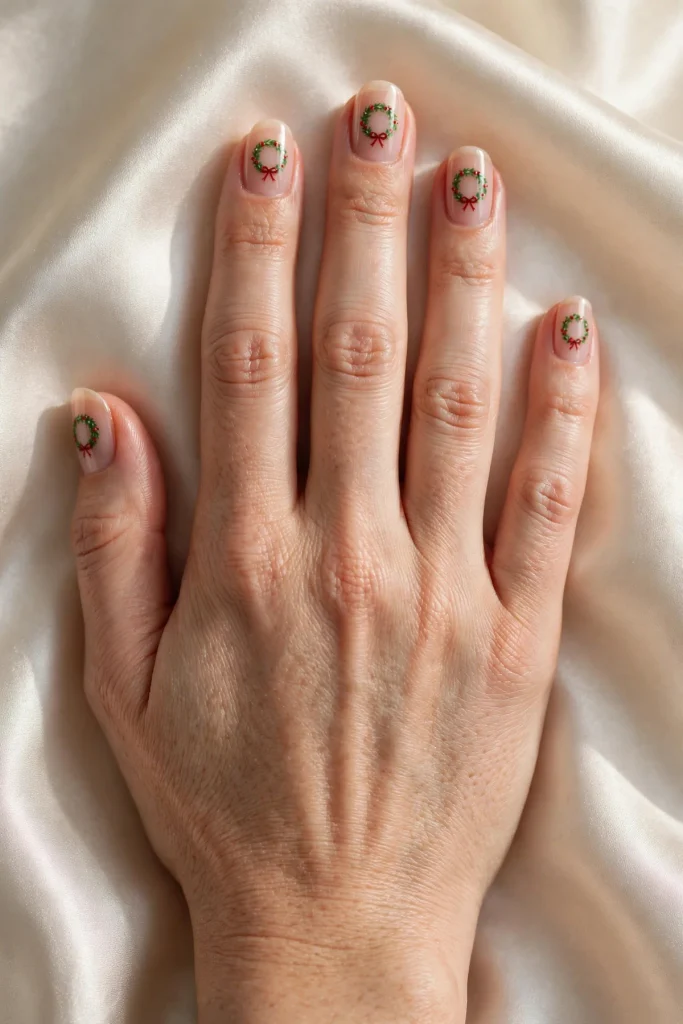
We end with the one I wore on Christmas Day last year, and my mom asked me to do hers the same night. The base is a soft, creamy white that feels calm and clean.
A green wreath circle, with tiny red berries and the smallest gold bow, sits in the center of every nail. The wreath design repeats on all nails, so each fingertip looks like a little door dressed for the holiday.
A dotting tool dragged in a small circle makes the wreath leaves. Berries are three tiny dots. A salon does the bow best, but a simple gold dot works at home too. Medium oval nails frame the circle well.
With gel, this easily lasts through Christmas and into the week after, lovely for Christmas morning. Avoid placing the wreath too low. Center it, or the nail looks empty on top.
Questions Readers Keep Asking Me
Do I really need the design on every nail, or can I do one accent nail?
But the whole point of this list is a full festive set. One accent nail with five plain ones often looks half done in photos. When the art is on every nail, even a simple design looks planned, rich, and truly Christmas.
Can I do these designs at home, or do I need a salon?
Most of them, yes, you can do at home. Snowfall dots, candy cane stripes with tape, holly berries, and star stickers are all beginner friendly with a dotting tool and a fine brush. Reindeer faces and tiny wreath bows are harder, so those are worth a salon visit. A good rule: if the design has a face, book the salon. If it has dots and lines, try it at your table first.
How long will Christmas nail art last?
With regular polish, plan on five to eight days before the tips start to wear. With gel, most of these designs last ten days to two full weeks. Wear gloves for cleaning, add a clear top coat every two or three days, and your art will stay bright right through the holiday.
What nail shape works best for these ideas?
Short nails are not a problem at all. Snowfall, holly, plaid, and peppermint swirls all sit well on short round or square nails. Designs that need height, like tiny trees, Santa hat tips, and the Santa suit belt, look better on medium almond or oval nails.
When should I get my Christmas nails done?
If you are booking a salon, aim for about five to seven days before Christmas. Your nails will look fresh for parties, photos, and Christmas morning, without weeks of grow-out showing. Put on a Christmas movie, take your time, and enjoy the process a little.
Final Thoughts
Friend, Christmas shows up in the small things. A cookie on a plate. A song from the kitchen. And yes, tiny snowflakes and gold stars moving across your hands while you pass the dinner rolls.
You do not need all sixteen ideas. Just pick the one that made you smile and try it this week, with the design on every nail, full and festive. Start with snowfall dots if you are new, or book the reindeer if you want a treat.
If this list helped you, please save this post so you can find it at the salon, and follow me on Pinterest for more nail ideas through the season.