16 Spooky Halloween Nail Ideas That Are Cute, Creepy, and Easy to Copy
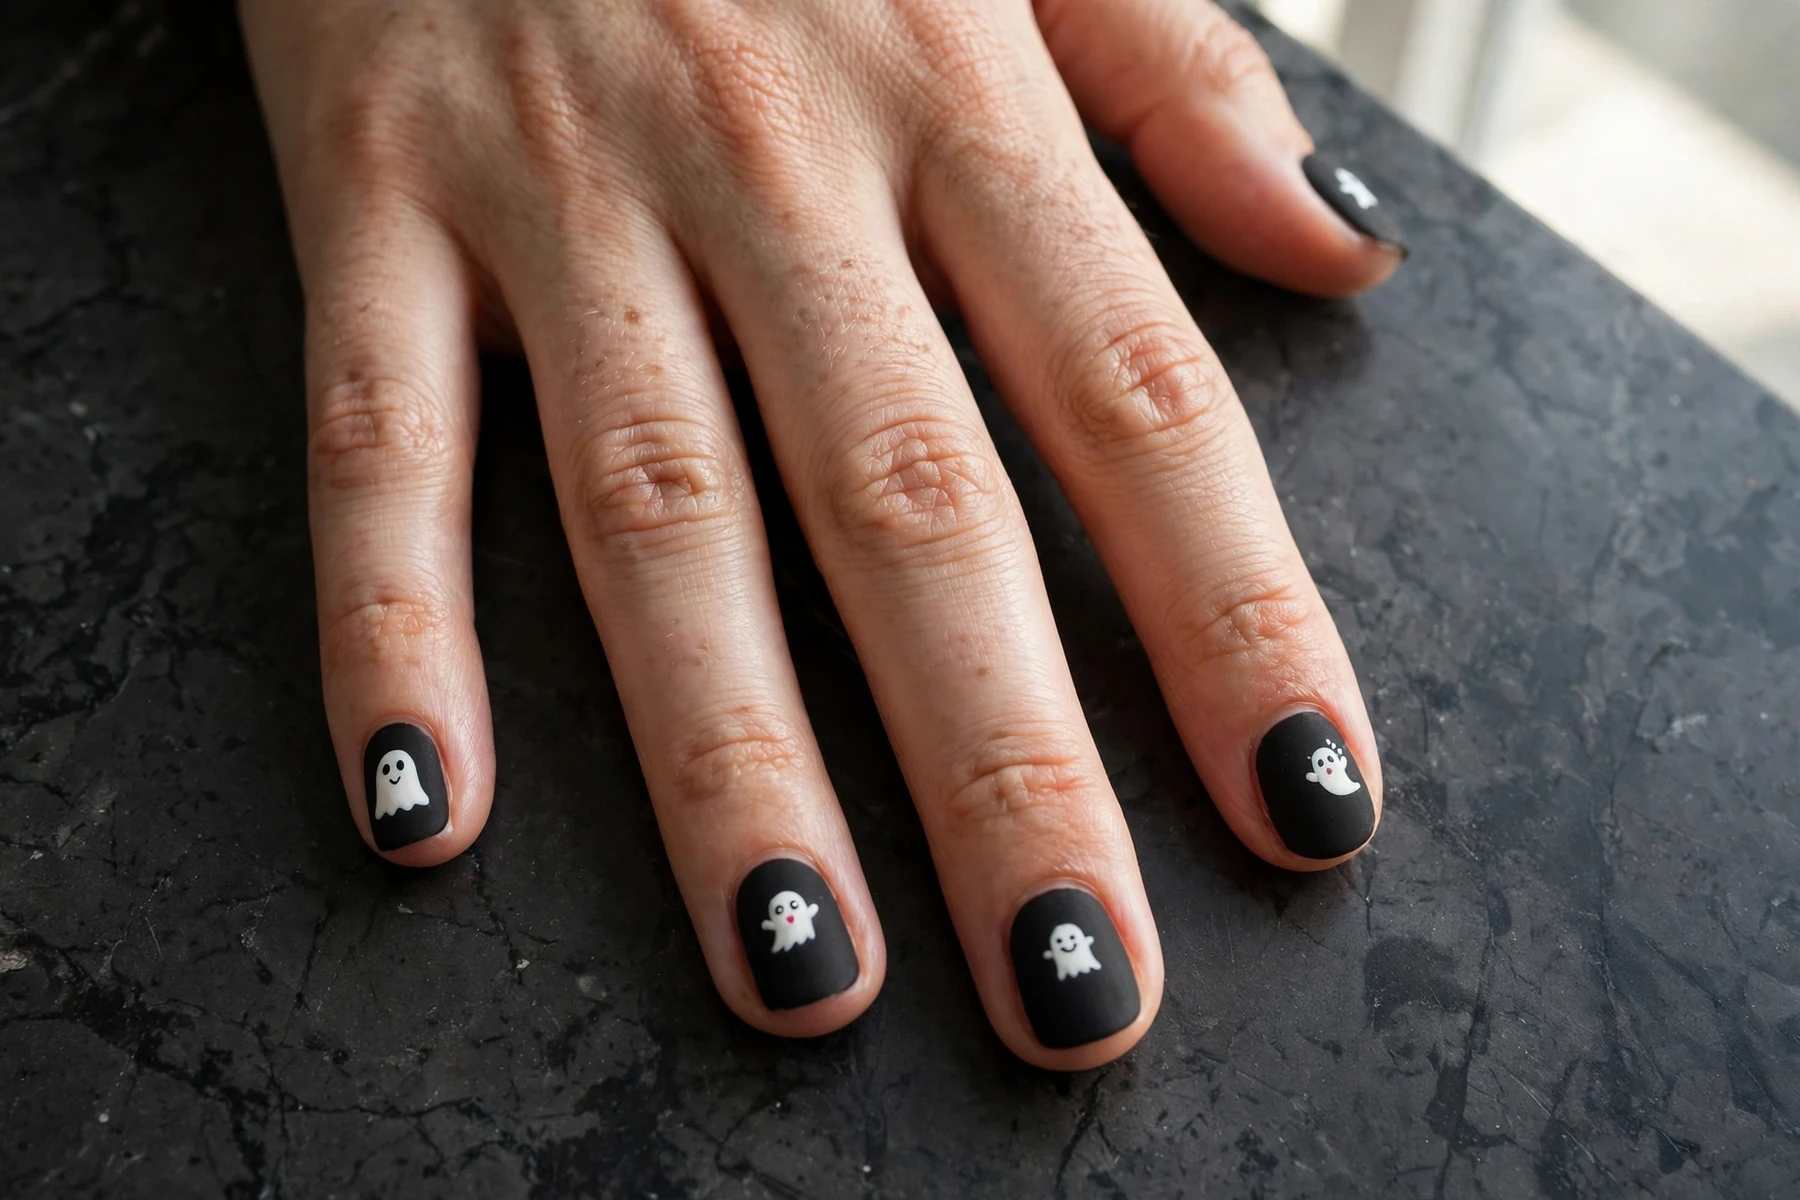
Last October, I was in the checkout line holding a bag of candy I fully intended to hand out to trick-or-treaters, and the cashier grabbed my wrist for a second and said, “Okay, the tiny ghosts are adorable.” That set of nails got me more compliments than any expensive manicure I have ever paid for, and it cost me one black polish, one white polish, and a toothpick.
That is the sweet spot I chase every Halloween. Spooky, yes. Fun to look at up close, yes. But still wearable to work, to dinner, and to the school run without feeling like a costume. Every idea below is one I would actually wear, with the shapes, finishes, and little tricks that make each one work in real life.
One honest note before we start: you do not need long nails for any of this. Most of these designs look even better on short or medium nails, because the art stays neat and the whole hand looks polished instead of costume-party wild.
Moody Blacks and Midnight Shades
These are the sets I reach for when I want Halloween energy without a single drop of orange. They read elegant from across the room and spooky only when someone looks closer, which is my favorite kind of surprise.
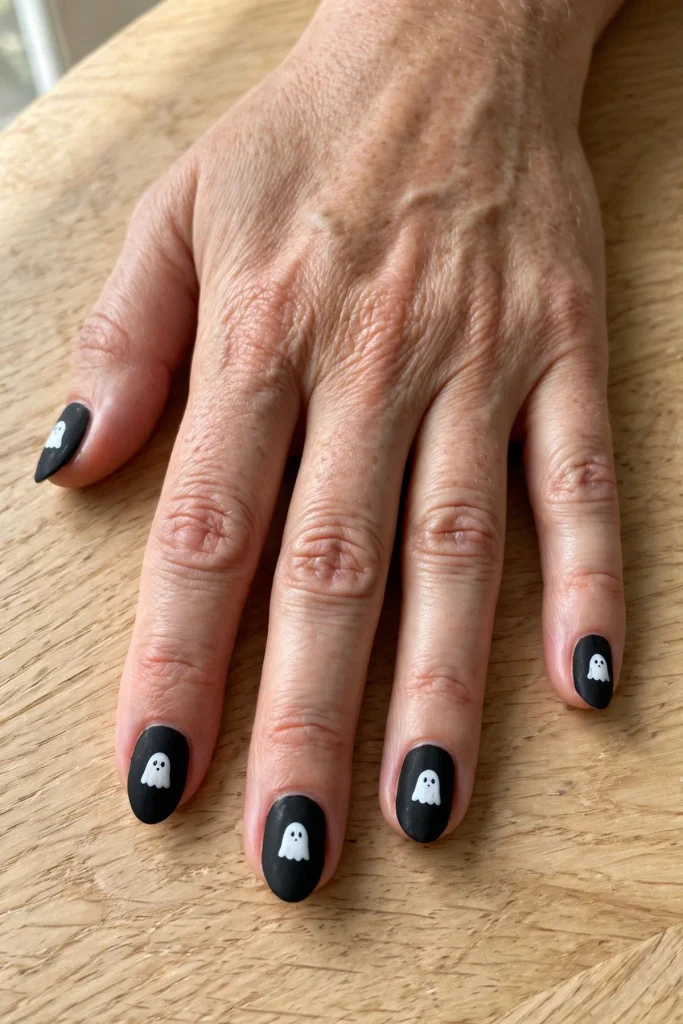
1. Tiny Ghosts on Matte Black
Start with two coats of a true black polish and finish with a matte top coat. The matte finish is the whole trick here, because it makes the little white ghosts pop like chalk on a board. Each ghost is just a white oval with a wavy bottom edge and two tiny black dots for eyes. A dotting tool works, but the flat end of a bobby pin honestly works just as well.
I like this on short almond or squoval nails, with a ghost on every nail in a slightly different spot so it looks playful instead of stamped. The mistake to avoid is making the ghosts too big. Small ghosts look chic. Big ghosts look like stickers from a kids’ party pack.
Wear time is great, too. Matte black hides tiny chips better than glossy black, and a quick extra layer of matte top coat on day four brings the whole set back to life.
2. Spiderweb Accent Nails
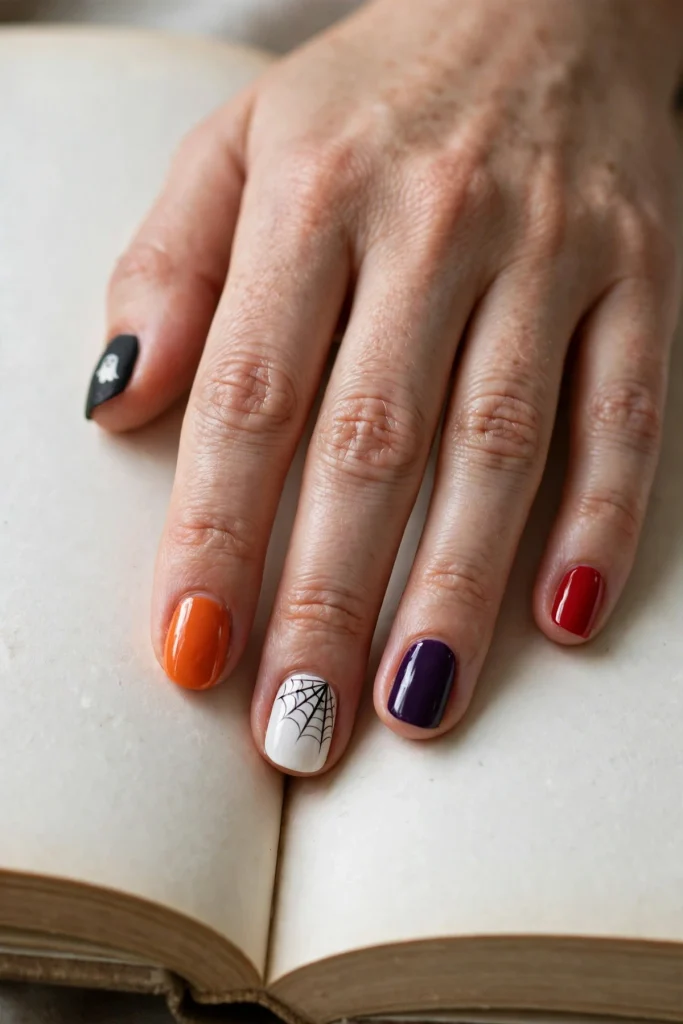
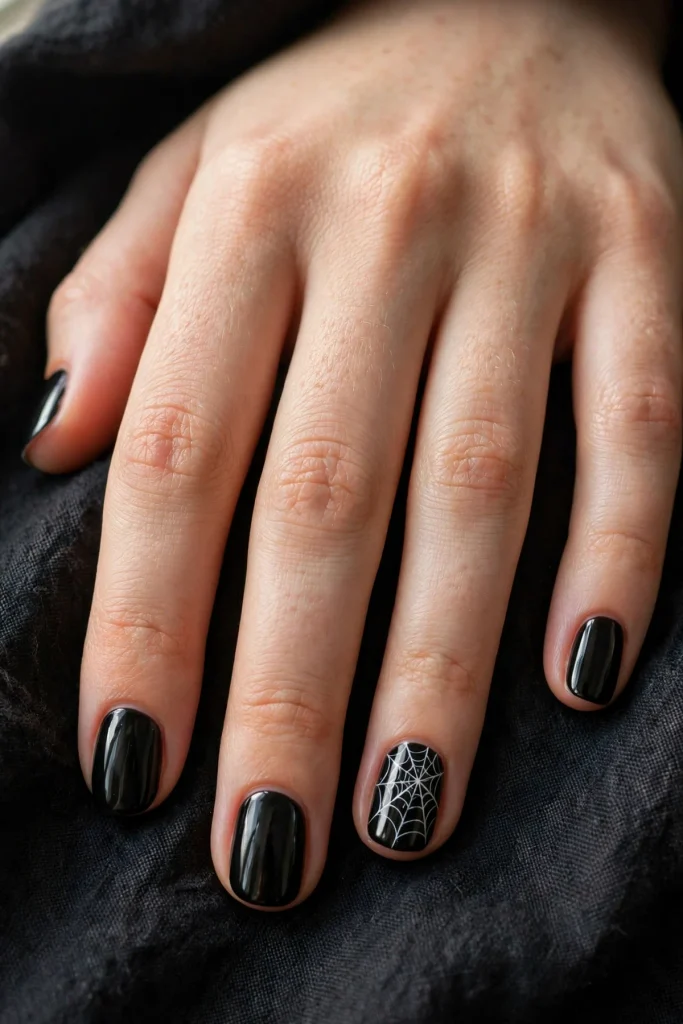
This is the one to pick when you want people to ask, “Wait, how did they do that?” Paint four nails a deep glossy black and keep one accent nail, usually the ring finger, for the web. On the accent nail, draw thin white lines out from one corner, then connect them with soft little curves. Thin lines are key. A web drawn with a shaky thick brush turns into a blob fast.
If your hands are not steady, ask your nail tech for the web on a clear or smoky grey base instead of black. The contrast is softer, it suits shorter nails, and small wobbles are far less visible. At home, a striping brush from any craft store beats a polish brush every single time.
Pair it with silver rings if you like jewelry. The cool tones sit so well together, and the whole hand ends up looking styled instead of random.
3. Midnight Purple Ombre with Little Moons
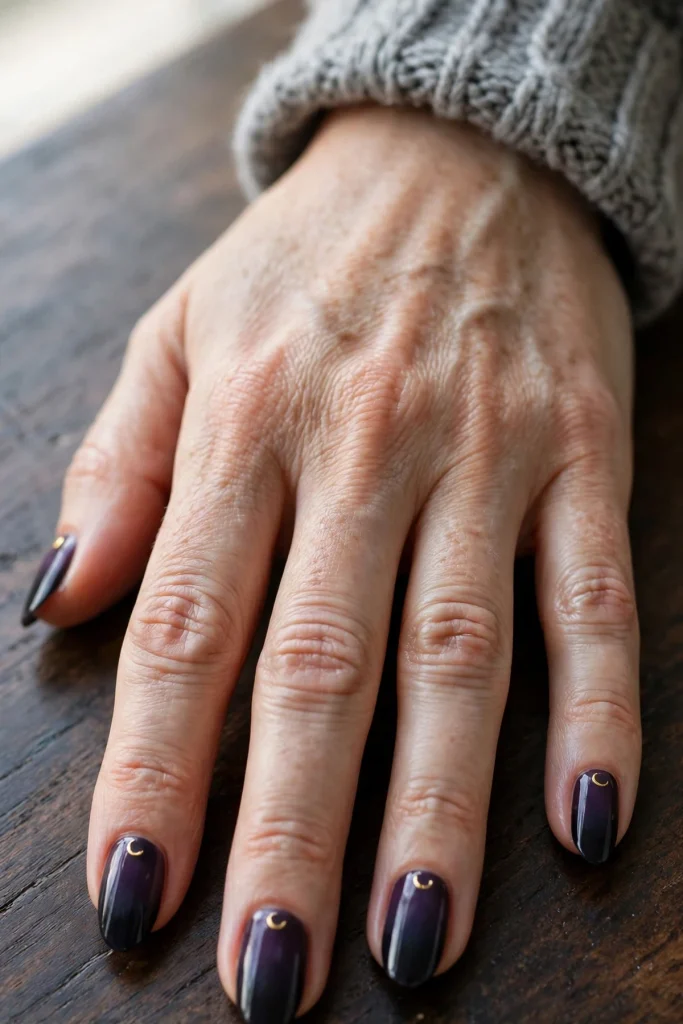
Deep purple fading into black at the tips is pure October-night sky, and it flatters every skin tone I have ever seen it on. The blend is done with a makeup sponge: paint stripes of purple and black on the sponge, dab, repeat twice, then clean the skin around the nail with a small brush dipped in remover.
Once the ombre is dry, add one tiny gold or silver crescent moon near the cuticle of two or three nails. Keep the rest plain. That restraint is what makes it look expensive. A crescent moon decal works if your freehand is not there yet, and nobody will ever know.
This design loves medium almond nails and a glossy top coat, because gloss makes the color fade look deep and glassy. It is also a kind one to grow out, since the dark cuticle area hides new growth for an extra few days.
4. Gravestone Grey with a Velvet Finish
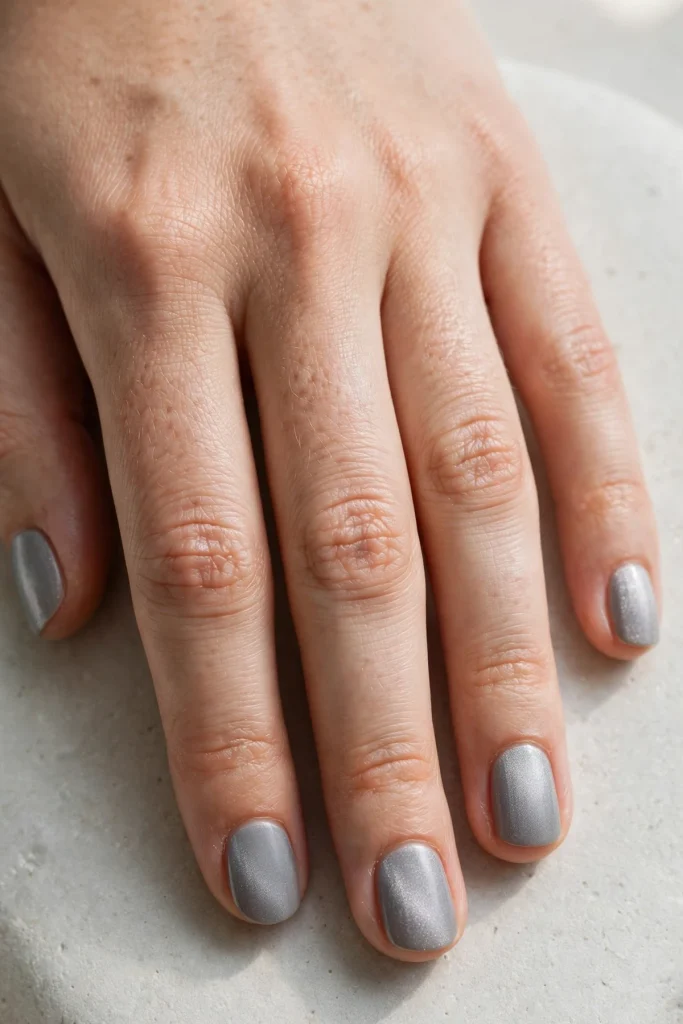
Grey is the most underrated Halloween color. A stone grey set with a velvet (magnetic cat-eye) finish catches the light in soft waves, a bit like fog moving. At the salon, ask for grey cat-eye gel and have the tech hold the magnet so the shimmer runs diagonally. Diagonal shimmer looks like mist. Straight across looks like a stripe, and stripes are not the goal here.
At home, regular grey polish with a fine silver shimmer top coat gets you close. One coat of shimmer, not two, or the grey turns frosty and dated.
I wear this shape short and rounded for real life. It goes with every coat I own, it never clashes with an outfit, and it still gives a quiet little nod to the season. If you work somewhere formal, this is your Halloween nail.
The Cute-Spooky Classics Everybody Recognizes
Now for the cheerful side of the season. These are brighter, sweeter, and very Pinterest-friendly, the kind of sets that get saved and shared because anyone can picture them on their own hands.
5. Candy Corn Fade
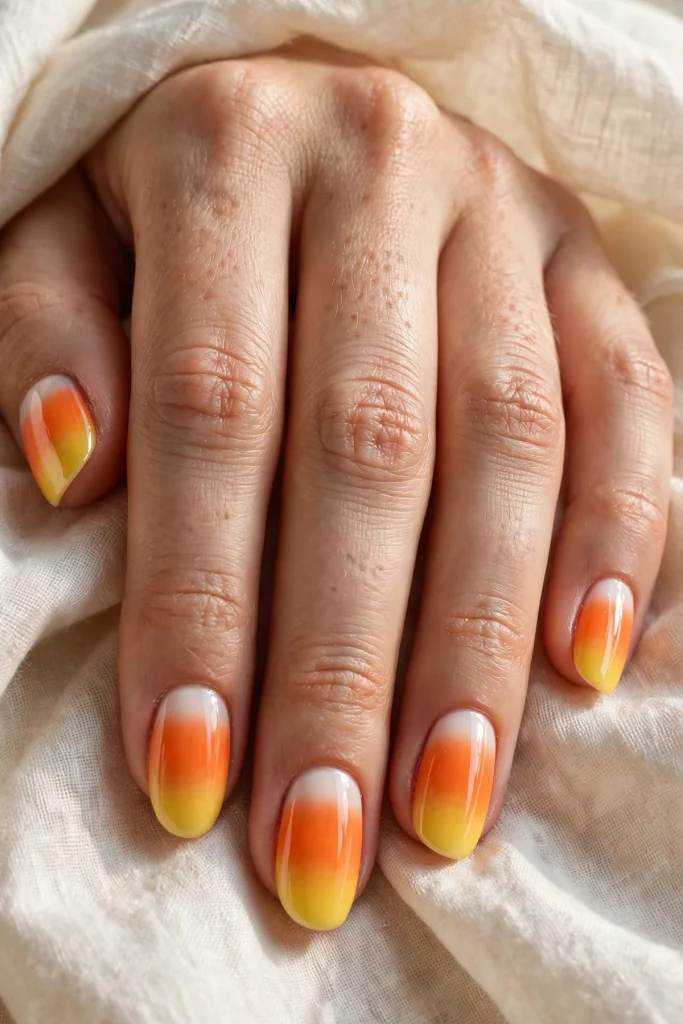
White at the cuticle, orange in the middle, yellow at the tip: the candy corn fade is a Halloween rite of passage. The sponge method from the purple ombre works here too, but order matters. Lay down the white first and let it dry fully, because orange dragged over wet white turns into a sad peach smear.
My honest take: this design looks best on medium nails with a soft square or almond shape, where there is enough room for all three bands to show. On very short nails, do the fade on four nails and paint the thumb solid orange. It still reads candy corn, just cleaner.
Glossy top coat is non-negotiable. Candy corn is shiny in real life, and the gloss is what sells the whole idea.
6. Jack-o’-Lantern Smiles on Orange
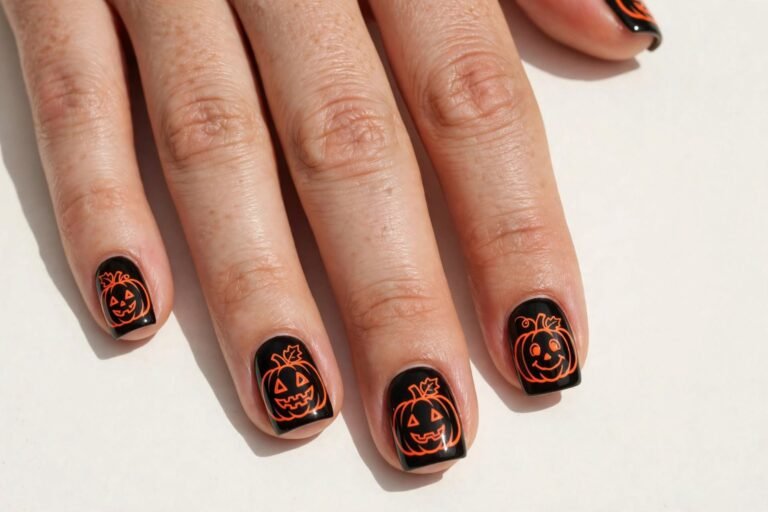
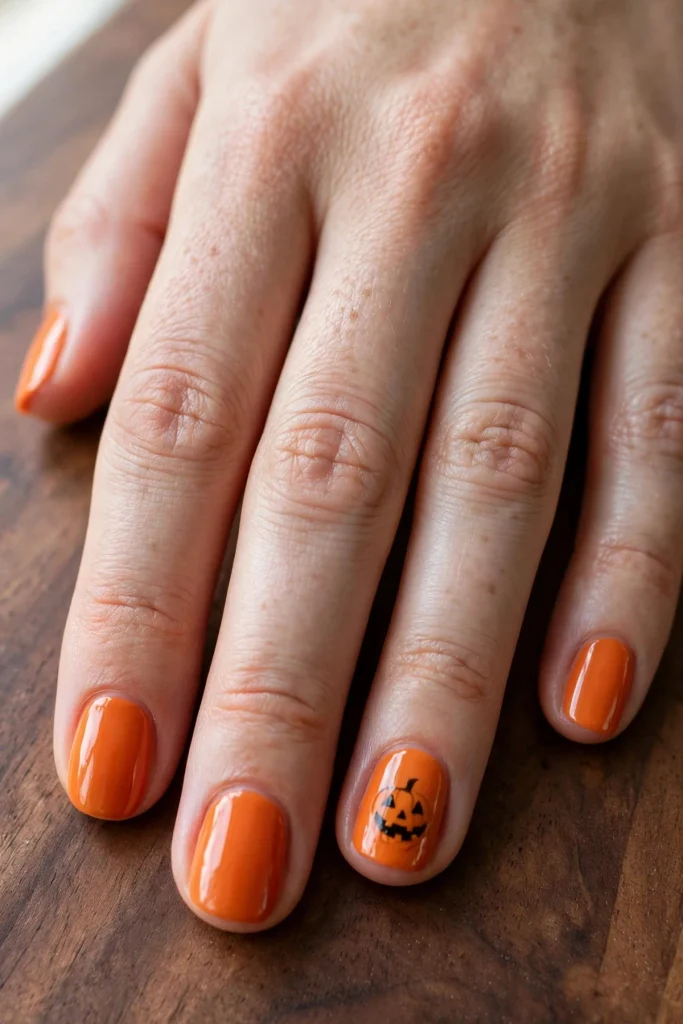
A rich pumpkin orange base with one black smiling face per hand is all you need. Triangles for eyes, a wide grin, done. Trying to paint a face on every nail is where this design usually falls apart, so take it from me: one face per hand, on the ring finger or thumb, and plain orange everywhere else.
Use a detail brush and slightly thinned black polish so the lines stay crisp. Thick polish blobs at the edges of the smile, and suddenly your pumpkin looks worried instead of cheerful.
This is a brilliant pick if your nails are short, because the face reads clearly at any length. It is also the set kids point at in the grocery store, which never stops being fun.
7. Pumpkin Spice Chrome
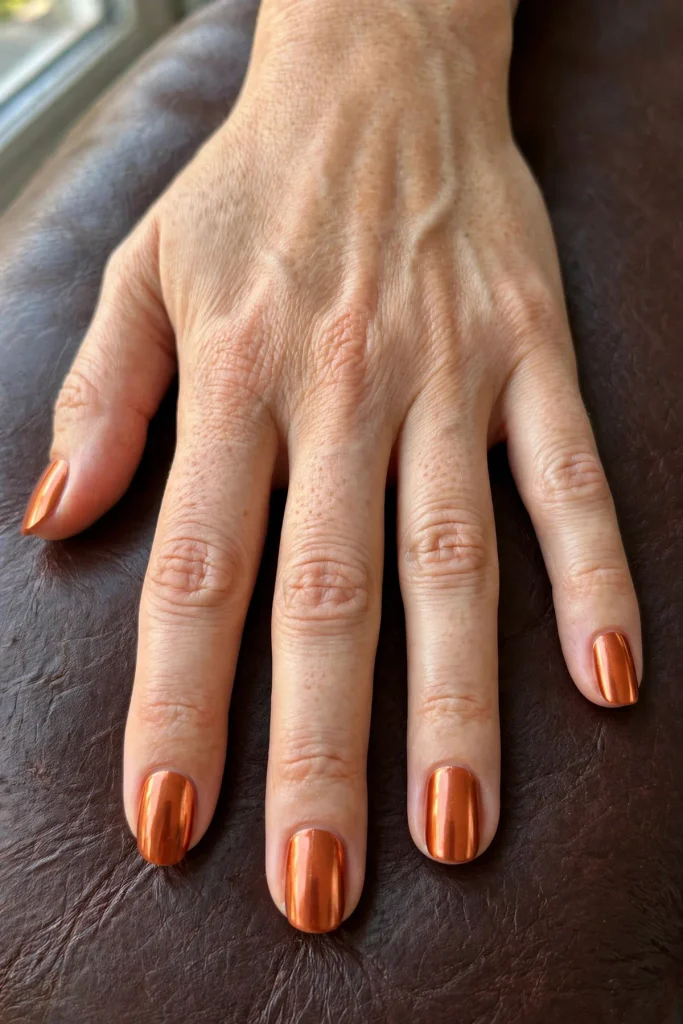
If nail art is not your thing, this one is yours. A warm burnt-orange or copper base with chrome powder rubbed over the top gives that glazed, lit-from-within look that photographs beautifully. At the salon it is a five-minute add-on. At home, chrome powder kits work over gel polish, and a foam applicator gives the smoothest rub.
The shade matters more than the technique. Go burnt orange, rust, or copper, not bright traffic-cone orange. The deeper tone is what keeps it in “fall outfit” territory instead of “party decoration.”
I love this on coffin or almond nails for evenings out, but a short chrome set with a cozy sweater is a whole mood on its own. One warning: chrome shows every ridge, so use a ridge-filling base coat first.
8. Black Cat Silhouettes
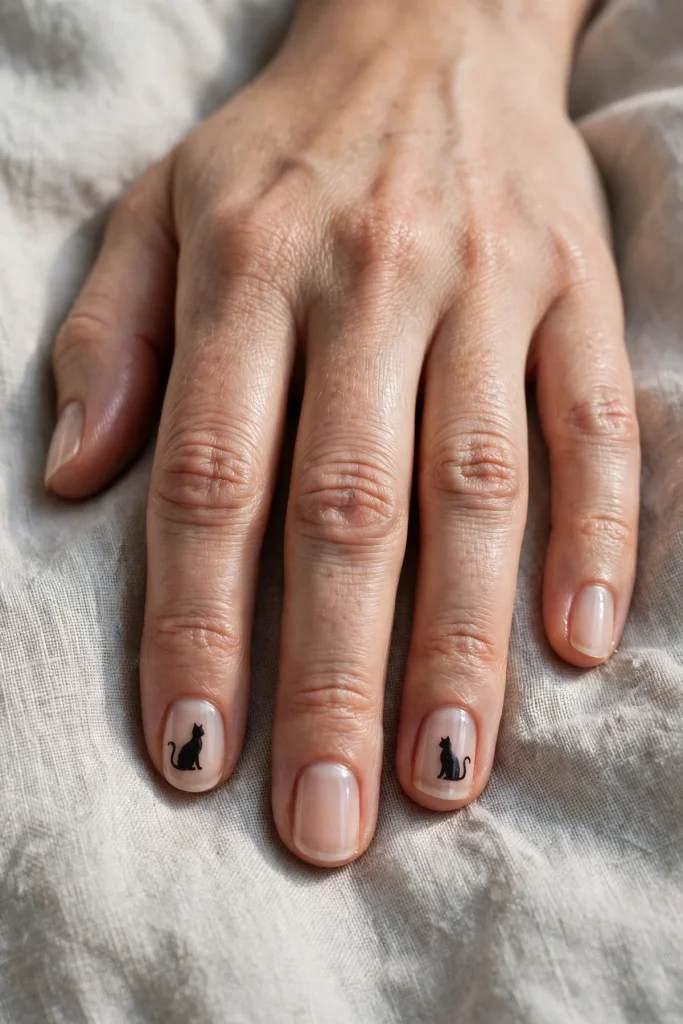
A soft nude or pale grey base, and on two nails, a simple black cat: a round head, two triangle ears, and a curved tail wrapping along the side of the nail. The sitting-cat shape is the easiest animal silhouette in nail art, because it is basically two circles and a swoop.
Decals are a completely fair shortcut here, and good ones are under five dollars a sheet. Seal them with two layers of top coat, paying attention to the edges, so they do not lift by day three.
Keep the base sheer and clean rather than busy. The charm of this design is the quiet contrast, like a cat slipping across a wall at dusk. It suits short nails, office dress codes, and anyone who wants Halloween in a whisper instead of a shout.
A Little Bit of Gore, Kept Pretty
This group leans darker and bolder. The trick with all four is a clean, fresh base. Gore on a neat manicure looks like art. Gore on a chipped, messy manicure just looks like a kitchen accident.
9. Blood Drip French Tips
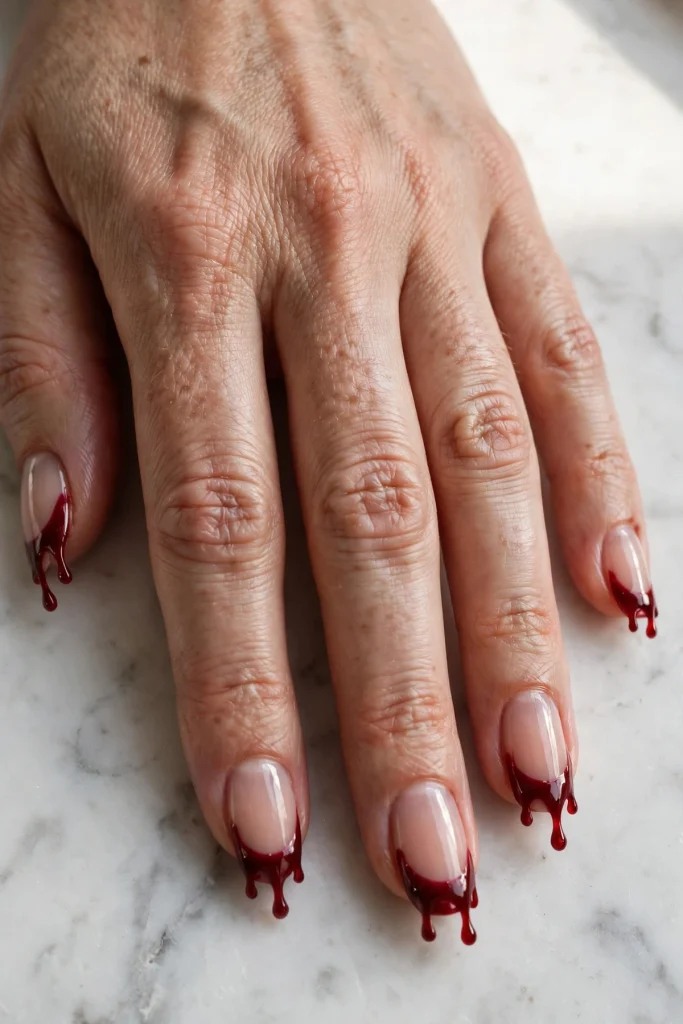
Instead of the usual white French tip, the edge of the nail drips red, like a very glamorous vampire just finished lunch. Start with a sheer pink or nude base so the nail looks healthy, then paint the red tip with uneven drips running back toward the cuticle. Uneven is the point. Perfectly matching drips look printed and fake.
A dotting tool pulled downward makes each drip in one move. Practice on paper first; after three tries your hand figures it out.
Choose your red with care. A deep blue-toned red reads “stage blood” in the right way, while bright orange-red reads “ketchup,” and there is no saving ketchup nails. This design gets the strongest reactions of any on this list, in the best way.
10. Vampire Fang Accents
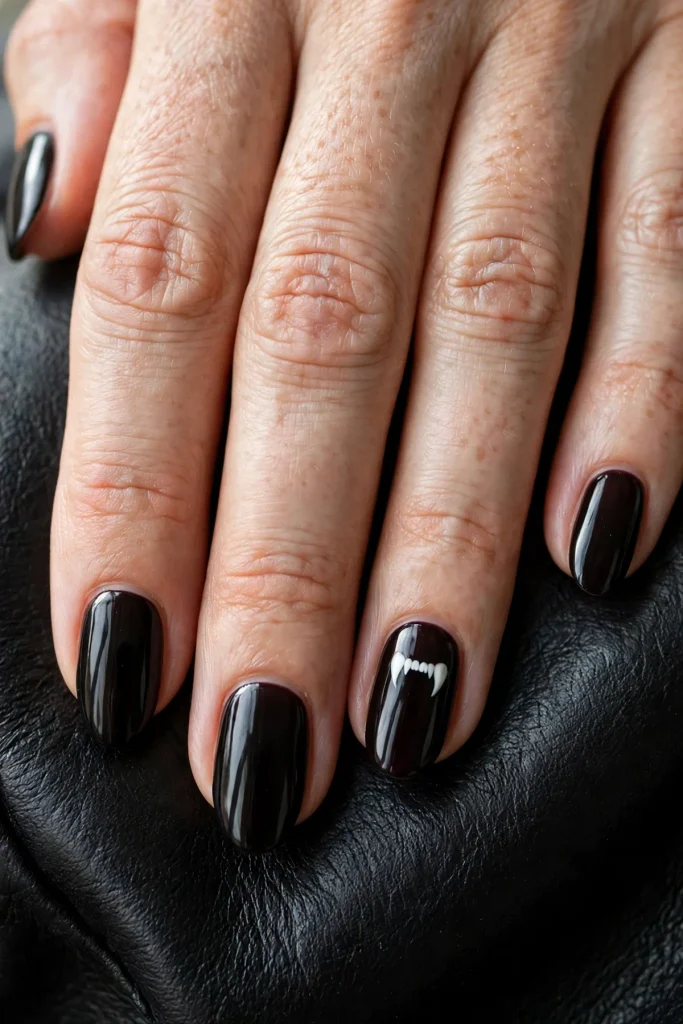
Mostly this set is a dark oxblood or black cherry manicure, rich and glossy. Then one nail carries two white fangs pointing down from the cuticle, with the tiniest red dot at the tip of one fang. It is a small detail, and small details are what make people lean in for a closer look.
Fangs are just two long triangles, so this is friendlier for beginners than it looks. Paint them over a fully dry base and outline nothing. Outlines make fangs look cartoonish.
I wear this with almond nails at a medium length, because the pointed shape echoes the fangs in a really satisfying way. Short nails can do it too; just make the fangs a touch smaller so they do not crowd the nail.
11. Poison Apple Red Chrome
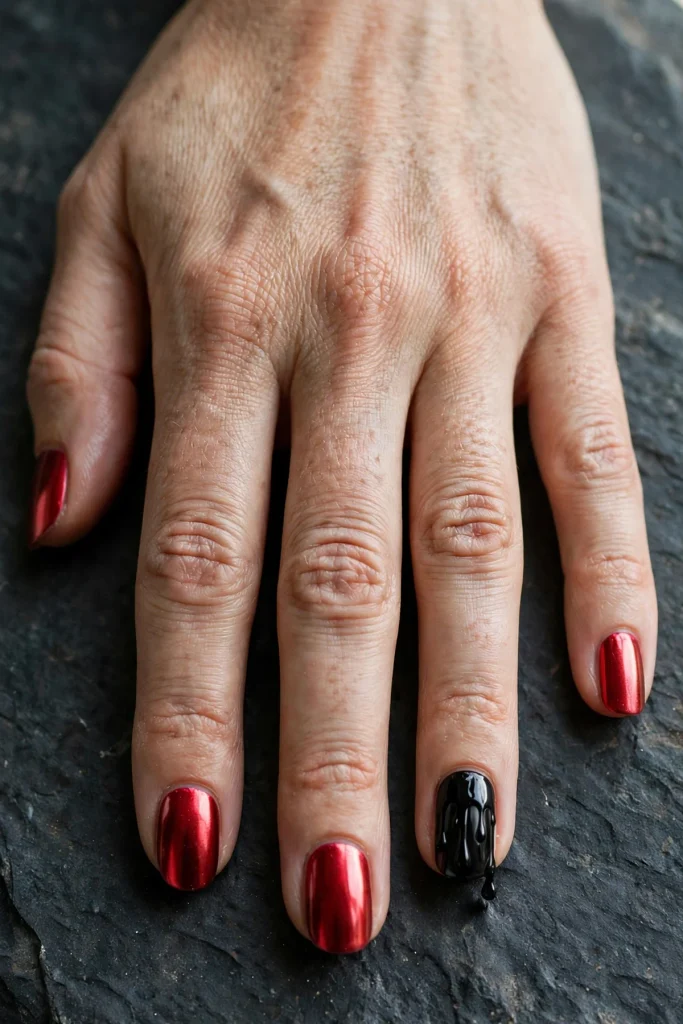
Snow White’s apple, but make it fashion. A juicy red chrome set, mirror-shiny, with one black accent nail carrying a slow black drip from the cuticle. Red chrome is easier at the salon, where they will layer red jelly polish over silver chrome for that candied depth. That jelly-over-chrome order is the secret, so ask for it by name.
At home, a metallic red polish with a glassy top coat lands close enough that nobody will quiz you.
This is my pick for a Halloween party where the dress code is “costume optional.” The nails carry the whole theme, your outfit can stay simple, and the shine does all the talking. Keep the length neat; mirror finishes show ragged edges more than cremes do.
12. Eyeball Nails That Follow You Around the Room
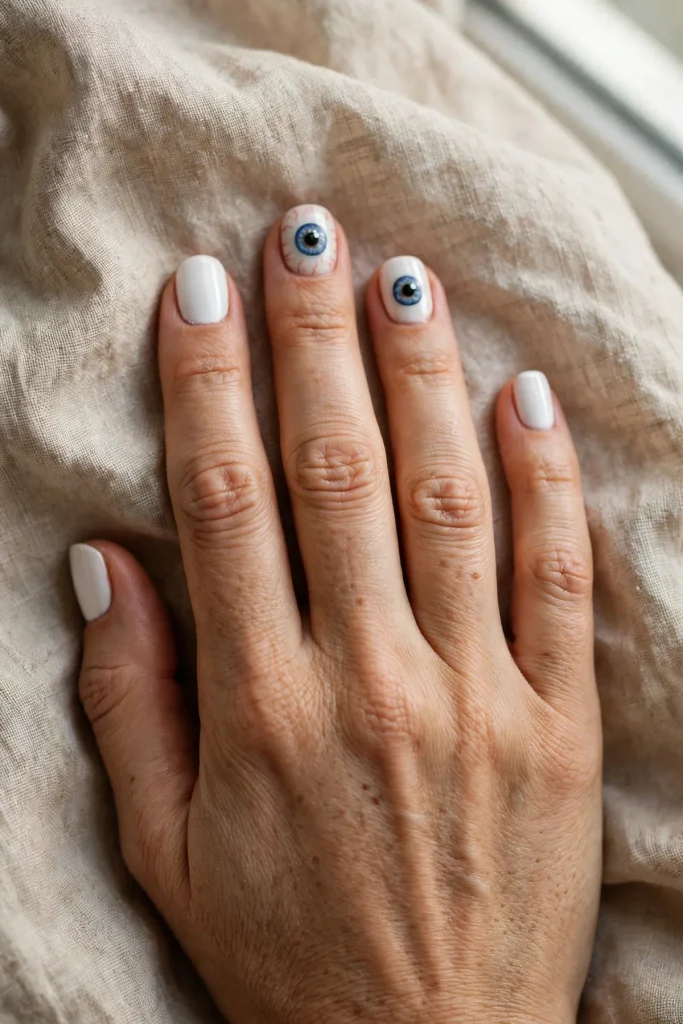
Okay, this one is pure fun. A white base, a colored iris circle, a black pupil, and two or three hair-thin red veins at the corners. One eyeball per hand is charming. Ten eyeballs is a lot of eye contact, so choose your comfort level.
The order of painting matters: white base, iris, pupil, then one tiny white dot on the pupil as a light reflection. That last dot is what turns a flat circle into an actual eye, and it takes two seconds.
Go with a blue or green iris for contrast on the white base. This set is a conversation starter at parties and a hit with teenagers, and it hides regrowth well since the base is pale. Matte or glossy both work; glossy looks wetter and more realistic, if realistic is a word we can use here.
Soft, Witchy, and Quietly Elegant
The last group is for anyone who loves the season but keeps their style gentle. Pale bases, fine lines, a little shimmer. These sets get compliments from people who do not even celebrate Halloween, which tells you how wearable they are.
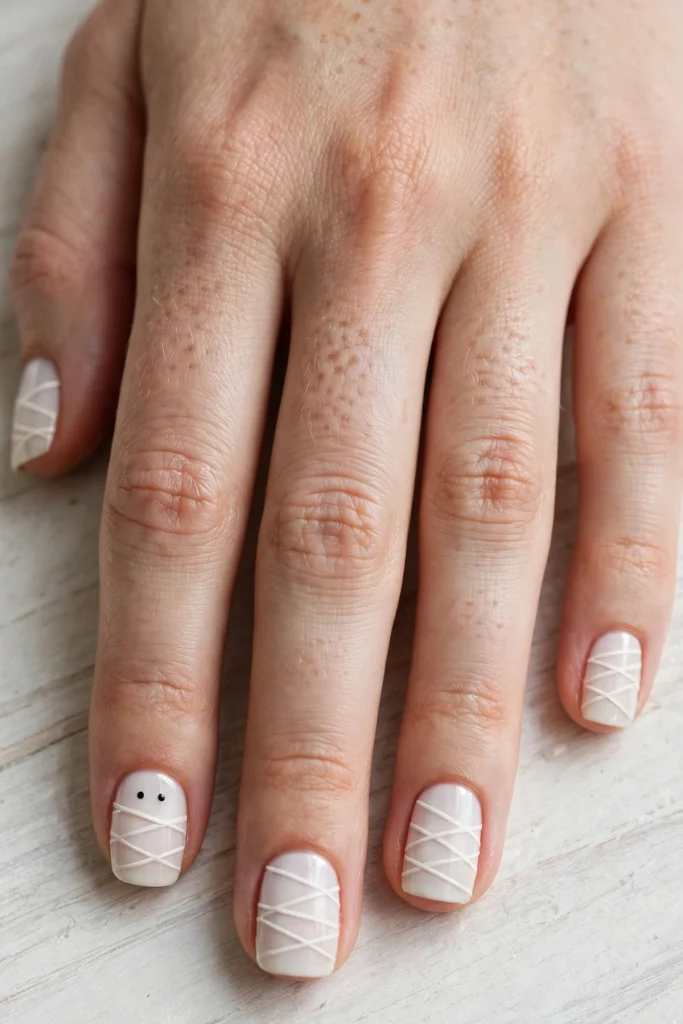
13. Mummy Wrap Whites
A milky white base with thin, slightly diagonal bands wrapped across each nail, like soft linen bandages, plus two tiny black dots peeking between the bands on one nail. Those two dots are the mummy’s eyes, and they turn a plain white set into a story.
Use a striping brush and a slightly off-white or light grey polish for the bands, not pure white on pure white. The faint contrast is what makes the wrapping readable. Keep the bands a little irregular; real wrapping is never perfect, and that looseness keeps it from looking like a barcode.
This is one of the fastest full sets on the list, kind to beginners, and lovely on short square nails. It also pairs with literally every costume and every normal outfit, which is a rare double win.
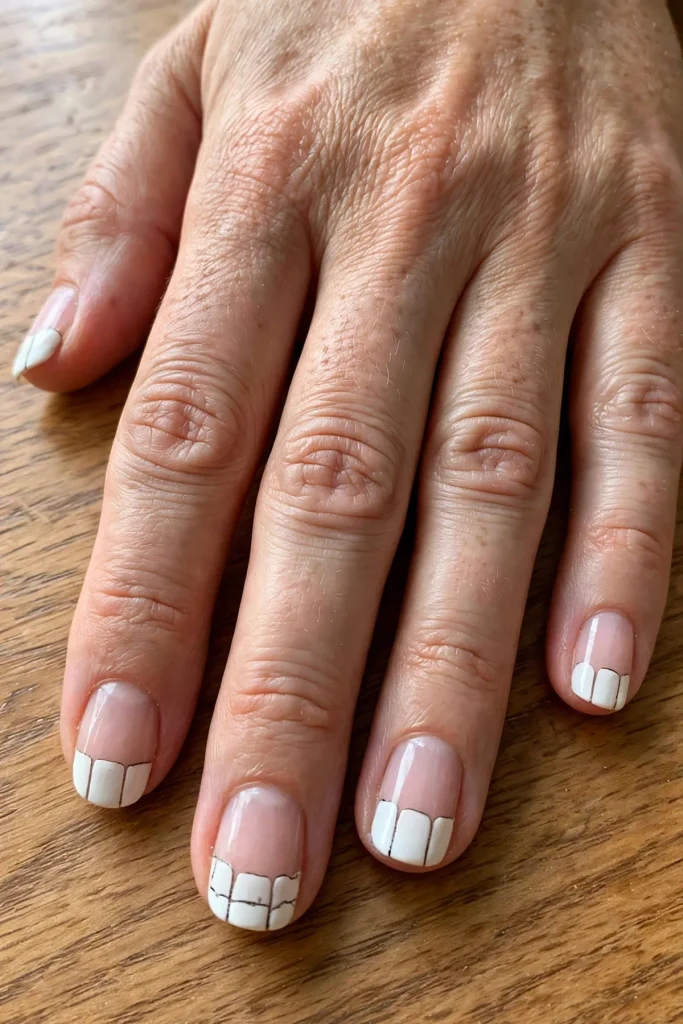
14. Skeleton Bone Tips
Think of a French manicure that wandered into a graveyard. A natural pink base, and the tips painted white in chunky little segments with thin dark lines between them, like finger bones. Two short vertical lines across each tip does it; you are suggesting bone joints, not drawing an anatomy chart.
A fine brush and a steady rest for your painting hand make all the difference. Rest your wrist on the table edge and paint with small strokes instead of trying to float the brush in the air.
Because the design sits only on the tips, this set is brilliant for nail-biters and short nails growing out. As the nail grows, the art moves with the tip, and the look holds together for a good two weeks with regular polish.
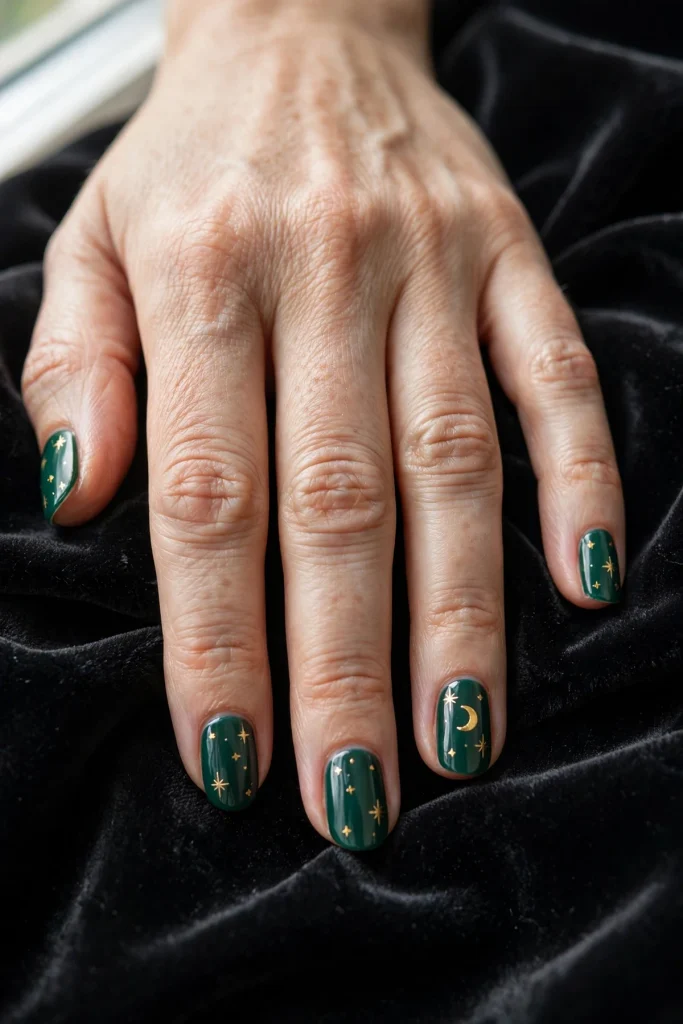
15. Emerald Green with Gold Stars
Deep emerald green is the witchy color that still looks like jewelry. Add tiny gold stars and one small gold moon, placed near the cuticle or floating at the tip, and the set turns rich and a little bit magical. Gold foil flakes pressed into tacky polish give a lovely uneven star-field effect if painting stars feels too fussy.
One coat of a deep green is rarely enough; plan on two thin coats so the color stays jewel-dark instead of swampy. Thin coats also dry faster and chip less, which your future self will thank you for.
I reach for this one with gold rings and a black dress. It reads “October evening” without a single pumpkin in sight, and it carries right through into the holiday season in December without looking out of place.
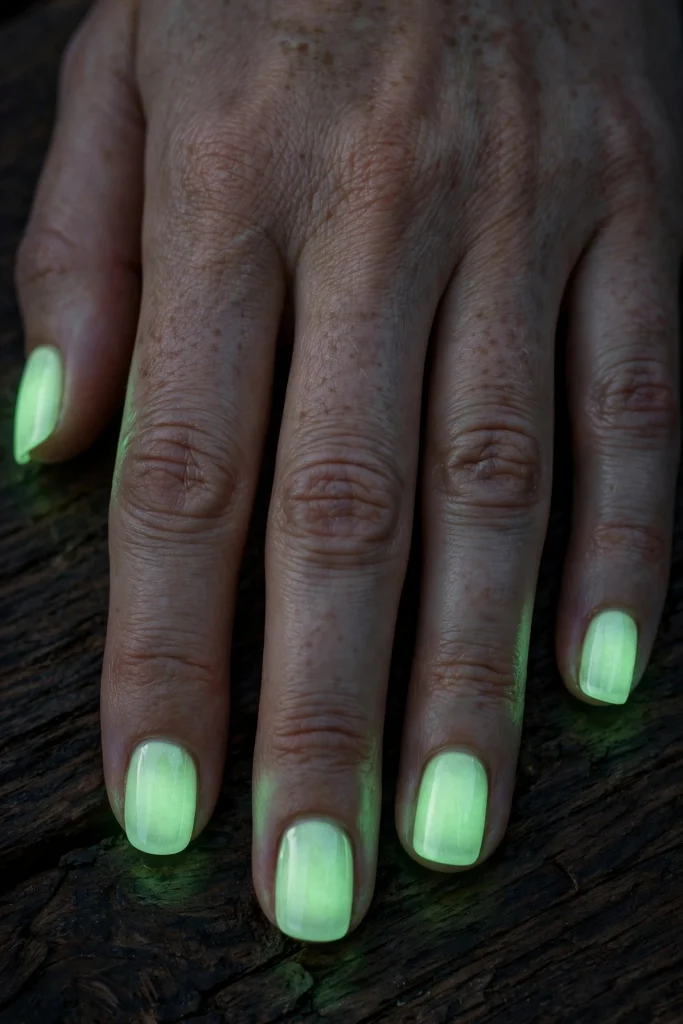
16. Glow-in-the-Dark Slime Green
End the list with the party trick. A slime-green glow polish looks pale and innocent in daylight, then lights up green when the lights go down. Charge it under a bright lamp for a minute before a party and the glow is genuinely strong for the first hour.
Glow polish is usually sheer, so paint it over a white base. That one step doubles the brightness and keeps the color clean instead of murky. Two glow coats over white, then top coat as usual.
Be honest with yourself about the setting, though. This set is for parties, haunted houses, and trick-or-treat duty, not Monday’s budget meeting. Kept in its lane, it is the most fun manicure on this entire list, and the one your friends will photograph in the dark.
Questions I Get About Halloween Nails Every Year
How early is too early to wear Halloween nails?
My rule is simple: the first of October is fair game, and the moodier designs like grey velvet or emerald and gold can stretch into the last week of September without raising eyebrows. If a set makes you happy when you look down at your hands, it is not too early.
Can I do these at home if I am bad at nail art?
Yes, and start with the forgiving ones: tiny ghosts, mummy wraps, candy corn fades, and glow polish. They were designed to look good with a slightly wobbly hand. Save the spiderweb for your second or third try, and lean on decals whenever you like. Nobody hands out medals for freehand work.
Which nail shape suits spooky designs best?
Almond is the all-rounder; it gives you room for art and softens dark colors. But ghosts, cats, and candy corn all shine on short squoval nails. Pick the shape that suits your daily life first, then choose art that fits it, never the other way around.
How do I make a Halloween manicure last until the thirty-first?
Book or paint your set around the middle of October if you want it fresh for the big night, wear gloves for dishes, and add a fresh layer of top coat every three days. Oil on the cuticles each night keeps the skin around the polish looking neat, which makes the whole set look newer than it is.
What if my workplace is strict about nails?
Go for the quiet ones: gravestone grey, black cat silhouettes on a sheer base, or emerald with a single gold star per hand. You will know it is Halloween every time you type, and everyone else will just see a tidy, pretty manicure.
Final Thoughts
Halloween nails are not about scaring anyone. They are about that little spark of fun every time you pick up your keys or wrap your hands around a warm mug. Pick one idea from this list, just one, and wear it like you mean it.
If a set here made you smile, save this post for your next salon visit, follow me on Pinterest where I pin fresh nail ideas all season, and tell me in the comments which design you are trying first. I read every single one, and your picks shape what I test next.