15 Hibiscus Flower Summer Nails: A Whole Garden on Ten Nails
The hibiscus is summer’s signature flower — bold, tropical, unapologetic. Five petals, a dramatic stamen, colors that don’t whisper. And on nails, it’s magic: recognizable at a glance, beautiful at any scale, and versatile enough for fifteen completely different designs.
This time, we’re doing something no list has done: organizing by composition — how the flower is arranged on the nail. Solo blooms for minimalists, full bouquets for maximalists, hibiscus with companions for storytellers, and abstract takes for artists. One flower, fifteen ways to wear it.
The Solo Bloom: One-Flower Statements
One hibiscus, done perfectly. These designs prove that a single well-painted flower beats a crowded garden.
1. The Classic Red Bloom
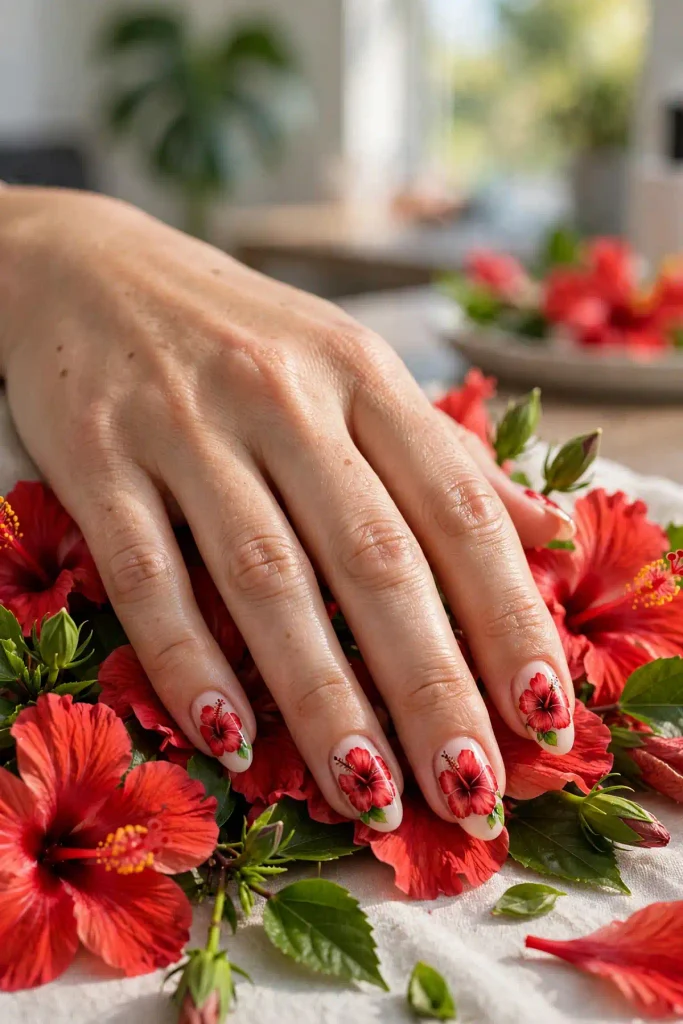
The definitive hibiscus: a single realistic red bloom with five petals and a prominent yellow stamen, painted over a sheer nude or white base. The petals should have subtle shading — deeper red at the base, brighter at the edges — to create dimension. It’s the postcard version, and it never fails.
The key to realism is the stamen: that dramatic central spike with pollen dots is what makes a hibiscus read as hibiscus rather than generic flower. Keep the bloom large enough to show detail but leave breathing room around it.
The hibiscus lesson: five petals, one stamen — learn this anatomy and every hibiscus you paint will be recognizable. Paint it when: you want the iconic tropical look with zero ambiguity.
2. White Bloom on Deep Base
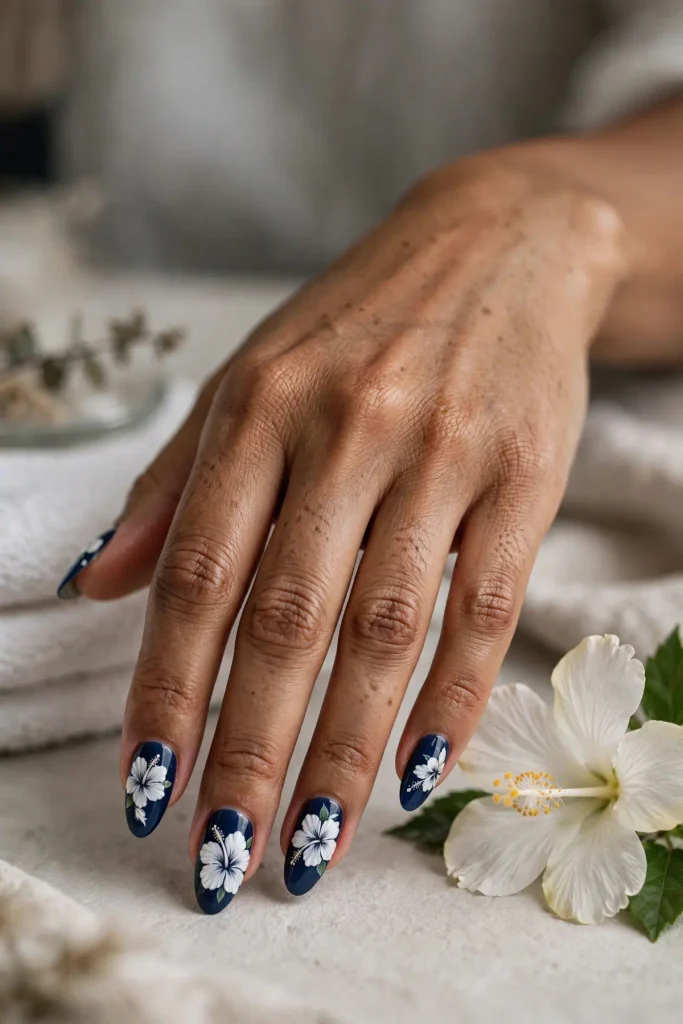
A white hibiscus painted over a deep teal, navy, or black base — maximum contrast, maximum drama. The white petals glow against the dark background like moonlight, and the dark base makes the flower look luminous. It’s the most striking solo bloom on this list.
This is a study in contrast: the dark base recedes, the white flower advances, and the result has almost 3D depth. Add the stamen in yellow or gold for the classic pop.
The hibiscus lesson: light flowers need dark grounds to shine — contrast is a compositional tool, not just a color choice. Paint it when: evenings, events, and anywhere you want your nails noticed.
3. Watercolor Bloom
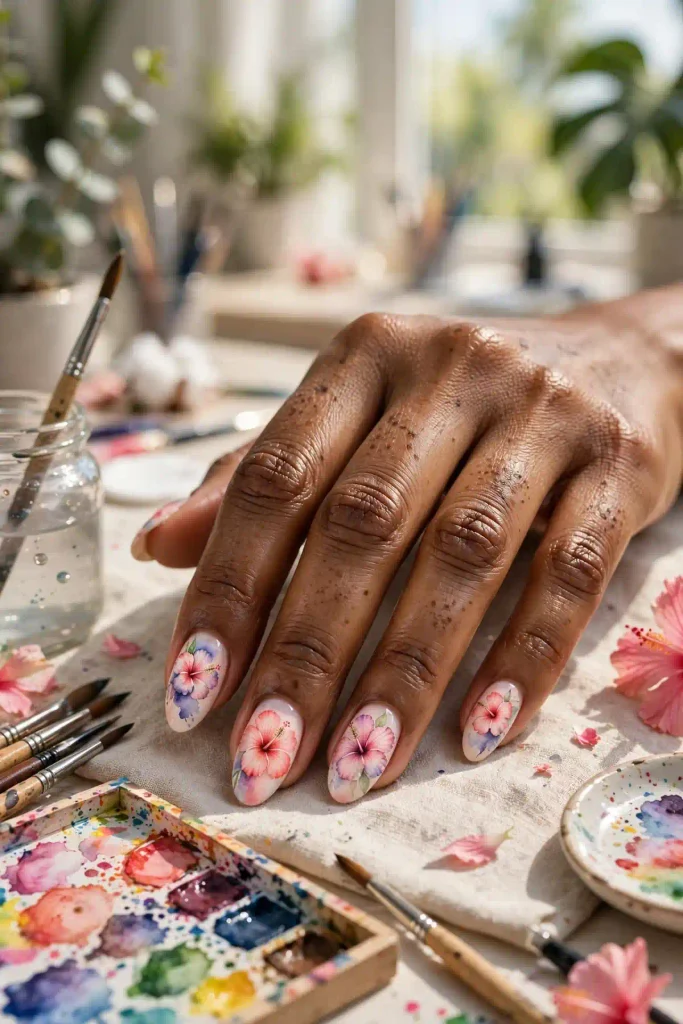
A hibiscus painted in soft watercolor washes — pink bleeding into coral, edges dissolving into the base. No hard outlines, no crisp details: just color blooming like ink in water. It’s the dreamiest hibiscus here, all softness and movement.
The watercolor technique suits hibiscus perfectly because real petals have that same soft gradient — darker at the throat, paler at the edges. Work wet-on-wet for the most organic blends, and resist the urge to over-define; the beauty is in what’s suggested, not stated.
The hibiscus lesson: soft edges read as petals — hard outlines read as clip art. Blur is your friend. Paint it when: you want romance without precision; this is the most forgiving realistic style.
4. Gold-Outline Bloom
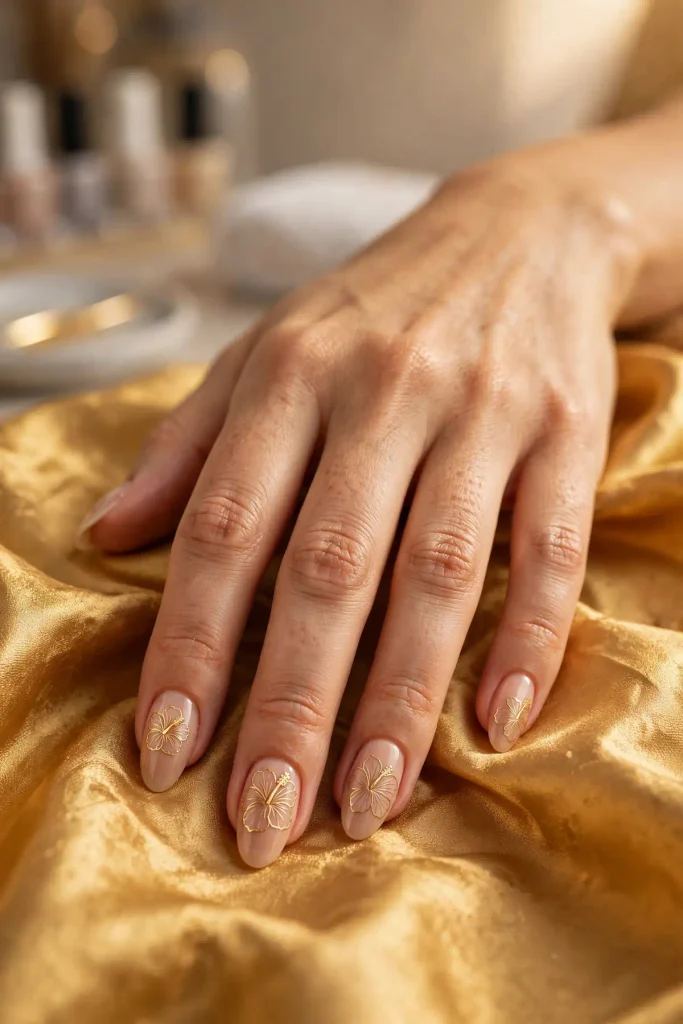
A hibiscus drawn in fine gold lines over a deep solid base — no fill, just outline. The flower becomes line art: elegant, architectural, and luxurious. The gold catches light as you move, so the bloom shimmers without any color fill at all.
This is hibiscus for minimalists — all the recognition, none of the color commitment. The linework must be confident: five petal outlines, the stamen curve, done. It’s the kind of design that looks simple and takes skill, which is exactly why it’s impressive.
The hibiscus lesson: outline-only designs live or die by line confidence — commit to each stroke, don’t sketch. Paint it when: you want floral with an edge; this reads modern, not sweet.
The Bouquet: Multi-Flower Designs
More is more. These designs fill the nail with blooms — lush, abundant, and unapologetically tropical.
5. The Full Garden
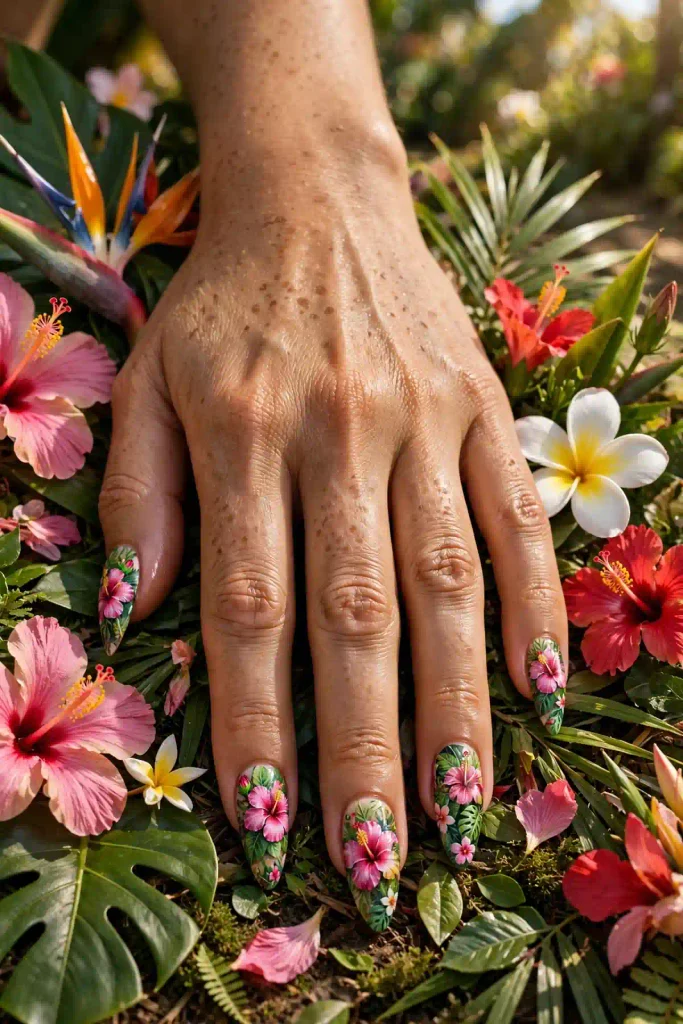
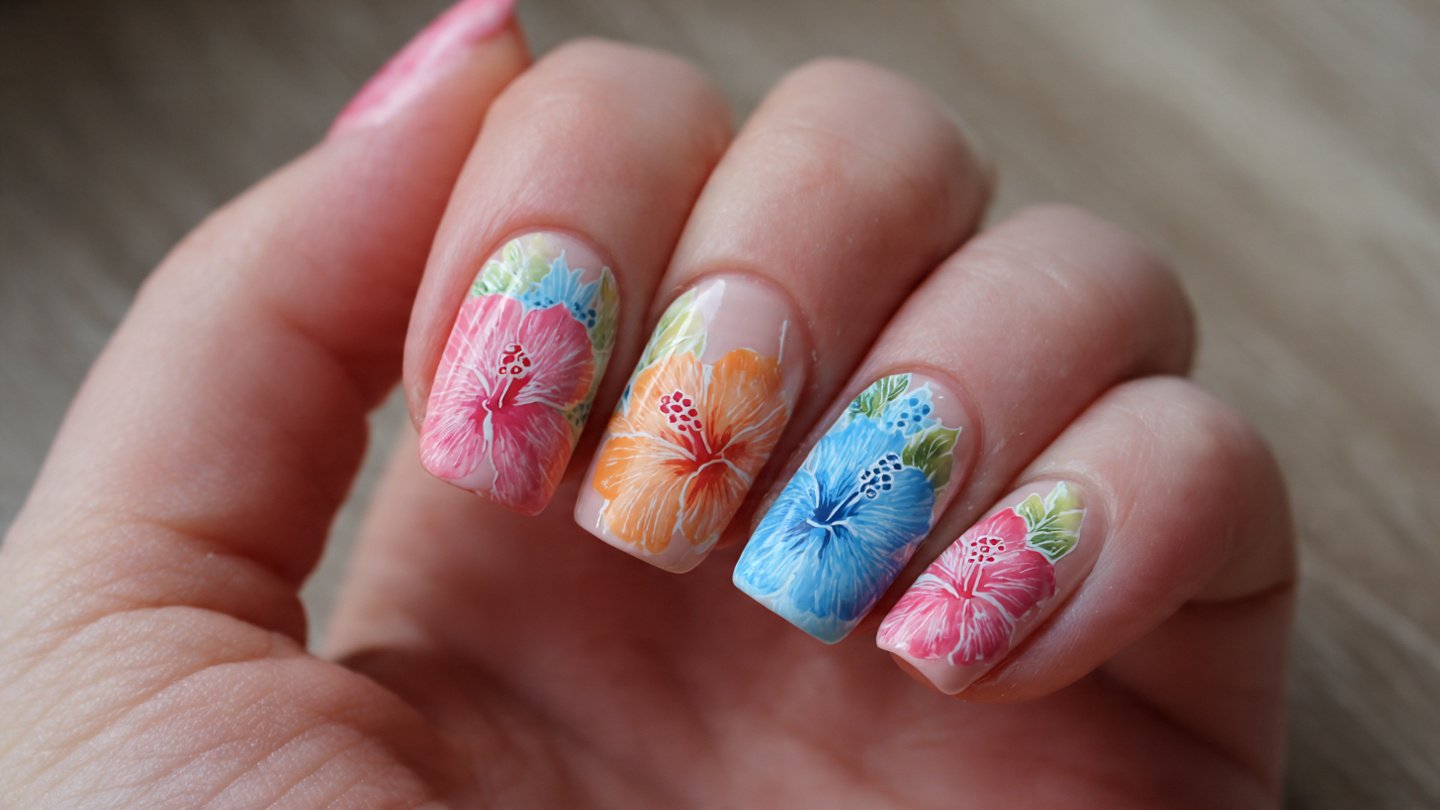
Multiple hibiscus blooms in varying sizes across each nail — large, medium, small — in a full garden composition. Red, pink, and coral blooms mingle with green leaves on a sheer or white base. It’s abundant, joyful, and completely maximalist.
Composition matters here: vary the bloom sizes and angles so it looks like a garden, not a pattern. Overlap petals slightly for depth, and let some blooms run off the nail’s edge.
The hibiscus lesson: vary scale and angle — uniform flowers look stamped, varied flowers look grown. Paint it when: vacations, festivals, and peak-summer maximalism.
6. Hibiscus + Plumeria Mix
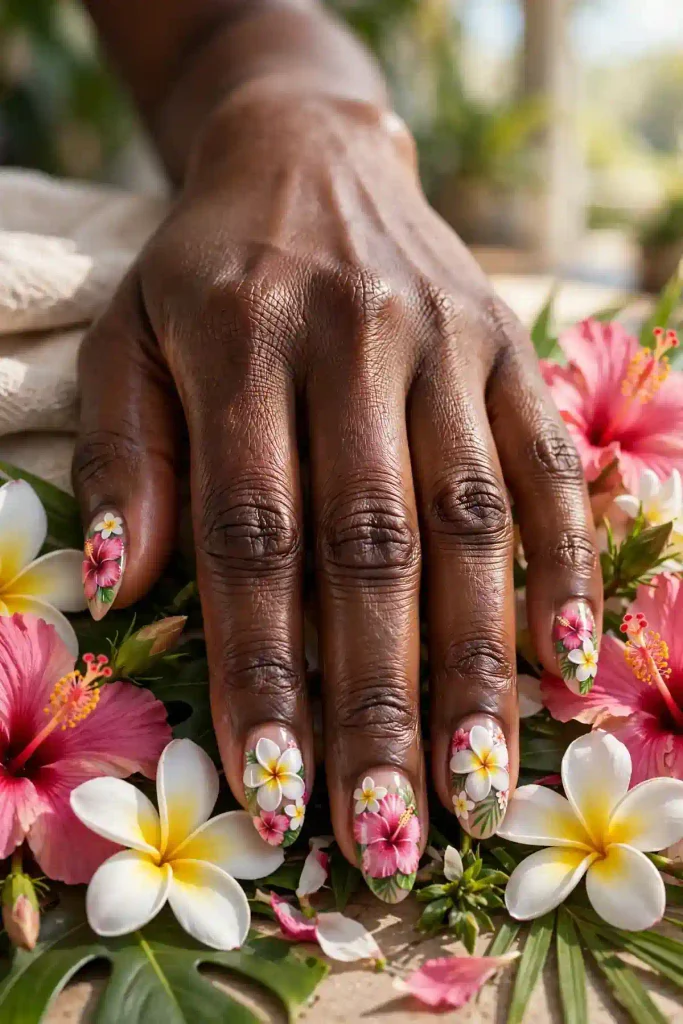
Hibiscus blooms paired with plumeria (frangipani) — the five-petaled white-and-yellow flower of leis — for a two-flower tropical story. The hibiscus provides bold color; the plumeria provides delicate contrast. Together they’re a Hawaiian garden in miniature.
The two flowers’ different structures keep the design interesting: hibiscus is bold and open, plumeria is small and precise. Paint hibiscus larger and plumeria smaller to establish hierarchy.
The hibiscus lesson: pairing flowers with different scales creates depth — contrast in size reads as distance. Paint it when: you want tropical with sophistication.
7. Trailing Vine Blooms
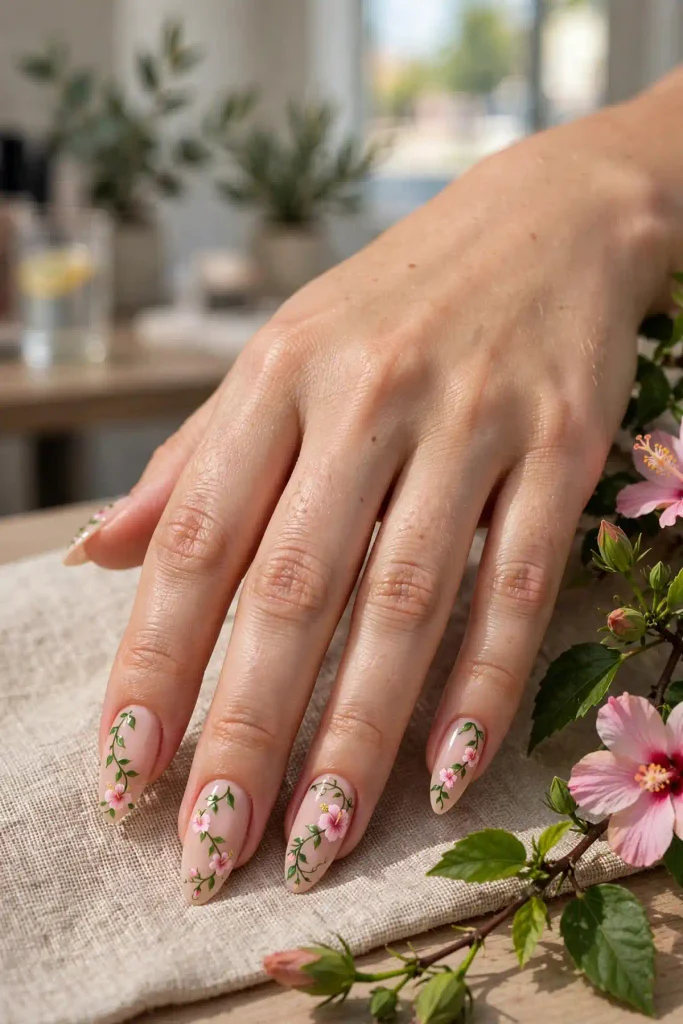
Hibiscus blooms connected by trailing green vines that curl across the nails — the flowers aren’t isolated, they’re growing. The vines should flow naturally, curving with the nail’s shape, with blooms placed along the vine like they’re blossoming in sequence.
This design tells a story: growth, movement, life. The vine gives the eye a path to follow across the nail, which makes the design feel dynamic. Small leaves along the vine add realism.
The hibiscus lesson: connecting elements with vines turns separate flowers into a composition — narrative beats decoration. Paint it when: you want your nails to feel alive.
8. Sunset Palette Bouquet
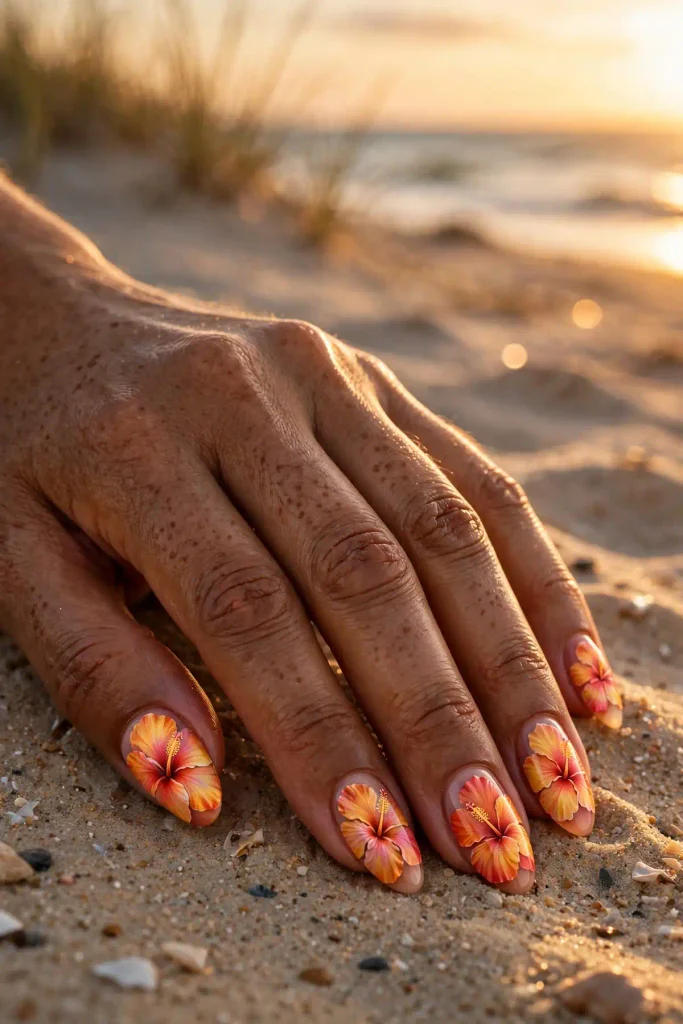
Hibiscus blooms painted entirely in sunset colors — the flowers themselves are orange, pink, and gold rather than botanically accurate. It’s hibiscus as sunset: the blooms become the sky, and the design glows with warm light. Realism is abandoned for radiance.
This is artistic license at its best — nobody cares that real hibiscus aren’t sunset-colored, because the effect is breathtaking. Paint the blooms with the same techniques as realistic ones, just in an impossible palette. The result is dreamlike and unforgettable.
The hibiscus lesson: impossible palettes work when the form stays accurate — paint the right shape in the wrong colors. Paint it when: golden hour is your personality; this design is a sunset.
Hibiscus Companions: Flowers Plus Elements
Hibiscus rarely grows alone — these designs pair it with the elements of its natural habitat.
9. Hibiscus + Palm Leaves
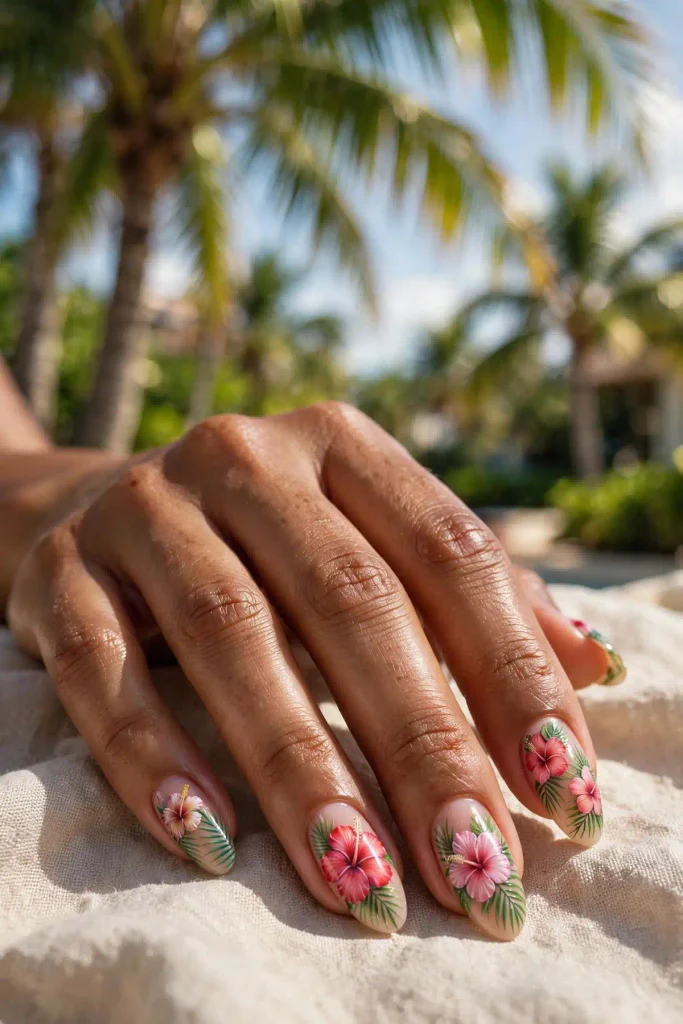
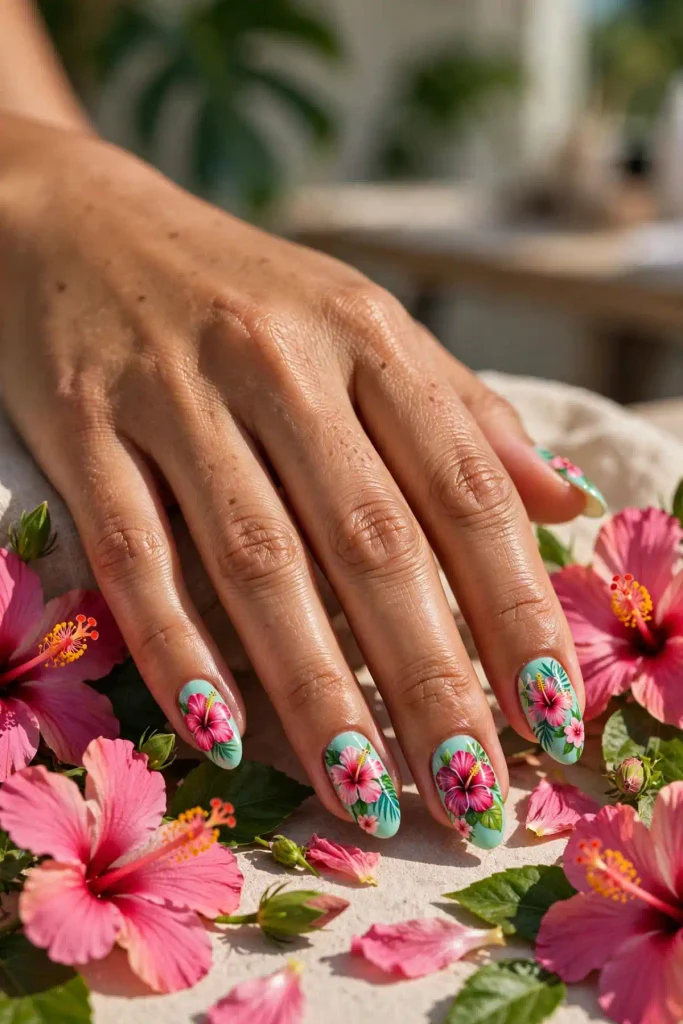
Bold hibiscus blooms with dramatic palm fronds — the classic tropical pairing. The palms should be dark green and architectural, providing a graphic backdrop for the softer blooms. It’s the postcard, the resort brochure, the vacation you can wear.
Balance the two elements: palms as background structure, blooms as foreground stars. The contrast between the palms’ sharp lines and the blooms’ soft petals is endlessly appealing.
The hibiscus lesson: pair soft with structural — blooms need the palms’ architecture the way songs need bass. Paint it when: you want the definitive tropical nail.
10. Hibiscus + Ocean Waves
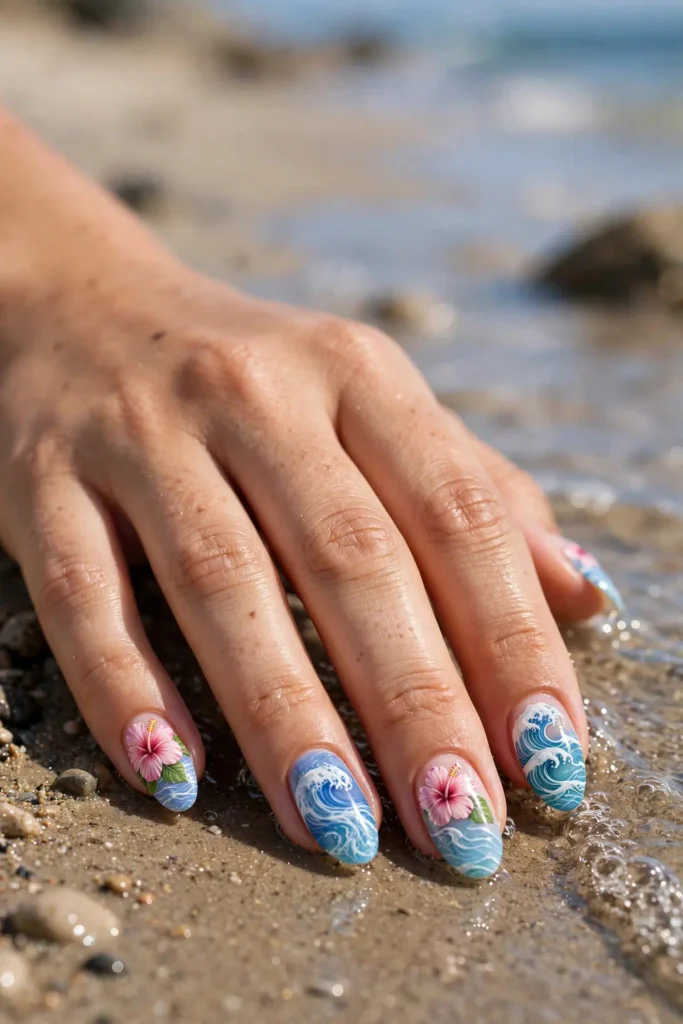
Hibiscus blooms floating above stylized ocean waves — flowers meeting water. The waves are simple curved lines in blues and whites beneath the blooms, suggesting the flower is drifting on the sea or blooming at the shoreline. It’s poetic and unexpected.
The combination works because both elements are fluid — petals and waves share a visual language of curves. Keep the waves simple; they’re the setting, not the subject. The blooms stay the star.
The hibiscus lesson: combine elements that share a visual language — curves with curves, never curves with angles. Paint it when: beach weddings, coastal vacations, and mermaid-adjacent moods.
11. Bloom & Bud
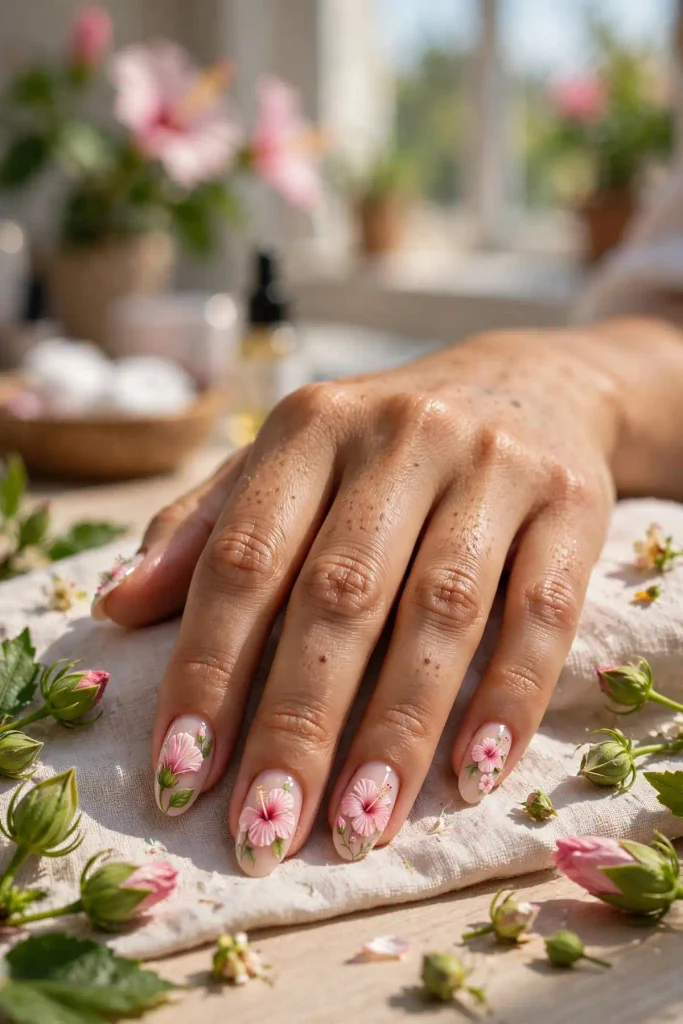
An open hibiscus paired with closed buds on the same nail — the flower’s life cycle in miniature. The open bloom is detailed and full; the buds are simple teardrop shapes in the same color family. It’s botanical, thoughtful, and quietly sophisticated.
This design shows knowledge — anyone can paint a flower, but painting its life stages shows you understand the plant. The contrast between the complex bloom and simple buds also creates a beautiful visual rhythm.
The hibiscus lesson: showing stages of life adds narrative depth — it’s illustration, not just decoration. Paint it when: you want floral with intellectual charm; this is the botanist’s choice.
12. The Floral Accent Nail
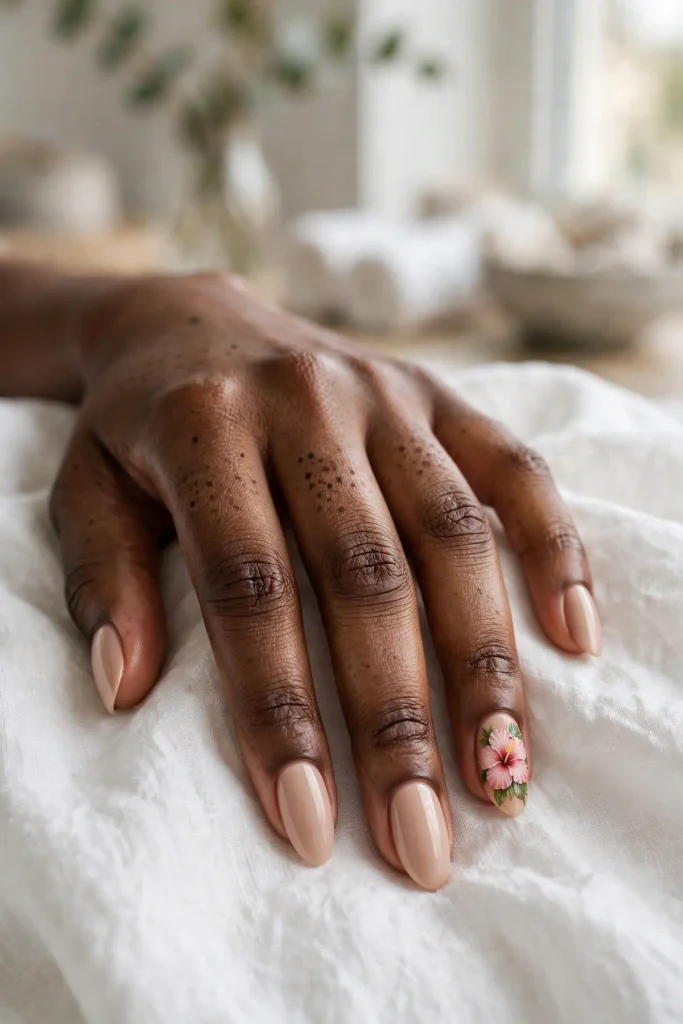
Nine nails in a coordinating solid — deep teal, warm nude, or soft white — with one accent nail carrying a detailed hibiscus bloom. It’s the best of both worlds: the ease of a solid manicure with the delight of floral art. The accent becomes a hidden treasure.
The solid color should complement, not compete — pick a shade that appears in or near the bloom. The accent nail is usually the ring finger, but the middle finger gives it more visibility. Either way, restraint makes the flower precious.
The hibiscus lesson: one perfect bloom beats ten mediocre ones — concentration creates value. Paint it when: you love florals but live a low-maintenance life; this is the compromise that satisfies.
Abstract Hibiscus: Beyond Realism
For artists who know the flower so well they can take it apart. These deconstruct the hibiscus into something new.
13. Petal Swirl Abstraction
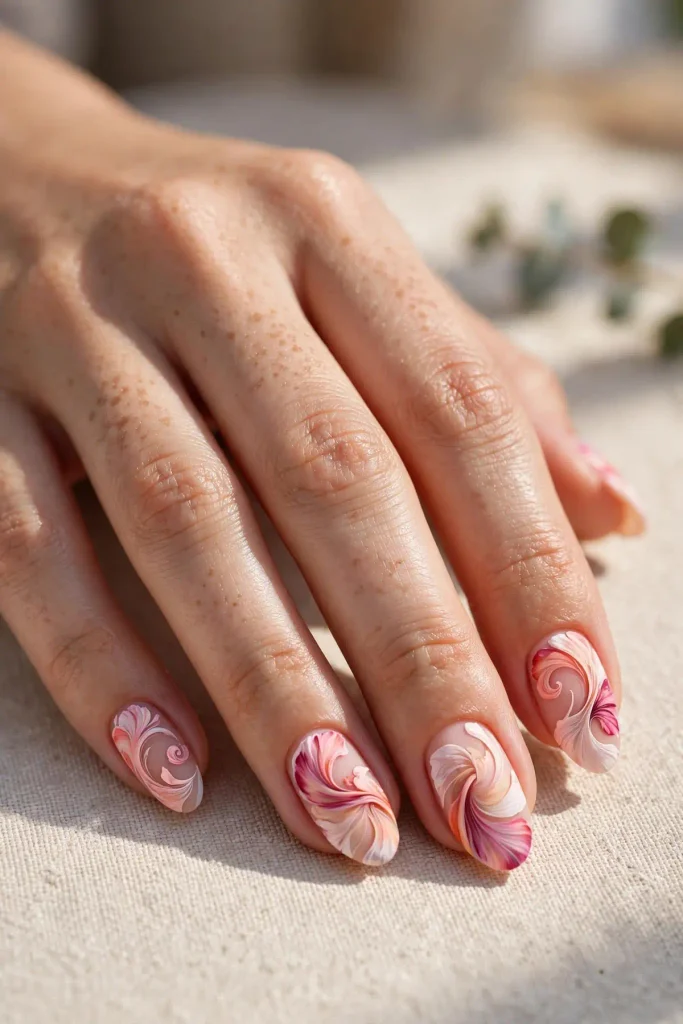
Hibiscus petals deconstructed into flowing swirls — the essence of the flower without its literal form. Curved petal shapes flow across the nail in hibiscus colors, suggesting blooms through movement rather than depiction. It’s the flower as feeling.
This requires understanding the petal’s curve deeply — the abstraction only works if the underlying anatomy is right. Keep the palette hibiscus-true (reds, pinks, corals) so the reference stays readable even as the form dissolves.
The hibiscus lesson: abstraction needs accurate foundations — you can only break rules you’ve mastered. Paint it when: you’re over literal florals but not over the flower; this is evolution.
14. Neon Line Hibiscus
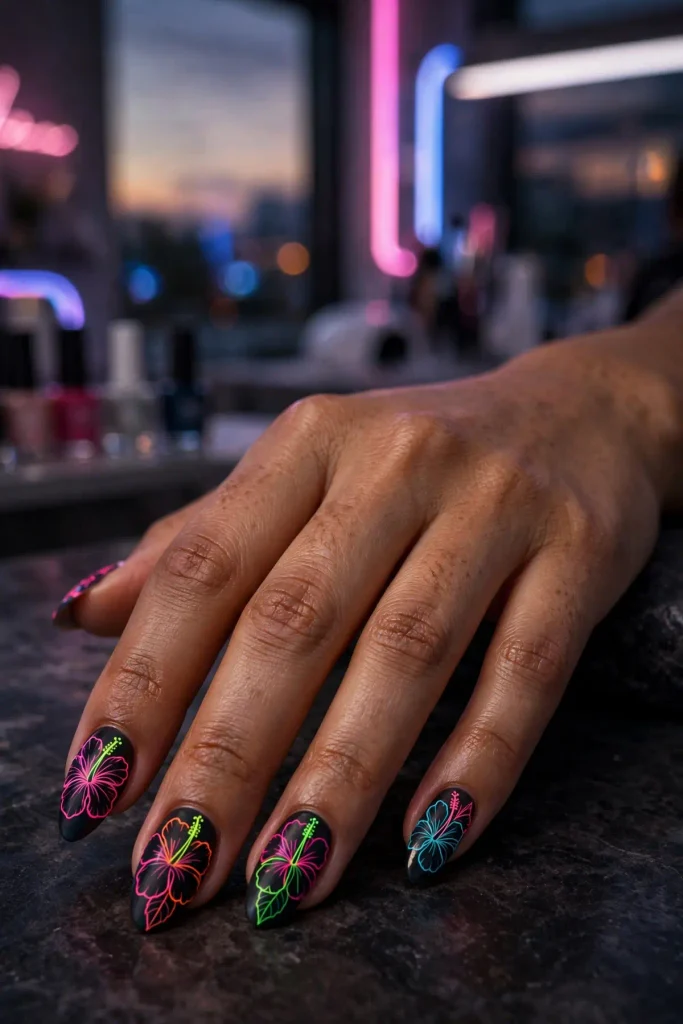
Hibiscus blooms drawn in neon line art — electric pink, lime, or orange lines on a dark base. No fill, just glowing outlines: the flower as a neon sign. It’s tropical meets cyberpunk, and it’s electrifying.
The neon lines should be thin and confident — the flower’s structure must read clearly in outline alone. On a black or deep navy base, the neon appears to glow. It’s the most modern hibiscus on this list by a mile.
The hibiscus lesson: line art tests your knowledge — if the flower reads in outline alone, you truly know its shape. Paint it when: nights out, festivals, and anywhere the lights go down.
15. Geometric Hibiscus
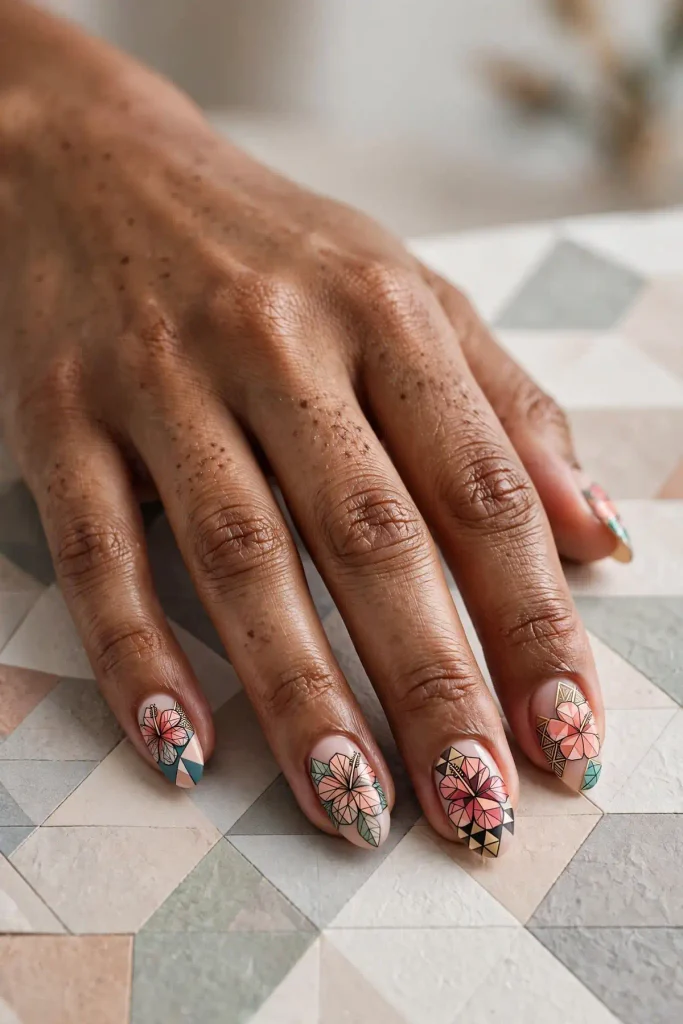
The hibiscus rebuilt from geometric shapes — triangular petals, angular stamen, faceted like a gemstone. It’s the flower through a cubist lens: recognizable but reconstructed. The facets can be shaded differently to enhance the gemstone effect.
This is the most conceptual design here — it asks the viewer to see the flower in the geometry. Keep the five-petal structure clear; that’s the anchor that makes the abstraction readable.
The hibiscus lesson: keep one anchor to reality (the five petals) while abstracting everything else — recognition needs a foothold. Paint it when: you want nail art that’s genuinely art; this belongs in a gallery.
Painting Hibiscus: Technique Basics
The anatomy first, then the art. The five petals: hibiscus petals are broad and slightly ruffled — paint them as rounded, overlapping shapes, not perfect ovals. Start with the back petals, then layer front ones over. The stamen: the dramatic central spike — a thin curved line extending beyond the petals, tipped with tiny dots (pollen). It’s the signature; never skip it. Shading: real petals are darker at the base (the “throat”) and lighter at the edges — blend a deeper shade at the center of each petal. The brush: a medium round brush for petals, a fine liner for the stamen and details. Practice order: paint ten blooms on paper first — petal shapes, then stamens, then full flowers. The shortcut: high-quality hibiscus stickers or stamping plates exist for the artistically anxious — there’s no shame in them, and modern ones are beautiful. Sealing: always seal floral art with two top coats; the layers of paint need protection, and the gloss unifies the design.
Hibiscus Color Meanings
In Hawaii’s language of flowers, color speaks. Red hibiscus: love, passion, and romance — the classic, and Hawaii’s state flower is actually a native red variety. Pink hibiscus: friendship, affection, and gentle love — the friendly bloom. White hibiscus: purity, new beginnings, and remembrance — also used in Hawaiian ceremonies. Yellow hibiscus: happiness, sunshine, and good fortune — Hawaii’s official state flower is the yellow ma’o hau hele. Orange/coral: enthusiasm, creativity, and tropical energy — the sunset shades. Choosing: there’s no wrong color, but knowing the meanings adds a layer — paint red for romance, yellow for joy, white for new chapters. Your nails can say what you don’t.
Making Florals Last in Summer
Flower art is an investment — protect it. Seal generously: two coats of top coat over floral art, minimum — the paint layers need armor. Gel for longevity: hand-painted florals last 2–3 weeks in gel versus days in regular polish; for art this detailed, gel is worth it. Sun protection: UV fades reds and pinks fastest — the exact shades hibiscus loves; a UV-protective top coat helps. Water wisdom: prolonged soaking softens art layers — wear gloves for dishes, and keep swim sessions reasonable. The touch-up: keep your base color for tip fixes; floral art itself rarely chips (it’s usually centered), but edges do. Refresh the gloss: a fresh top coat weekly revives the design’s vibrancy — dull top coat makes even perfect art look tired.
Hibiscus Nail Questions
How hard is it to paint a hibiscus?
Easier than roses, harder than daisies — the five-petal structure is simple, but the stamen and shading take practice. Ten practice blooms on paper and you’ll have it; it’s one of the more forgiving realistic flowers.
Can I do hibiscus nails at home?
Yes — ideas 1, 3, 4, 12, and 14 are very DIY-able with basic brushes. The realistic multi-bloom designs (5–8) benefit from professional skill, but stickers and stamping plates make even those achievable at home.
What base colors work best with hibiscus?
Sheer nude and white make blooms pop naturally; deep teal, navy, or black create dramatic contrast; sunset shades make the design glow. Avoid busy bases — the flower needs calm around it to shine.
How long do floral nail designs last?
In gel with proper sealing: 2–3 weeks looking fresh. In regular polish: about a week before tip wear shows. Florals centered on the nail (away from tips) last longest — placement affects longevity.
Bloom Where You’re Planted
Fifteen ideas, four compositions, one unforgettable flower. Whether you’re painting a single perfect bloom, a full garden, a shoreline story, or a neon abstraction — the hibiscus rewards everyone who attempts it.
So learn the five petals, master the stamen, and let your nails bloom. Summer’s flower is waiting, and it’s got your name on it.
Which composition is yours — the solo bloom, the full bouquet, the shoreline story, or the abstraction? Save this list for your next floral appointment, and send it to the friend who thinks flower nails are “basic” — she’s never met a hibiscus.