16 Fall Tortoise shell Nails, Catalogued Like Specimens in a Museum Case
Tortoiseshell is one of the few nail trends that is directly copying something real. The actual pattern, warm amber streaked with dark brown and black, comes from the shell of the hawksbill sea turtle, historically used in eyewear, combs, and jewelry before international trade in real tortoiseshell was banned for conservation reasons decades ago. Every acetate frame or nail design using that pattern today is an imitation of a material that used to come from an actual animal.
Knowing that changed how I thought about the pattern entirely. It stopped being a random blotchy brown manicure and started being something closer to a study in natural camouflage, irregular, organic, purposeful in its randomness rather than actually random. So I catalogued this post like a museum would catalogue real specimens: sixteen entries, each with a label describing the pattern variation, a technique note on how to recreate it, and a display case pairing for what to wear alongside it.
Case One: Classic Amber Specimens
The display closest to the entrance, showing the pattern in its most recognizable, traditional form.
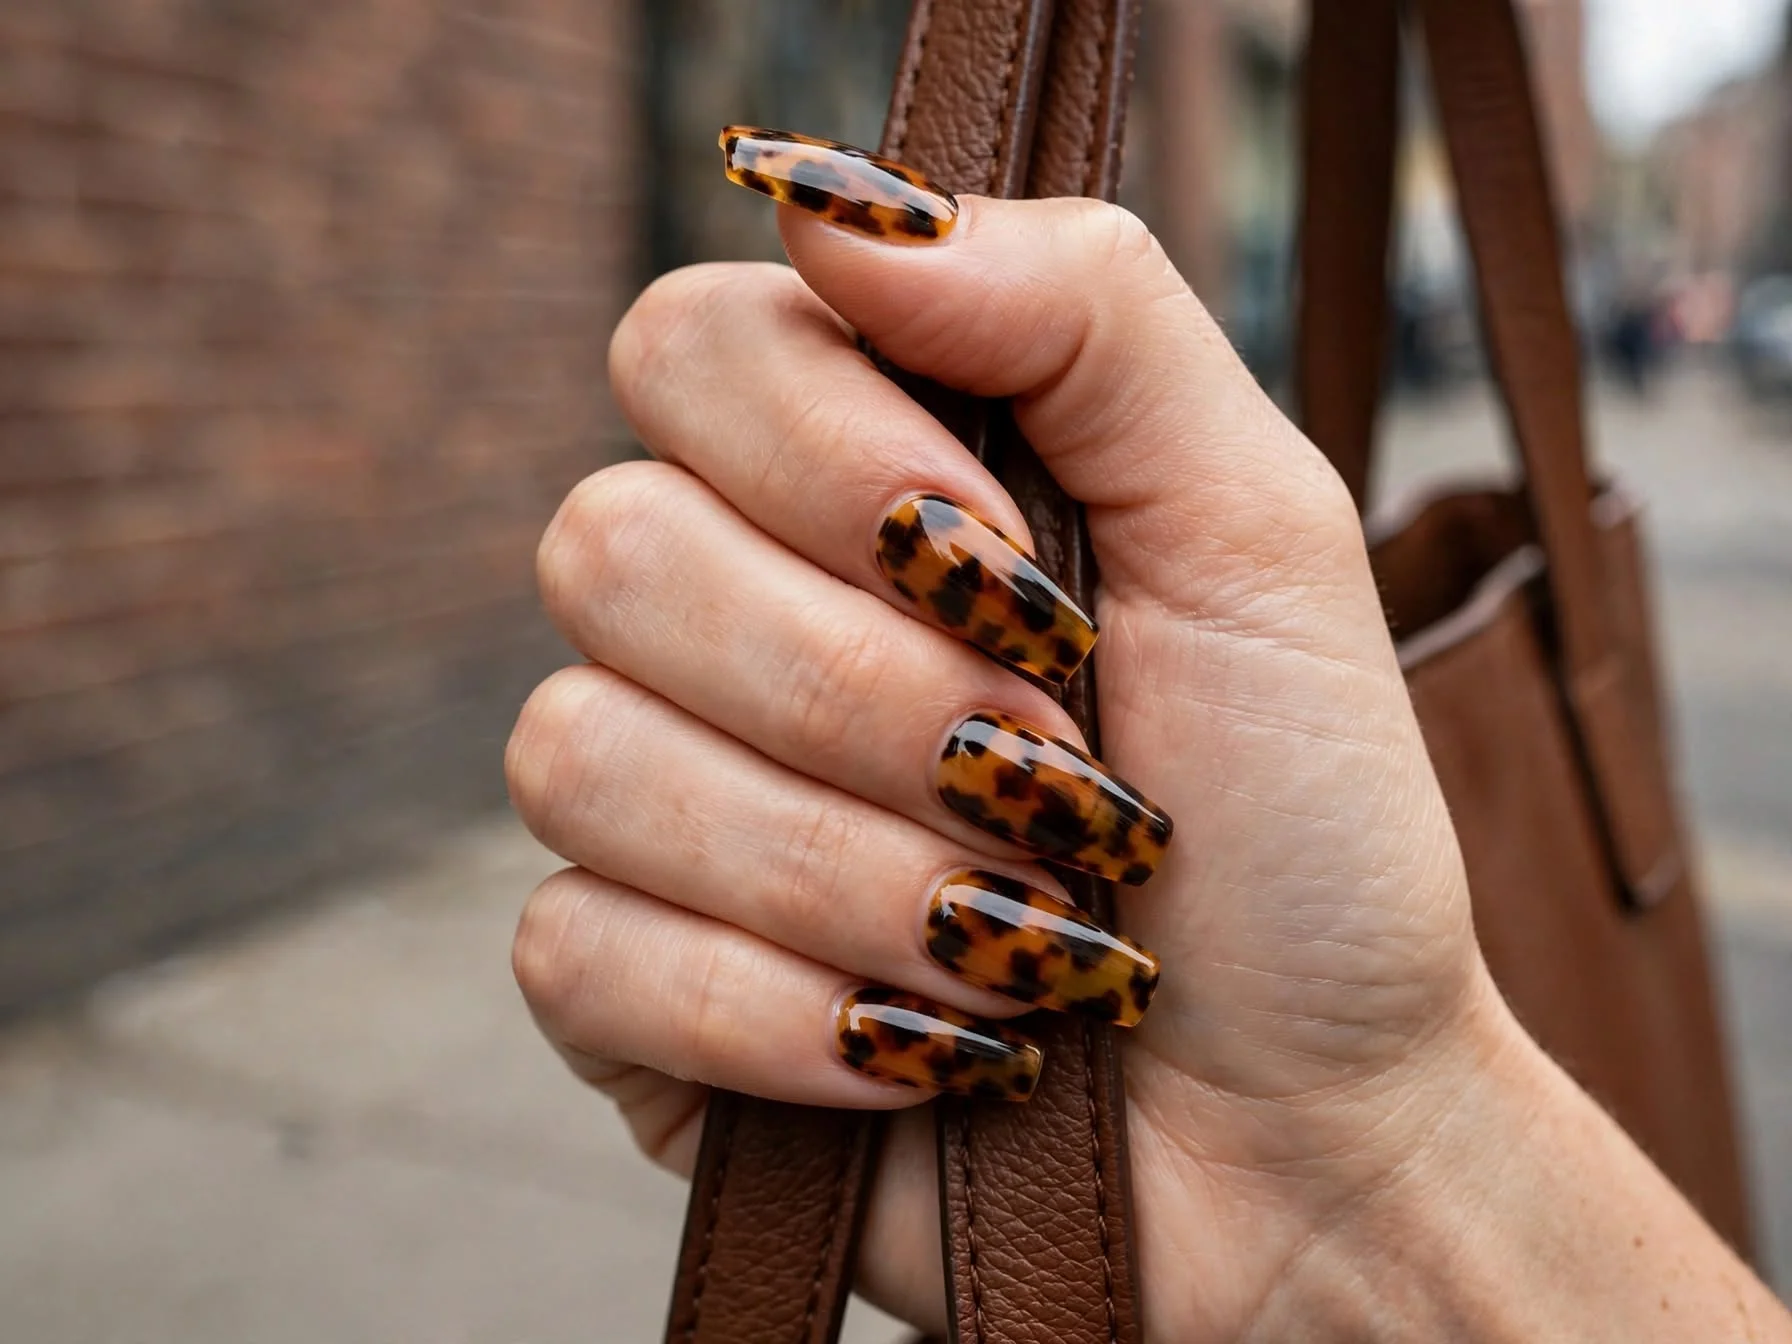
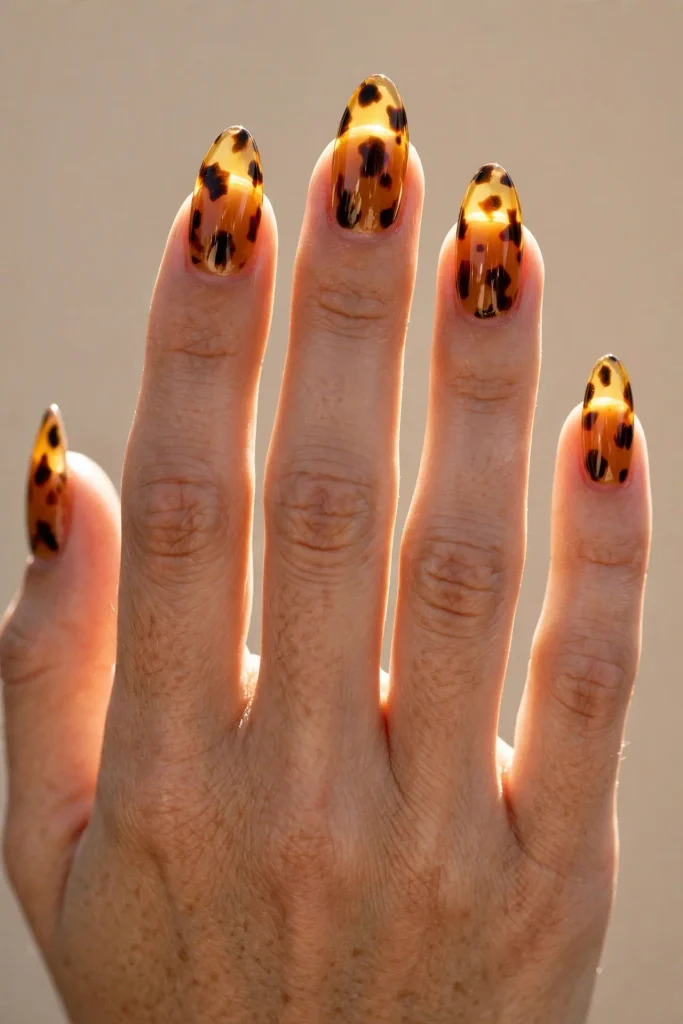
Specimen 1, True Amber Tortoiseshell.
Label: a warm honey-gold base with irregular, organic-shaped spots in dark chocolate and black, the pattern most people picture immediately when they hear the word tortoiseshell.
Technique: dab a makeup sponge lightly with the dark colors and press it onto the still-wet amber base in an irregular rhythm, never in a repeating pattern, since real tortoiseshell has no symmetry at all.
Case pairing: gold jewelry and camel coats, the pairing that started the whole trend in eyewear decades ago and still works identically on nails.
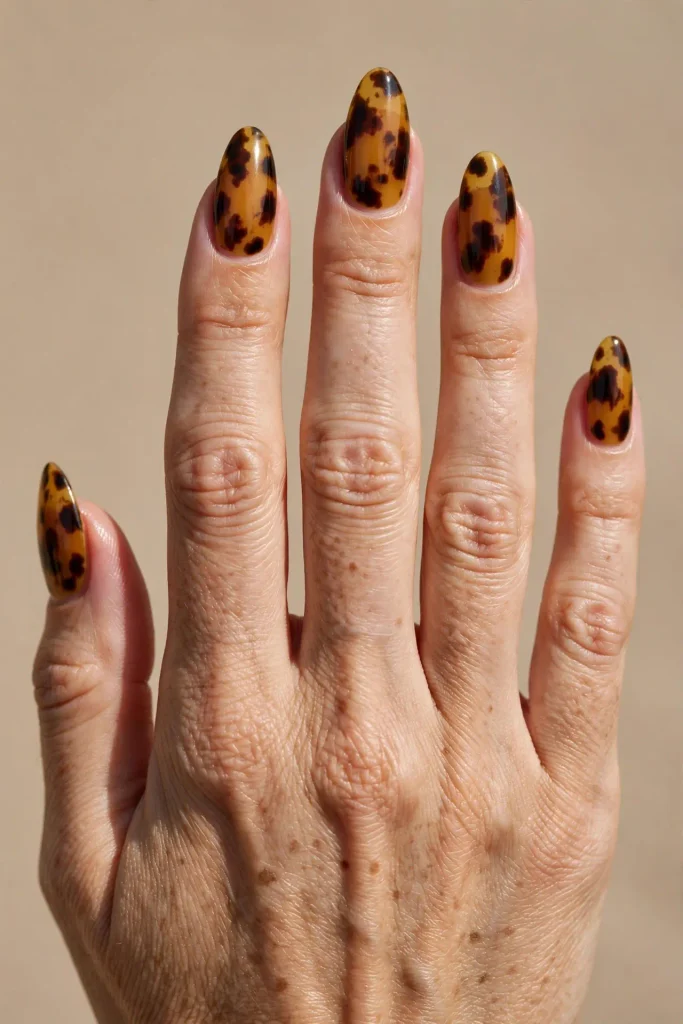
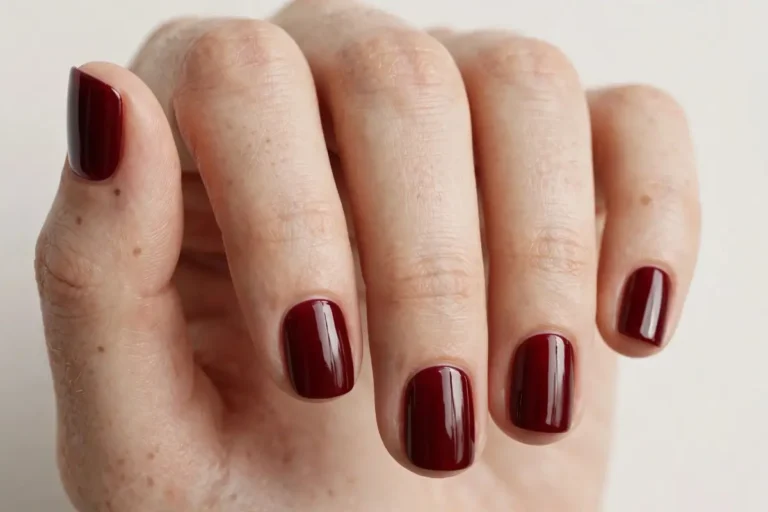
Specimen 2, Deep Amber Variant.
Label: the same warm base pushed one shade darker, closer to a rich caramel than honey, with the same irregular dark spotting.
Technique: identical sponge method, but start with a darker amber base so the contrast between base and spots reads as slightly more subtle overall.
Case pairing: chocolate brown and rust, a slightly moodier take on the classic pairing.
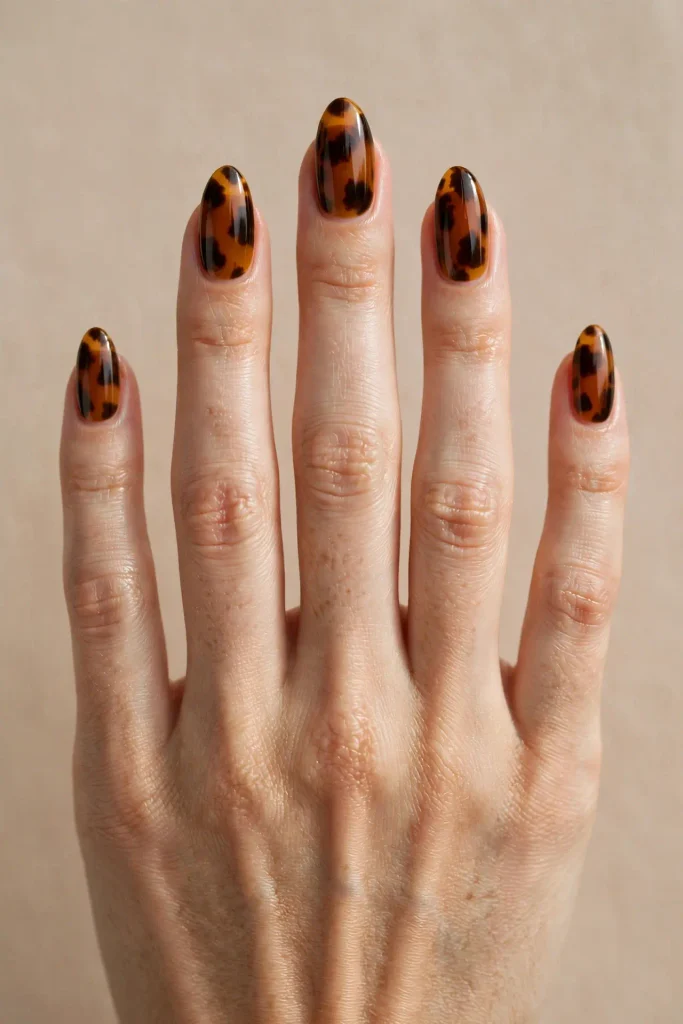
Specimen 3, Backlit Amber.
Label: the classic pattern but finished with a high-gloss top coat specifically, so the amber base catches light the way real polished shell does.
Technique: apply an extra-thick final top coat layer, buffed smooth, rather than the standard single coat most manicures use.
Case pairing: black outfits, since the glossy finish reads best against a dark, unfussy backdrop that lets the shine do the work.
Case Two: Cool-Toned Specimens
A smaller display, showing pattern variations that lean gray and muted rather than warm and golden.
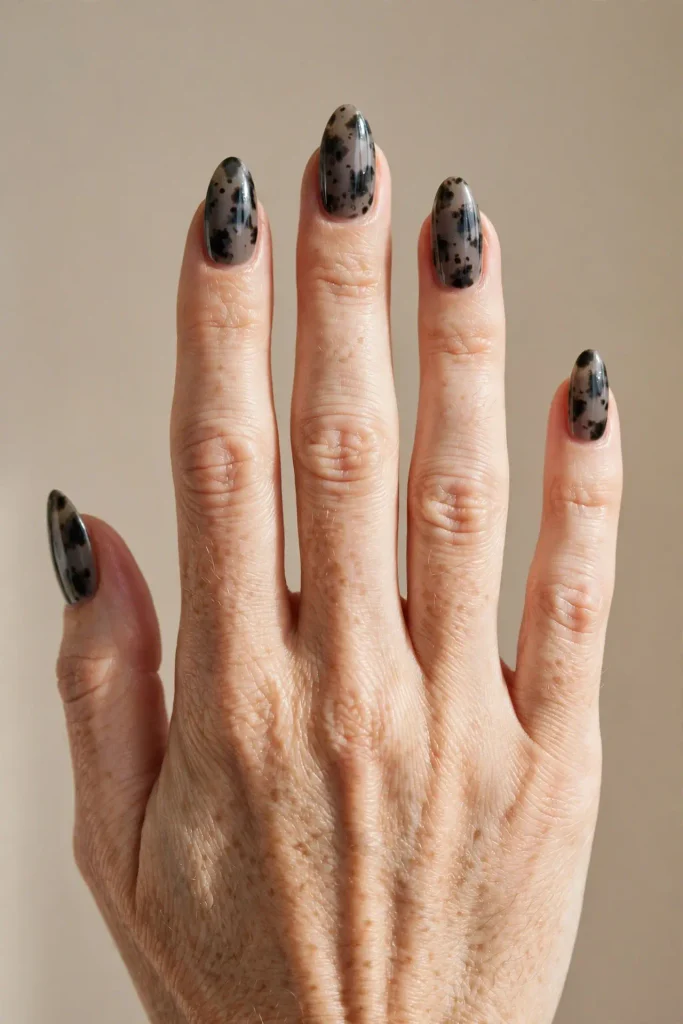
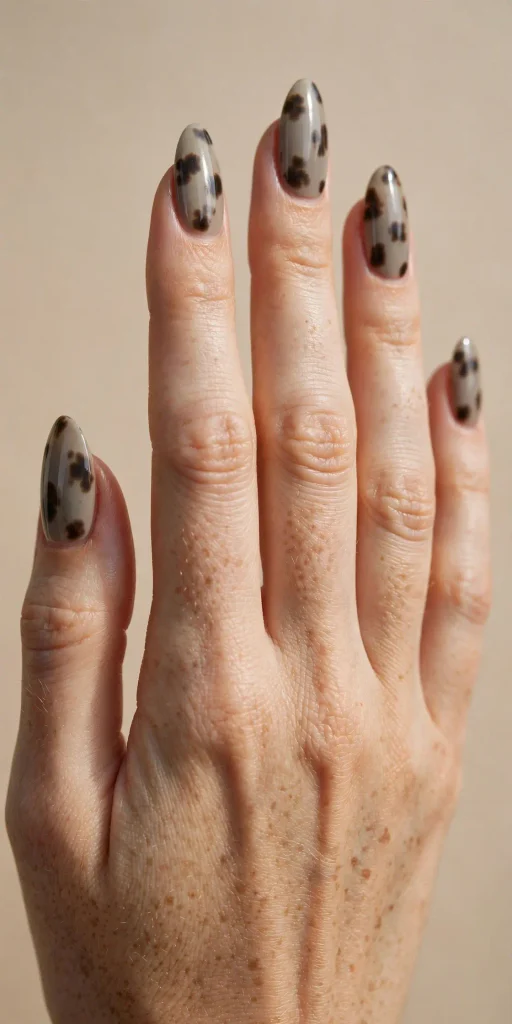
Specimen 4, Smoke Tortoiseshell.
Label: a cool gray-taupe base with charcoal and black spotting, essentially the tortoiseshell pattern translated into a completely different color family.
Technique: same irregular sponge method as the classic specimens, but swap the warm amber base for a cool gray creme first.
Case pairing: monochrome gray and black outfits, or silver jewelry specifically, since this variant clashes slightly with gold.
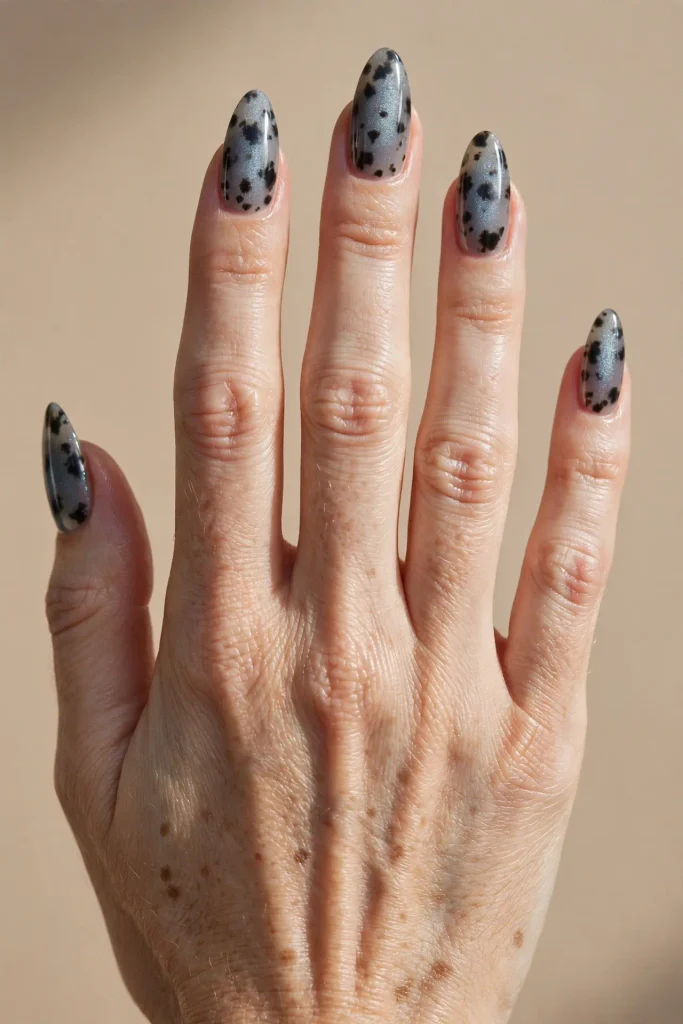
Specimen 5, Frosted Tortoiseshell.
Label: the smoke variant with a fine, cool-toned shimmer mixed into the base before the dark spotting is applied.
Technique: apply a shimmer top coat as a thin layer before adding the dark spots, so the shimmer sits beneath the pattern rather than over it.
Case pairing: winter-leaning fall outfits, wool coats and pearl jewelry specifically.
Specimen 6, Ash Tortoiseshell.
Label: a muted, almost beige-gray base with softer, less contrasted dark spotting than the other cool specimens, the quietest entry in this entire case.
Technique: use a lighter hand with the sponge, dabbing less pigment onto the sponge itself before pressing it onto the nail, so the spots read as soft rather than sharp.
Case pairing: office wear, since the low contrast keeps it professional-looking rather than statement-making.
Case Three: Warm Autumn Specimens
A case built specifically around fall’s own color palette rather than the traditional amber tortoiseshell tones.
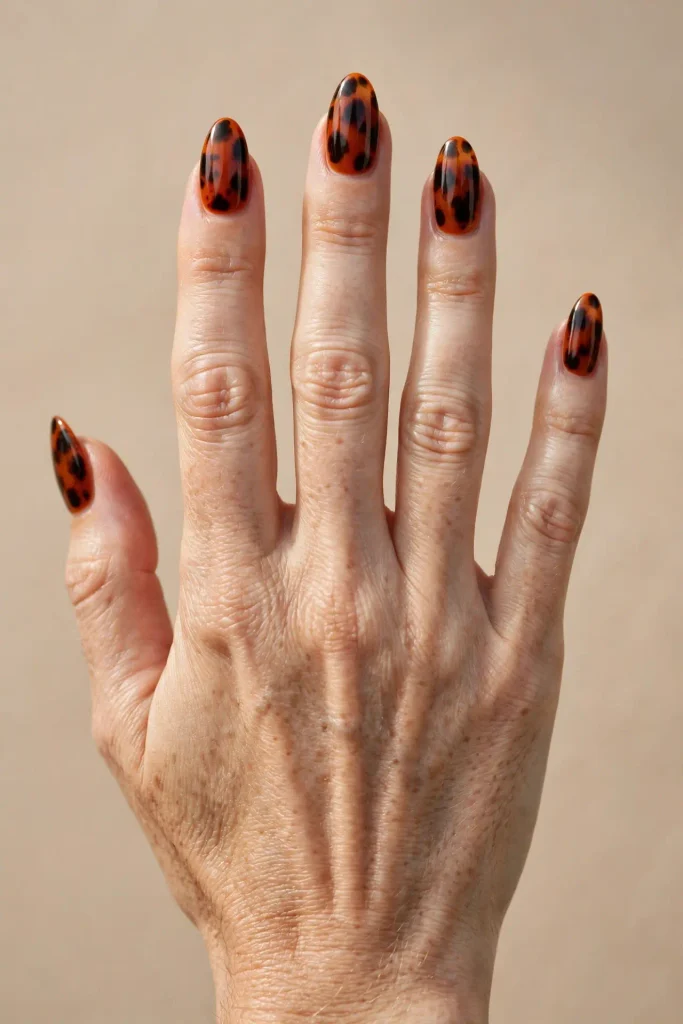
Specimen 7, Rust Tortoiseshell.
Label: the classic pattern rebuilt with a burnt orange-rust base instead of amber, with the same dark chocolate and black spotting layered on top.
Technique: identical sponge technique, simply swapping the base color, proving the tortoiseshell method works as a technique independent of the specific colors chosen.
Case pairing: denim and cream knits, the most genuinely autumnal pairing in the whole catalogue.
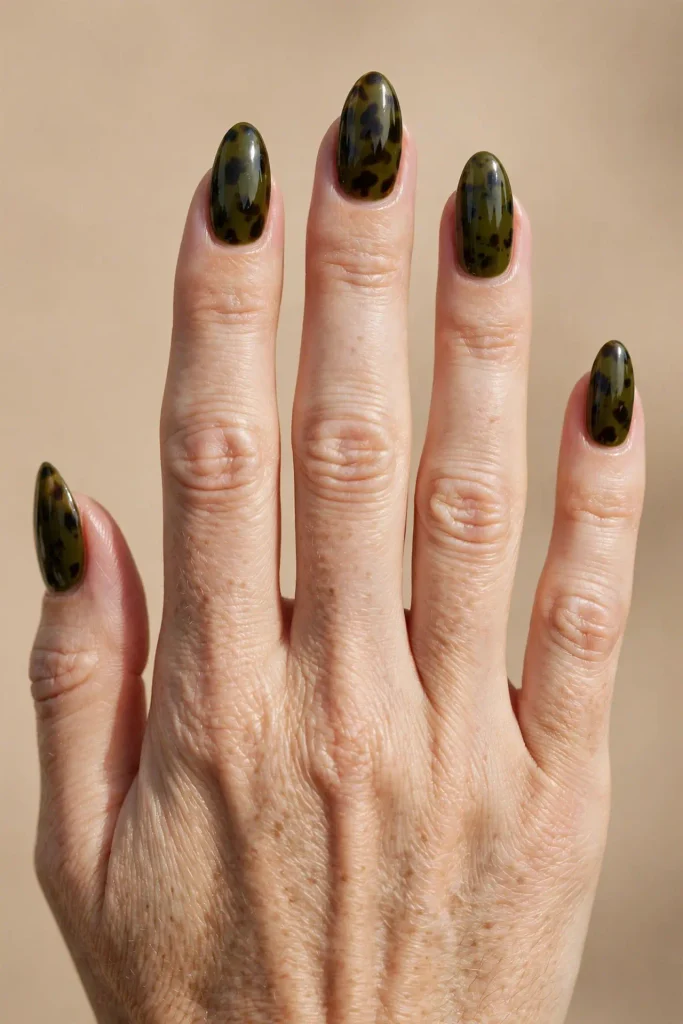
Specimen 8, Olive Tortoiseshell.
Label: a deep olive-green base with the traditional dark spotting, an unexpected but genuinely striking variant.
Technique: same method, and note that olive as a base requires slightly more dark pigment in the spotting to show up clearly compared to a lighter amber base.
Case pairing: forest green and brown outfits, doubling down on the earthy palette.
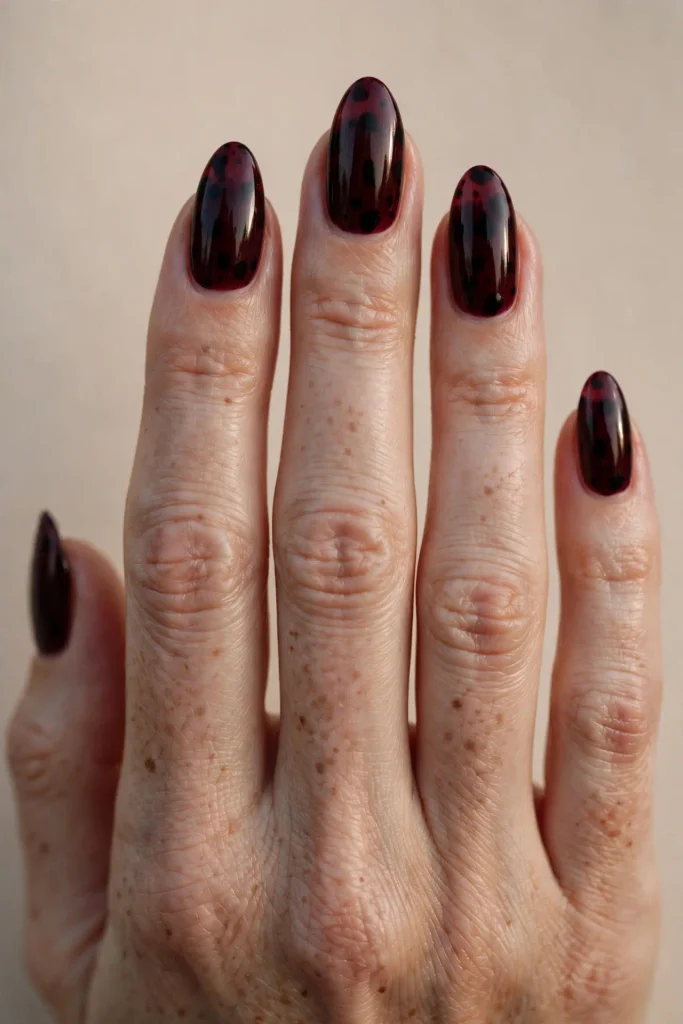
Specimen 9, Merlot Tortoiseshell.
Label: a deep burgundy-wine base with black spotting rather than the usual brown, reading as moodier and more evening-appropriate than the daytime amber specimens.
Technique: use pure black rather than chocolate brown for the spotting on this specimen specifically, since brown spots on a burgundy base tend to blend rather than contrast.
Case pairing: black leather and dark lipstick, an after-dark specimen.
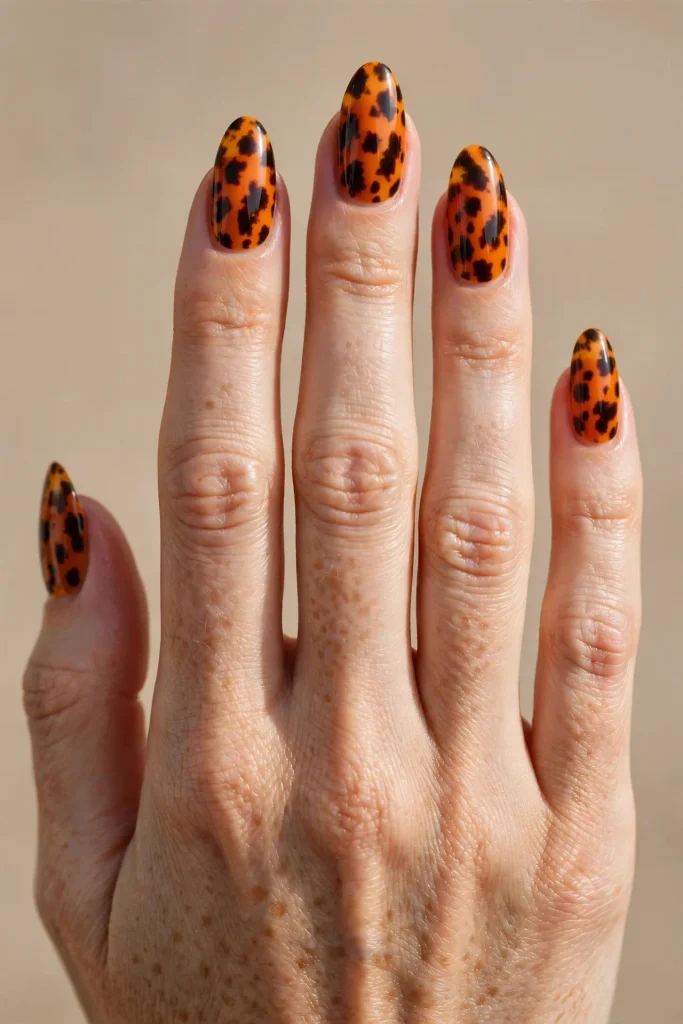
Specimen 10, Pumpkin Tortoiseshell.
Label: a bright, genuinely orange base with the classic dark spotting, the boldest and most obviously seasonal specimen in the whole museum.
Technique: same sponge method, though this base’s brightness means the dark spots need to be applied slightly more densely to keep the pattern from reading as too sparse against such a saturated background.
Case pairing: black sweaters specifically, letting the nails carry all the color in an otherwise neutral outfit.
Case Four: Miniature and Accent Specimens
A smaller display for visitors who want the pattern in a smaller dose, one nail rather than a full set.
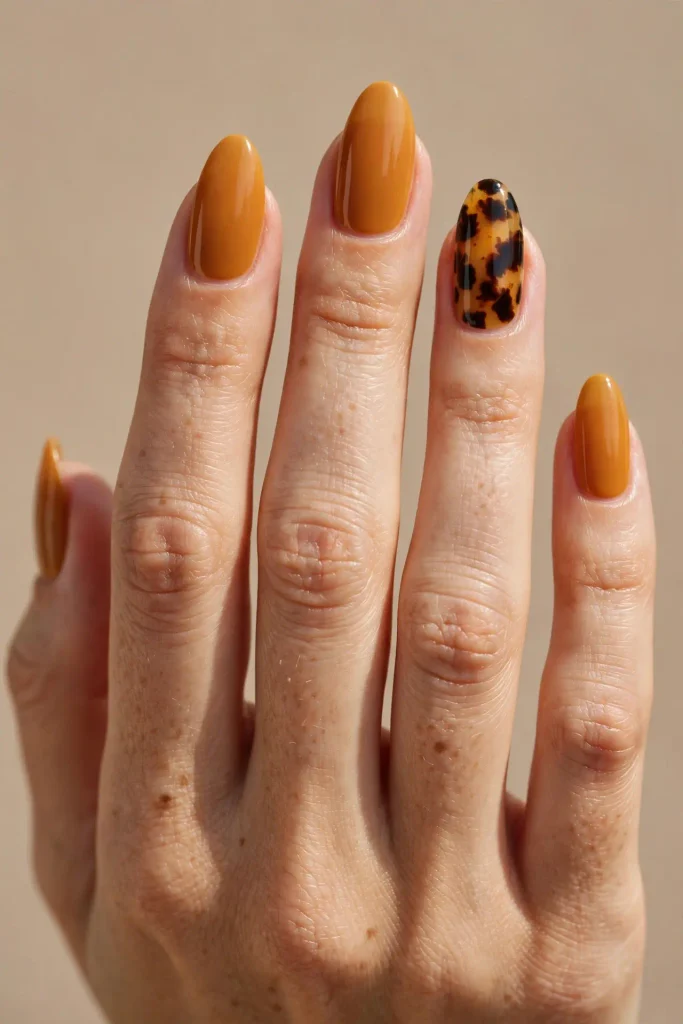
Specimen 11, Single Accent Amber.
Label: nine plain, solid amber nails with only the ring finger carrying the full tortoiseshell pattern.
Technique: this is simply Specimen 1’s method applied to a single nail rather than all ten, the easiest entry point for anyone hesitant about the full pattern.
Case pairing: any outfit at all, since a single accent nail is far more versatile than a full patterned set.
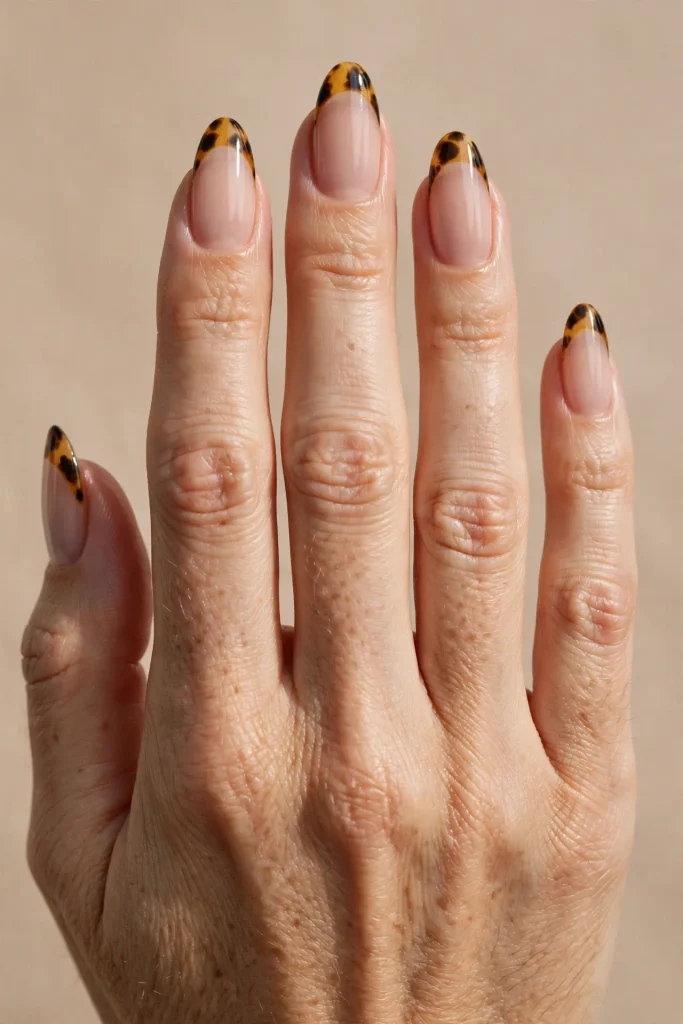
Specimen 12, French Tip Tortoiseshell.
Label: a sheer nude base with the tortoiseshell pattern confined only to the tip of each nail, rather than covering the whole surface.
Technique: apply the sponge technique only to the outer edge of the nail, using tape or a guide sticker to keep the pattern contained to the tip area specifically.
Case pairing: office and client-facing days, since the sheer base keeps the overall look professional while still showcasing the pattern.
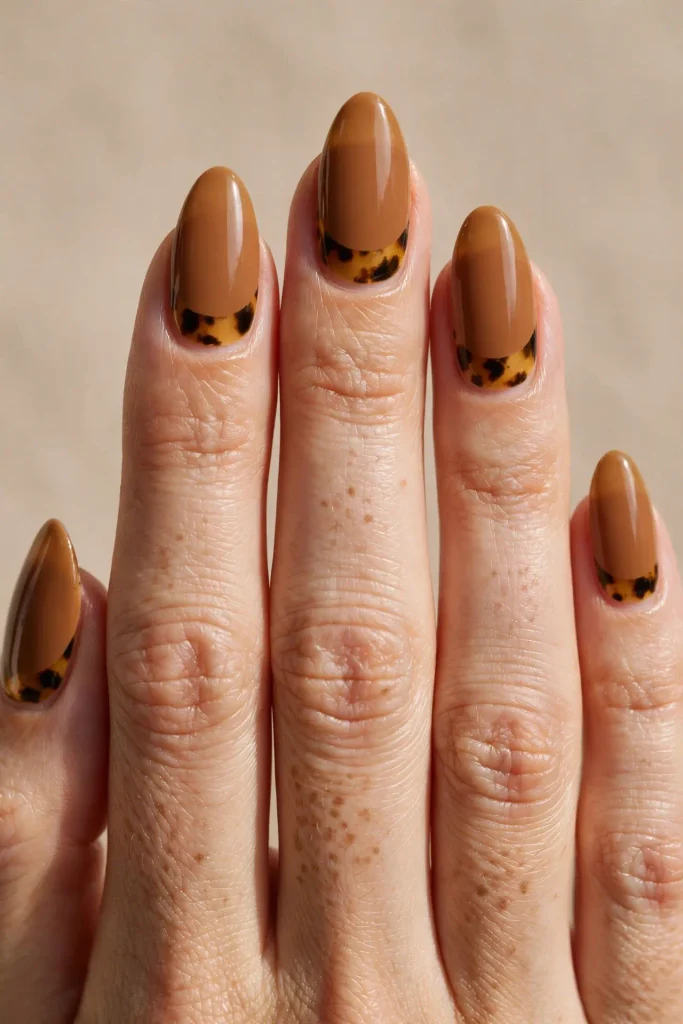
Specimen 13, Half-Moon Tortoiseshell.
Label: the pattern confined to a crescent shape at the cuticle only, with the rest of the nail left in a plain, coordinating solid color.
Technique: use a round sticker guide at the cuticle to mask the rest of the nail before applying the sponge pattern within the exposed crescent shape only.
Case pairing: minimalist outfits, since this is the subtlest possible way to wear the pattern while still being clearly identifiable as tortoiseshell.
Case Five: Modern Reinterpretation Specimens
The final case, showing how contemporary techniques have pushed the traditional pattern into new territory.
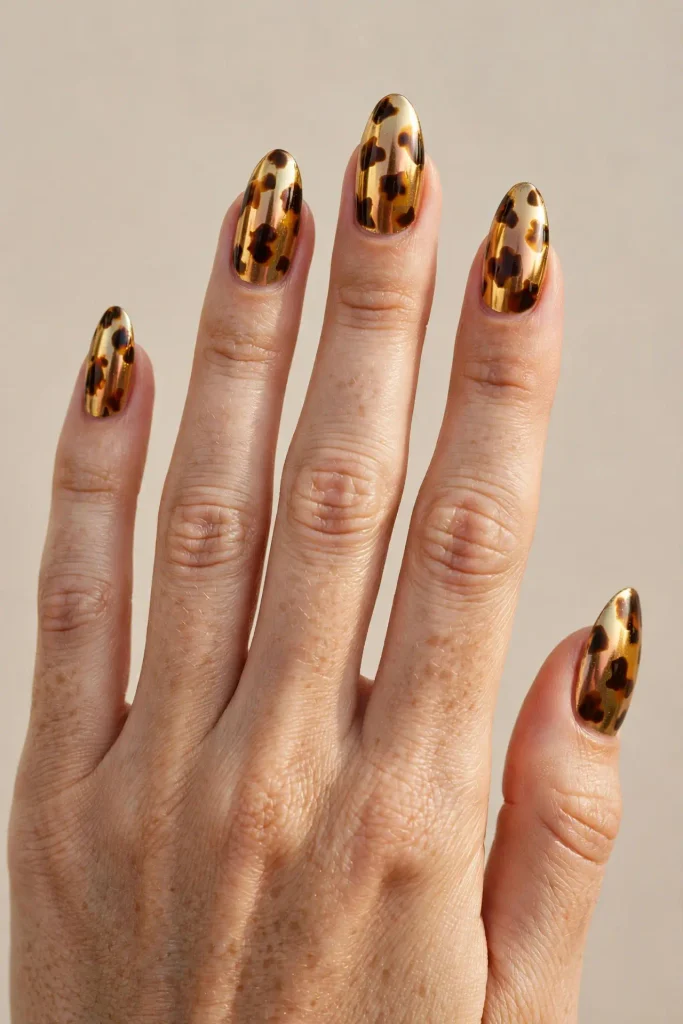
Specimen 14, Chrome Tortoiseshell.
Label: the classic amber and brown pattern sealed under a translucent gold chrome top layer, adding a metallic shift to the traditional matte-glossy finish.
Technique: apply the standard sponge pattern first, let it fully cure, then apply a thin, translucent gold chrome powder over the entire nail using the tacky-top-coat method described in most chrome nail tutorials.
Case pairing: evening wear specifically, since the chrome layer reads as dressier than the traditional finish.
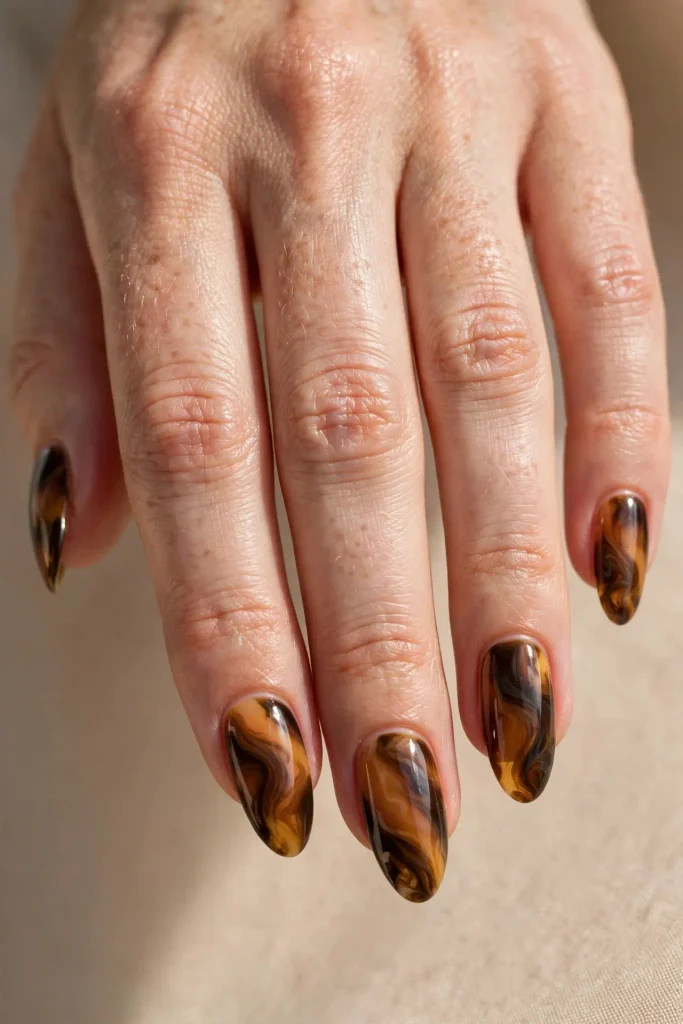
Specimen 15, Marbled Tortoiseshell.
Label: rather than distinct sponge-dabbed spots, this variant uses a wet-on-wet marbling technique for softer, more blended, flowing patterns rather than sharp organic blotches.
Technique: apply the dark colors while the amber base is still fully wet, then drag a fine brush or toothpick through the colors in loose, flowing strokes rather than dabbing them on with a sponge.
Case pairing: softer, more romantic outfits, since the blended marbling reads as gentler than the traditional sharp-edged pattern.
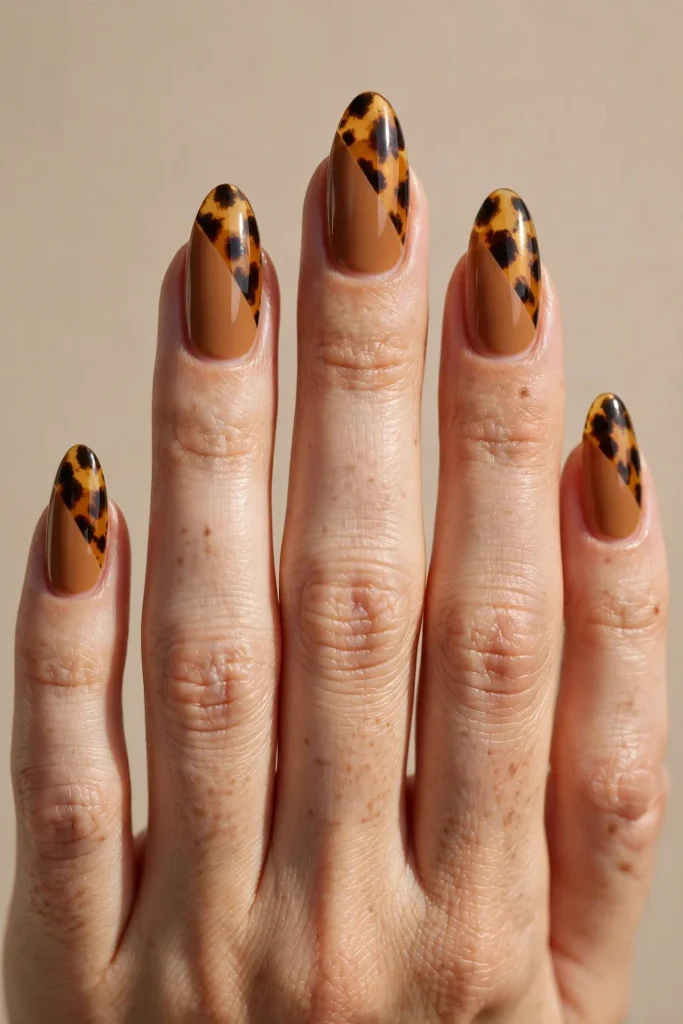
Specimen 16, Geometric Tortoiseshell.
Label: the traditional organic pattern reinterpreted within a hard-edged geometric shape, like a triangle or diagonal block, rather than covering the entire nail.
Technique: mask off a specific geometric section of the nail with tape, apply the traditional sponge tortoiseshell method only within that masked area, then remove the tape to reveal a crisp boundary between pattern and plain polish.
Case pairing: modern, minimalist outfits, since the geometric containment reads as considerably more graphic and current than the traditional full-nail pattern.
Something New: The Real Tortoiseshell Science Primer
Understanding where this pattern actually comes from makes recreating it far more intuitive than treating it as an abstract design.
Real hawksbill tortoiseshell gets its irregular, blotchy pattern from variations in pigment concentration within the keratin plates of the turtle’s shell, the same protein that makes up human fingernails and hair, which is part of why the pattern translates so naturally onto an actual nail surface. The pattern has no symmetry or repetition because it forms organically as the animal grows, meaning no two real tortoiseshell pieces, whether antique combs or eyewear frames, have ever had an identical pattern. This is the single most important thing to remember when applying the look to your own nails: resist the urge to make the spots even, symmetrical, or evenly spaced, since doing so is the fastest way to make the pattern look artificial rather than authentic, regardless of how technically neat your application is.
Technique Comparison: Sponge vs. Freehand vs. Decal
There are genuinely three different ways to achieve this pattern, and each suits a different skill level and desired outcome.
The sponge method, used in most specimens above, presses pigment onto the nail using a makeup sponge dipped in the darker colors, producing the classic organic, slightly soft-edged blotches most people associate with the trend. It’s the easiest technique for beginners and the most forgiving of an unsteady hand. The freehand method uses a fine detail brush to paint individual spots and streaks directly, giving more control over the exact placement and shape of each mark, but requiring considerably more patience and a steadier hand than the sponge technique. The decal method uses pre-made tortoiseshell pattern stickers or transfers, applied directly to the nail and sealed under top coat, offering the most consistent, salon-quality result with essentially no freehand skill required at all, though the patterns available are necessarily more limited and repetitive than a hand-applied version.
For a first attempt, the sponge method remains the most reliable entry point, since its inherent softness forgives the small inconsistencies that would look like mistakes under the sharper freehand or decal methods.
The Contrast Ratio Guide
How dramatic your tortoiseshell reads depends heavily on the contrast between your base color and your spotting color, not just which colors you choose.
A high-contrast pairing, like Specimen 1’s honey-gold base with near-black spots, reads as bold and immediately recognizable from across a room. A medium-contrast pairing, like Specimen 6’s muted ash base with softer brown spotting, reads as more subtle and office-appropriate. A low-contrast pairing, using two shades within the same close color family, like a caramel base with only slightly darker caramel-brown spots, reads as almost textural rather than clearly patterned, appearing as subtle depth rather than an obvious tortoiseshell effect from any distance. Choose your contrast level based on the display case pairing you’re aiming for: higher contrast for evening and statement looks, lower contrast for daytime and professional settings.
Smudge Troubleshooting
Because the sponge technique involves pressing wet pigment onto a wet or nearly-wet base, smudging is the most common issue beginners run into. If the spots bleed into each other rather than staying distinct, the base coat wasn’t given enough time to become tacky before the sponge was applied. Wait an additional thirty seconds to a full minute after the base color looks dry before beginning the pattern. If the edges of individual spots look blurry rather than crisp, too much pigment was loaded onto the sponge at once. Dab the sponge on a paper towel first to remove excess polish before pressing it onto the nail. If the overall pattern looks muddy rather than layered, too many colors were applied in the same small area before the earlier layer had a chance to set even slightly. Work in a genuinely light touch, allowing brief pauses between dabs even within a single nail, rather than working continuously without any pause.
Case-by-Case Wearability Chart
| Case | Best For | Contrast Level | Occasion Fit |
|---|---|---|---|
| Cool-Toned | Silver jewelry wearers, gray palettes | Medium | Office, winter transition |
| Warm Autumn | Genuine fall color lovers | High | Casual, seasonal events |
| Miniature/Accent | Beginners, professional settings | Low to medium | Office, first attempts |
| Modern Reinterpretation | Statement-seekers, evening wear | High | Parties, dinners, events |
Quick Answers
What’s the easiest tortoiseshell technique for a first attempt?
The sponge method specifically, since its natural softness forgives the small inconsistencies that beginners tend to produce, unlike the sharper freehand or decal methods.
How do I keep the pattern from looking too even or fake?
Deliberately avoid symmetry and repetition when placing the dark spots, referencing the real biological origin of the pattern, which forms with no repeating structure at all.
Can I do tortoiseshell nails without buying special tools?
Yes, a regular makeup sponge, cut into a smaller piece for more control, works as well as any specialized nail art sponge for this specific technique.
What’s the most office-appropriate version of this trend?
Specimen 11 or 12, the single accent nail or French tip variations, since both contain the pattern to a smaller, less attention-grabbing area of the hand.
One Last Thing
Tortoiseshell nails are one of the rare beauty trends genuinely rooted in something real, an actual biological pattern that took millions of years to evolve, now recreated in miniature on a fingernail with a sponge and two bottles of polish. Understanding that origin is what makes the pattern easier to get right, since the goal was never neat symmetry in the first place, only organic, irregular beauty.
Pick a case that matches your comfort level, start with the sponge technique on a single accent nail if you’re new to the pattern, and let the natural imperfection of it do the work rather than fighting to make it look too clean.
Which case are you visiting first: the classic amber, the cool-toned display, or one of the modern reinterpretations? Save this article for your next manicure appointment, and send it to a friend who’s been eyeing tortoiseshell frames and nails alike and hasn’t worked up the nerve to try either yet.