15 Fall Nails With Pumpkins, Grown in a Pumpkin Patch of Their Own
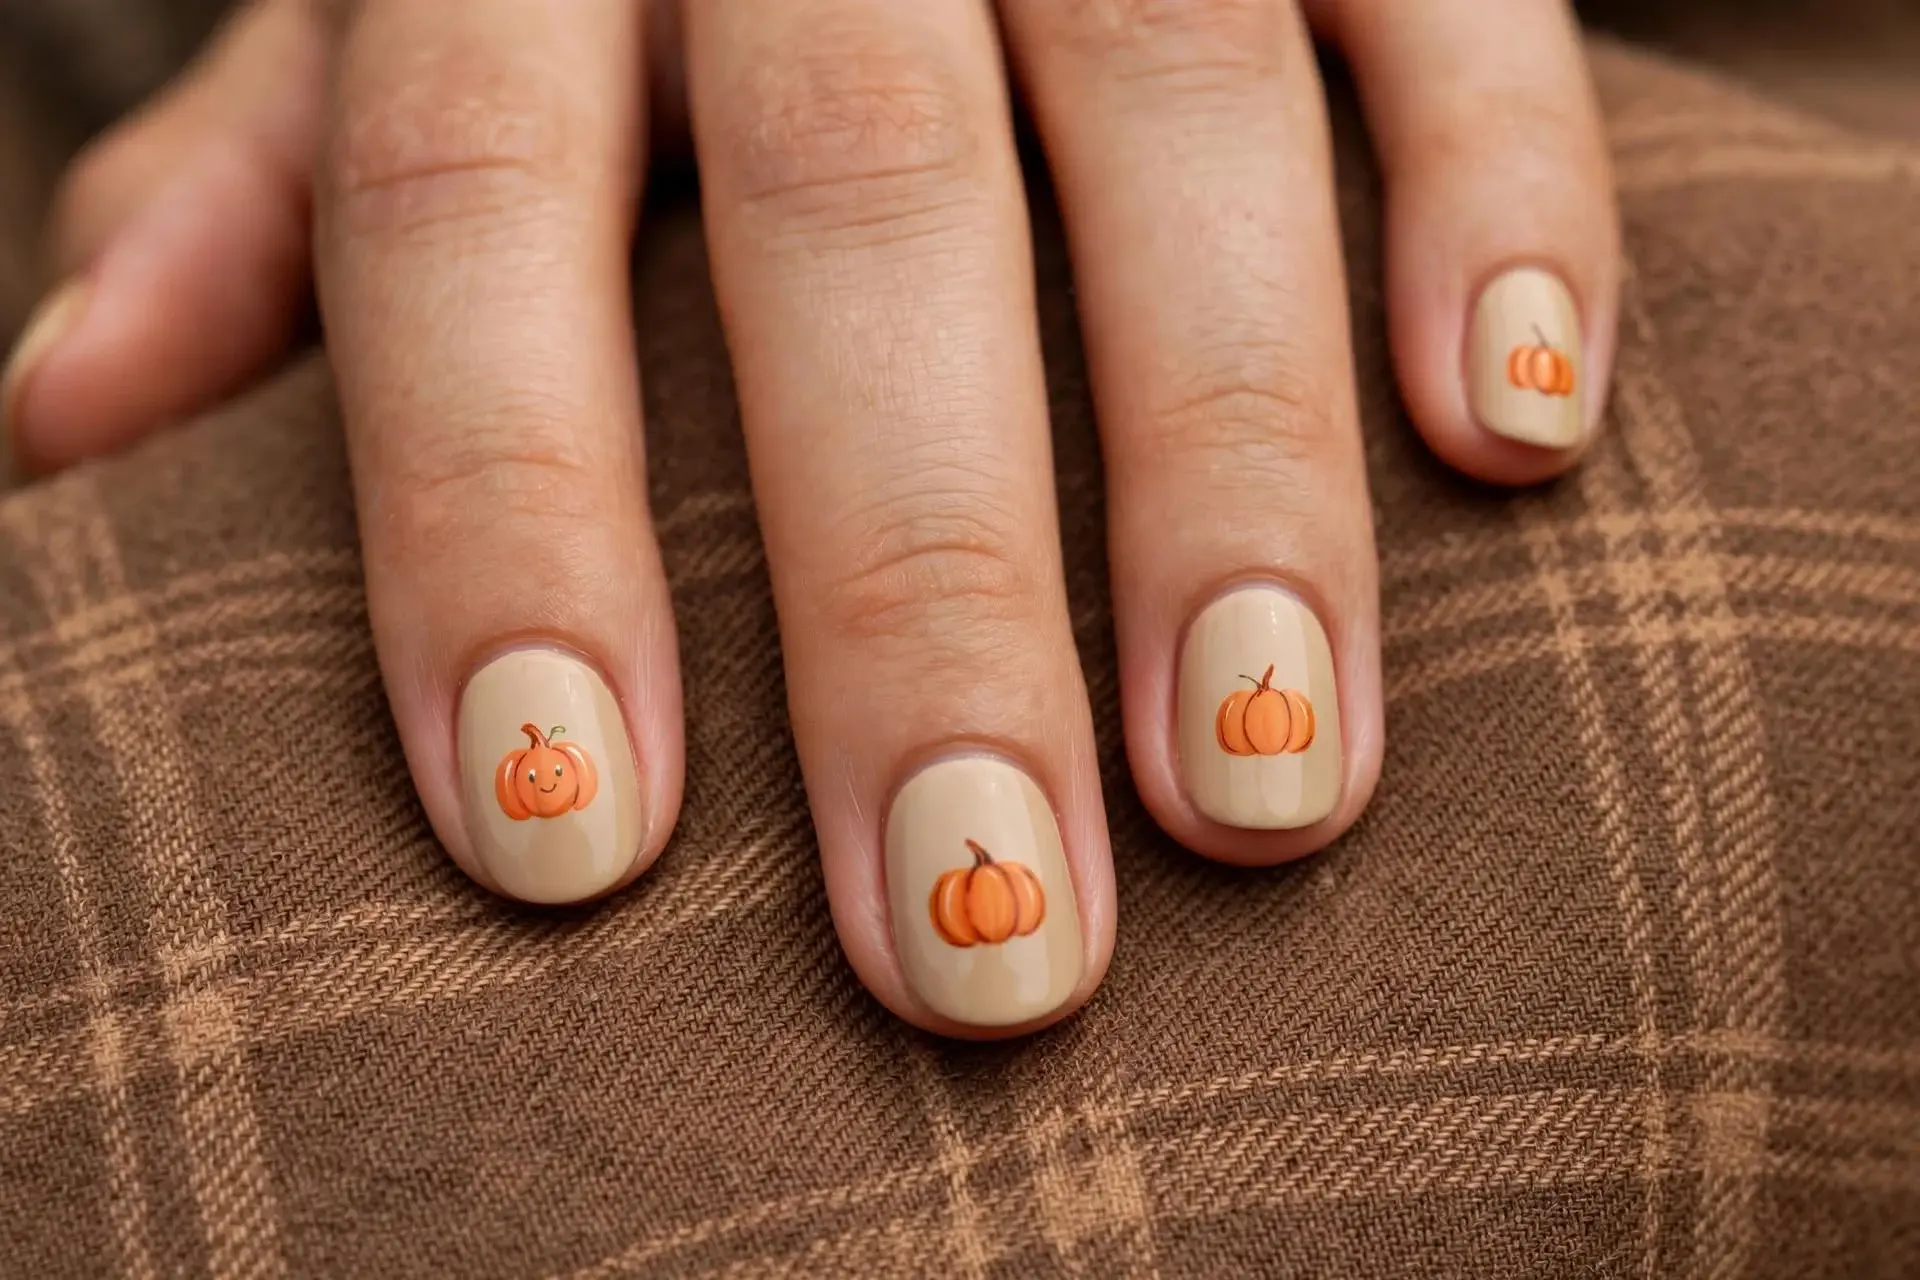
Every October I promise myself I will not paint a pumpkin on my nails. Then I walk past a farm stand with a wheelbarrow of tiny orange pumpkins, and by that evening I am sitting at my desk with a toothpick and a bottle of burnt orange polish.
Pumpkin nails have a reputation for looking childish, and they can if the orange is too bright, the pumpkin is too big, or every nail has one. Done well, they look charming and a little witty, like a small seasonal joke that only shows up when someone looks closely.
So I planted this post like a pumpkin patch. The 15 designs are grouped by pumpkin variety, because a real patch is not all orange. You will find Sugar Pies (classic and cute), Cinderellas (soft and dressy), White Ghosts (pale and modern), Blue Jarrahdales (muted and unusual), and Jack-o’-Lanterns (spooky and bold). Each design has a Grow Difficulty, a Harvest Time (how long it takes to paint), and a Best Picked For note.
Here is what else you will find, all things I rarely see in nail posts:
- The Pumpkin in Four Strokes, a beginner method for painting a pumpkin that actually looks like one
- The Orange Decoder, because the wrong orange can wash out your hands
- The Subtle Pumpkin Rule, for wearing pumpkins to the office
- The Practice Pumpkin Trick, a fun way to warm up before you paint your nails
- The Pumpkin Calendar, so you know when to wear which look
- A Photo Prop List and a Quick Fix Chart
The Pumpkin in Four Strokes
If you can draw a smiley face, you can paint a pumpkin nail. Use a toothpick or a thin brush.
- The body. Paint a small oval on a dry, light base. Make it slightly wider than it is tall.
- The ridges. Add two curved lines inside the oval, slightly darker than the body, to make it look segmented.
- The stem. Dab a short brown or dark green stroke on top.
- The curl. Add one tiny curved line off the stem for a vine.
Keep the pumpkin small. A tiny pumpkin looks cute, and a big one looks like a sticker.
Blogger note: Let the base dry for at least ten minutes before you draw. A tacky base drags, and the pumpkin looks smeared.
The Orange Decoder
Orange is the hardest fall color to wear, because the wrong one makes skin look yellow or tired.
| Orange | What It Looks Like | Best For |
|---|---|---|
| Pumpkin orange | Bright, classic, cheerful | Warm skin tones, accent nails |
| Burnt orange | Deeper, with a brown tint | Most skin tones, the safest choice |
| Terracotta | Muted, clay-like, earthy | Neutral and warm skin tones |
| Peachy orange | Soft and light | Fair skin, early fall |
| Rust | Red-brown, moody | Cool and neutral skin tones |
Quick test: Paint one nail and hold your hand next to your face in daylight. If your skin looks smooth and bright, keep it. If it looks yellow or dull, switch to a deeper or browner orange.
The Pumpkin Patch
Row One: Sugar Pies (Classic and Cute)
Small, round, and friendly. The best place to start.
1. The Tiny Accent Pumpkin
Grow Difficulty: Easy | Harvest Time: 40 minutes
The look: Creamy nude nails with one small burnt orange pumpkin on the ring finger.
Best picked for: Office days, first-timers, jeans and sweaters.
Blogger note: One pumpkin per hand is the sweet spot.
2. Pumpkin Dots
Grow Difficulty: Easy | Harvest Time: 30 minutes
The look: A cream base with tiny orange, mustard, and brown dots along the tips, like scattered mini pumpkins.
Best picked for: Short nails, casual weekends, cozy knits.
Blogger note: Use a bobby pin for round dots, and space them unevenly.
3. Pumpkin Patch French
Grow Difficulty: Medium | Harvest Time: 50 minutes
The look: A sheer nude base with a burnt orange French tip and a tiny green vine curling up the side of one nail.
Best picked for: Dressier days and camel coats.
Blogger note: Keep the tip thin so the vine stays the star.
4. Half-Moon Pumpkin
Grow Difficulty: Medium | Harvest Time: 45 minutes
The look: A pale base with an orange crescent at the cuticle, like a pumpkin just rising from the ground.
Best picked for: Vintage outfits, soft neutrals.
Blogger note: Round reinforcement stickers make a clean curve.
Row Two: Cinderellas (Soft and Dressy)
Named for the fairy-tale carriage pumpkin. Romantic, rounded, and a little glamorous.
5. Champagne Carriage
Grow Difficulty: Medium | Harvest Time: 55 minutes
The look: A shimmery champagne base with a tiny gold-outlined pumpkin on one nail.
Best picked for: Dinners, weddings, and holiday parties.
Blogger note: Outline the pumpkin with a thin gold striping brush, not a thick one.
6. Glazed Pumpkin Latte
Grow Difficulty: Easy | Harvest Time: 40 minutes
The look: Milky caramel nails with a pearl top coat and one tiny pumpkin on the ring finger.
Best picked for: Cafes, cream sweaters, and gold jewelry.
Blogger note: The pearl finish makes the whole set look like frothy milk.
7. Velvet Pumpkin Spice
Grow Difficulty: Medium | Harvest Time: 50 minutes
The look: Burnt orange magnetic polish with a copper shimmer band.
Best picked for: Evening outfits and velvet blazers.
Blogger note: Hold the magnet a centimeter above the wet polish for ten seconds.
8. Rose Gold Pumpkin Blush
Grow Difficulty: Easy | Harvest Time: 40 minutes
The look: A soft blush base with a peachy orange gradient at the tips and a rose gold fleck.
Best picked for: Early fall days and romantic outfits.
Blogger note: Dab the gradient with a makeup sponge, not a brush.
Row Three: White Ghosts (Pale and Modern)
Pale pumpkins that look like sculpture. Perfect if you want the theme without the bright orange.
9. Ivory Pumpkin on Nude
Grow Difficulty: Medium | Harvest Time: 50 minutes
The look: A sheer nude base with a creamy ivory pumpkin outline on one nail, no fill.
Best picked for: Minimalists, office wear, and neutral outfits.
Blogger note: Use a very thin brush and keep the outline slightly wobbly, like a sketch.
10. Chalk and Tan Pumpkin Set
Grow Difficulty: Easy | Harvest Time: 35 minutes
The look: Chalky white, tan, and sand shades on alternating nails, with one tiny brown stem accent.
Best picked for: People who love neutral nails but want a seasonal wink.
Blogger note: A matte top coat makes the shades look like painted clay.
Row Four: Blue Jarrahdales (Muted and Unusual)
Gray-blue pumpkins that look surprisingly stylish next to burnt orange.
11. Slate Blue Pumpkin Accent
Grow Difficulty: Medium | Harvest Time: 50 minutes
The look: Soft gray nails with one slate blue pumpkin and a tiny mustard stem.
Best picked for: Denim, gray coats, and cool-toned outfits.
Blogger note: Blue against orange is a color-wheel opposite, so keep the orange to one small detail.
12. Sage and Terracotta Pair
Grow Difficulty: Easy | Harvest Time: 40 minutes
The look: Alternating sage green and terracotta nails, with a tiny pumpkin on the ring finger.
Best picked for: Linen shirts, olive jackets, and earthy outfits.
Blogger note: Keep the pumpkin very small so the colors do the talking.
Row Five: Jack-o’-Lanterns (Spooky and Bold)
For October 31, and every day close to it.
13. Black Cherry Jack-o’-Lantern
Grow Difficulty: Advanced | Harvest Time: 1 hour
The look: Deep black cherry nails with one orange nail featuring a tiny carved face.
Best picked for: Halloween parties and leather jackets.
Blogger note: Use a fine brush and paint the eyes and mouth as small triangles. Two or three simple shapes are enough.
14. Glow Pumpkin Gradient
Grow Difficulty: Medium | Harvest Time: 55 minutes
The look: Black at the cuticle fading into glowing orange at the tips, like a lit pumpkin in the dark.
Best picked for: Night parties, black dresses, and dark lipstick.
Blogger note: Blend the two colors with a sponge, then add a top coat between layers to keep the fade smooth.
15. Spooky Pumpkin with Gold Web
Grow Difficulty: Advanced | Harvest Time: 1 hour 10 minutes
The look: A charcoal base, one orange pumpkin nail, and a small gold web in the corner of another.
Best picked for: Halloween events, costumes, and photos.
Blogger note: Keep the web tiny and in one corner only. Too much reads as a costume prop.
The Subtle Pumpkin Rule
Not everyone can wear a big orange pumpkin to work. If you want the theme with a professional finish, try this:
- Choose the Pumpkin Family, not the pumpkin itself. Terracotta, burnt orange, and caramel shades say pumpkin without drawing one.
- Keep art to one nail. A tiny outline on the ring finger is enough.
- Choose sheer or milky bases. They soften bold color.
- Avoid heavy glitter and bright orange. These read as party looks, not office looks.
The Practice Pumpkin Trick
Before you paint your nails, warm up on a real mini pumpkin. Yes, really.
- Buy a small pumpkin and wipe it clean.
- Paint a few practice shapes with your toothpick or brush. The curved surface is a lot like a curved nail.
- Try your lines, ridges, and stems.
- Wipe off the polish with remover and try again.
- When you feel steady, move to your nails.
It also gives you a cute mini pumpkin for your table.
The Pumpkin Calendar
Timing changes how pumpkin nails feel.
| When | What to Wear | Why |
|---|---|---|
| Early September | Peachy orange, sage and terracotta (#8, #12) | Subtle and still summery |
| Late September | Pumpkin dots, glazed latte, half-moon (#2, #6, #4) | The first real cozy days |
| October | Any design on the list | Peak pumpkin season |
| Halloween week | Jack-o’-lanterns and glow gradients (#13, #14, #15) | Playful and spooky |
| November | Ivory or chalk pumpkins, champagne carriage (#9, #10, #5) | Calm, elegant, and Thanksgiving-friendly |
Outfit Match Table
| Outfit | Best Designs |
|---|---|
| Cream or camel sweaters | #1, #6, #10 |
| Denim jacket and jeans | #2, #3, #11 |
| Black dress or leather | #7, #13, #14 |
| Plaid skirts or flannel | #2, #4, #12 |
| Office blazer | #9, #1, #10 |
| Wedding or dinner | #5, #7, #9 |
Photo Props That Make Pumpkin Nails Pop
- A mini pumpkin or gourd: It ties the nails to the theme.
- A cozy knit sweater: Cream or oatmeal makes the orange stand out.
- A warm drink: A latte or cider mug looks lovely in the photo.
- A leaf or dried flowers: Add texture without competing with the nails.
- A wooden table or a blanket: Simple backgrounds keep the focus on your hands.
- Natural light: Sit near a window and avoid yellow lamps.
Pumpkin Nail Quick Fix Chart
| Problem | Fix |
|---|---|
| The pumpkin looks like a blob | Draw with a thinner tool, and let the base dry longer |
| Orange looks too bright | Add a top coat of sheer brown or use a burnt orange instead |
| Stem is too big | Wipe with a cotton swab and repaint smaller |
| Lines smudge | Let each layer dry fully before the next |
| Details chip early | Cap the tip and use a thick top coat |
| Color looks yellow on your skin | Try terracotta, rust, or burnt orange |
Common Pumpkin Nail Mistakes
- Painting a pumpkin on every nail. One or two is enough.
- Making the pumpkin too big. Small looks stylish, and big looks like a sticker.
- Choosing a bright orange that fights your skin tone. Use the Orange Decoder.
- Skipping the base coat. Orange and dark shades can stain nails.
- Rushing the drying time. A tacky base ruins fine details.
- Forgetting the top coat. It protects the art and adds shine.
Frequently Asked Questions (FAQs)
1. Are pumpkin nails appropriate for the office?
Yes, if you keep them subtle. Choose terracotta or burnt orange, use one small accent nail, and keep the base sheer or milky.
2. What is the easiest pumpkin nail design for beginners?
The Tiny Accent Pumpkin (#1) and the Pumpkin Dots (#2) are the easiest.
3. What orange looks best on most skin tones?
Burnt orange is the safest, and terracotta suits neutral and warm tones.
4. Can I do pumpkin nails on short nails?
Yes. Dots, half-moons, and single tiny pumpkins work beautifully on short nails.
5. What tools do I need to paint a pumpkin on my nail?
A toothpick, a thin brush, and a bobby pin for dots are all you need.
6. When should I start wearing pumpkin nails?
Late September is a good start. In early September, choose peachy orange or terracotta.
7. What colors go well with orange pumpkins?
Cream, brown, mustard, sage green, gold, and charcoal.
8. How do I make pumpkin nails look elegant?
Use muted oranges, keep the design small, add a thin gold detail, and finish with a glossy top coat.
9. Can I wear pumpkin nails after Halloween?
Yes. Ivory pumpkins and champagne carriage designs work through Thanksgiving.
10. How long do pumpkin nail designs last?
With a base and top coat, regular polish lasts five to seven days. Gel lasts two to three weeks.
11. What nail shape is best for pumpkin designs?
Short round, oval, and squoval shapes suit small pumpkins, and almond and coffin give more room for art.
12. How do I remove nail art with gold or glitter?
Soak a cotton pad in acetone, place it on the nail, wrap with foil for a few minutes, then gently wipe.
Conclusion
Pumpkin nails do not have to be loud. A tiny orange pumpkin on one finger, a soft terracotta shade, or a pale ivory outline can make your hands look festive and put together. The secret is choosing the right orange, keeping the art small, and having fun with the process.
Start with a Sugar Pie if you are new to nail art, use the Pumpkin in Four Strokes for practice, and save the Jack-o’-Lanterns for Halloween week. Take a quiet evening, pour something warm, and let your hands join in on the season.
Which pumpkin are you picking first from the patch? Save this post for your next nail night, and send it to a friend who is always trying to look festive without going overboard.