14 Almond Christmas Nails That Flatter Every Hand
Here is the quietly useful thing about this shape: an Almond Christmas Nails gives you more painting wall than a round nail of the same length. That extra curve is exactly why almond shape Christmas nails carry tiny painted scenes so well.
A bus, a bird, a whole castle: the tapered sides work like a little frame, and the art sits inside it.
Below are fourteen sets with art on every nail, thumb included, plus the steps for each one, plain enough to copy at home or hand to your tech.
What I rate about the almond is its manners. It lengthens the look of your fingers without a sharp point’s drama, and it holds up through wrapping, typing and cooking better than pointier shapes. My lean is medium length for December: long enough for real art, short enough to open a biscuit tin easily.
Find Your Pick in 10 Seconds
Match your December mood to a number, then jump there.
- Love a little scene? Start with the snowy bus in idea 1 or the castle in idea 14.
- Animal soft spot? The cow in idea 3, the otter in idea 12 and the donkey in idea 13 are yours.
- Bird detail more your thing? Look at the bullfinch in idea 4 and the kingfisher in idea 5.
- Soft, icy and calm? Ideas 6 and 10 keep the palette pale.
- Food-inspired? Ideas 8 and 9 taste like Christmas.
Ideas 2, 4, 6, 9 and 11 need a gel kit and a lamp; the rest use regular polish.
1. Almond Christmas Nails With a Snowy Red Bus
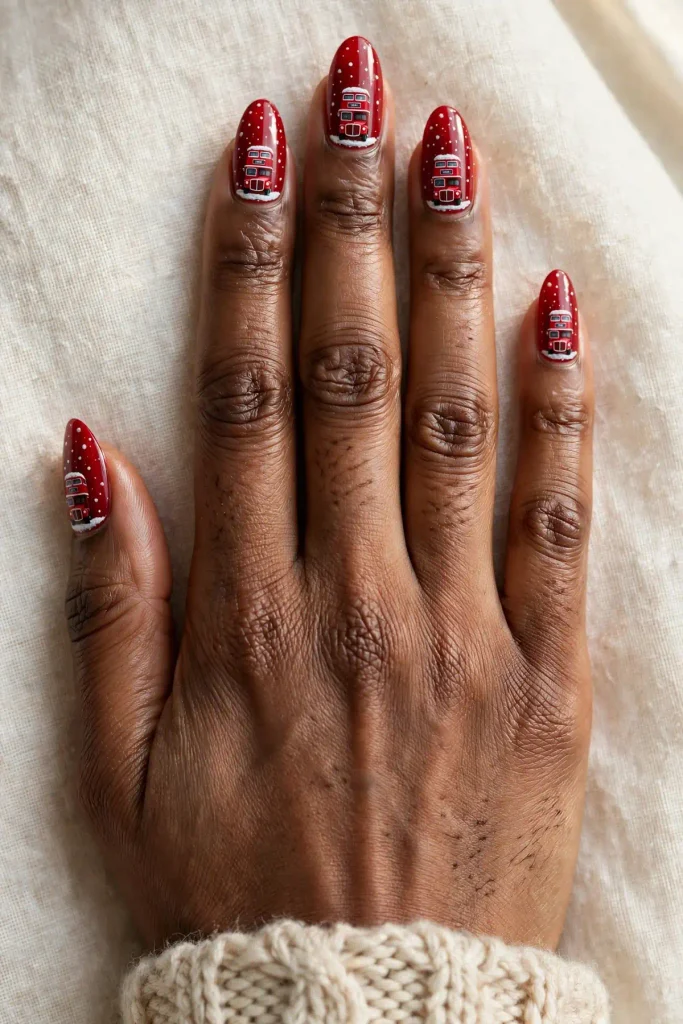
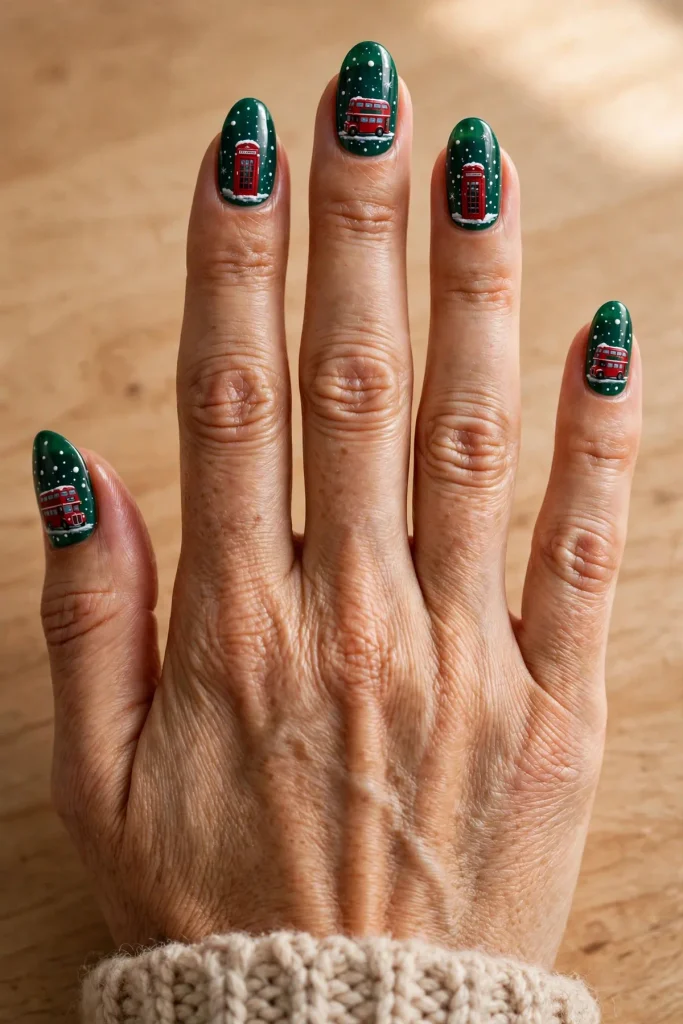
Glossy crimson nails, and on every nail a small red double-decker bus: snow on its roof, white ground line along the tip, snow dots above. Medium almonds give the bus its length; on short nails it shrinks into a red smudge.
The order: base coat, two coats of crimson, dried hard. Ground line first, then the bus: simple red shape, paler roof, windows dotted in cream, snow cap in white, glossy top coat.
Photo note: Cream windows, not white, keep the bus readable in photos.
Shape note: A low-starting taper gives the scene a longer road.
2. Almond Christmas Nails With a Phone Box in the Snow
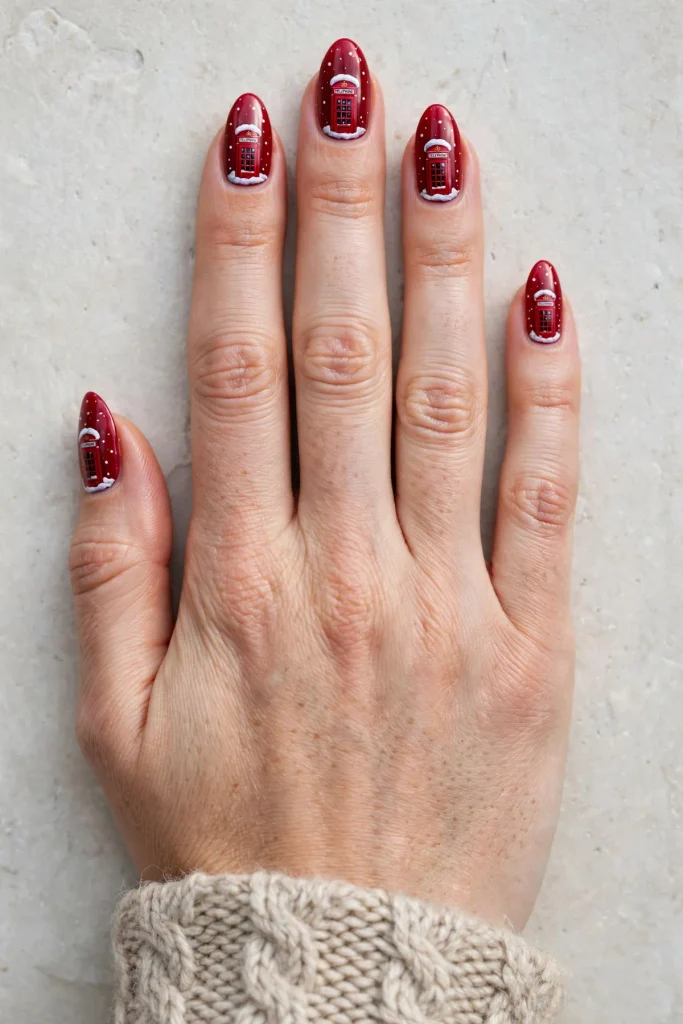
Deep berry red, high-shine, and a tiny red phone box standing in snow on every nail: white cap on its roof, white ground line at the tip, snow dots around. This set is gel and needs a gel kit and a lamp, since straight edges stay crisp only when each layer cures before the next lands. In the chair: gel base coat, cured. Two coats of berry gel, each cured. The box with a fine brush: red panels first, then white roof snow and ground line, flash-cured. Gel top coat, final cure.
Gel note: Gel pays off here; straight edges bleed in slow polish.
Wear note: Berry red hides regrowth, so week three looks tidy.
3. Highland Cow Almond Christmas Nails With Snow on Her Fringe
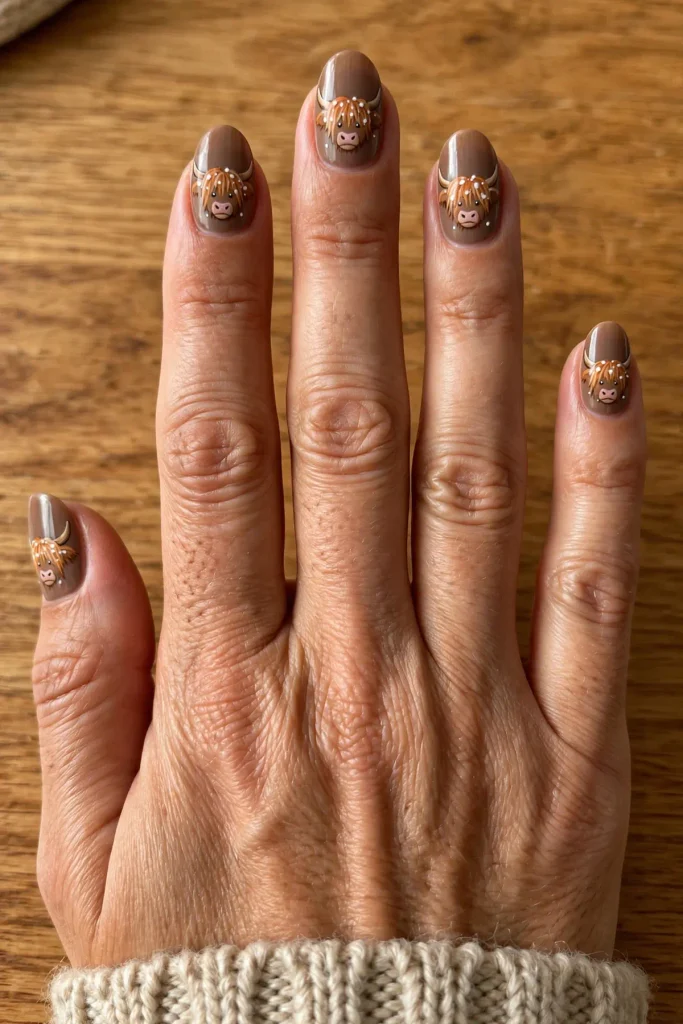
Warm taupe-brown nails, and on every nail a Highland cow face: all fringe and patience, snow specks in her hair. Paint her like this: base coat, two coats of taupe. Sweep the fringe in strokes of rust and ginger downward with a fine brush, small cream horns at the sides, a soft pink oval nose with two dots. White specks flicked over the fringe last, glossy top coat.
Colour note: Three browns in the fringe stop it reading flat.
Photo note: Daylight flatters this set; flash flattens the fringe.
4. Bullfinch Almond Christmas Nails on Deep Berry Red
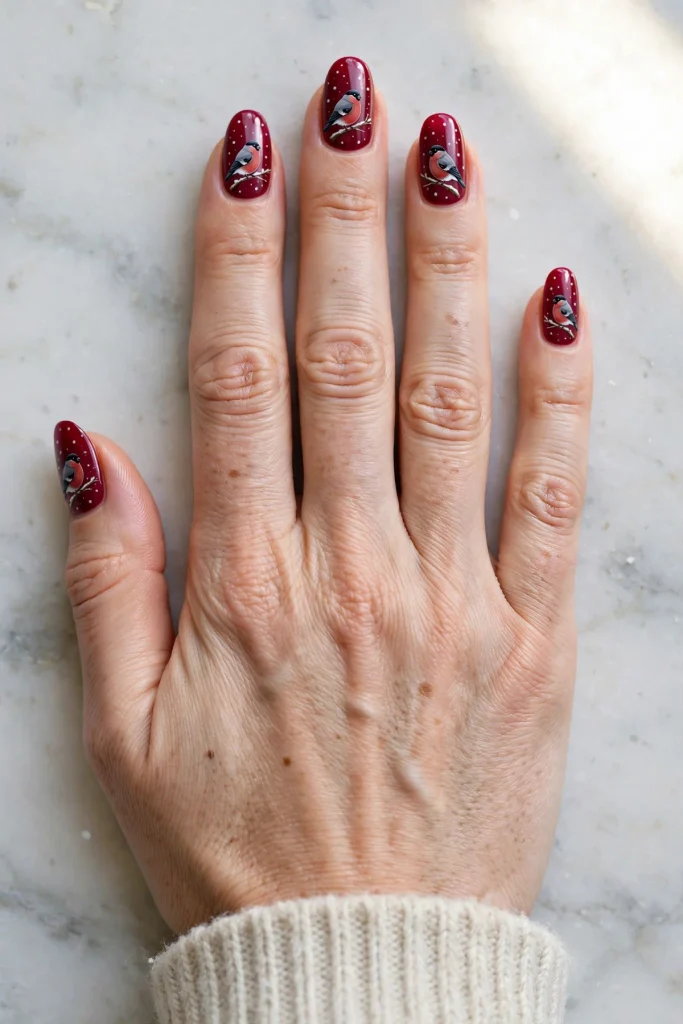
Deep berry-red nails, and on every nail a plump bullfinch: grey back, black cap, bright red breast, perched on a snowy twig. Bird detail does not get cosier. This one is gel, since the breast must sit clean against the grey, layer over cured layer; it needs a gel kit and a lamp. Build in stages: gel base, cured. Berry coats, cured. One brown stroke for the twig, a grey teardrop bird over it, black cap and tail, red breast last so it stays vivid. Snow dots, gel top coat, final cure.
Salon note: Five matching birds take around seventy-five minutes.
Final note: Gloss keeps the red breast looking feathered, not flat.
5. Kingfisher Almond Christmas Nails on Icy Teal
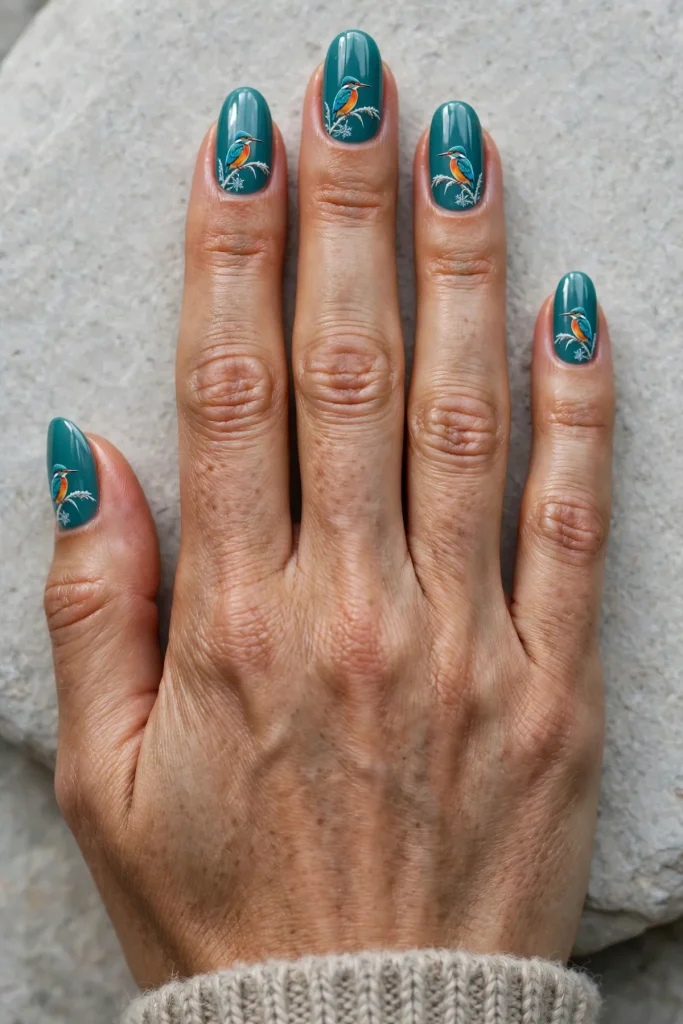
Icy teal nails, and on every nail a small kingfisher: bright blue back, orange breast, long beak, perched on a snowy reed. The bird’s long shape suits an almond outline; keep length medium so the beak has room to point. The order: base coat, two coats of teal. Body as a blue teardrop, breast a sweep of orange beneath, one fine line for the beak, the reed a brown stroke with white snow dabbed on. One tiny eye dot per bird, then gloss.
A kingfisher is the brightest bird on a grey riverbank; an icy teal set brings that same flash to December.
Colour note: Pick a teal that leans blue, or the back vanishes.
At-home tip: Beaks pointing the same way look deliberate in photos.
6. Jack Frost Almond Christmas Nails in Pale Ice Blue

Ice-blue nails, and on every nail a Jack Frost face: blue-white skin, spiky frost hair, eyebrows up, grinning like he just breathed on your window on purpose. Faces punish wobbly layers, so this set is gel, cured feature by feature; it needs a gel kit and a lamp. The build: pale blue gel base, cured. Face as a white-blue oval, cured. Hair spikes in white, features in deep blue, grin last. Gel top coat, final cure, gloss kept high.
Watch out: Faces magnify asymmetry; paint the middle nail first.
Gel note: Curing between features keeps the grin out of the eyebrows.
7. Quilted Burgundy Almond Christmas Nails With Soft Stitched Seams
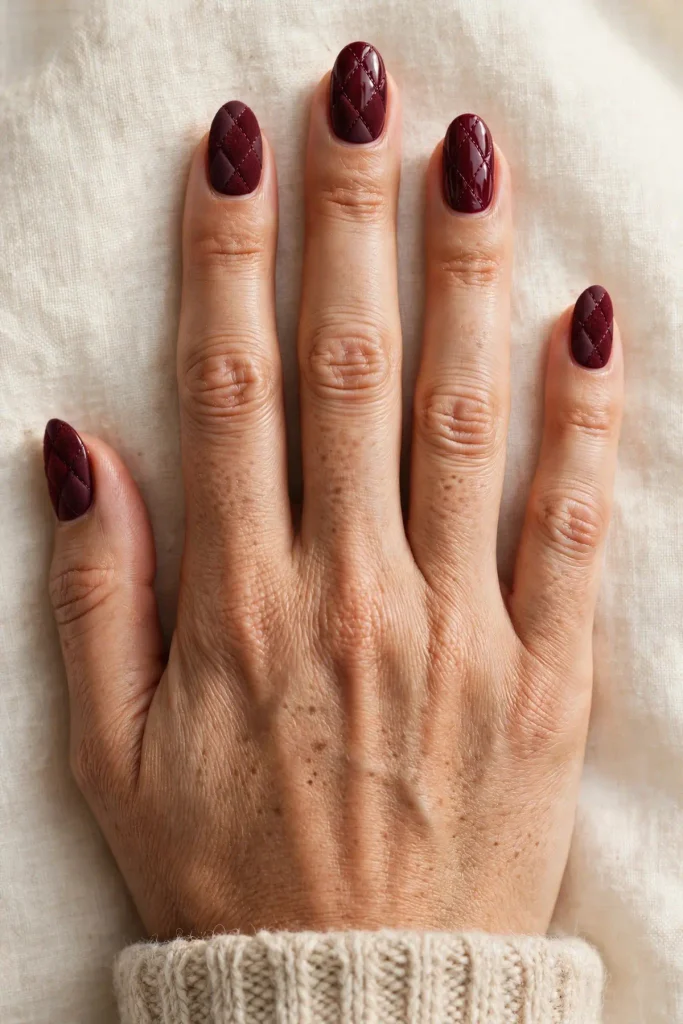
Deep burgundy nails patterned edge to edge with padded diamonds: seams as fine stitched lines, alternate diamonds matte and glossy so the pattern shifts as you move. Quilting borrowed from a winter coat. The technique: base coat, two coats of burgundy, dried well. Score the grid lightly with a striping brush in a deeper burgundy, let it set, then matte top coat everywhere. Re-gloss every second diamond with a small brush, seams left matte.
Texture note: The matte-gloss contrast does the work; skip glitter.
Swap idea: On shorter almonds, wider diamonds read more padded.
Halfway check: hold your hand at arm’s length. On a good almond set the art still reads as colour and shape from there; detail is the bonus up close.
8. Christmas Trifle Almond Nails With Jelly and Cream Layers
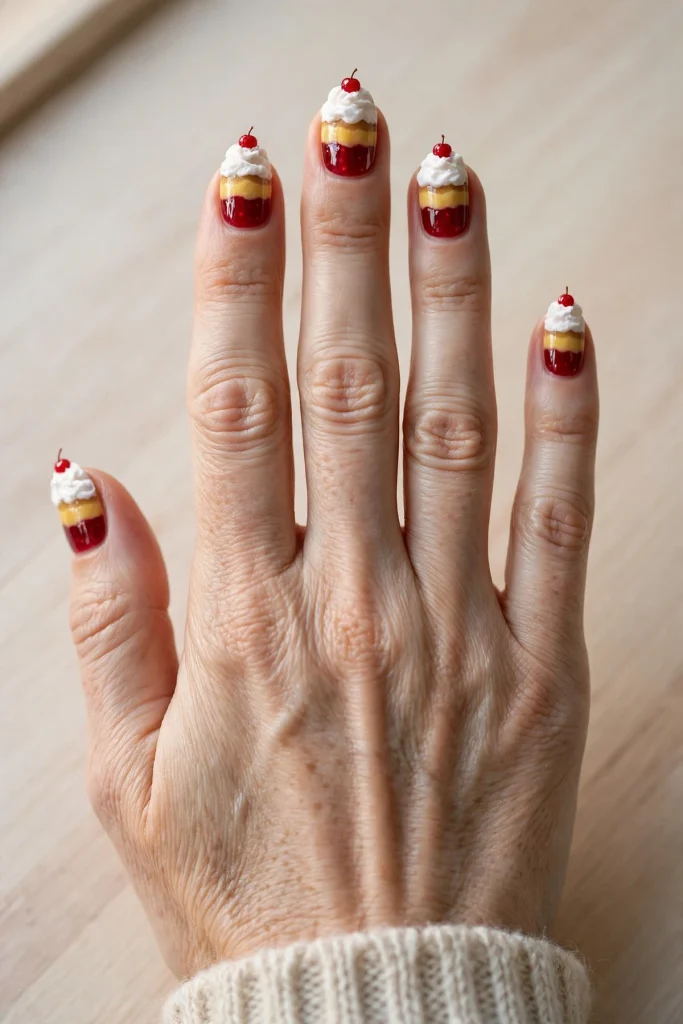
Every nail striped like a trifle seen through glass: deep red jelly at the base, golden custard through the middle, soft white cream at the tip, one red cherry in the cream. It is the friendliest art here for newer painters, since wobbly layers just look like real trifle. The order: base coat. Red jelly third first, dried properly. Custard band above it, then the cream, dabbed with the brush edge for a whipped edge. Cherry last: one red dot, a tiny white shine mark, glossy top coat.
Colour note: Golden custard reads rich; yellow reads warning sign.
Watch out: Thick cream layers wrinkle; two thin dabs beat one.
9. Mulled Wine Almond Christmas Nails With a Tiny Painted Glass
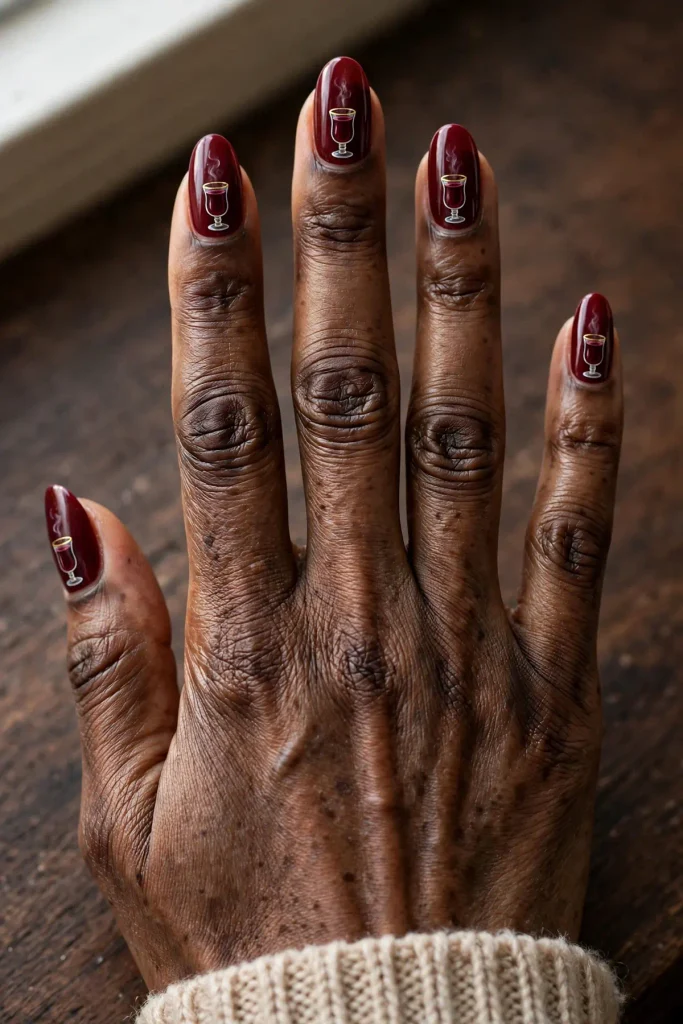
Deep wine-red nails, and on every nail a tiny gold-rimmed glass of mulled wine: the drink dark and glossy, one curl of steam above it. The glass shine needs gel, since thin layers cured under the lamp keep the outline separate from the drink; this set needs a gel kit and a lamp. The steps: wine-red gel coats, each cured. Outline in pale gold with a fine brush, cured. Fill the drink a shade deeper than the base, steam curl in soft white, gel top coat, final cure.
Salon note: A small, high steam curl stops it swallowing the glass.
Gel note: Gloss over the drink area only reads as liquid.
10. Almond Blossom Christmas Nails on a Toasted Almond Base
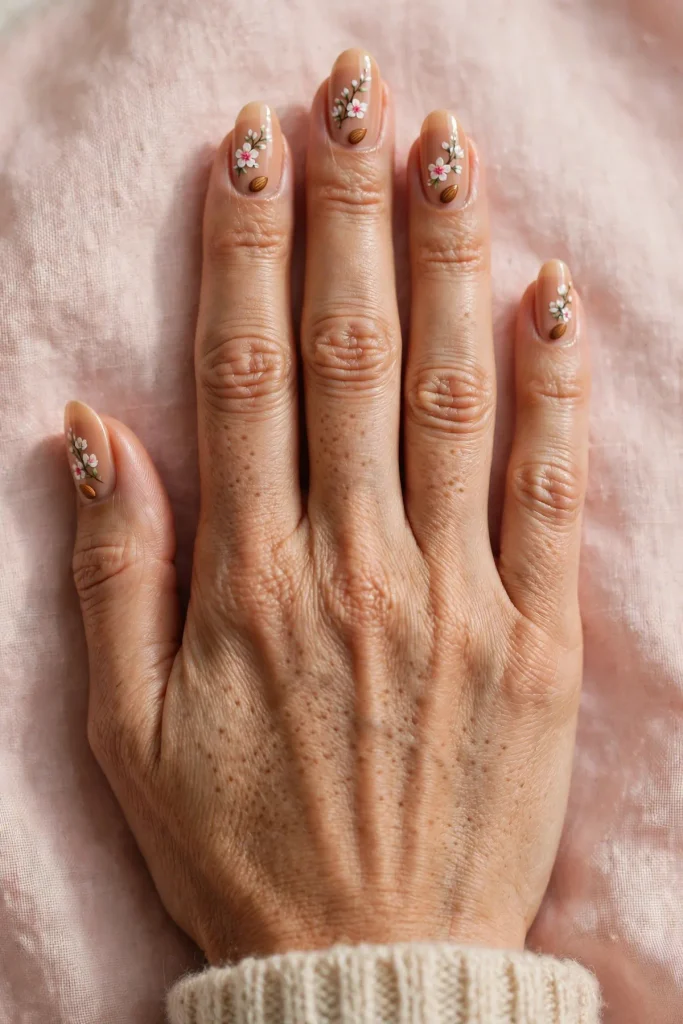
Warm toasted-almond nude nails, and on every nail a delicate sprig of almond blossom: white petals, soft pink centres, one tiny whole almond near the cuticle. It is the quietest set here, and goes with every outfit you own. Paint it in this order: base coat, two coats of nude. Branch first, one fine brown stroke. Petals as five tiny white dabs around a pink centre dot, two or three blossoms per sprig; the almond as a small tan oval. Glossy top coat.
Blossom on a nude base is my quiet favourite: soft from across the room, detailed only up close.
Shape note: Nothing fights the outline, so the almond curve shows fully.
Final note: Gloss keeps this nude warm; matte can turn it chalky.
11. La Befana Almond Christmas Nails With a Flying Witch Silhouette
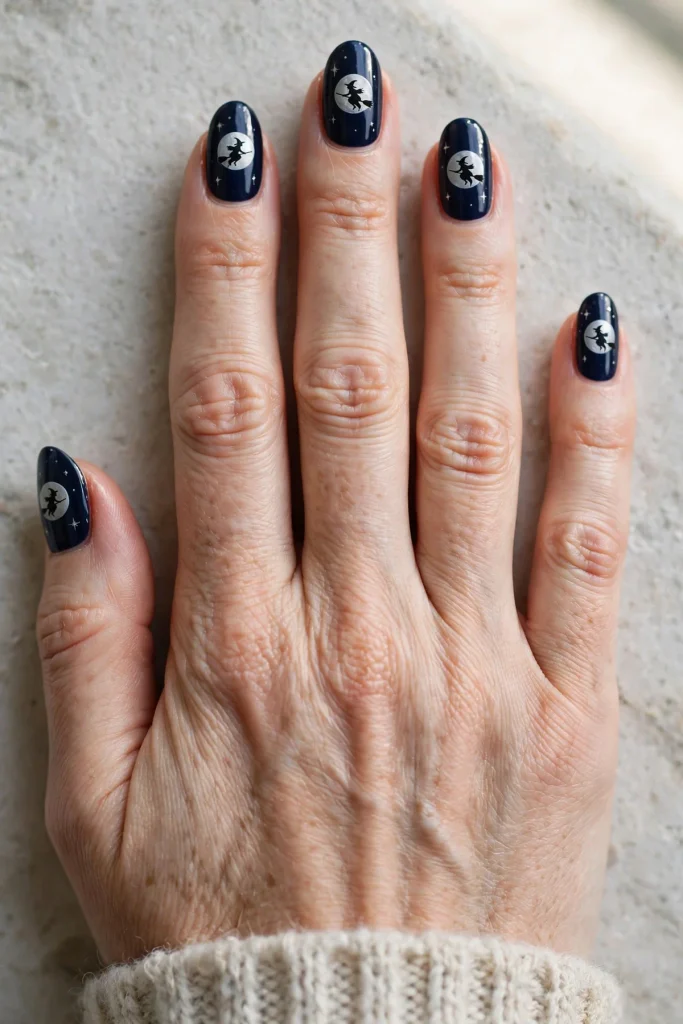
Midnight navy nails, a round silver moon on every nail and a black witch silhouette crossing it: La Befana, Italy’s Christmas witch, mid-delivery, skirts, broom and all. Silhouettes live or die on clean edges, so this set is gel, cured between steps; it needs a gel kit and a lamp. The build: navy gel coats, cured. Moon as a silver circle, cured. The witch over it in black with a fine brush, a rim of moonlight left visible around her. Stars dotted in, gel top coat, final cure.
Story note: Expect to explain her once per party; that is the fun.
Gel note: Cure the moon fully first, or black bleeds into silver.
12. Otter Almond Christmas Nails Sliding Through the Snow

Soft grey-blue nails, and on every nail a small brown otter sliding belly-first through white snow: paws out, snow spraying behind. Pure joy, mid-slide, and the least precious set here. The painting: base coat, two coats of grey-blue, snow as a white sweep along the lower half. The otter as a long brown curve over it, a head circle at the front, one tiny ear, tail flicked up behind, two dots for eye and nose. White spray dots behind the tail, glossy top coat.
Photo note: The slide reads clearest with the otter low, near the tip.
At-home tip: Body curve, head, tail: the spray dots sell speed.
13. Little Donkey Almond Christmas Nails in Soft Grey

Soft warm-grey nails, and on every nail a small donkey face: long ears, kind eyes, a pale muzzle, light snow around her. Those long ears use the almond length well, running up the curve. Paint her like this: base coat, two coats of grey. Ears first, two long strokes in deeper grey with pale pink inside. Face over them in mid grey, muzzle a pale oval at the lower end, nostril and eye dots in charcoal. Snow dots last, kept off the face. Glossy top coat.
Colour note: Three greys, deep, mid and pale, give her face shape.
Final note: A satin finish suits her if gloss feels too party.
14. Fairytale Castle Almond Christmas Nails Under Snow
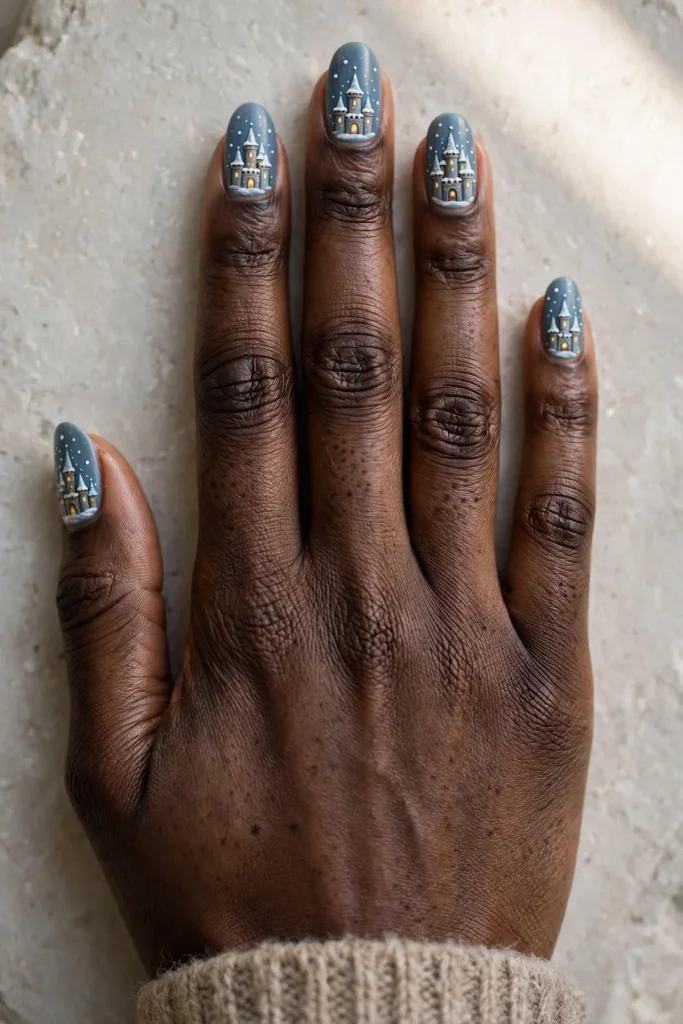
Dusty blue-grey nails, and on every nail a small fairytale castle: snow thick on its towers, warm gold glowing in tiny windows. The most detailed scene here, so give it medium-to-long almonds and a patient tech. The order: base coat, two coats of blue-grey. Castle body in pale stone grey, towers as narrow shapes with pointed roofs, all capped in white. Windows as tiny gold rectangles, two or three lit per nail. Snow dots around it, glossy top coat.
Salon note: A full castle on every nail is a ninety-minute booking.
Photo note: Gold windows photograph lit in dull light; keep them small.
What to Tell Your Nail Tech Before the Art Starts
Show up with three things settled: your length, a photo of the shape you mean, and your patience level. Almond art goes wrong when the taper gets filed after the design is planned, since every scene is composed for the curve it will sit on. Ask for shape first, art second.
Name your finish out loud too, matte, satin or gloss, since several sets change character with it. For the gel sets, ideas 2, 4, 6, 9 and 11, say upfront that you want each layer cured before detail lands on top; a tech who knows that will book the longer slot instead of rushing faces. And agree the thumb design before anyone starts; a plain thumb reads like a mistake.
Time and Money: What an Almond Art Set Really Takes
No exact prices here, since salons price art by the minute and the tech, but the pattern is steady: scenes cost more than plain colour, and gel art more than polish art. The simpler sets, ideas 7, 8, 10 and 12, sit near the forty-five minute mark. Faces and the castle, ideas 4, 6 and 14, can run to ninety.
At home the tool list is modest: a fine brush, a dotting tool, a striping brush and polishes you already own cover every regular-polish set here. The gel sets ask for the kit and lamp first, a one-time cost rather than a per-set one.
The Almond Sweet Spot: Length That Suits the Shape
Almond nails have a working range, and December art narrows it. Too short, and the shape collapses into a round nail with ambitions: the taper barely forms, and scenes like the bus and the castle lose their long painting wall. Too long, and the tip turns fragile exactly when December asks most of your hands: lids, clasps, wrapping paper, the lot.
The sweet spot for most hands is a free edge roughly a third of the nail bed’s length, the widest point of the curve just past the fingertip. That keeps the outline clearly almond, gives a bird or a face room to spare, and still types, cooks and fastens buttons without negotiation. Growing slowly? Wear the quieter sets, ideas 7 and 10, at your current length, and save the castle for a grown-out month.
Care That Keeps Almond Christmas Nails Intact
Almond tips tend to snap at the sides, where the curve narrows, so treat that curve kindly: gloves for washing up, no nails as tools, a file in your bag for the first snag. Cuticle oil each day keeps the set flexible. For regular-polish sets, fresh top coat every few days keeps the art sealed.
For gel sets, patch test any new gel product on one nail before a full set, keep base coat between gel and natural nail, and do not peel gel off when it lifts, since peeling takes nail surface with it. Book professional removal instead, and skip the long soaking tricks you may read about; forced removal is where the damage happens. A chip in a scene is not the end, either: most designs here forgive a small touch-up with the original colour.
Almond Christmas Nails Questions, Answered
How long should almond Christmas nails be for painted art?
Medium is the sweet spot for most sets here: a visible free edge and a clear taper, enough wall for a bird or a bus, without the tip getting fragile. The quilted set in idea 7 and the blossom in idea 10 still read well a little shorter.
Do almond nails suit short or wide fingers?
Often, yes. The tapered tip draws the eye along the finger, which is why this shape is often suggested for shorter fingers. Keep the sides straight rather than pinched, at medium length; a narrow point on a wide nail bed can look strained.
Can I paint these at home without a lamp?
Nine of the fourteen, yes. Ideas 1, 3, 5, 7, 8, 10, 12, 13 and 14 use regular polish and basic tools. Ideas 2, 4, 6, 9 and 11 are gel sets that need a gel kit and a lamp, because the detail is cured layer by layer.
How long does a full-art almond set take at a salon?
Plan for forty-five to ninety minutes. Simple patterns sit at the fast end; faces and the castle at the slow end, gel sets adding curing time between layers. Booking the longer slot upfront beats a rushed thumb.
How do I stop almond tips from chipping?
Seal the free edge with top coat and refresh it every few days; wear gloves for washing up, and file snags the day they appear. Most breaks start as a tiny side snag ignored for a week.
The Short Version
Almond is the shape that lets Christmas art behave like tiny paintings, not stickers: room to paint, a curve that flatters, tips that still get through December. Pick the scene that matches your month, keep the length in the sweet spot, and let the thumb share the art.