16 Summer Blooming Gel Nail: Where Chemistry Becomes Art
Blooming gel is nail art’s magic trick: a special gel that makes colors spread, bleed, and bloom on contact — creating marble, watercolor, and organic effects that would take hours by hand. You drop the color in, and chemistry does the painting.
These sixteen ideas are organized by what the bloom becomes: stone, flowers, nature scenes, and pure artistic experiments. Same technique, sixteen completely different results. Let’s make chemistry beautiful.
Marble & Stone: Blooms That Look Like Geology
The blooming gel’s most famous trick — colors spreading into patterns that look exactly like natural stone.
1. Blue Lace Agate
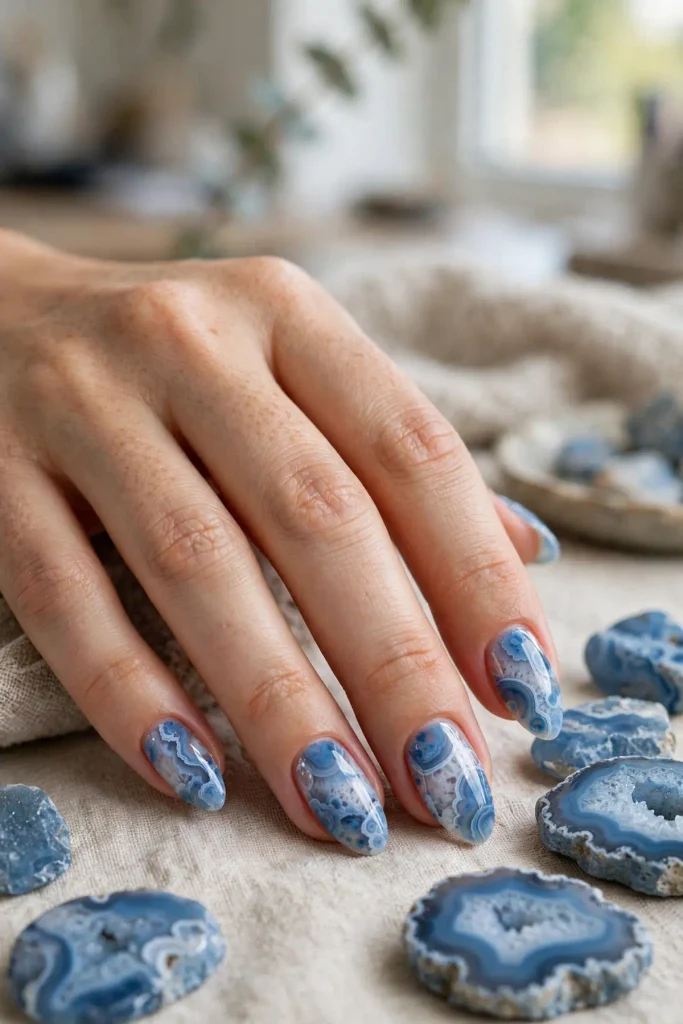
Soft blue and white blooming into delicate agate bands — the gentle, lacy stone rendered in gel. Drop white and pale blue into blooming gel and watch them form the agate’s characteristic fine banding. It’s serene, intricate, and mesmerizing up close.
The key is restraint: a few drops, minimal manipulation, let the gel do the work. The bands form naturally if you don’t overwork them. Seal with gloss for the polished-stone finish.
The bloom science: low-viscosity colors spread furthest — thin your blues slightly for the finest agate lines. Try it when: you want intricate art with minimal effort; the gel does 90% of the work.
2. Rose Quartz Bloom
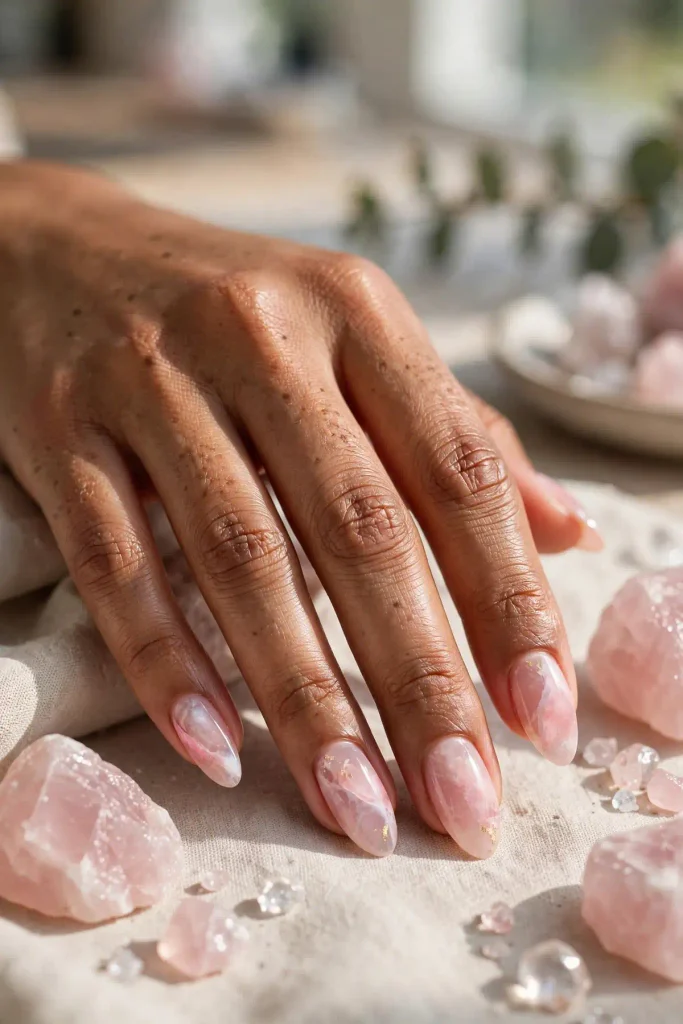
Milky pink and white melting into rose quartz — soft, romantic, and luminous. The pink should be sheer and dreamy, the white creating the stone’s characteristic cloudy depth. It’s the crystal-girl manicure, done in chemistry.
Layer the drops: pink first, white into the pink, then a touch more pink. The layering creates the depth that makes it read as stone rather than just pink swirls.
The bloom science: layering drops creates depth — each new drop pushes the previous ones outward in rings. Try it when: you want romantic geology; this is the softest stone here.
3. Ocean Jasper
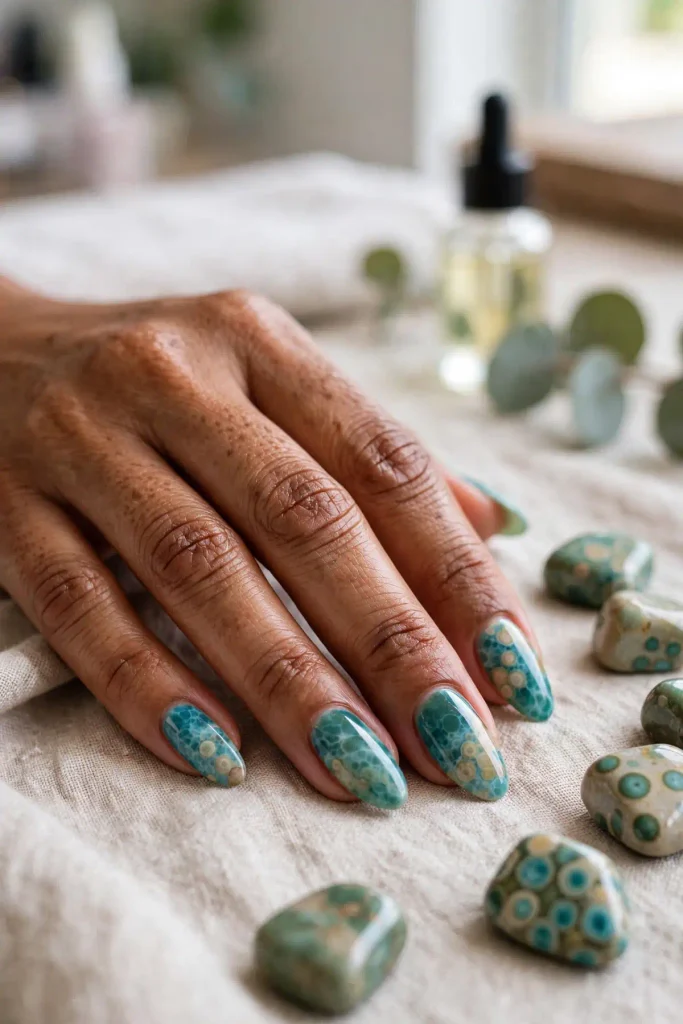
Teal, deep blue, and sandy beige blooming into ocean jasper — the stone that looks like the sea floor. The colors should mingle but not fully mix: distinct zones of blue and sand with organic, flowing boundaries.
This is controlled chaos — you want the colors to meet and marble, not blend into mud. Work quickly and cure as soon as the pattern pleases you; over-blooming kills the definition.
The bloom science: cure timing controls the pattern — earlier cure freezes sharper boundaries, later cure means softer blends. Try it when: you want marine stone; this is the ocean’s geology.
4. Smoky Quartz
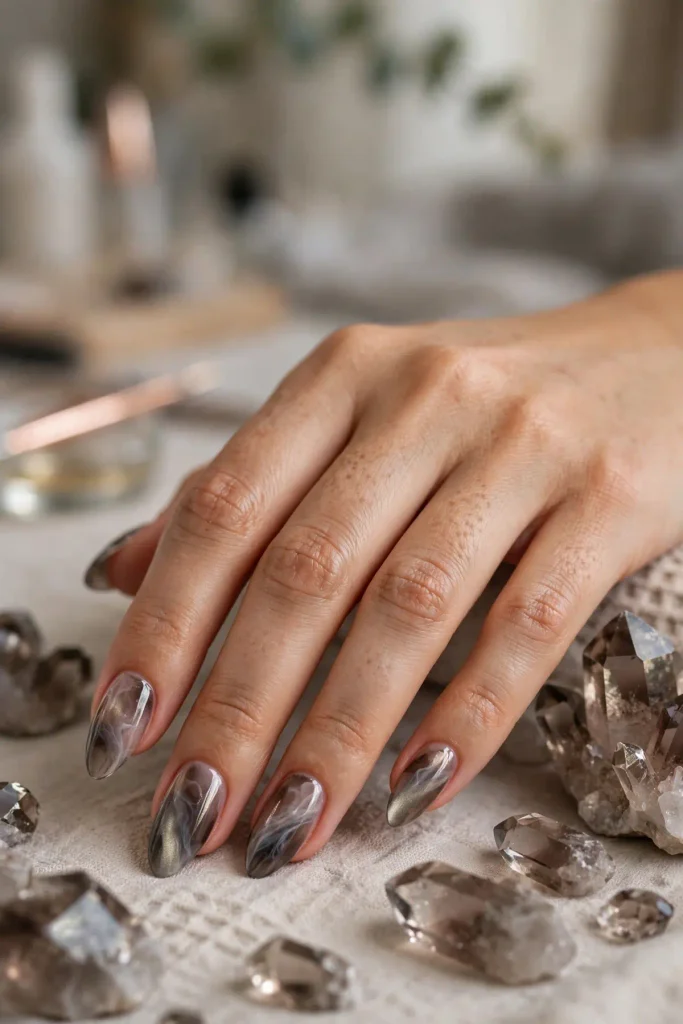
Grey, charcoal, and white blooming into smoky quartz — moody, sophisticated, and unexpectedly chic. The dark tones make it the most dramatic stone here: it’s marble with mystery.
Smoky quartz suits the blooming technique perfectly because the grey gradients are naturally soft — the gel’s organic spreading mimics the stone’s cloudy depths. A touch of white brightens; too much ruins the smokiness.
The bloom science: dark colors bloom slower and hold sharper edges — use this to keep the smoky definition. Try it when: you want stone with edge; this is geology gone gothic.
Floral Blooms: Flowers From Chemistry
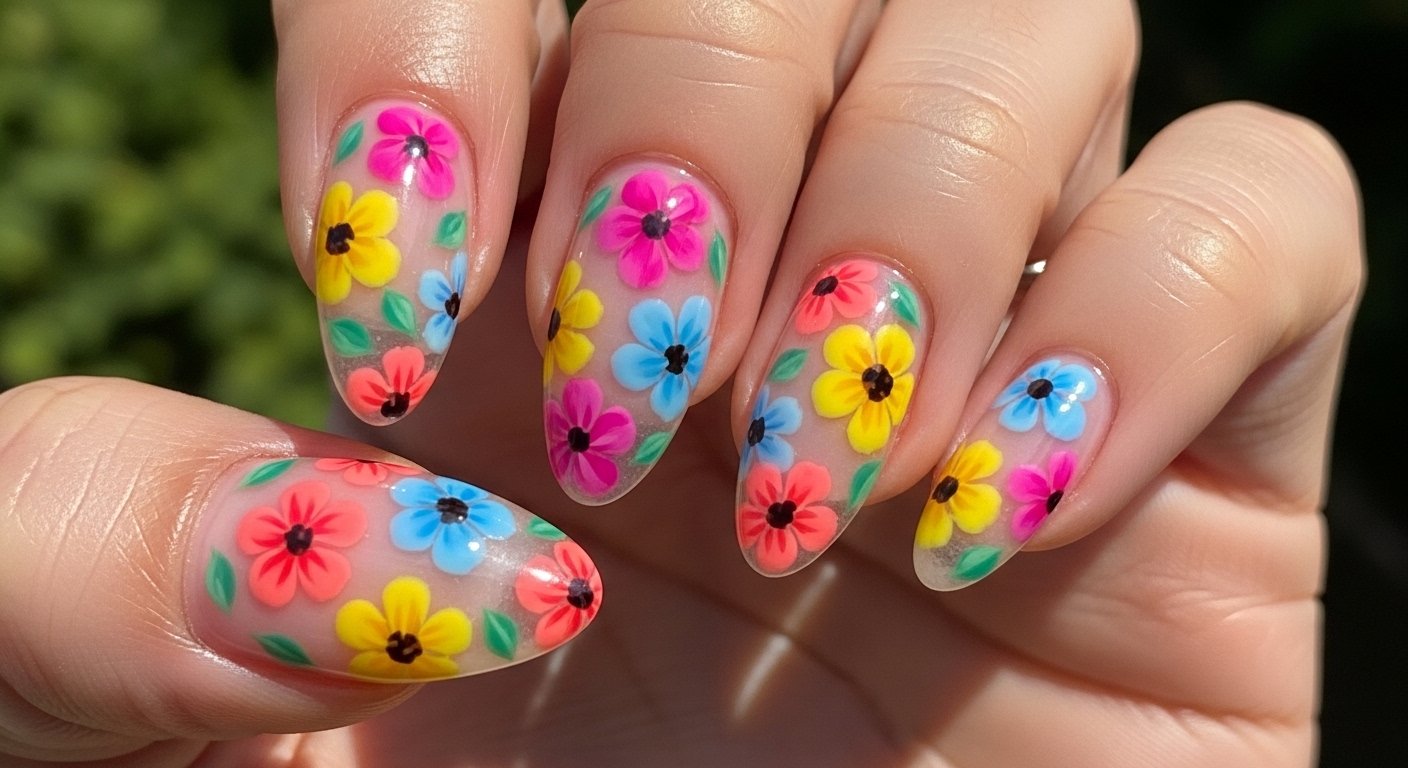
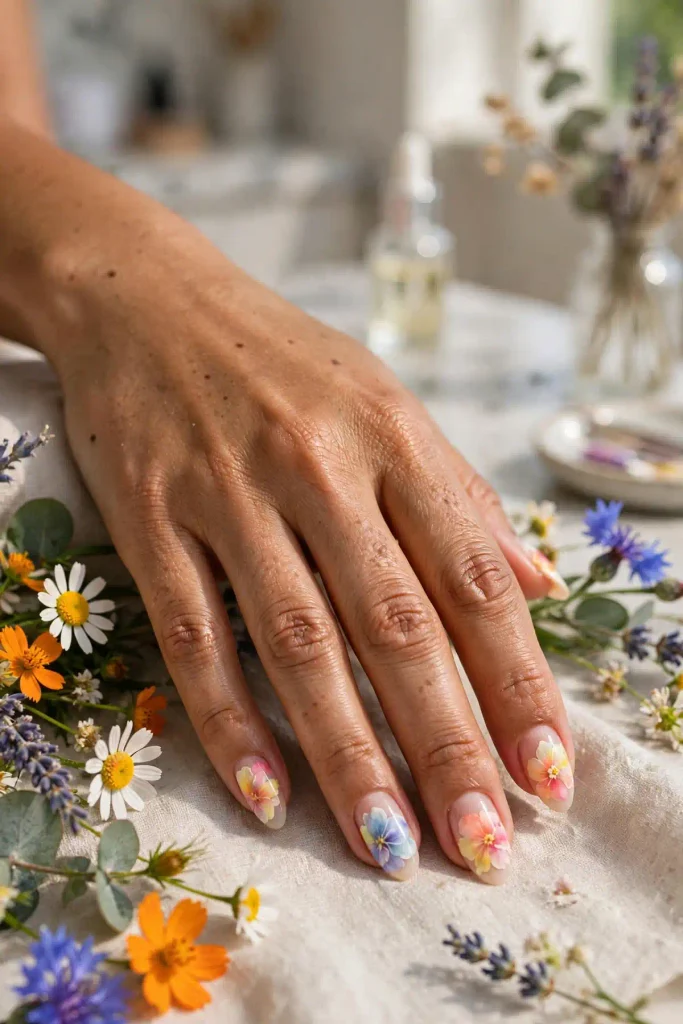
Blooming gel doesn’t just make stone — dropped strategically, it blooms into flowers.
5. Blooming Roses
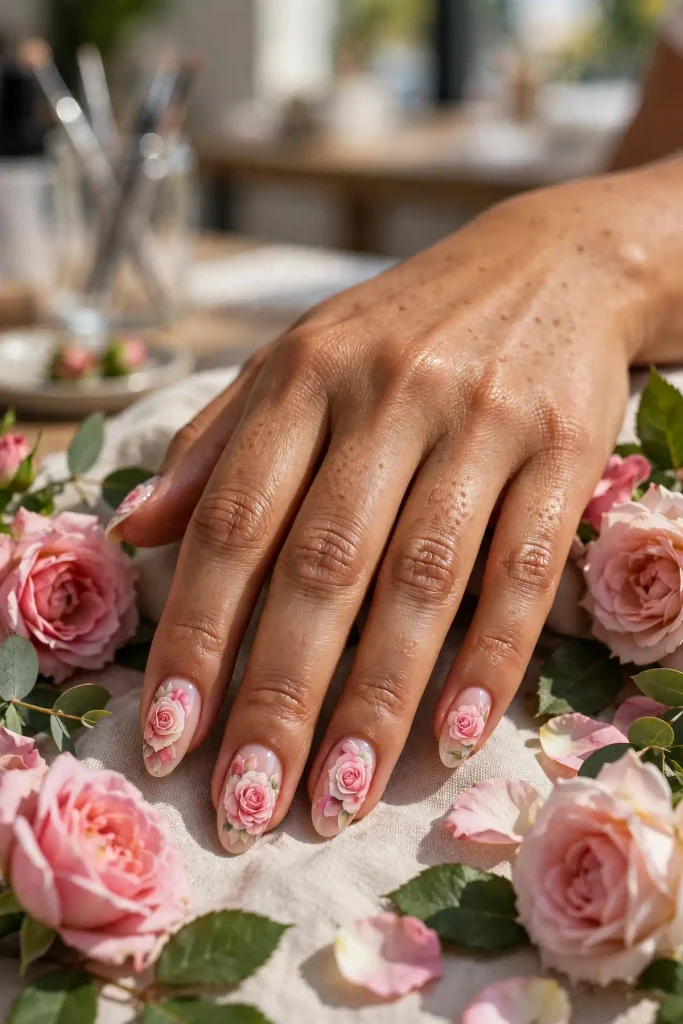
Dusty pink drops bloomed into rose shapes — five-petal blooms formed by the gel’s natural spreading. Place a central dot, surround it with petal drops, and let the blooming gel pull them into rose forms. Add a fine liner for definition after curing.
The technique is placement, not painting: where you drop determines the flower’s shape. It’s floral art for people who can’t paint flowers — chemistry handles the petals.
The bloom science: drops placed in a ring bloom outward into petals — the center stays dense, the edges feather. Try it when: you want roses without the brush skills; placement beats painting.
6. Watercolor Peonies
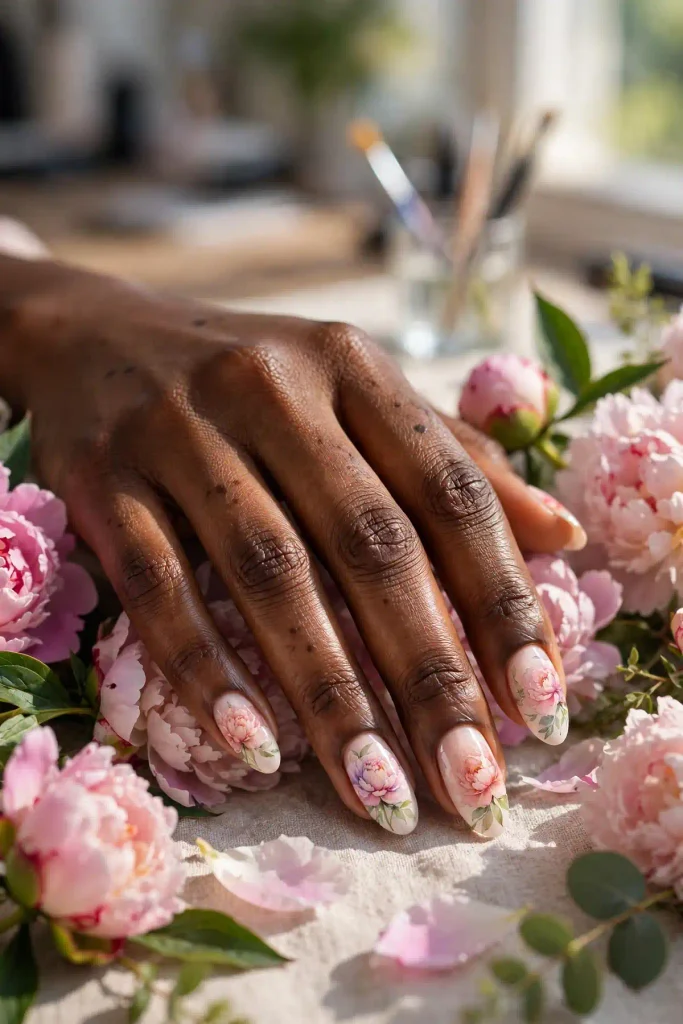
Soft, layered peonies in blush and cream — the blooming gel creating the flower’s characteristic ruffled, translucent petals. Multiple sheer drops layered and bloomed create the peony’s lush depth.
The watercolor effect comes from sheerness: use translucent colors so the layers show through each other. Opaque colors make blobs; sheer colors make petals.
The bloom science: sheerness creates petal translucency — light passing through layers mimics real flower tissue. Try it when: you want the softest florals; this is romance in chemistry.
7. Cherry Blossoms
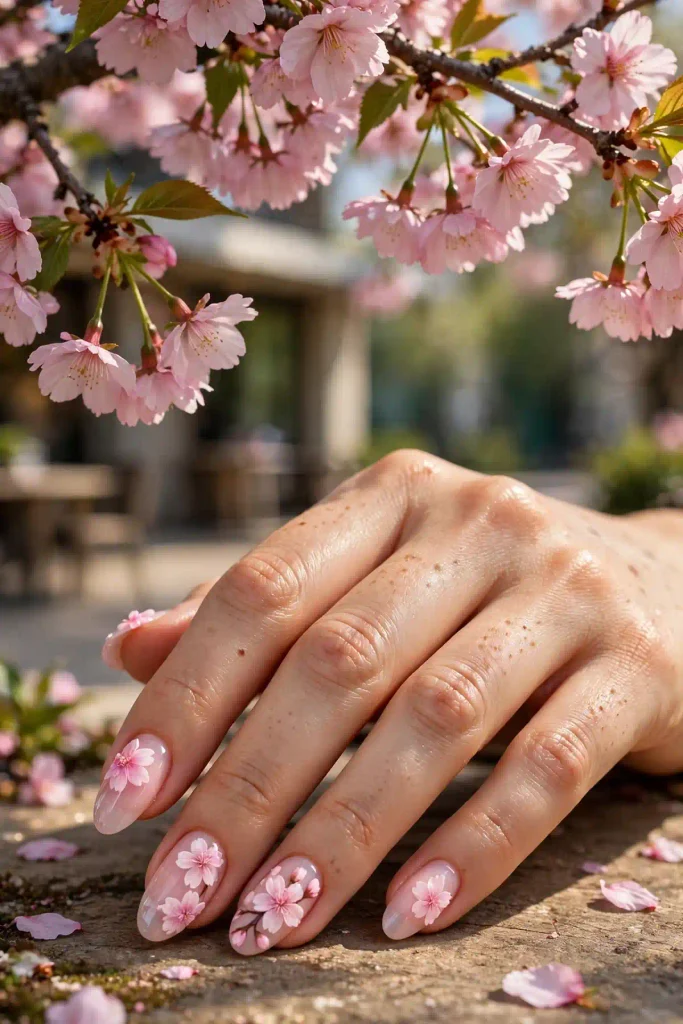
Delicate pink and white cherry blossoms — small, scattered blooms with the characteristic five-petal shape. The blooming gel’s soft edges perfectly mimic the blossom’s fragile petals.
Scatter the blossoms asymmetrically — a branch-like flow across the nails reads as a cherry tree in miniature. A few tiny brown branch lines (painted after) complete the scene.
The bloom science: small drops bloom into small flowers — scale your drops to your desired blossom size. Try it when: spring-meets-summer; this is the most delicate floral here.
8. Abstract Petals
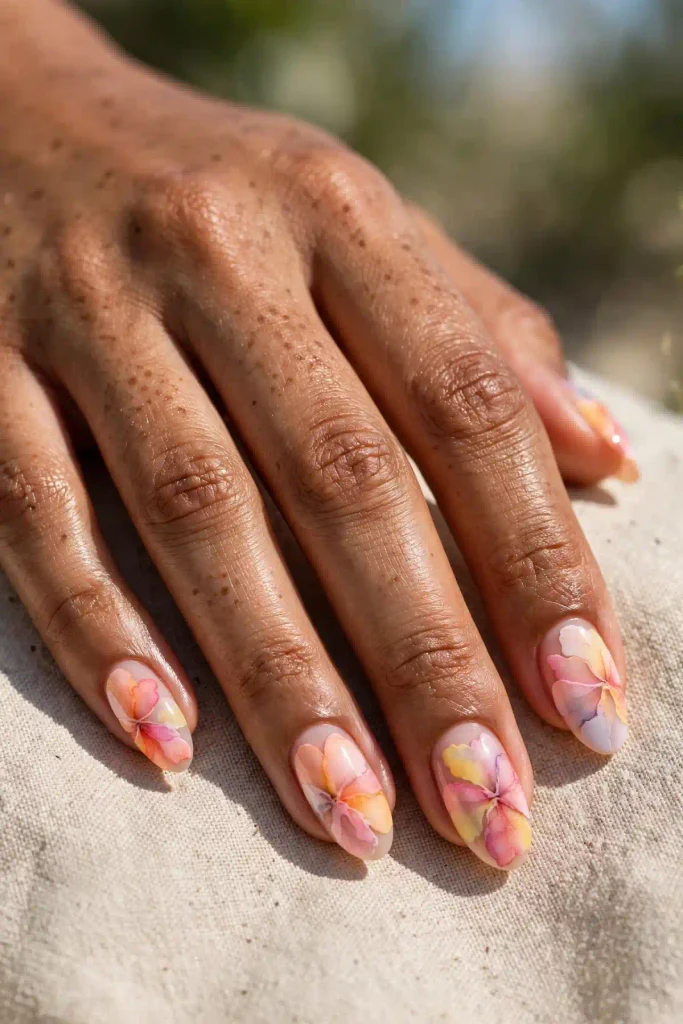
Bold, graphic petals in unexpected colors — electric blue, deep purple, hot coral — bloomed into stylized floral shapes. Not realistic flowers: floral essence, deconstructed and modern.
The abstraction comes from color choice and scale — oversized petals in impossible colors. It’s florals for the avant-garde: recognizable as flowers, impossible as botany.
The bloom science: bold colors bloom with more contrast — the petal shapes read stronger in saturated hues. Try it when: you’re over pretty florals; this is flowers with attitude.
Ocean & Sky: Nature in Bloom
The blooming gel’s organic spreading is perfect for nature’s own fluid patterns — water, sky, and cosmos.
9. Ocean Waves
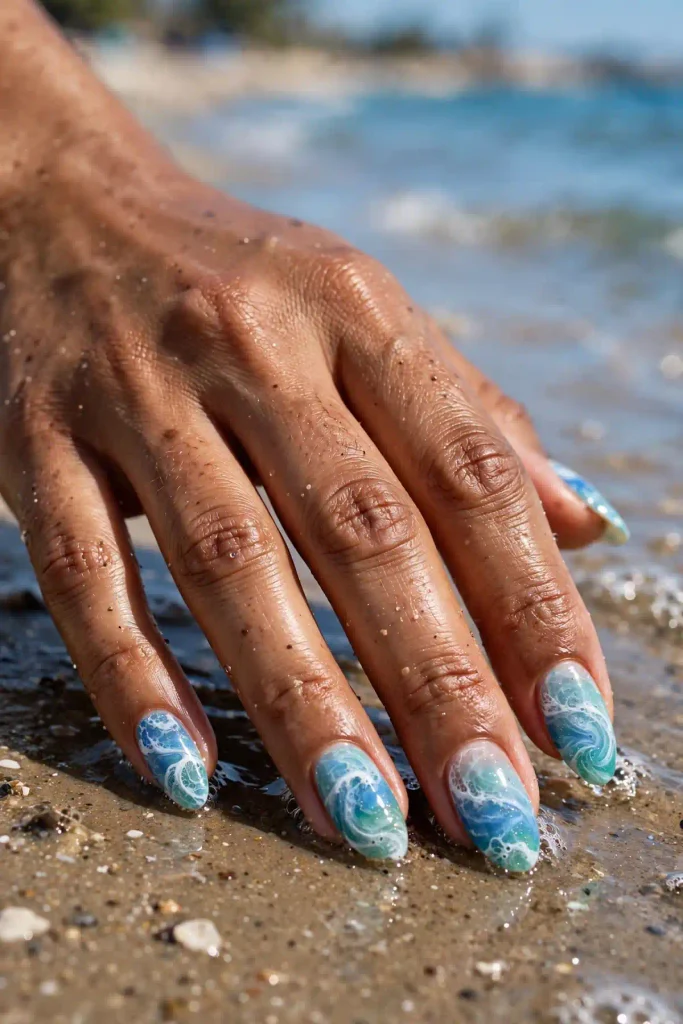
Deep blue, turquoise, and white bloomed into rolling waves — the sea’s motion captured in gel. The white blooms into the blue like sea foam, creating natural wave patterns. It’s the ocean without a single brushstroke of actual waves.
Drag a fine tool lightly through the blooming colors to suggest wave direction — the gel does the blending, you just guide the flow. It’s collaborative art with chemistry.
The bloom science: dragging through blooming colors creates directional flow — the gel follows your tool’s path. Try it when: you want the sea’s movement; this is the ocean’s own technique.
10. Sunset Sky
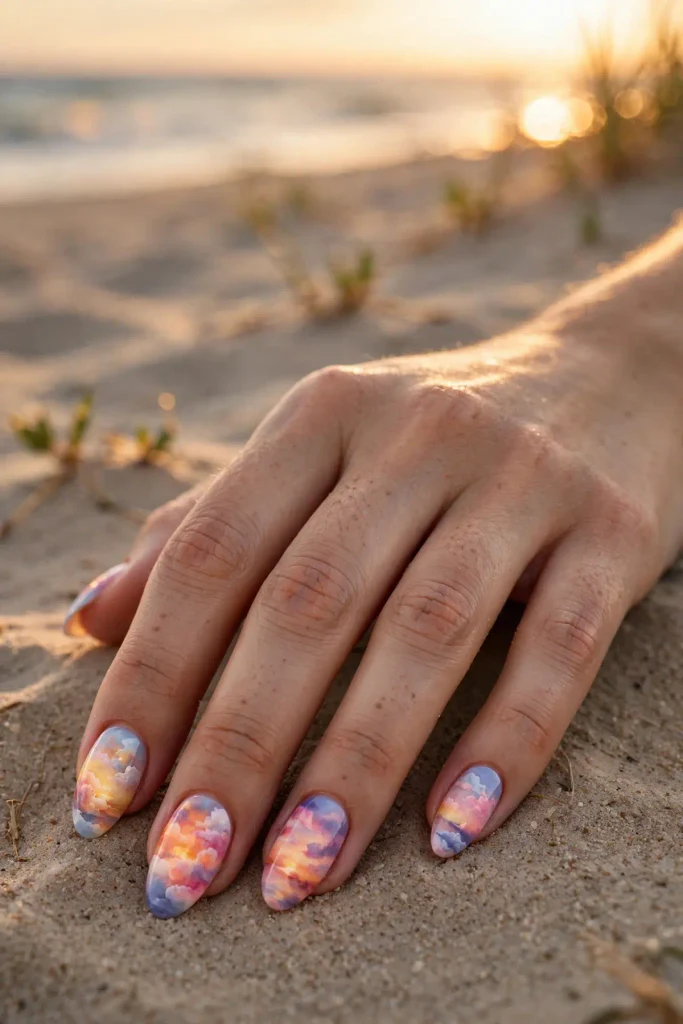
Pink, orange, and gold bloomed into a sunset sky — colors melting into each other exactly as they do at dusk. The blooming gel’s natural gradients mimic the sky’s own blending: no harsh lines, just light dissolving into light.
Place the colors in sunset order (gold at the horizon/tip, pink above) and let them bloom toward each other. The middle coral zone forms naturally — it’s the prettiest part.
The bloom science: adjacent warm colors bloom into seamless gradients — the gel erases boundaries naturally. Try it when: golden hour is your personality; this is the sky’s own blending.
11. Galaxy Bloom
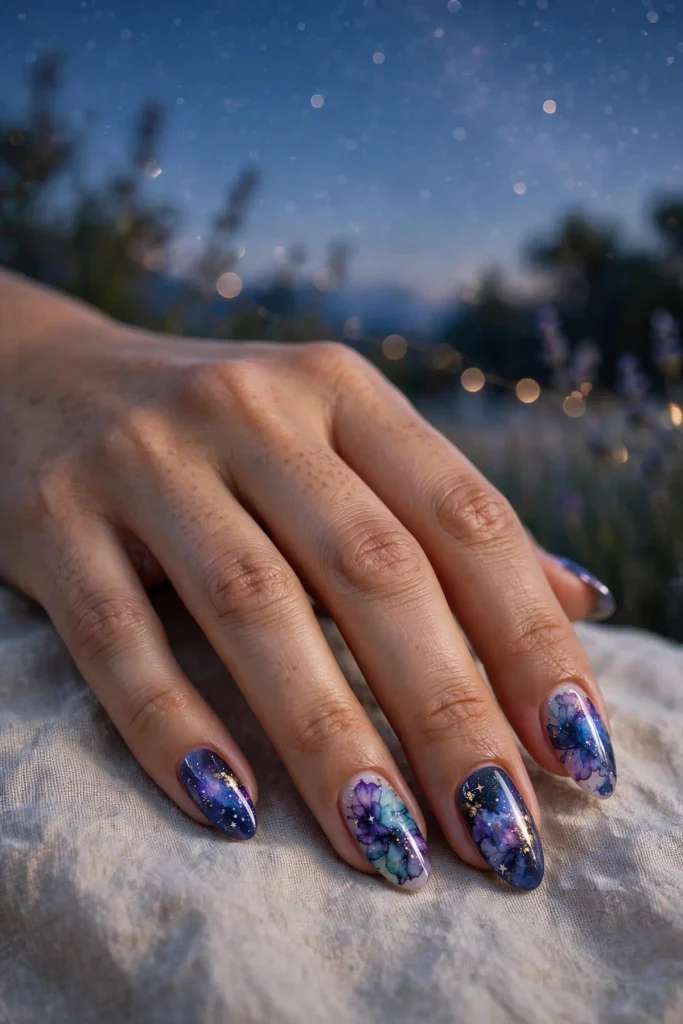
Deep purple, navy, and black with white star dots — a galaxy formed by blooming. The dark colors marble into nebula clouds; white dots (added after curing) become stars. It’s the cosmos in chemistry.
The nebula effect needs multiple dark tones blooming together — the variation creates the cloudy depth. Add the stars after curing so they stay crisp against the soft nebula.
The bloom science: multiple darks create nebula depth — single-color blooms look flat, layered darks look infinite. Try it when: you want the universe; this is the most dramatic sky here.
12. Tortoise Shell
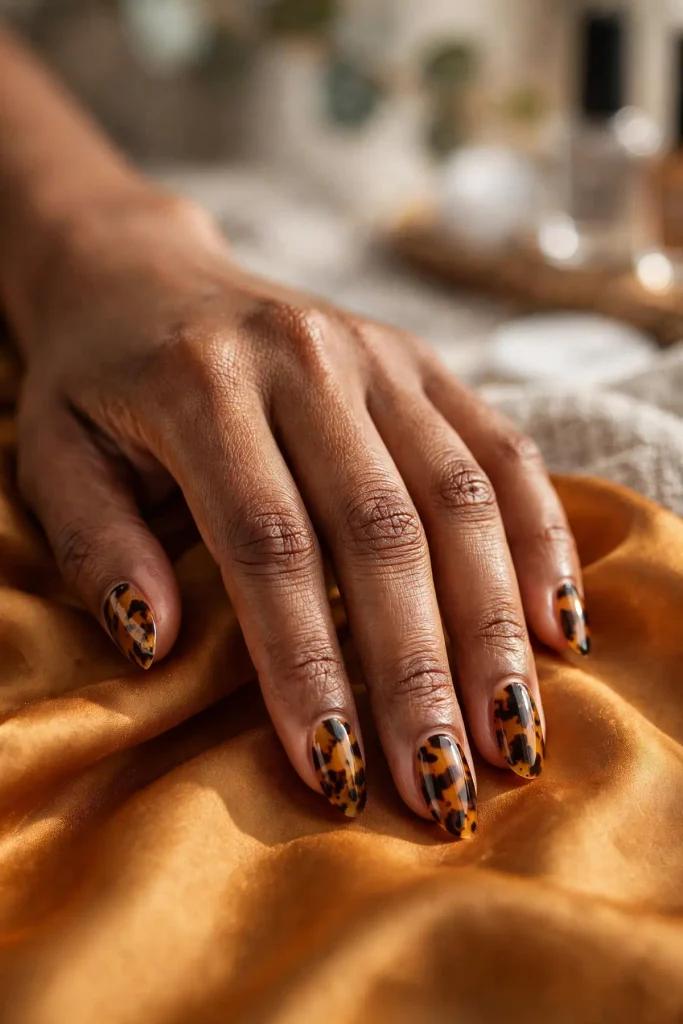
Amber, brown, and black bloomed into tortoise shell — the classic pattern, perfected by chemistry. The blooming gel creates the shell’s characteristic translucent amber with dark mottling better than any hand-painting could.
The translucency is key: build on a sheer amber base so light passes through. The dark blooms create the shell’s depth. It’s vintage luxury in a modern technique.
The bloom science: sheer bases plus dark blooms equal translucency — the light-through effect that defines tortoise. Try it when: you want timeless pattern; this is the heirloom of the list.
Artistic Experiments: Beyond the Basics
For the adventurous — blooming gel pushed past its usual tricks into pure art.
13. Smoke Effect
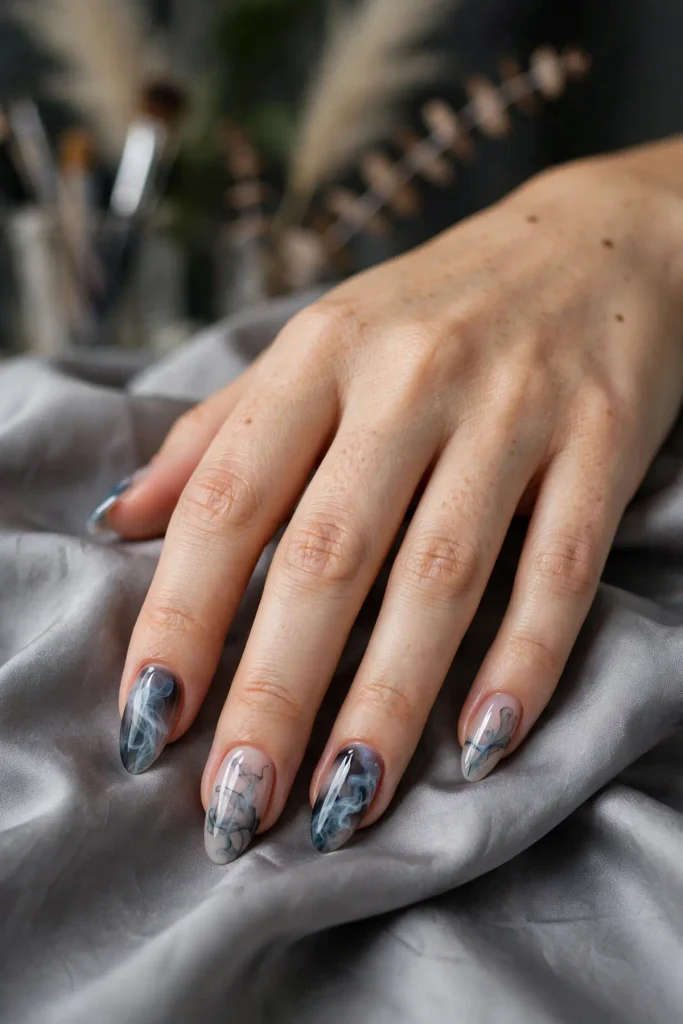
Grey and white bloomed into wisps of smoke — ethereal, moody, and hypnotic. The colors should be sheer and the blooming minimal: you want suggestion, not saturation. It’s the ghost of the list.
Less is everything here — a few drops, brief blooming, quick cure. Overworked smoke becomes fog; restrained smoke stays magical.
The bloom science: minimal blooming preserves wispiness — cure early to freeze the delicate tendrils. Try it when: you want mystery; this is the most atmospheric design here.
14. Ink Blot Art
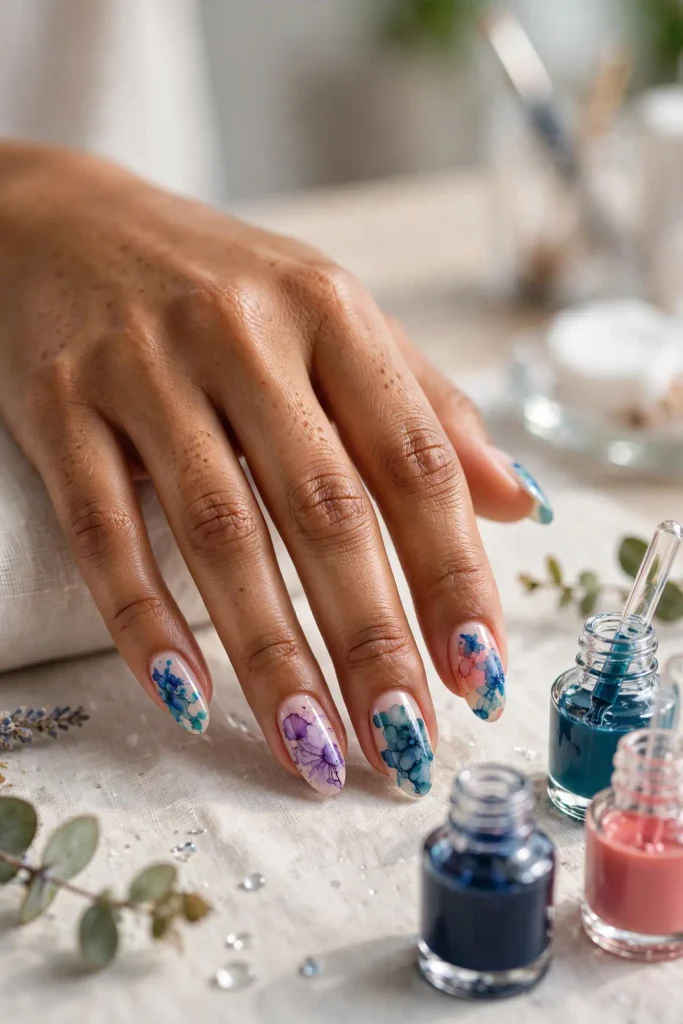
Bold black or deep color dropped into blooming gel and left to spread into Rorschach-like blots — abstract, dramatic, and utterly unique. Every nail is different; every result is unrepeatable.
Embrace the randomness — the beauty is in what the gel decides. Add a glossy top coat to make the blots look like wet ink, frozen mid-spread.
The bloom science: single bold drops spread furthest — one drop makes the most dramatic blot. Try it when: you want true one-of-a-kinds; no two ink blots ever match.
15. Aura Bloom
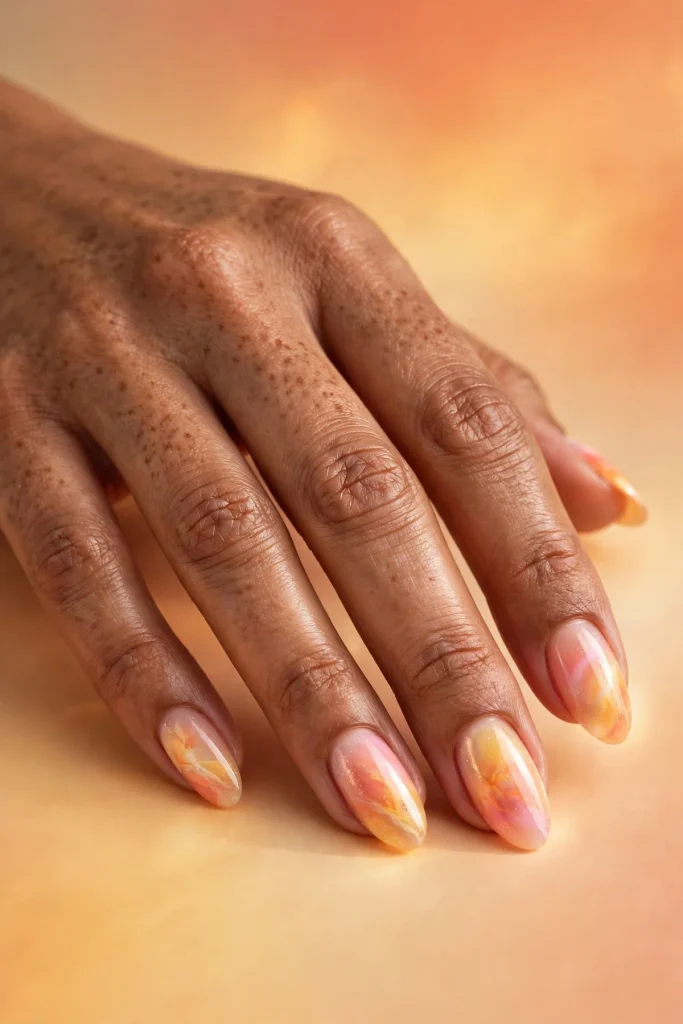
A soft color bloomed gently in the nail’s center over a milky base — the aura effect, achieved through chemistry rather than sponging. The blooming gel creates the softest possible gradient: color dissolving into milk.
The key is a single small drop and patience — let it bloom slowly for the softest aura. It’s the dreamiest technique on this list.
The bloom science: small drops on milky bases bloom slowest — the viscosity difference creates the gentlest gradients. Try it when: you want the softest aura; chemistry beats sponging for delicacy.
16. Negative Bloom
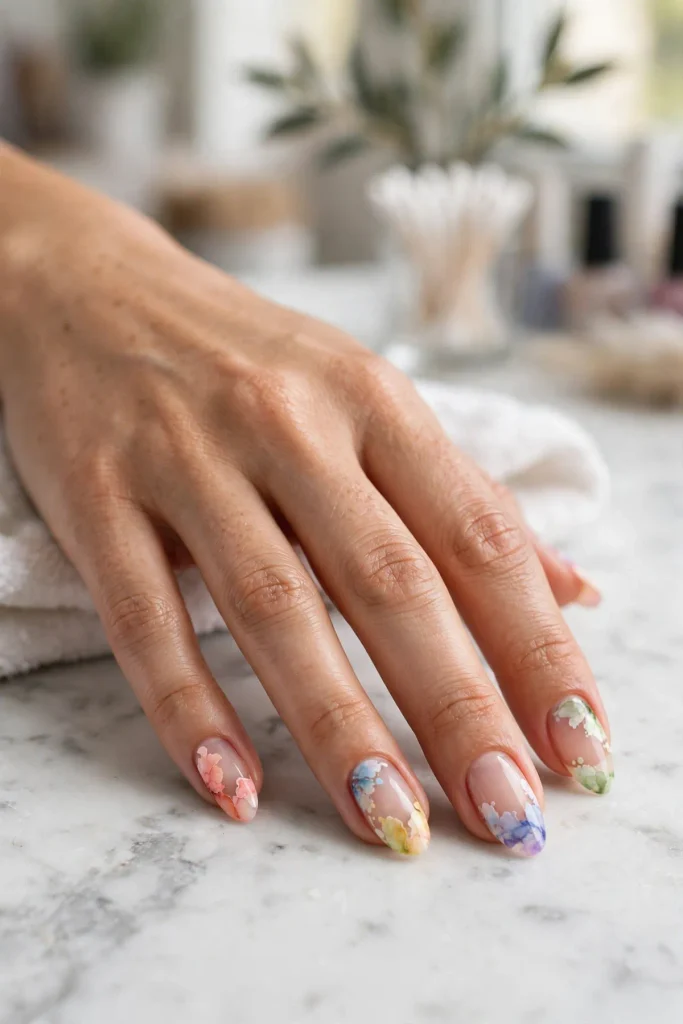
Blooming gel patterns on a bare or sheer nude nail — the bloom as the only decoration. A single marble streak, one small flower, a wisp of smoke: minimal art on maximum negative space.
The restraint is the design — the bare nail makes the small bloom precious. It’s the connoisseur’s choice: proof that you understand the technique deeply enough to use it sparingly.
The bloom science: blooms show sharpest on bare bases — no competing color means maximum pattern clarity. Try it when: minimalism is your religion; this is blooming gel at its most refined.
Blooming Gel 101: How It Works
The technique behind the magic, explained simply. What it is: a clear gel with a special formula that causes wet gel polish to spread on contact — colors “bloom” outward instead of sitting where placed. The basic steps: apply and cure your base color, apply a layer of blooming gel (don’t cure), drop wet colors into it, watch them spread, cure when the pattern pleases you. Timing is everything: the longer you wait before curing, the further colors spread — seconds matter; watch closely and cure at the perfect moment. Drop size matters: small drops make delicate patterns, large drops make bold ones — scale your drops to your vision. Tool play: a fine dotting tool or liner dragged through blooming colors creates directional effects — marble veins, wave motion, petal shapes. Layering: cure between layers to build complex designs — each cured layer is a foundation for the next bloom. The finish: always seal with top coat — blooming gel patterns need protection, and gloss unifies the art.
Blooming Gel Mistakes to Avoid
Learn from others’ disasters, not your own. Over-blooming: the number one mistake — waiting too long turns beautiful patterns into muddy soup; when it looks good, cure immediately. Too many colors: more than three colors in one bloom usually becomes brown — restraint creates beauty, excess creates mud. Wrong base: blooming on a dark base mutes everything — most bloom effects need a light or white base to shine (darks work for galaxy and smoke only). Thick drops: heavy drops spread uncontrollably — thin, small drops give you control; you can always add more. Touching the drops: once placed, don’t poke and prod — every touch distorts the natural spread; place, observe, cure. Skipping practice: do five test nails on tips before your real manicure — blooming gel has a learning curve, and practice is cheaper than redoing. Forgetting to seal: unsealed bloom art wears fast — the patterns are delicate and need top coat armor.
DIY vs. Salon: Blooming Gel
Should you bloom at home or book a pro? DIY wins when: you have a UV/LED lamp, patience for practice, and love experimenting — blooming gel is one of the more DIY-friendly advanced techniques because the gel does the artistic work. Startup cost is a lamp plus gels, but then each manicure is nearly free. Salon wins when: you want complex multi-layer designs (ideas 5, 6, 11), have an event with no room for error, or don’t own a lamp — a skilled tech’s timing and placement elevate the results. The hybrid: learn basics at home (ideas 1, 9, 13, 15 are very DIY-able), book the salon for showstoppers. Cost reality: salon blooming gel art runs premium (it’s skilled work); DIY pays for itself in two manicures. The verdict: blooming gel rewards practice more than talent — if you’ll practice, DIY; if you won’t, salon.
Blooming Gel Nail Questions
What exactly is blooming gel?
A clear gel formula that makes wet gel polish spread and marble on contact — it’s the medium that creates the “blooming” effect. You apply it uncured, drop colors into it, watch them spread, then cure to freeze the pattern.
Can I do blooming gel without a UV lamp?
No — blooming gel is a gel product and requires UV/LED curing to set. Without a lamp, the design never hardens. If you don’t own a lamp, this technique needs a salon visit.
How long do blooming gel designs last?
As long as any gel manicure — 2–3 weeks with proper application and sealing. The bloom patterns themselves are as durable as the gel they’re made from; longevity depends on your base application, not the art.
Why did my colors turn muddy brown?
Too many colors, too much blooming time, or both — the classic beginner mistake. Stick to 2–3 harmonious colors, cure as soon as the pattern looks good, and remember: the gel keeps spreading until you cure it.
Let It Bloom
Sixteen ideas, four effects, one magical medium. Whether you’re blooming marble, flowers, oceans, or pure abstraction — blooming gel turns chemistry into art and beginners into artists.
So get the gel, mind your timing, and let it bloom. The patterns are waiting in the bottle — all you have to do is drop, watch, and cure.
Which effect is yours — the stone, the flower, the ocean, or the experiment? Save this list for your next gel appointment, and send it to the friend who thinks nail art requires talent — blooming gel is proof that chemistry is the real artist.