16 Red and Gold Christmas Nails That Bring Instant Holiday Glam
Plain red nails at Christmas are a missed chance. Red and gold Christmas nails give you the classic colour with the richness turned up, and the gold is what makes people lean in for a closer look.
Every December I reach for the same two bottles first: a true scarlet and a warm gold. These are the pairings I return to when plain red feels unfinished.

Quick Picks: Five Shortcuts Into This List
Short on time? Start with these. There is a pick here for short nails, long nails and every budget in between. Richest finish: idea 3, sequin scales sealed over deep oxblood. Short nails: idea 10, a gilded walnut that fills a small nail like a medallion. Longest wear: idea 9, a glitter core glowing under red jelly gel. Softest shine: idea 7, velvet red with a torn gold edge. Biggest statement: idea 11, hammered foil panels on cherry red. Note: ideas 2, 3, 6, 8, 9 and 16 need a gel kit and a lamp, while the other ten are regular polish.
1. Scarlet Red and Gold Christmas Nails With a Caviar Bead Frame
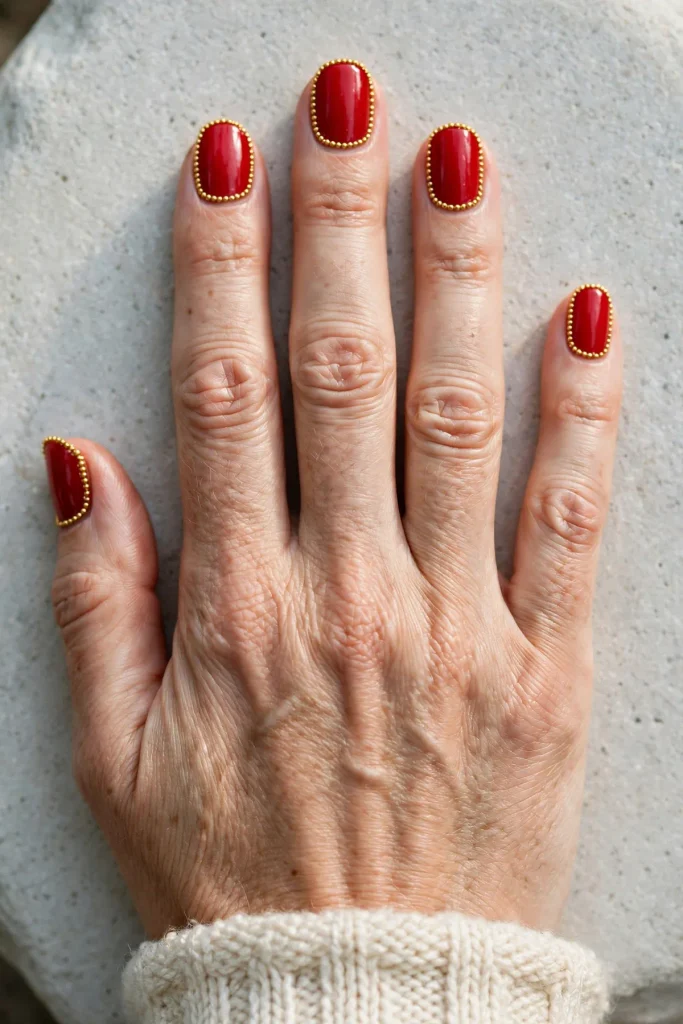
A glossy scarlet creme covers the whole nail, and a frame of tiny gold caviar beads runs around every edge, like a picture frame for the colour. It flatters a medium almond shape and the finish is full gloss.
To make it: base coat first, so the red sits smooth. Lay down two thin coats of scarlet and let the second dry properly, because beads sink into wet polish and lose their line. Paint a thin border of clear polish around the edge, pick up gold micro-beads with a wax pencil, and set them along that wet line. Float a glossy top coat over the beads rather than dragging it.
2. Ruby Jelly Red and Gold Christmas Nails With Gold Leaf Inside
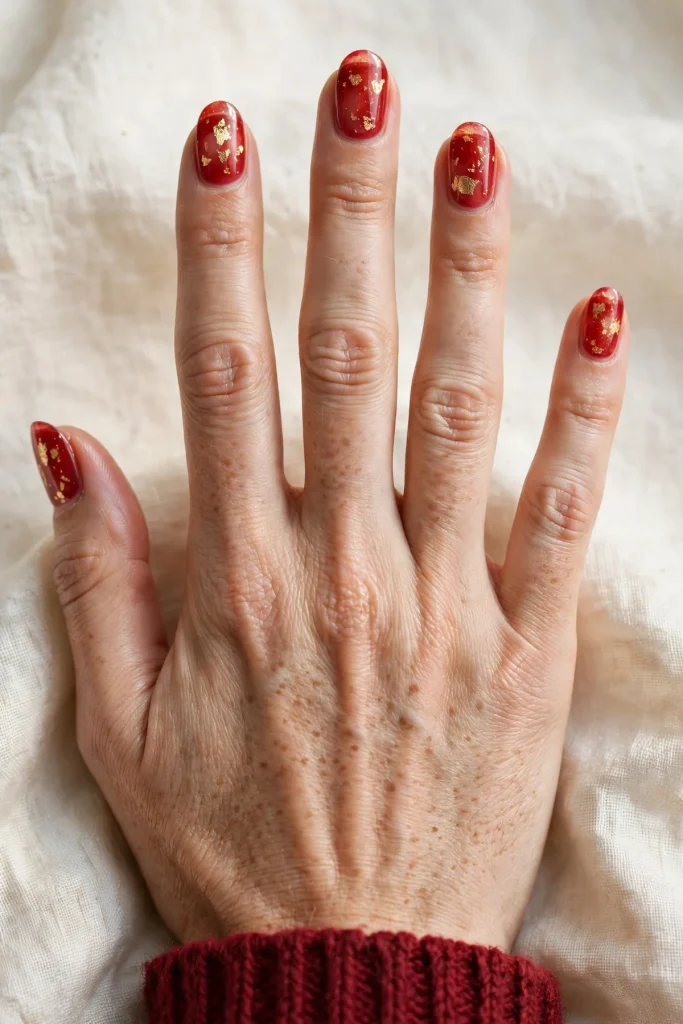
Translucent ruby gel with shards of gold leaf floating inside it has a depth flat polish cannot copy. This one needs a gel kit and a lamp, since the leaf is sealed between cured layers, on a medium oval shape.
Build it in stages: gel base coat, cure, then one thin layer of ruby jelly gel and cure again. Tear the gold leaf into small shards first, because big pieces fold and wrinkle, and press them flat with tweezers, spread across every nail. Float a second jelly layer over the top, cure, and finish with a glossy gel top coat. Keep each layer thin so the leaf stays visible.
3. Oxblood Red and Gold Christmas Nails With Sequin Scales

Rows of tiny gold sequins overlap like fish scales over a deep oxblood base. It is a gel design, because the sequins need encapsulating, and it suits a long squoval shape where the rows have room to run.
Start with gel base and two coats of oxblood gel, curing between coats. With a wax pencil, place gold sequins one at a time in overlapping rows, beginning at the free edge and working back toward the cuticle, so each row tucks over the one before. Flash cure for a few seconds after each row to stop anything sliding. Seal the scales under clear builder gel and cure fully, so the edges sit smooth against knitwear.
4. Quilted Crimson Red and Gold Christmas Nails With Tiny Studs

Crimson polish pressed into a quilted diamond pattern, with one tiny gold stud at each crossing. Regular polish does the job on a medium square shape, and the matte finish makes the studs look brighter by contrast.
Paint two coats of crimson and let them reach the tacky stage: dry to a light touch, still soft underneath. Press diagonal lines into the polish with the edge of a toothpick or a length of dental floss, first one way, then the other, to form diamonds. While the polish is still soft, set a micro gold stud at each crossing with a wax pencil. Let everything harden before the matte top coat.
5. Burgundy Red and Gold Christmas Nails With Antique Patina Gold

Not all gold has to gleam. Here the gold is dragged over burgundy in worn, patchy strokes. It suits medium almond nails, and a satin top coat keeps the aged feel.
Begin with two coats of burgundy creme and let them dry right through. Load a dry brush with antique gold polish, wipe almost all of it off on the bottle neck, then drag what remains across the nail in short, uneven strokes. Leave the cuticle third mostly burgundy; that bare patch makes the gold read as worn-in rather than messy. Seal with the satin top coat.
6. Deep Red and Gold Christmas Nails With Deco Fan Rows

Neat rows of gold fan shapes march across a deep red base. A gel design on a medium oval nail; each row needs a quick cure to stay crisp.
After base coat and two cured coats of deep red gel, take your finest liner brush and gold gel paint. Paint one row of small scallop arcs near the cuticle (press, lift, press, lift), then cure before starting the next row lower down, offsetting the arcs so the fans nest together. Cure after each row so one wobbly arc cannot smudge the row above, and finish with a glossy gel top coat.
Gold should look poured, not sprinkled. If the gold is the first thing you spot from across the room, the red has stopped doing its share of the work.
7. Velvet Red and Gold Christmas Nails With a Torn Gilded Edge

A soft matte red with a rough, torn strip of gold foil along the free edge is the quiet rebel of this list. Regular polish handles it, and a medium almond shape keeps the torn edge looking deliberate.
Paint two coats of deep red and let them dry fully, then add a matte top coat and let it set before touching the foil. Tear the foil, do not cut it; torn edges look gilded, while cut edges look like a failed French tip. Dab clear polish along the free edge as glue, press a torn piece over it, and lift away the excess. Seal only the edge with glossy top coat.
8. Classic Red and Gold Christmas Nails With Wire-Wrapped Tips

A flat spiral of fine gold wire lies over the tip of every glossy red nail, sealed under gel so it sits smooth. This needs a gel kit and suits a medium oval shape.
Make all ten spirals before any polish comes out: snip short lengths of fine gold craft wire and wind each into a small flat coil with round-nose pliers, trimming the tail so nothing sharp sticks out. Paint gel base, cure, then two coats of classic red gel, curing between them. Spread a thin layer of uncured gel top coat, lay one spiral flat over each tip with tweezers, and cure to lock it. A second cured top coat buries the wire edges.
9. Red and Gold Christmas Nails With a Glitter Core Under Jelly
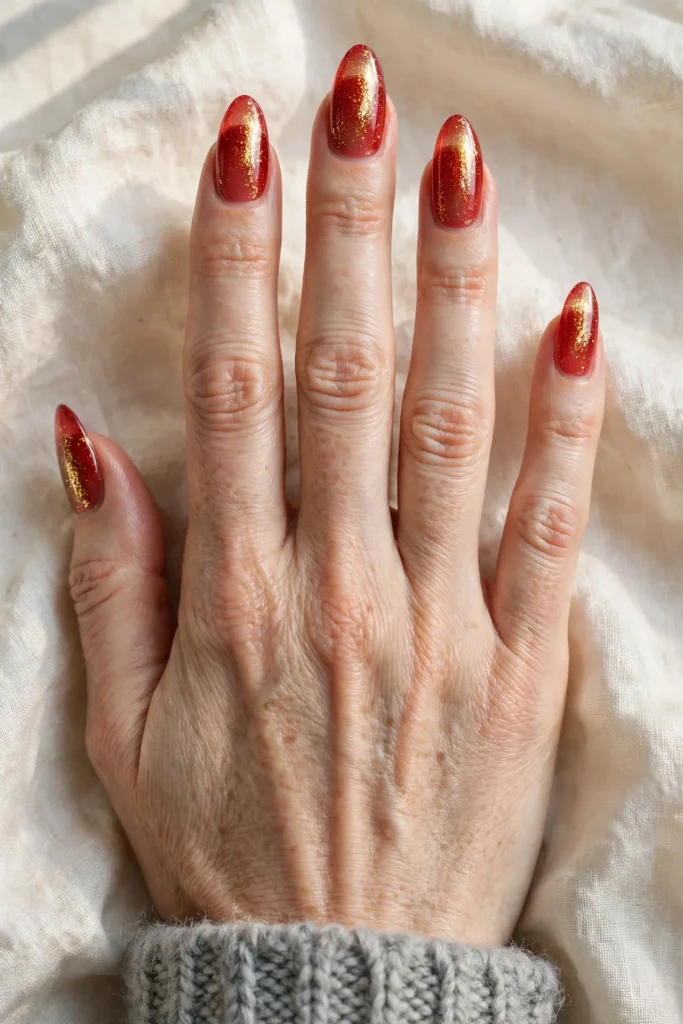
The sparkle sits deep inside this set, under layers of translucent red, so the nails glow instead of glittering at the surface. A gel build and the longest-wearing design here, on a long almond shape.
Start with gel base and cure. Pack on one layer of fine gold glitter gel, thinner near the cuticle so the red reads deepest at the base, and cure. Float a layer of red jelly gel over the glitter and cure, then repeat with a second jelly layer. Finish with a glossy gel top coat.
Halfway check: hold your hand under warm lamplight before you commit to a gold. A gold that behaves in both lamplight and daylight will behave in party photos too.
10. Dark Red and Gold Christmas Nails With Gilded Walnuts

Gilded walnuts used to hang on Christmas trees as ornaments, and one painted walnut half covers each nail here in gold, seam and wrinkles and all. Short round nails carry the motif well. Regular polish, glossy finish.
Paint two coats of dark red and let them dry. With gold polish and your finest brush, paint a plump oval in the centre of the nail. Add the seam as one wavy line down the middle, then short wrinkled strokes curving out from it toward the edges; a toothpick does this part more neatly than a brush on short nails. Keep a red border around the gold and finish with glossy top coat.
11. Cherry Red and Gold Christmas Nails With Hammered Foil Panels

Broad panels of crinkled gold foil sit across a cherry red base like beaten metal. Foil glue and regular polish do the work, and a long tapered square shape gives the panels room.
After two coats of cherry red, paint foil adhesive in broad, uneven panels rather than stripes, and wait until it turns clear and tacky. Lay gold foil over the nail, press with a fingertip, and lift sharply; the foil breaks where the glue is, leaving a hammered, patchy panel. Foil dulls under one thick coat, so seal with two thin glossy coats.
12. Garnet Red and Gold Christmas Nails With a Rope-Braid Border
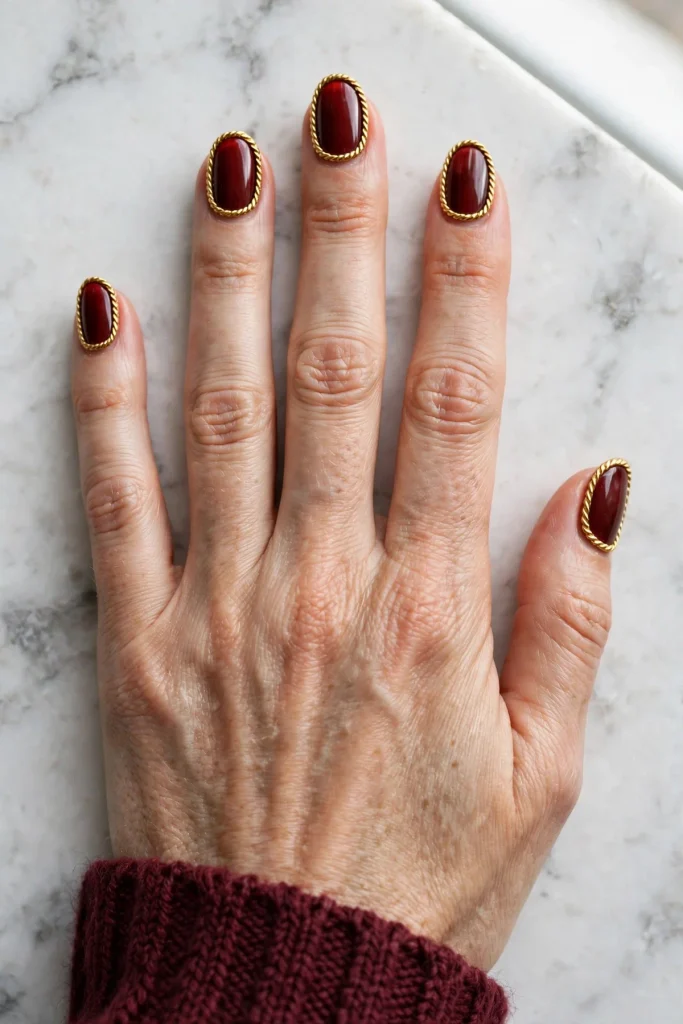
A twisted gold rope frames each garnet red nail. Regular polish can fake the twist convincingly, and a medium almond shape suits the framed look.
Begin with two coats of garnet and let them dry until hard. With gold polish on a fine liner brush, draw a steady frame just inside the nail’s edge, following its shape all the way round. While that frame is still wet, drag a clean toothpick across it in short, evenly spaced diagonal nicks, so the line breaks into the angled segments of a rope twist. Add a glossy top coat once the gold is dry.
A border is a promise you make to all ten nails. Keep it even on the little finger too, or the whole set looks like it gave up halfway.
13. Scarlet Red and Gold Christmas Nails With Fine Filigree Scrolls

Fine gold scrollwork curls across a scarlet base, one confident S-curve per nail with smaller curls branching off it. It is pure brushwork in regular polish, on a medium oval nail.
Paint two coats of scarlet and let them dry properly, because liner work drags on soft polish. Thin your gold polish with a drop of clear top coat so it flows like ink. Starting near one corner of the cuticle, draw one smooth S-curve toward the opposite tip, then add two or three small curls branching off the main line. Apply the glossy top coat with a light hand.
14. Red and Gold Christmas Nails With an Ikat Weave Pattern
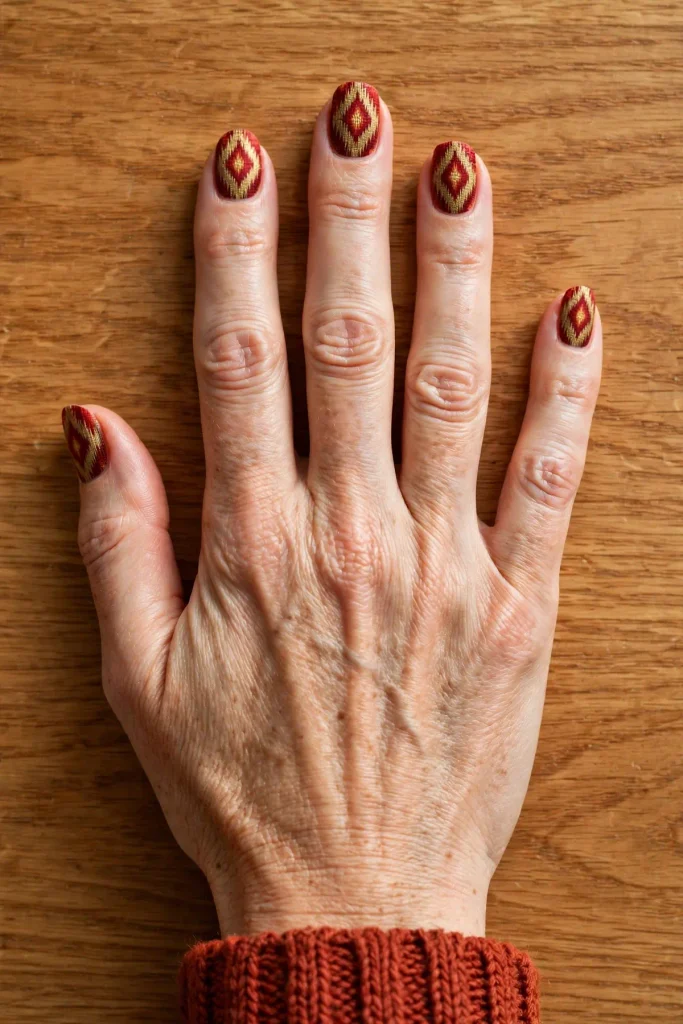
Ikat fabric gets its soft, feathered diamonds from dyed threads, and the same shapes in deep red and antique gold give this set a woven warmth. Regular polish and a dry brush do it, on a medium squoval nail.
Start with two coats of antique gold and let them dry fully; the gold is the ground colour here. With a dry brush loaded with deep red, stamp broken, feathery diamond shapes in a rough column down each nail, leaving gaps of gold between them. Resist tidying the fuzzy edges with a liner. Add a smaller burgundy diamond inside each red one for the woven centre, again with broken strokes. A satin top coat keeps the fabric feel; high gloss makes it look printed.
15. Bordeaux Red and Gold Christmas Nails With Honeycomb Lines
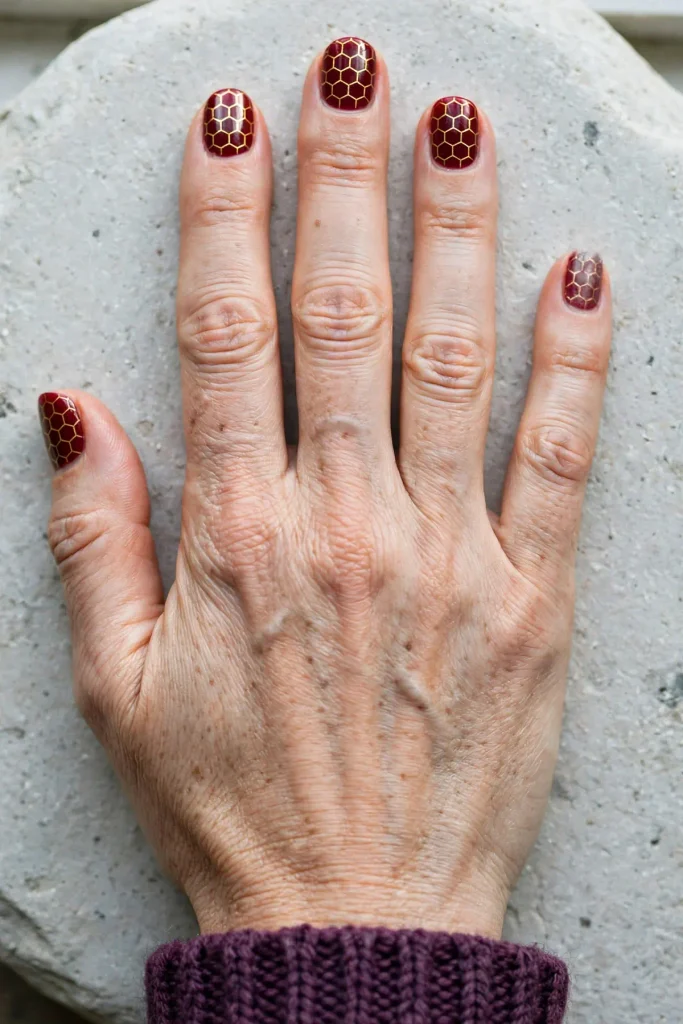
A neat honeycomb of gold hexagons runs over a bordeaux base, orderly and a touch geometric against all the curls elsewhere in this list. It suits short to medium round or soft almond nails, and regular polish with a steady hand is all it takes.
Paint two coats of bordeaux and let them dry hard. Load a dotting tool with gold polish and place a grid of evenly spaced dots across the nail; dots first, because they set your spacing honestly. Join neighbouring dots with a fine liner brush to complete the hexagons, one nail at a time. If a line wobbles, a dot of bordeaux on a toothpick tidies the corner.
16. Claret Red and Gold Christmas Nails With a Greek Key Border

A Greek key border in gold runs along the tip edge of a claret red nail, squared-off and architectural, sharper and more tailored than the rope frame of idea 12. Gel paint gives the cleanest corners, so this one needs a gel kit, on a medium square or almond nail.
Apply gel base, then two coats of claret gel, curing between coats. With a short liner brush and gold gel paint, build the key pattern as a row of squared spirals along the free edge: line forward, turn, turn back, step, repeat. Flash cure after each nail so the corners stay square. Seal with glossy gel top coat.
The Red-to-Gold Balance: Where the Shine Goes
The sets that look expensive share one habit: the red does most of the work and the gold arrives like punctuation. Gold covering about a third of what the eye takes in tends to read rich; gold covering two thirds tends to read costume. Gold at the edges and tips catches light as your hands move, which is why the framed designs here (ideas 1, 12 and 16) look lively even in flat winter light. Gold spread over the whole nail, like the sequin scales of idea 3, works when the red underneath is deep enough to hold its own. One gold texture per set is plenty; mixing leaf, foil and beads makes them argue with each other.
Briefing a Nail Tech: Getting Red and Gold Right
Take a photo of the exact design, not a cousin of it. Name the gold finish you want (leaf, foil, glitter, beads or wire). Say where the gold should sit: framed at the edges, sealed inside jelly, or across the whole nail. If the design has raised pieces, ask for them to be fully encapsulated so nothing catches. And if it is your first gel set, ask about a patch test before the full booking.
Care That Keeps Red Pigment and Gold Detail in Place
Red pigment is the keenest stainer in the polish drawer, so a base coat is not optional with this pairing; use a stain-blocking base under reds. For the gel designs, do a patch test with a small amount of gel product first, and stop if you notice itching or redness around the nail. Do not peel gel off when it lifts; peeling takes nail layers with it. Book professional removal instead, and skip the long soaking tricks shared online, since extended soaking weakens the nail plate. Re-float a thin top coat over foil, leaf and studs every few days, and wear gloves for washing up.
Questions Readers Ask About Red and Gold Nails
Which red suits cool skin tones, scarlet or burgundy?
Blue-based reds usually flatter cool skin, so burgundy, claret and ruby jelly tend to sit more comfortably than orange-leaning scarlet. Pair them with a paler gold rather than a deep yellow one.
Can I copy the gel designs with regular polish?
Some translate well and some honestly do not. The filigree scrolls of idea 13, the patina of idea 5 and the honeycomb of idea 15 are regular polish already. The sealed-in effects — leaf in idea 2, sequins in idea 3, wire in idea 8 and the glitter core of idea 9 — need gel layers and a lamp to hold and cure properly.
How do I stop red polish staining my nails?
A stain-blocking base coat under the red is the main defence, doubled if staining is a known problem for you. Remove red polish promptly when the set is done rather than leaving it chipped for days.
Will the beads, studs and wire survive Christmas week?
They hold well when they are sealed properly: beads and studs want top coat floated over them rather than brushed across, and the wire design is encapsulated in gel, which grips it firmly.
What shape shows red and gold well on short nails?
Round and short oval shapes show it most clearly, because the eye reads the whole nail at once. Framed designs scale down gracefully; the caviar frame of idea 1 and the walnut of idea 10 were both planned with short nails in mind.
A Last Word on Red and Gold
Red brings the Christmas, gold brings the candlelight, and the balance between them is the whole craft. Pick one design, place the gold with intention, and your set will look considered rather than decorated.