14 DIY Christmas Tree Ideas You Can Build This Weekend
Stop scrolling past the tree-shop photos and put the tape measure away. A DIY Christmas tree built by hand can hold a room just as well as a bought one, starting with things already in your home. These fourteen builds cover walls, corners and tabletops, each with its materials, build notes and the spots it suits.

What I love about a handmade tree is that it fits the room you actually have. A narrow hallway, a rented flat, a corner already claimed by the sofa — a bought tree ignores all of that, while a built one works around it.
My honest rule is simple: if a build needs a tool you do not own and a free Saturday you do not have, it is the wrong build. Every idea below asks for basic bits only.
Quick Picks: Match the Build to Your Room
Five quick picks to match the build to your room:
- Up this evening: idea 1, the string-light outline, the fastest set-up here: one wall, one string of lights.
- A toddler in the house: idea 12, the felt tree they can decorate, strip and decorate again.
- Nothing new to buy: idea 4, stacked books with a star on top, from shelves you already own.
- Rented walls: idea 6, the tomato cage tree, which touches nothing but the floor.
- Modern and minimal: idea 14, white PVC pipe with clean lines and baubles resting inside the tubes.
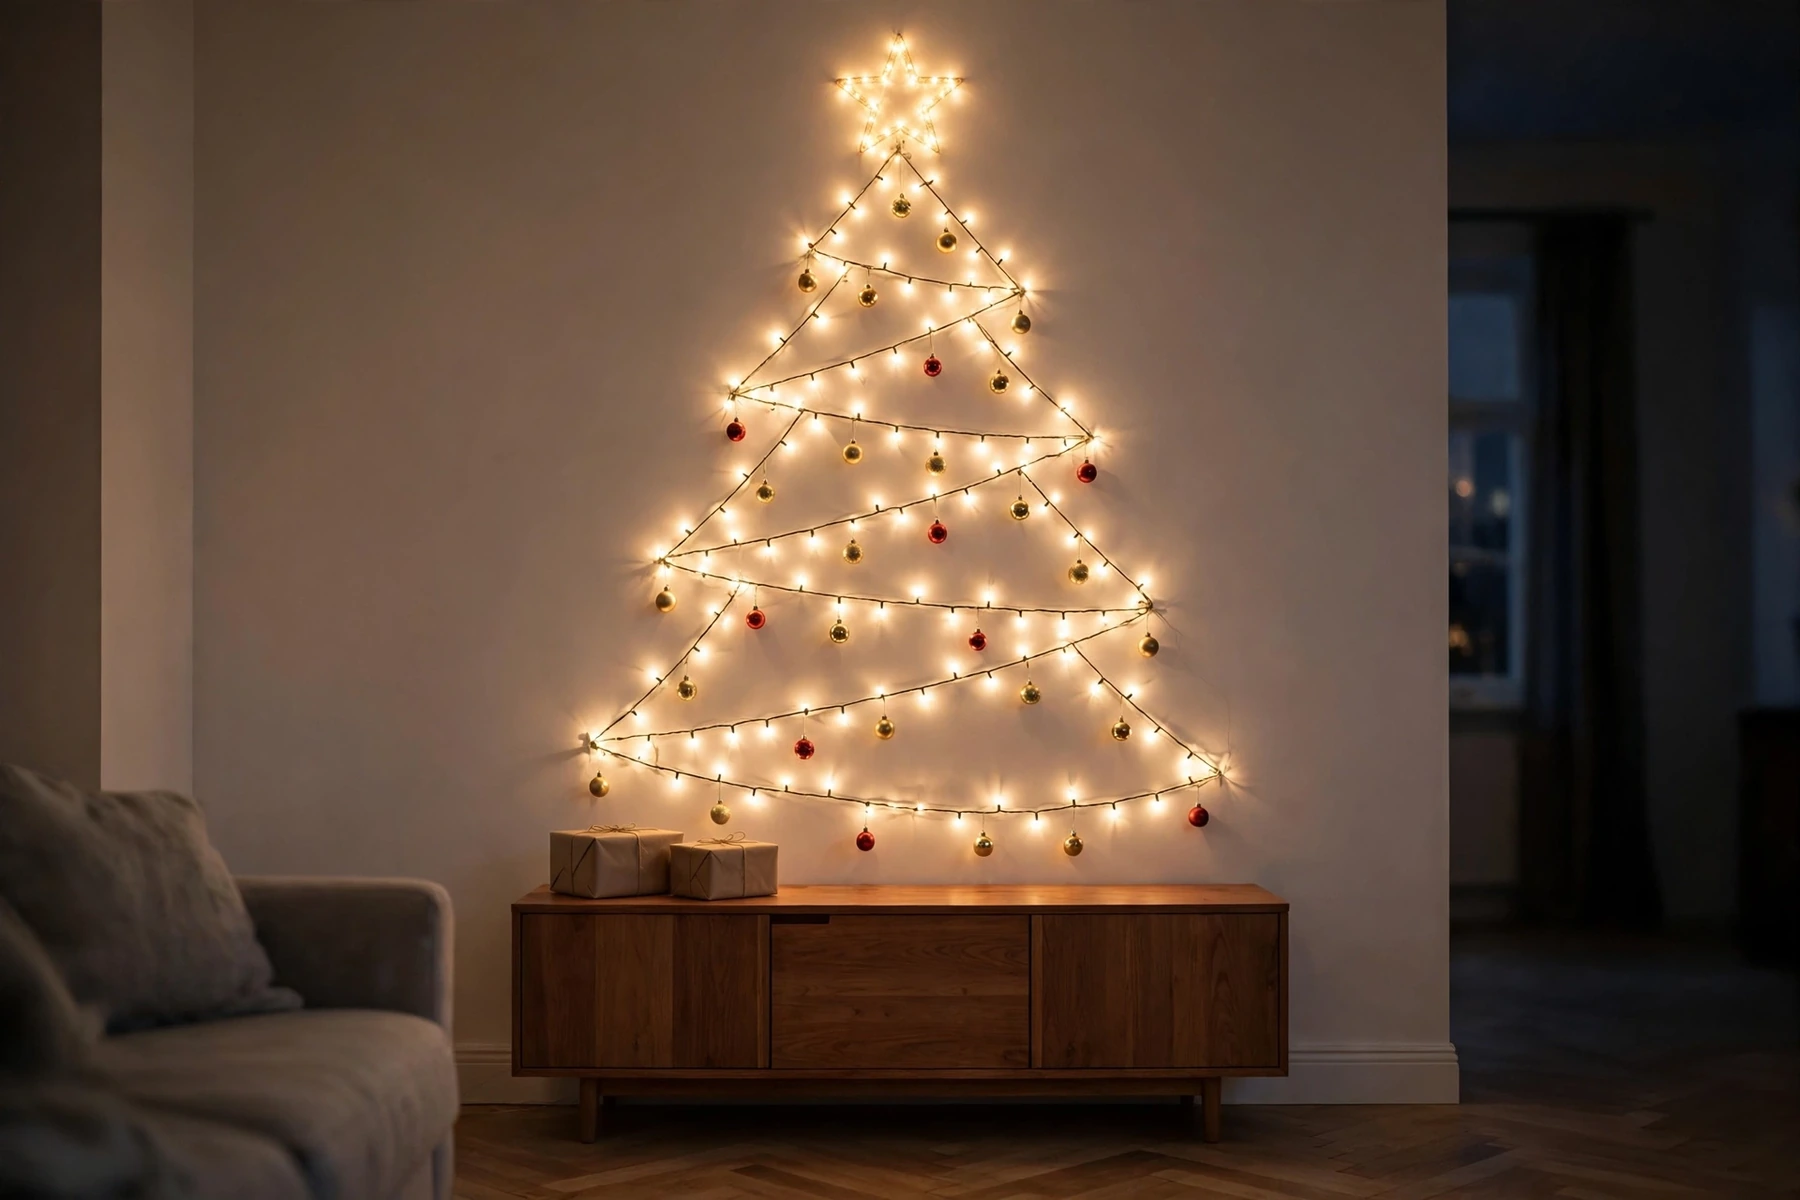
1. String Lights DIY Christmas Tree Outline on a Wall

Start with the build that asks the least of you. Warm-white fairy lights zigzag up a blank wall in a tree outline, fixed with removable adhesive clips, with a star or one bold bauble at the top point. Hang a few light baubles along the wire and the shape reads as a tree the moment the room lights go down. You need one string of lights, clips and a wall you may stick things to. Sketch the outline in pencil first, stand back, adjust, then fix the clips; battery lights keep it cord-free. It suits small flats, hallways and the wall above a sideboard. Gentlest on the wallet too: lights and clips, and nothing if both are already in a drawer.
2. Ladder DIY Christmas Tree With Shelves of Baubles
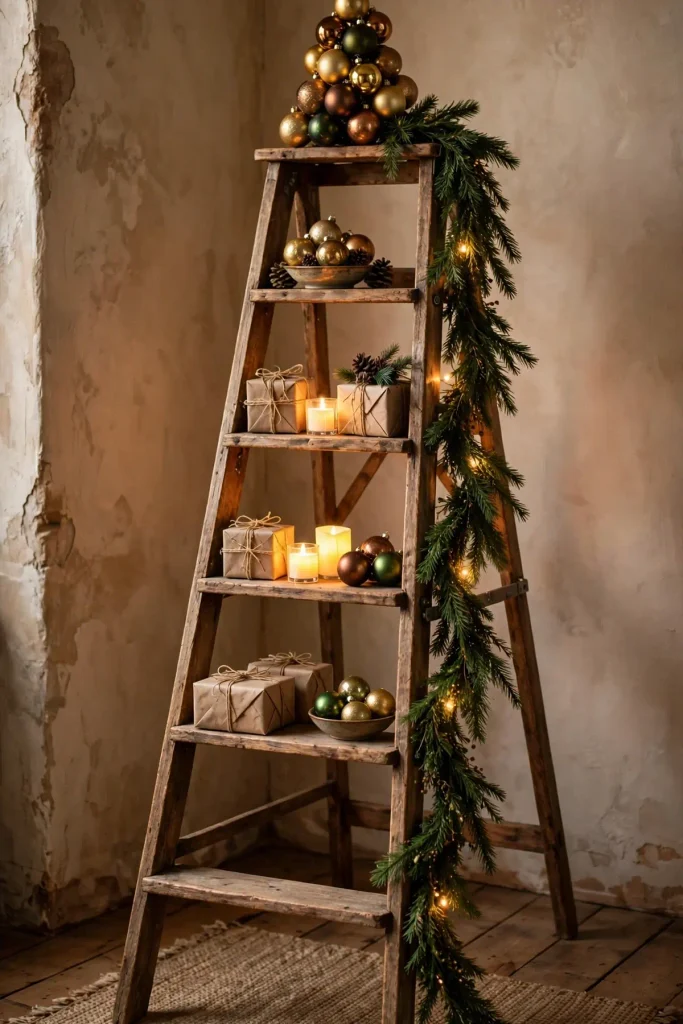
Open a wooden step ladder fully, lay short boards across the steps if you want flat shelves, then dress each level: baubles in a bowl, a small wrapped gift, LED candles, garland trailing down one side, and a cluster of baubles on the top step. You need a sturdy ladder, boards (optional), garland and ornaments, with heavy pieces kept on the lowest steps and the feet checked flat before decorating. It suits rustic rooms, porches and kitchens with a spare corner. A ladder you already own keeps the spend low; the garland is the only likely purchase. Dressing the shelves takes longer than opening the ladder, mostly because you will keep rearranging them.
3. Bare Branch DIY Christmas Tree in a Heavy Vase

Choose a bare, sculptural branch with plenty of side twigs, clean it, dry it, and set it into a heavy stoneware or ceramic vase weighted with pebbles or sand. Baubles hang from the twigs on thread or ribbon, and fairy lights wind along the main stems if you want glow. You need the branch, a heavy vase, and lightweight ornaments only, glass belongs on the sturdiest twigs. It suits minimal rooms and calm corners; a smaller branch makes a tabletop version. The branch is free if collected; the vase is where money earns its place, since weight is the point.
4. Stacked Books DIY Christmas Tree With a Star Topper

Your bookshelves are hiding a tree. Hardback books stack in shrinking layers, each layer turned slightly so the pile twists gently as it rises, with the biggest, heaviest books at the bottom. Cloth covers in green, red or cream give you colour blocks for free. Wind fairy lights around the stack and finish with a star, bought or folded from card. You need books, lights and a star, nothing else. Build it on the surface it will live on, because a finished book tree does not enjoy being carried. It suits reading corners, desks and sideboards. Nothing needs buying here, unless the star is missing, and a folded card one settles that.
A book tree works when you build it like a wall, not a pile: heavy at the bottom, patient at the top, and every layer checked before the next one lands.
5. Pallet Wood DIY Christmas Tree With Painted Slats
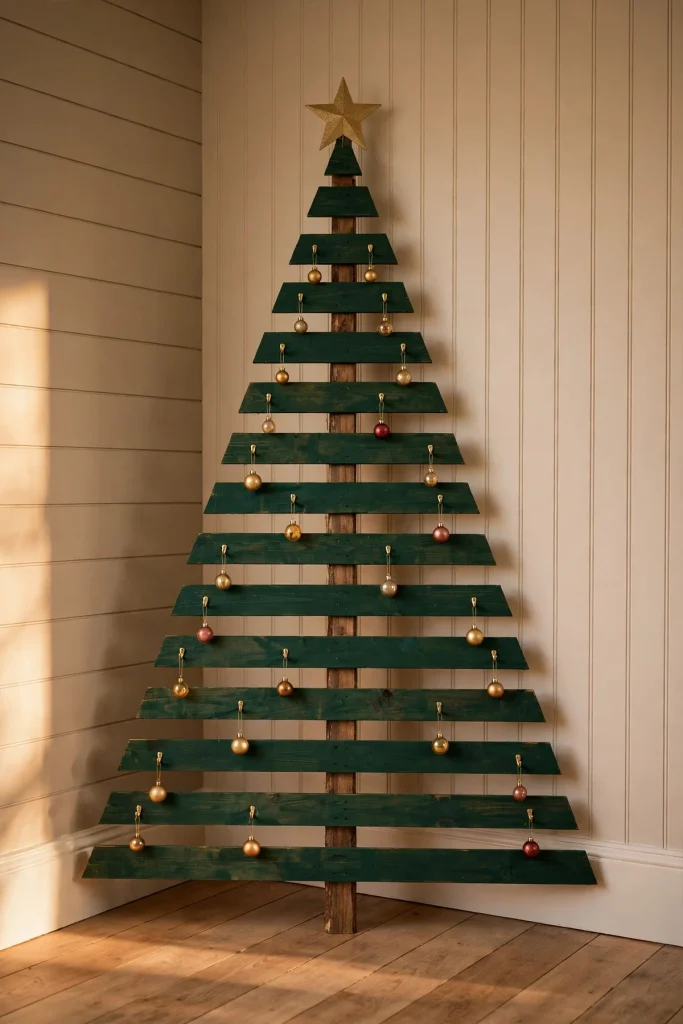
Start with a pallet or a few spare planks. Slats are arranged in shrinking lengths on one central batten so the silhouette reads as a tree, then painted deep green or white, or left as bare wood with painted tips. Small hooks or nails along each slat hold baubles, and the finished tree leans against a wall or hangs from a single sturdy hook. You need slats, a batten, screws or nails, paint and sandpaper. Sand every edge, and check old pallet wood for stray staples. It suits rustic rooms, porches and hallways. Shops often give pallet wood away, so paint and screws are the whole spend: firmly low band. Cutting and sanding is the slow part of this one; once the slats are ready, the assembly goes quickly.
6. Tomato Cage DIY Christmas Tree Wrapped in Garland

Turn the cage so the wide ring sits at the bottom, gather the leg ends at the top and tie them together to hold the point, then wrap the frame with green garland until the wire disappears. Add lights inside the garland as you wrap, then baubles once the shape is full. You need a tomato cage, garland, lights and ties. Standing the cage in a heavy plant pot hides the ring and adds ballast at once. It suits porches, rented homes and any floor corner. A shed cage makes it nearly free; bought with garland, it still sits at the low end.
7. Driftwood DIY Christmas Tree Hung on the Wall
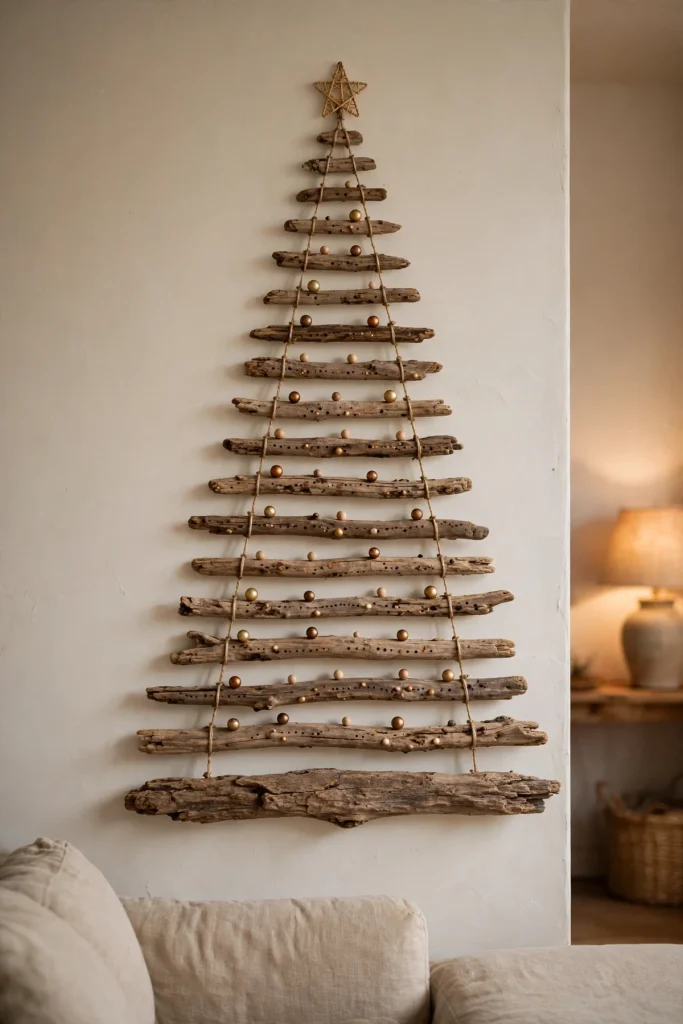
Driftwood pieces sort themselves into this build. Lay the pieces out on the floor first, longest at the bottom and shortest at the top, with small gaps between rows. Drill a hole at each end of every piece, thread them onto two lengths of twine or thin rope, and hang the finished ladder of wood from one strong hook. Baubles and a small star sit along the pieces. You need driftwood or weathered sticks, twine, a drill and one wall hook. Collected wood should be clean and fully dry before it comes indoors. It suits calm, neutral rooms and narrow hall walls. Collected driftwood costs the walk only; bought craft pieces push it toward mid band. Sorting and drilling the pieces is the fiddly stage, so spread it across a lazy afternoon rather than rushing it.
Halfway note: whatever you are building, switch the lights on and step back before adding a single bauble, the outline has to read as a tree first.
8. Hanging Baubles DIY Christmas Tree From a Ceiling Hook

Clear fishing line hangs from a secure ceiling hook at staggered lengths, each line ending in a bauble, so the hanging ornaments spiral into a cone shape with a star at the centre top. You need a hook in a joist or a proper ceiling anchor, fishing line and baubles in two or three sizes. Tie the longest lines first to set the bottom ring, then work upward in shorter rounds. Hang it above a sideboard or in a corner where nobody walks through, and keep it well out of toddler reach. It suits flats with no spare floor space. Raid the bauble box first: a full set bought for this is what pushes the cost up. Set aside an unhurried few hours for the tying; this build rewards patience far more than speed.
9. Cardboard Cut-Out DIY Christmas Tree for Small Flats
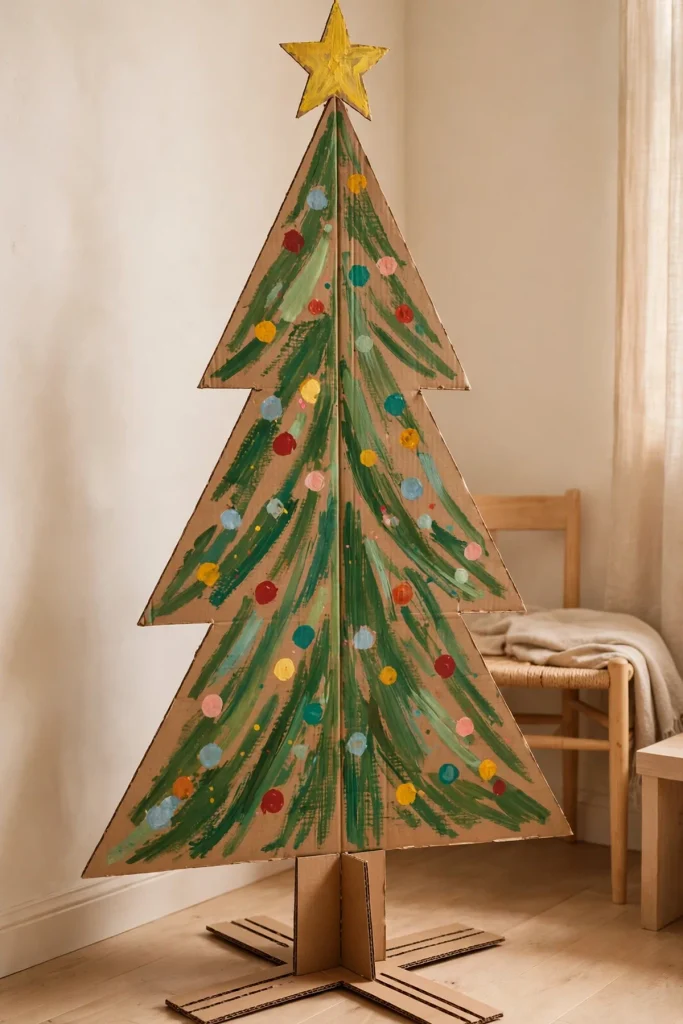
The biggest box you can find becomes this tree. Draw a tree silhouette on flattened cardboard (an appliance box gives the height), cut two, and slot them together crosswise at the base so it stands. Paint it green, or keep the kraft brown and paint on dots and a garland swirl. Paper ornaments glue flat, so nothing falls and nothing breaks. You need cardboard, a craft knife, paint and glue. One flat panel also works leaned on a wall. It suits small flats, kids’ rooms and last-minute decorating. A recycling-bound box and cupboard paint keep it as close to free as a build gets.
10. Stacked Crates DIY Christmas Tree With Lit Shelves

Wooden crates stack into a pyramid: three at the bottom, two above, one on top, each crate turned to face the room. Battery fairy lights thread through the crates; the shelves hold baubles, small wrapped gifts, pinecones and LED candles, and a star rests on the top crate. You need crates, lights and decorations you already own. Fix the crates to each other at the back with screws or brackets before you decorate, a pyramid of loose boxes is asking for trouble. It suits rustic rooms and family spaces, and afterwards the crates go back to storage duty. The crates are the spend: new sets land mid band, garage crates leave just the lights to buy. Once the crates are fixed together, dressing the shelves is the quick, enjoyable part.
Crates earn their keep twice in December: open shelves while the tree is up, honest storage the rest of the year. Builds that store themselves are the ones worth making.
11. Wooden Dowel DIY Christmas Tree With a Clean Outline

Wooden dowels are cut in shrinking lengths, drilled through the centre, and threaded onto one vertical rod fixed into a wooden base, with a small gap between each bar so the outline stays open and light. Ornaments hang from the outer ends of the dowels only, that restraint is what keeps the silhouette crisp. You need dowels, a rod, a base block, a drill and a saw. Give the base real width; a narrow footprint is where this design wobbles. It suits clean, modern rooms and desks. Dowels and a rod are a modest hardware spend, shrunk further by offcuts. Drilling every bar dead-centre is the patient part; the threading itself is quick.
12. Felt DIY Christmas Tree Toddlers Can Decorate Again
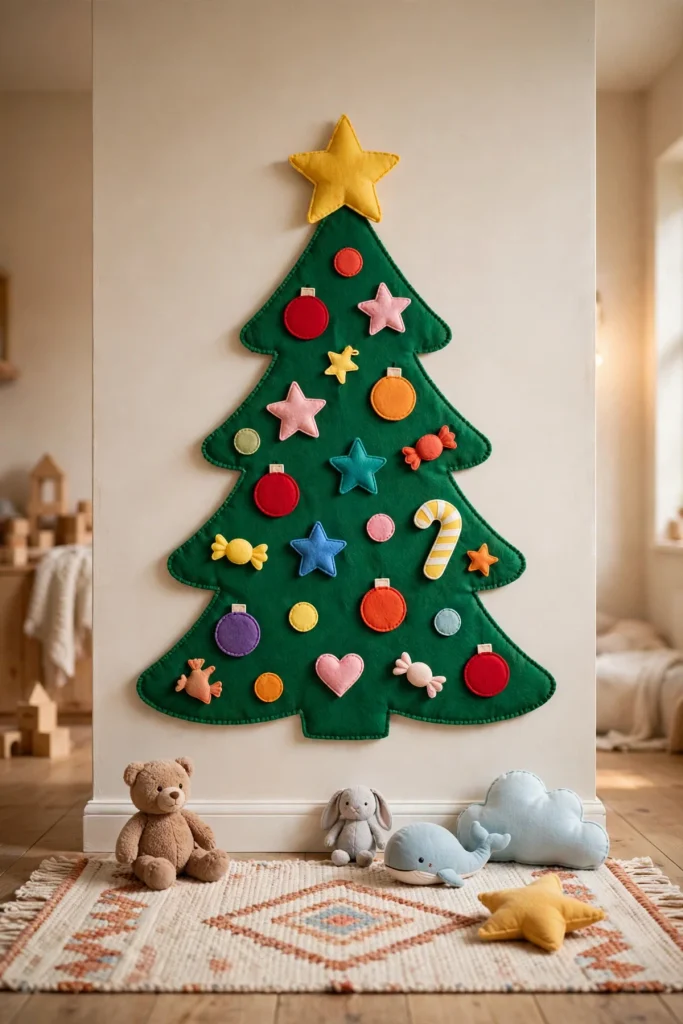
Cut a large tree shape from green felt and fix it to the wall at toddler height with removable strips, or pins placed well out of reach. Then cut felt ornaments and a big star for the top, and let small hands press them on. Felt sticks to felt, so ornaments can be moved, dropped and rearranged all season without hooks, glue or breakage. You need felt sheets in green and bright colours, scissors and wall strips. Cut more ornaments than you think you need, because a few will move into the toy box by week two. It suits playrooms, nurseries and grandparents’ hallways. Felt sheets are cheap and go far, so it stays low band even from scratch.
13. Pinecone DIY Christmas Tree Built on a Cone Frame

Glue them in rings around a cone frame, a cardboard cone you roll yourself or a craft foam cone, starting at the bottom and overlapping each row over the last, tips pointing down and out. White paint brushed on the edges gives a frosted look, and a small star pins into the top. You need a cone, collected pinecones, strong craft glue and patience. Shake and clean collected cones outdoors and let them dry fully before gluing, or the glue fails. It suits mantels, sideboards and dining tables. Collected cones cost glue money only; craft cones and a foam base nudge it mid band. Gluing goes ring by ring and cannot be hurried, so put a film on and settle in.
14. White PVC Pipe DIY Christmas Tree With Clean Lines

White PVC pipe lengths, cut in shrinking rows and stacked into a tree shape on a board, hold the ornaments: each bauble rests inside an open pipe end, so the white circles frame the colour. A strip of lights behind the pipes adds a soft glow through the tubes. You need PVC pipe offcuts, a saw, sandpaper and a board or frame. Sand cut edges smooth (raw PVC is sharp) and put the largest baubles in the widest bottom pipes. It suits modern rooms, offices and anyone who prefers their Christmas decoration graphic and tidy. Pipe offcuts are cheap, keeping it low-to-mid; spend on the saw blade, save on the rest. The sawing and sanding is the slow stage; once the pipes are ready, the stacking takes minutes.
Picking the Right Spot Before You Build
Decide where the tree will live before choosing the build. Wall builds (ideas 1, 7, 9 and 12) belong where floor space is spoken for; floor builds (ideas 2, 6 and 10) need a corner out of the walking line.
Mains-powered lights need a socket within reach of the cord, while battery packs free you to build anywhere: above a sideboard, on a landing, in a porch. Be honest about foot traffic too: a build brushed past all day needs a steadier base than one in a quiet corner.
The Fourteen Builds at a Glance
| Build style | Ideas | Main materials | Rough build time |
|---|---|---|---|
| Wall outlines and hangings | 1, 7, 9, 12 | String lights, driftwood, cardboard, felt | Under an hour to an afternoon |
| Shelf stacks | 2, 10 | Ladder, wooden crates, boards | A few hours |
| Found-object builds | 3, 4, 13 | Branch and vase, books, pinecones | Under an hour to an afternoon |
| Wrapped frames | 5, 6, 14 | Pallet wood, tomato cage, PVC pipe | An afternoon |
| Hanging build | 8 | Ceiling hook, fishing line, baubles | A few hours |
The Sturdy Base Rule: DIY Trees That Do Not Tip
Every fallen handmade tree I have ever heard about failed at the bottom, not the top. So here is the rule I build by: the widest, heaviest part of any DIY tree sits at the floor, and the lightest decorations sit at the top. The base carries weight on purpose, so the shape above it can stay light.
Then nudge-test the bare build from two sides before decorating. If it rocks, fix the base now: a pot around the cage, brackets behind the crates, a wider block under the dowels. Baubles only make a wobble worse.
Wall and hanging builds follow the rule in reverse: the anchor is their base, so tug-test every hook, clip and line before the first ornament goes on.
Keeping a Handmade Tree Safe and Dust-Free
Battery fairy lights run cooler and leave no cord, which suits felt, cardboard and paper builds. Keep fabric and paper away from hot bulbs and real candles, and check older strings for frayed wire.
Dust is the quiet enemy of a handmade tree. A soft brush or a cool hairdryer clears garland, pinecones and felt without dismantling anything. Flat builds (cardboard, felt, driftwood) store between two sheets of cardboard; the rest come apart into their own boxes.
DIY Christmas Tree Questions, Answered
Can a DIY Christmas tree work in a very small flat? Yes: wall builds take no floor space at all, and the string-light outline (idea 1), cardboard cut-out (idea 9) and felt tree (idea 12) sit flat against a wall, while the hanging bauble tree (idea 8) uses the ceiling.
Which DIY Christmas tree usually costs the least to make? The stacked-book tree (idea 4) usually costs nothing new, because the books, and often the star, are already in the house.
How do I stop a handmade tree falling over? Put the widest, heaviest layer at the bottom and nudge-test the bare build before decorating; a cage in a heavy pot, back-bracketed crates and a wide dowel base all follow that rule.
Are DIY Christmas trees safe around toddlers? Some do. The felt tree (idea 12) is made to be touched and rearranged; keep glass baubles, small parts and the hanging build (idea 8) out of reach, and choose battery lights so there are no cords to pull.
How long does a DIY Christmas tree take to build? Wall outlines and the book stack can be up within the hour; shelf stacks and the hanging tree take a few hours; the pallet, PVC and driftwood builds fill a relaxed afternoon.
Built, Not Bought
A handmade tree asks for an afternoon and gives back a corner that looks like nobody else’s. Pick the build that fits your room, give the base the respect it deserves, and the rest is just decorating.