17 DIY Halloween Decorations You Can Make From Things Already in Your House
Confession time: some of my favorite Halloween decorations cost me nothing. My kids’ egg-carton bats have hung above our front window for four Octobers now, and every single year someone asks where I bought them.
That’s the beauty of DIY Halloween decor. It doesn’t have to look homemade in the “bless your heart” way. With a little paint, the right glue and some confidence, a cardboard box can become a creepy tombstone and a sad old book can become a witch’s spell book.
I’ve organized these 17 projects by where the materials come from: your recycling bin, the dollar store, and your own backyard. I finish with two weekend showstoppers for when you’re feeling brave. Each project has a difficulty rating, quick steps, and a “rescue tip” for when things go sideways, because in my craft room, they often do.
Before You Start: My DIY Halloween Toolkit
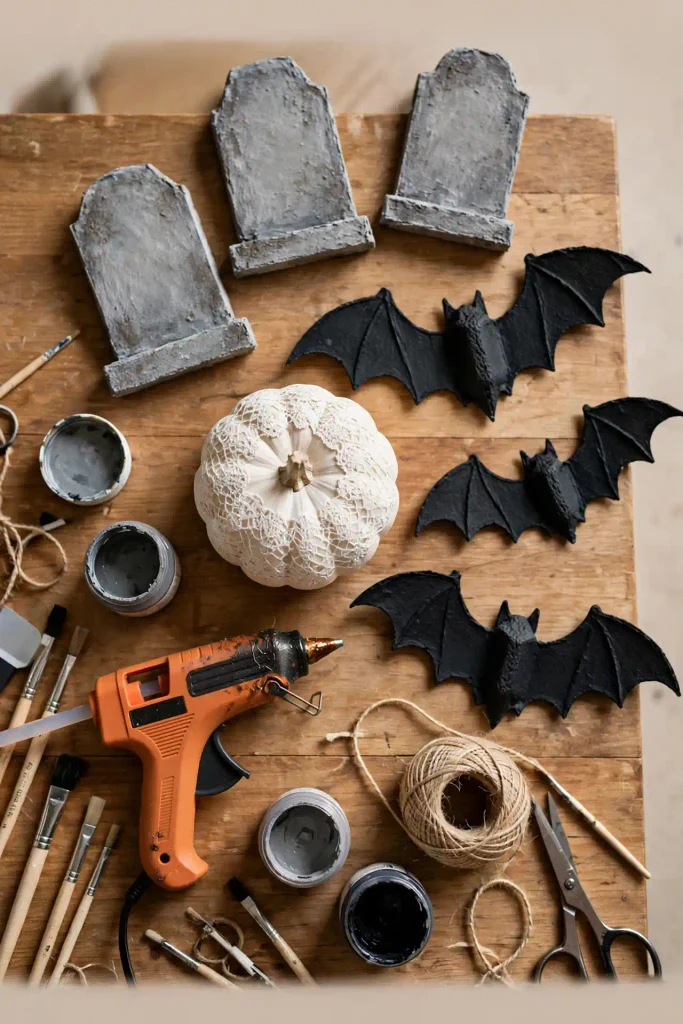
You don’t need a craft store’s worth of supplies. Almost every project here uses some combination of:
A hot glue gun with plenty of glue sticks
Black and white acrylic paint, plus one metallic (gold or copper)
Matte black spray paint, the single most useful Halloween supply there is
Scissors, a craft knife and a cutting mat
Clear fishing line and removable wall putty
A pack of battery-operated LED tea lights
The Glue Cheat Sheet Nobody Tells You About
Half of all DIY fails are really glue fails. Here’s what I use for what:
Hot glue: fast, strong on paper, cardboard, fabric and pinecones. Weak on smooth glass and anything that gets hot outdoors.
Mod Podge: for sealing paper onto surfaces and giving projects a finished coat. Choose matte for a vintage look.
Tacky craft glue: better than hot glue for kids, and great for felt and paper.
Strong multi-surface adhesive (like E6000): for metal, glass and plastic that need to stay put. Use it in a ventilated room.
Keep this list handy. It will save you from watching your beautiful skull wreath slide off the door at 4 p.m. on Halloween.
Part One: Raid the Recycling Bin
Free materials, big impact. These are the projects I do with my kids.
1. Cardboard Tombstones for the Front Lawn
Difficulty: Easy | Time: 1–2 hours
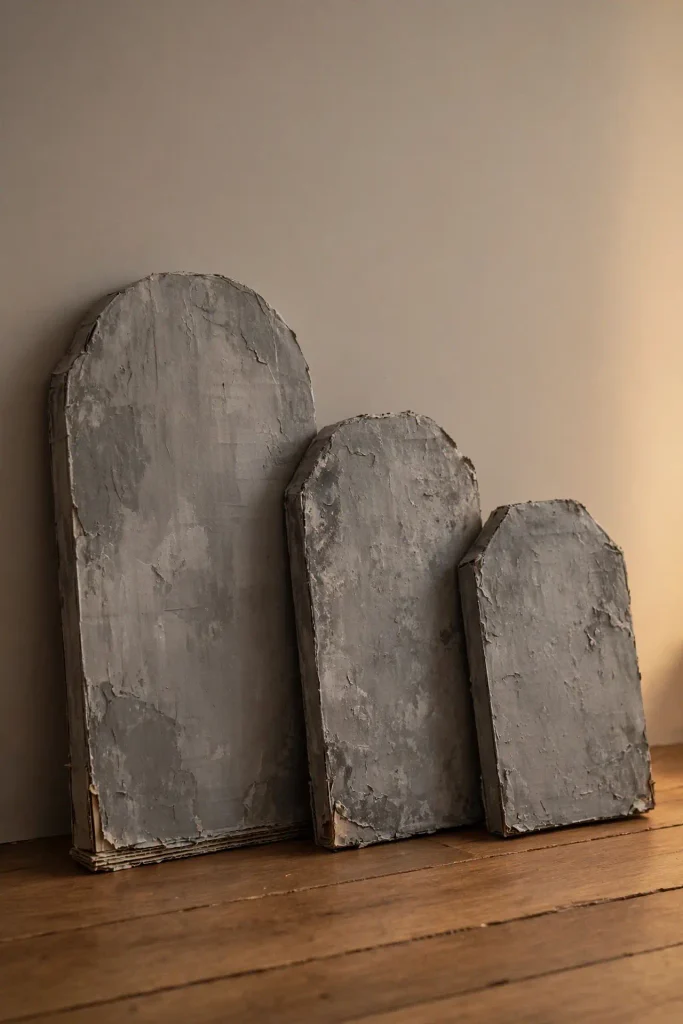
Nothing makes a front yard look haunted faster than a little graveyard. Large shipping boxes make perfect tombstones.
Cut rounded or cross-topped tombstone shapes from flattened cardboard. Cut two per stone and glue them together for strength.
Paint them gray, then dab on darker gray and black with a crumpled paper towel to fake the look of weathered stone.
Write funny epitaphs, like “I Told You I Was Sick” or “Here Lies Candy, Eaten Too Soon,” in black paint.
Tape a wooden garden stake or paint stirrer to the back and push it into the lawn.
Rescue tip: Cardboard hates rain. Seal the finished stones with a coat of clear spray sealant, or bring them inside on wet nights.
2. Punched Tin Can Lanterns
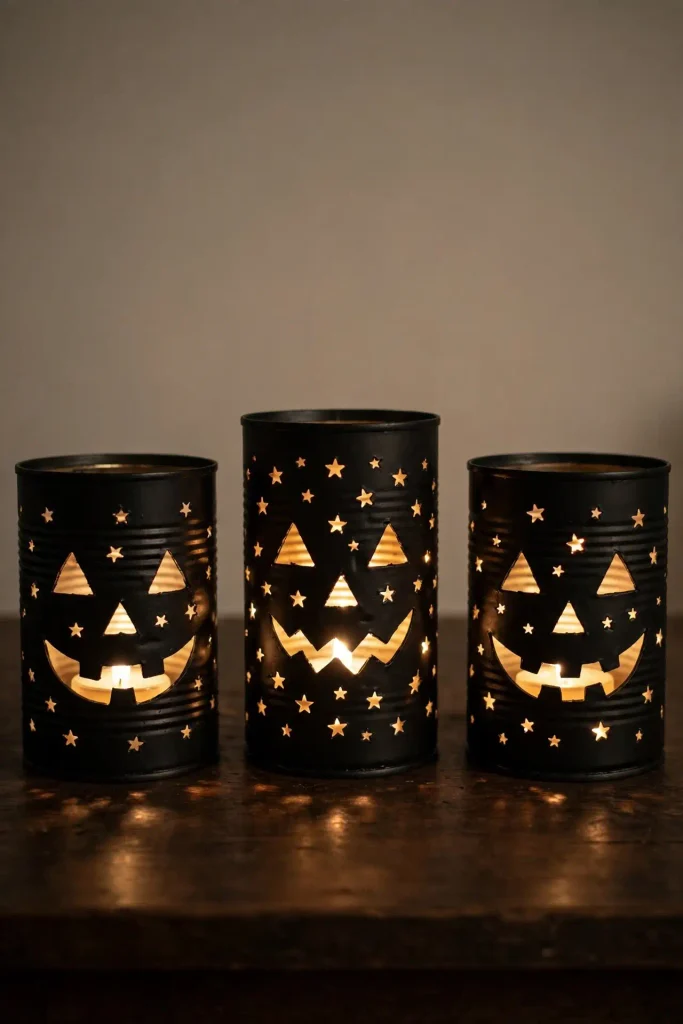
Difficulty: Medium | Time: 1 hour (plus overnight freezing)
Old soup and tomato cans make beautiful lanterns that throw patterned light across a porch.
Remove labels, wash the cans, then fill them with water and freeze overnight. The ice stops the can from denting.
Tape a paper template, like a jack-o’-lantern face or a scatter of stars, to the outside.
Tap holes along the pattern with a hammer and nail.
Let the ice melt, dry the can, spray it matte black, and pop an LED tea light inside.
Rescue tip: The edges of punched holes can be sharp. Keep these on a table or step out of reach of small hands.
3. Egg Carton Bat Garland
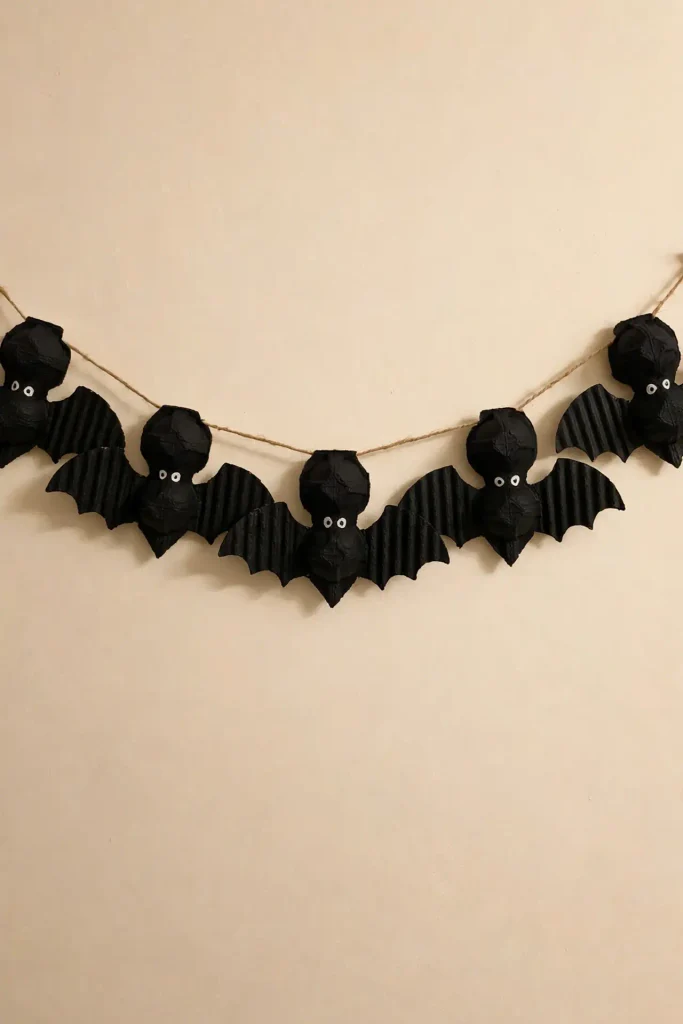
Difficulty: Easy | Time: 30 minutes
This is the project that started my DIY obsession, and it’s ideal for kids.
Cut a cardboard egg carton into sections of three cups in a row. The middle cup is the body; the outer cups become wings.
Trim the outer cups into scalloped wing shapes.
Paint everything black and add googly eyes, or white paint-pen eyes.
Poke a small hole in the top and thread onto twine to make a garland.
Rescue tip: If the paint looks patchy on the cardboard, add a second coat once the first is dry. Cardboard soaks up the first layer.
4. Cereal Box Haunted Village
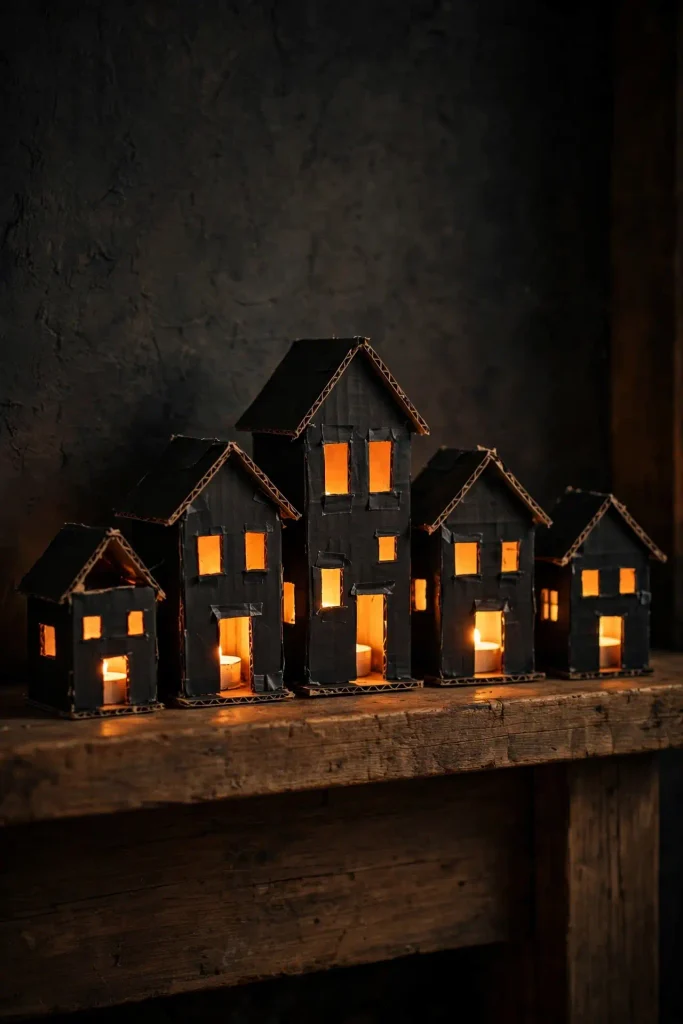
Difficulty: Easy to medium | Time: 2 hours
This one feels like building a gingerbread village, but spooky. Every cereal box, cracker box and tissue box becomes a tiny haunted house.
Cut boxes down into house shapes with pointed roofs.
Paint them black or dark gray.
Cut out windows and doors, then glue orange or yellow tissue paper behind them.
Arrange the houses on a mantel or shelf and put a small LED light inside each one.
Rescue tip: Paint the boxes inside out so the glossy printed side is inside. The plain brown side takes paint much better.
5. Pool Noodle Eyeball Wreath
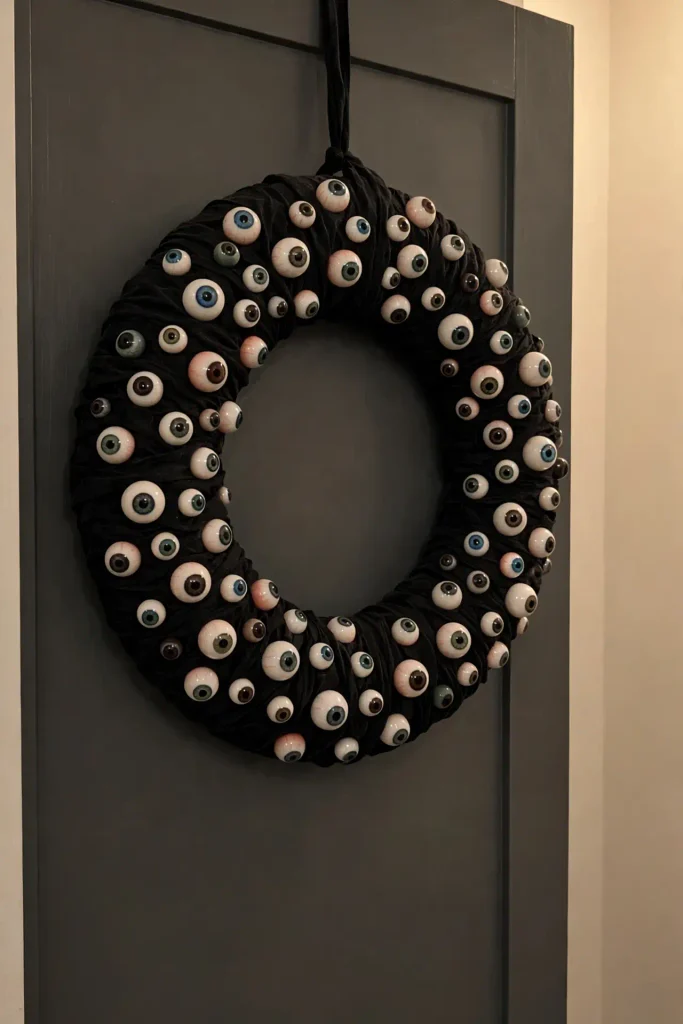
Difficulty: Easy | Time: 45 minutes
This one’s delightfully weird. Grown-ups laugh, kids squeal, and it costs almost nothing if you have an old pool noodle in the garage.
Bend a pool noodle into a circle and tape the ends together firmly with duct tape.
Wrap it in black fabric strips or black crepe paper.
Hot glue plastic eyeballs (or ping-pong balls painted with irises) all over the front, in different sizes.
Rescue tip: If the noodle keeps springing open, slide a short piece of wooden dowel into both ends before taping.
Part Two: Dollar Store Magic
A $15 budget and a free afternoon.
6. Stacked Vintage Spell Books
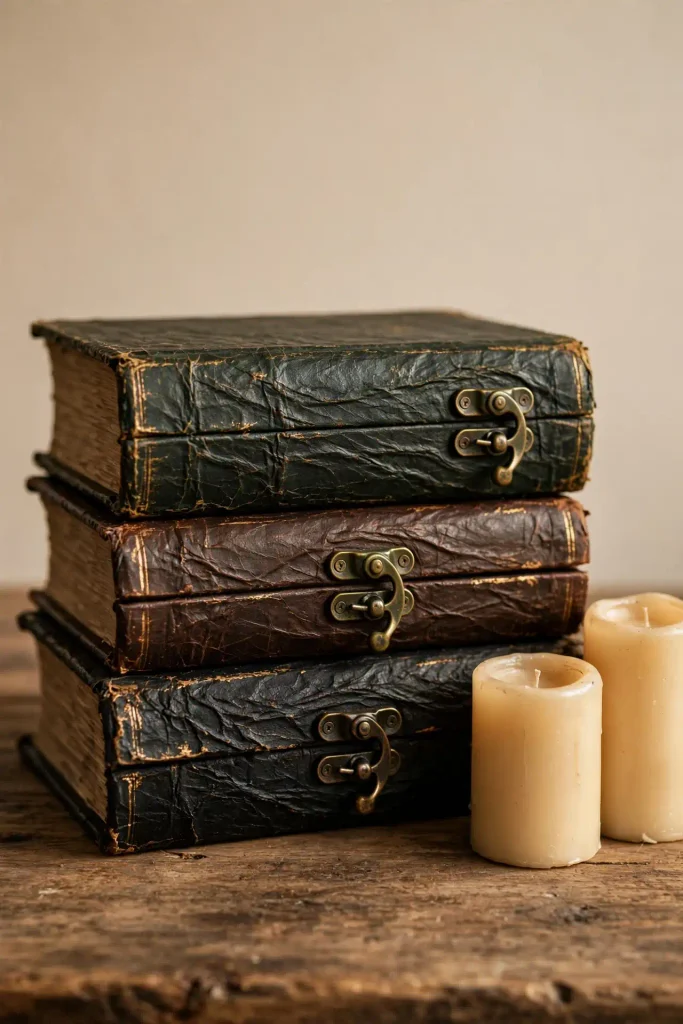
Difficulty: Medium | Time: 2 hours
Old hardcover books from a thrift store or dollar bin become a stack of mysterious spell books.
Glue textured paper towels or tissue paper over the covers with Mod Podge, pressing in wrinkles for a leathery look.
Once dry, paint the covers dark brown, black or deep green.
Dry-brush a little gold or copper over the raised wrinkles.
Add titles on printed labels, like “Potions for Beginners” or “Curses & Cures,” and glue on old buttons or jewelry for clasps.
Rescue tip: Don’t use books you’d ever want to read again. This process is permanent.
7. Giant Yarn Spider Web
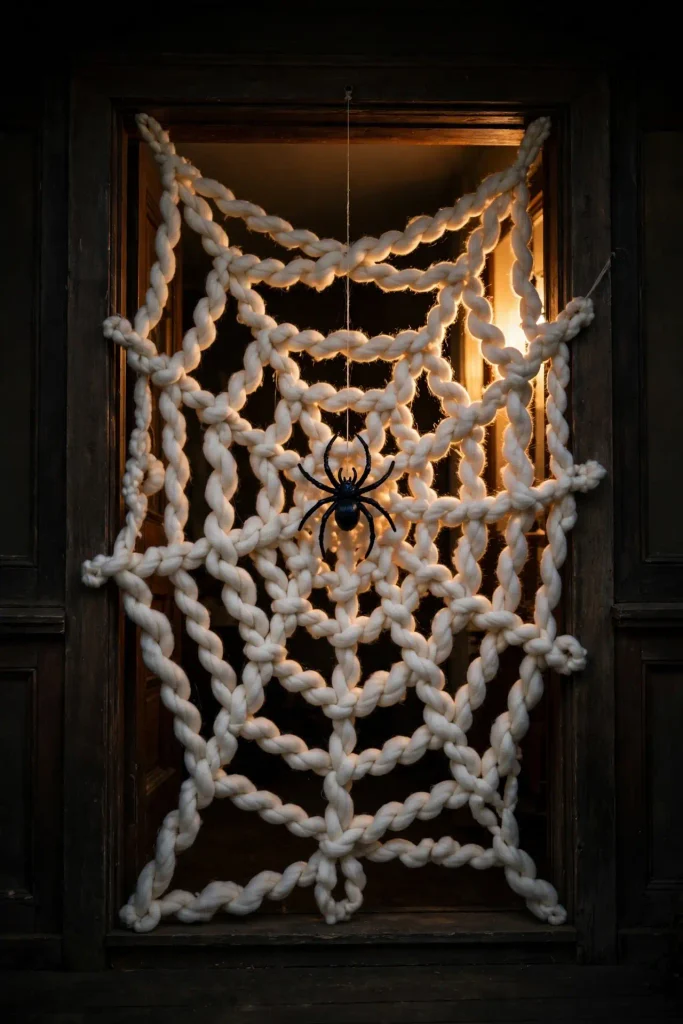
Difficulty: Easy | Time: 1 hour
Skip the stretchy fake cobwebs that end up everywhere. A giant yarn web looks graphic and dramatic on a porch or across a doorway.
Tie long strands of white or black yarn from a central point out to the edges, like spokes on a wheel. Anchor them to porch posts, hooks or railings.
Starting from the center, wrap yarn around each spoke in a spiral, working outward.
Add a big dollar-store spider for drama.
Rescue tip: Use thicker, chunky yarn. Thin yarn disappears from the street.
8. Flower-Crowned Skulls

Difficulty: Easy | Time: 30 minutes
This is my favorite “pretty spooky” project. Take a plastic dollar-store skull, spray paint it matte black, white or gold, then glue faux flowers across the top of the head like a crown.
Deep red roses, dried grasses and dark leaves look gothic and romantic; bright marigolds feel festive and cheerful.
Rescue tip: Cut flower stems short, less than half an inch, so the flowers sit snug against the skull rather than sticking out.
9. Lace-Stenciled Pumpkins
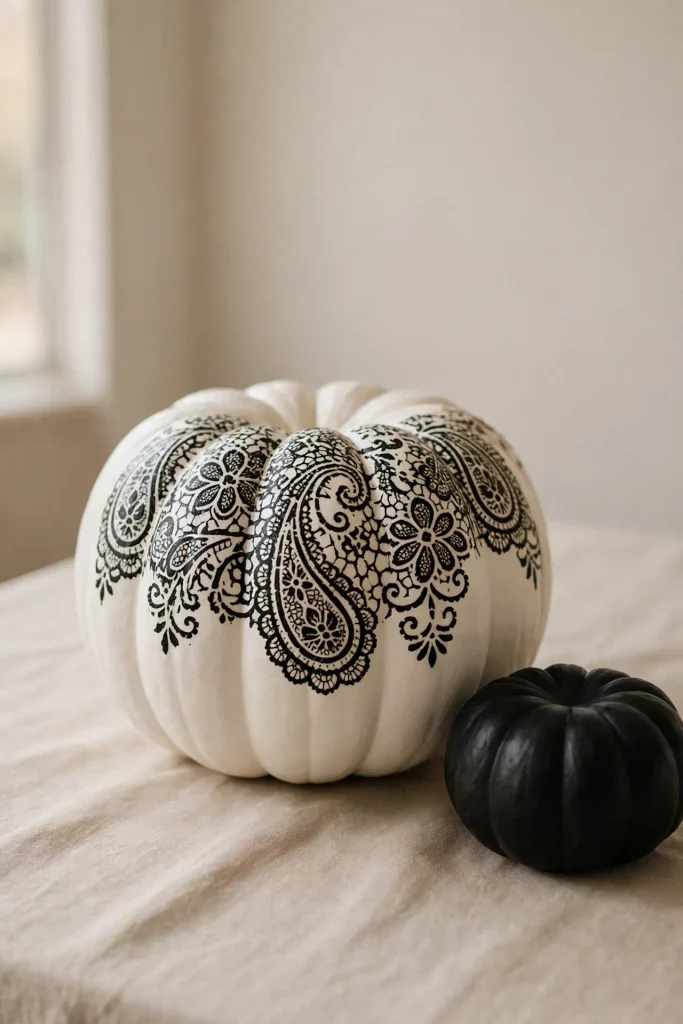
Difficulty: Easy | Time: 30 minutes
Wrap a faux or real pumpkin in a piece of black or white lace, secure it tightly at the back, and spray paint over it. When you peel the lace away, you’re left with a delicate, lacy pattern.
Black lace on a white pumpkin looks especially elegant.
Rescue tip: Spray in short bursts from about 12 inches away. Heavy spraying bleeds under the lace and blurs the pattern.
10. The Witch’s Broom
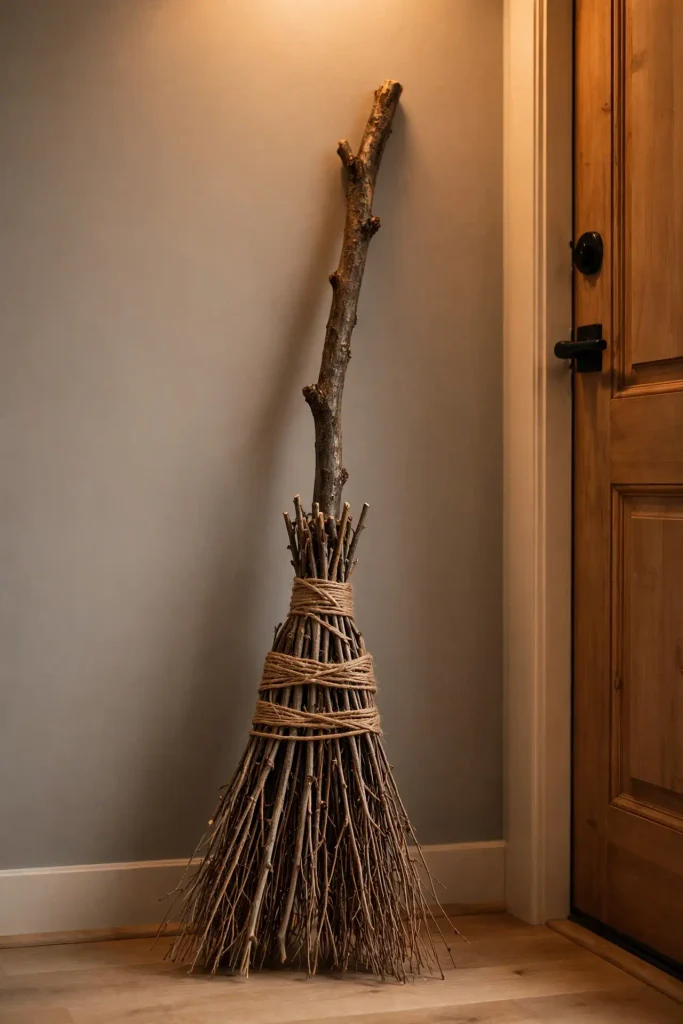
Difficulty: Medium | Time: 1 hour
A rustic handmade broom looks wonderful leaning by the front door.
Gather a sturdy straight branch for the handle and a big bundle of thin twigs, dried grass, or a dollar-store bundle of raffia.
Arrange the twigs around the bottom of the branch.
Wrap them tightly with twine in two or three places, finishing with a neat knot.
Trim the bottom so it looks a little uneven and wild.
Rescue tip: Wrap the twine very tightly and add a little hot glue under each wrap, or the twigs will slip down every time someone brushes past.
11. Fabric Scrap Pumpkins
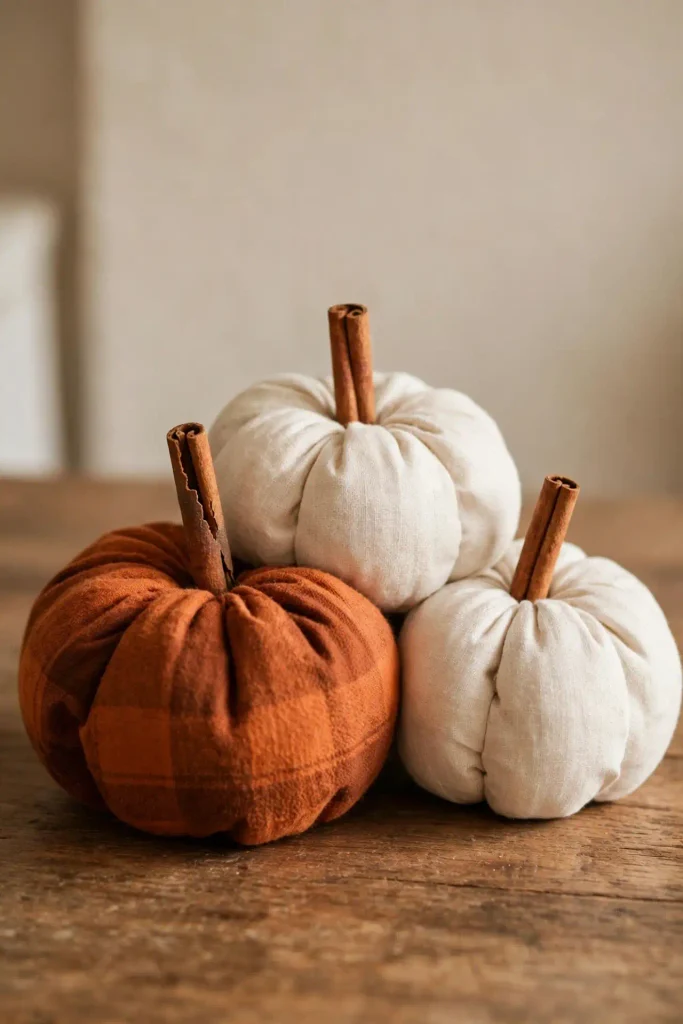
Difficulty: Easy | Time: 20 minutes each
These soft pumpkins give your home cozy, farmhouse Halloween vibes, and they’re perfect for using up old flannel shirts and fabric scraps.
Place a toilet paper roll in the center of a square of fabric.
Tuck all the fabric edges into the roll, pushing them inside to form a round pumpkin shape.
Add a short cinnamon stick or twig for the stem and a fabric or felt leaf.
Rescue tip: Too flat? Add a handful of fiber stuffing inside the fabric before tucking.
Part Three: Straight From the Backyard
Nature is the best free craft store I know.
12. The Spooky Halloween Tree
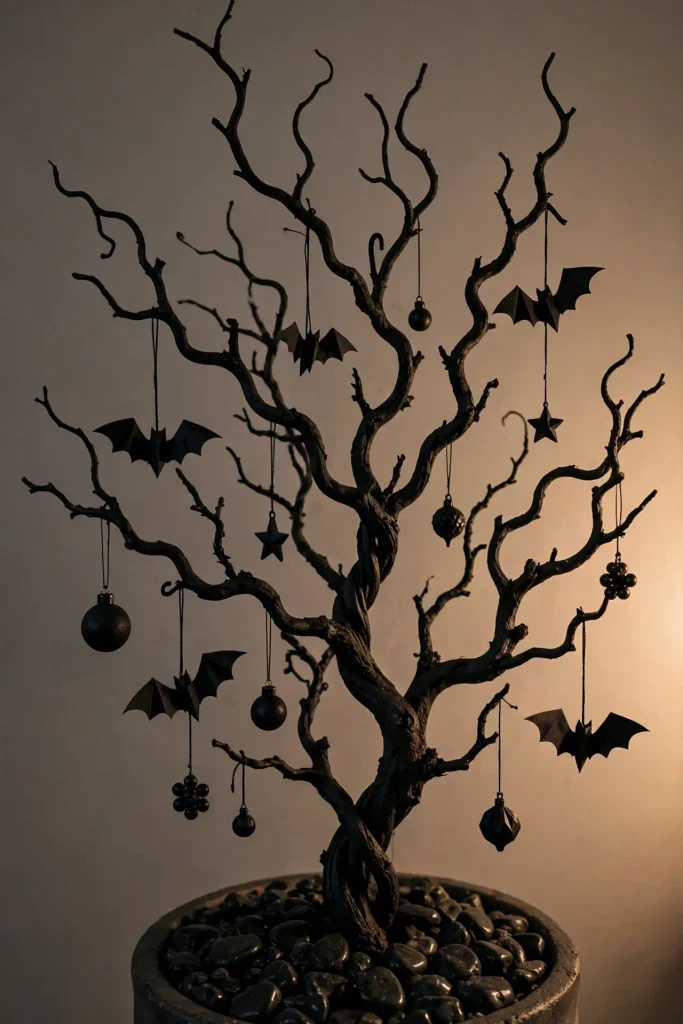
Difficulty: Easy | Time: 1 hour
Find a twisted branch with lots of little arms. Spray it matte black, then plant it in a pot or vase with stones or floral foam.
Now decorate it like a Christmas tree with tiny paper bats, small handmade tags that say “BOO,” mini ghosts or small ornaments.
Rescue tip: Weigh the pot down well. A branch loaded with ornaments tips over easily.
13. Leaf Ghost Garland
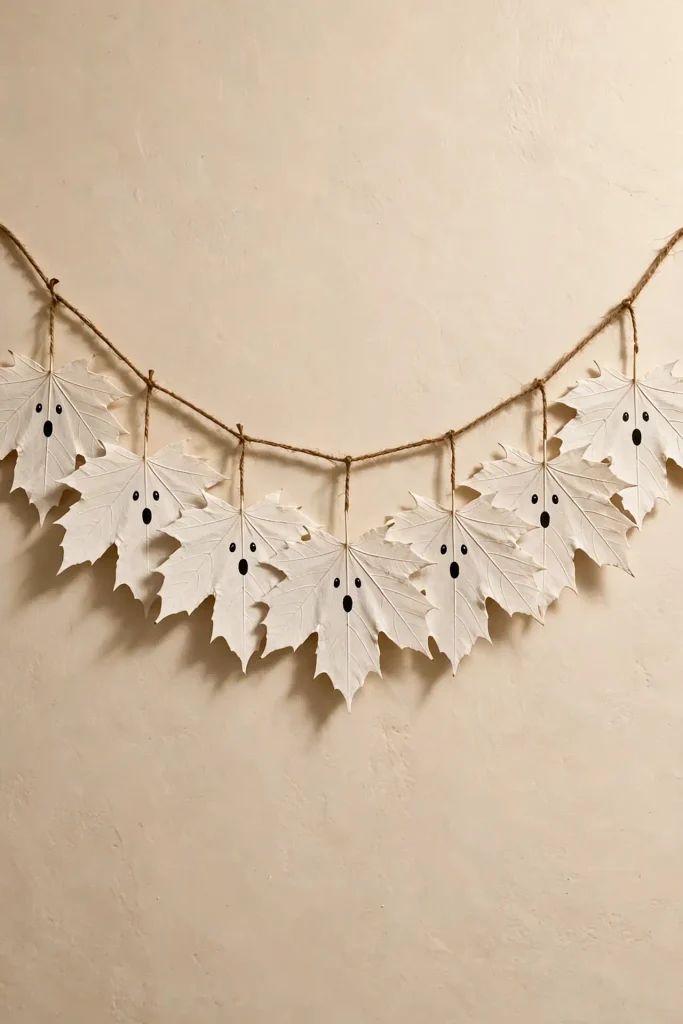
Difficulty: Easy | Time: 45 minutes
Collect big, flat autumn leaves and paint them white. Once they’re dry, add little black ghost faces with a paint pen. String them on twine for an adorable garland.
Rescue tip: Press the leaves under a heavy book overnight before painting so they don’t curl.
14. Pinecone Bats and Spiders
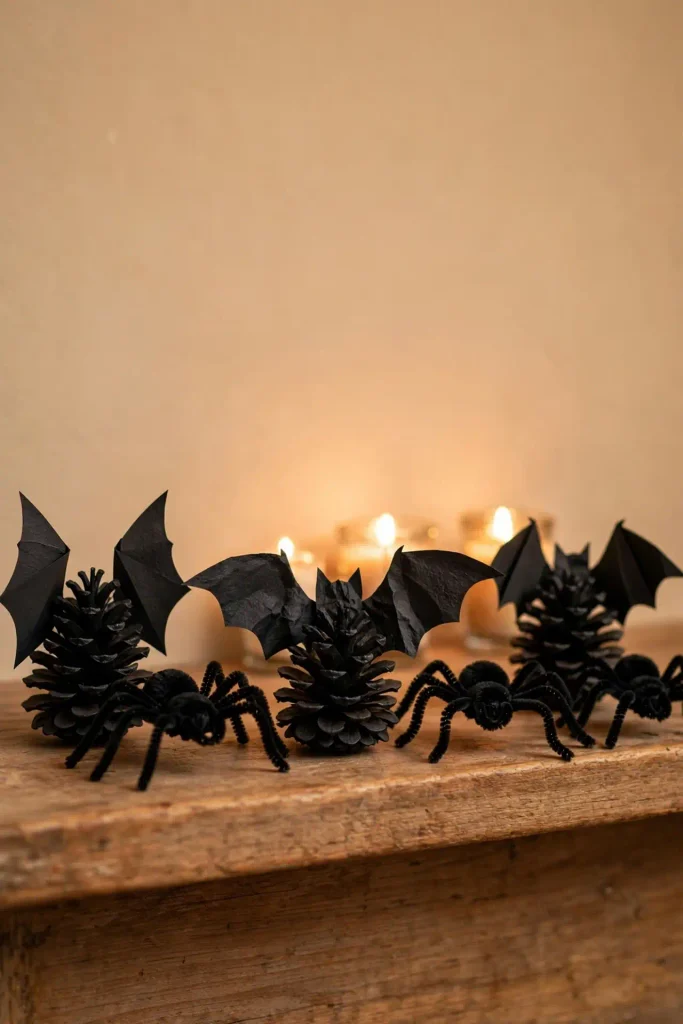
Difficulty: Easy | Time: 30 minutes
Paint pinecones black. For bats, hot glue black cardstock wings to the sides and add tiny eyes. For spiders, glue on bent black pipe cleaner legs.
Scatter them across a mantel, windowsill or table centerpiece.
Rescue tip: Bake pinecones on a lined tray at a low temperature (around 200°F) for about 30 minutes before painting to kill any bugs. Keep a close eye on them.
15. Moss “BOO” Letters
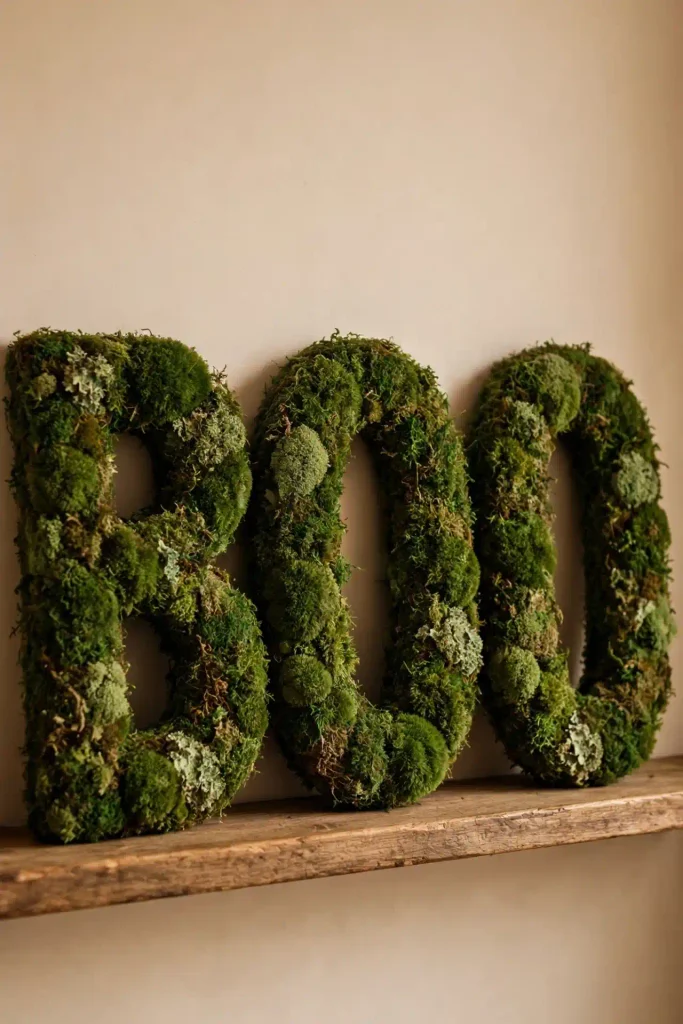
Difficulty: Easy | Time: 30 minutes
Buy or cut cardboard letters spelling “BOO” and cover them completely in preserved moss using hot glue. Lean them on a shelf or hang them on the front door.
They look like something straight out of an enchanted forest, and they’re chic enough to keep up all autumn.
Rescue tip: Work in small sections so the glue doesn’t cool before you press the moss down.
Part Four: The Weekend Showstoppers
When you want everyone to stop in the doorway and say “Whoa.”
16. The Raven Wreath

Difficulty: Medium | Time: 2 hours
A black grapevine wreath covered in ravens is dramatic, elegant and perfect for a vintage spooky front door.
Spray a grapevine wreath matte black.
Glue on black feathers all around one side.
Attach three or four faux crows or ravens at different angles.
Tuck in dried black florals or dark eucalyptus.
Rescue tip: Leave some of the wreath bare. A wreath covered edge to edge looks crowded instead of mysterious.
17. The Floating Candle Ceiling

Difficulty: Medium to hard | Time: One weekend afternoon
If you’ve ever dreamed of a wizard-school dining hall, this is your project. Empty paper towel tubes become floating candles above your dining table.
Cut paper towel tubes into different lengths.
Paint them cream or ivory, then drip hot glue down the top edges to look like melted wax. Paint over the drips.
Glue an LED tea light into the top of each tube.
Hang them at different heights from the ceiling using clear fishing line and removable hooks.
Turn out the lights at dinner and watch everyone’s jaws drop.
Rescue tip: Choose tea lights with a remote control. Climbing on a chair to switch on 20 candles gets old fast.
Want to Make It a Party? Host a DIY Halloween Craft Night
Some of my favorite October memories come from craft nights with friends. Here’s how to make one easy:
Choose two or three projects from the easy list, like flower skulls, fabric pumpkins or pinecone bats.
Set up stations with all the supplies pre-cut and ready.
Ask everyone to bring one supply to share the cost.
Add Halloween snacks and a playlist, then let everyone take home what they make.
It turns decorating into a night everyone will remember.
Is DIY Actually Cheaper?
Usually, yes, and often dramatically. A store-bought moss letter set or a raven wreath can cost $40 or more, while the DIY versions often cost under $15, especially if you already have paint and glue.
The real savings come from projects using recycled materials: tombstones, tin can lanterns, egg carton bats and the cereal box village cost almost nothing. The one exception is when you need to buy lots of tools for a single project. That’s why I recommend building your toolkit once and using it every season.
Frequently Asked Questions
What are the easiest DIY Halloween decorations for beginners?
Egg carton bats, leaf ghosts, pinecone spiders and the flower-crowned skulls. They need very few supplies and are hard to get wrong.
What’s the best paint for DIY Halloween decorations?
Acrylic craft paint works on paper, cardboard, wood and pinecones. For plastic, metal and pumpkins, matte spray paint gives a smooth, even finish.
Which DIY decorations can go outside?
The tombstones (with sealant), tin can lanterns, yarn spider web, witch’s broom and raven wreath can all go outdoors. Bring paper and cardboard projects inside if rain is expected.
How can I make homemade decorations look store-bought?
Use matte paint, stick to a small color palette, add texture with dry brushing, and seal your projects with a clear finish.
Go Make Something Spooky
The best part of DIY Halloween decorations isn’t the money you save, although that’s nice. It’s the stories behind them. Every October, when I hang those lopsided egg carton bats, I remember the rainy afternoon my kids and I made them at the kitchen table.
Pick one project this weekend. Start small, don’t worry about perfection, and have fun getting glue on your fingers.
Which of these 17 DIY Halloween decorations are you making first? Tell me in the comments. Bonus points if you share your craft fails, because I promise I’ve had plenty of my own.