19 Fall Halloween Nails, From Barely There to Fully Spooky (Salon Scripts Included)
I have a nail confession: I’ve shown up at the salon, pulled out my phone, shown my nail tech a gorgeous Halloween design from Pinterest, and walked out an hour later with something that looked… nothing like it.
It wasn’t her fault. I just didn’t know how to ask for what I wanted.
So this post is a little different from your average nail inspiration list. Yes, you’ll find 19 fall Halloween nail designs. But for every one, I’m also giving you exactly what to say to your nail tech, which nail shape and length it looks best on, and a pro tip if you’re painting at home.
I’ve sorted the designs using what I call the Halloween-o-meter: from “fall-first” nails that work at the office, to “sneaky Halloween” nails with small spooky details, to “full Halloween” nails for parties and the big night itself.
You’ll also find my nail shape guide, the best fall shades for your skin tone, how to make your manicure last, and how to remove it without wrecking your natural nails.
Let’s get polished.
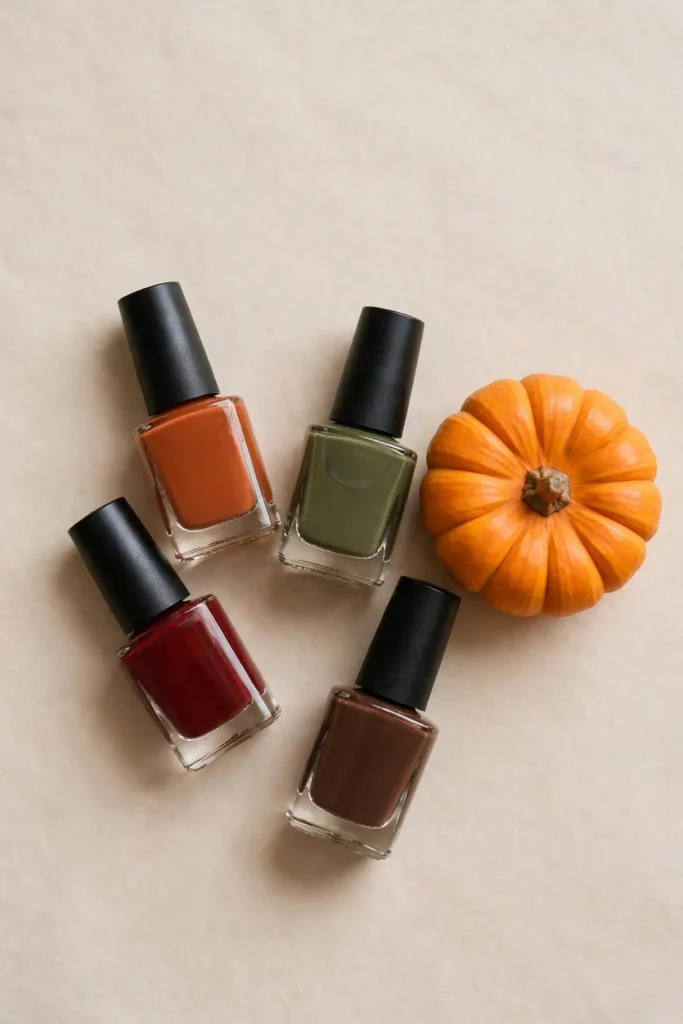
Where Are You on the Halloween-o-Meter?
Before choosing a design, ask yourself one question: how much Halloween does my life allow?
Level 1: Fall-First. You want seasonal nails you can wear to work, a wedding and a parent-teacher meeting all in the same week. Rich colors and textures, no spooky icons.
Level 2: Sneaky Halloween. Mostly elegant, with one or two tiny Halloween details that people notice only up close.
Level 3: Full Halloween. Pumpkins, bats, drips and glow-in-the-dark. Maximum fun, usually for the last week or two of October.
Many of my readers do a Level 1 manicure in September, switch to Level 2 in early October, and go all out with Level 3 right before Halloween. It’s a fun way to build up to the big night.
Level 1: Fall-First Nails
Seasonal, sophisticated and office-approved.
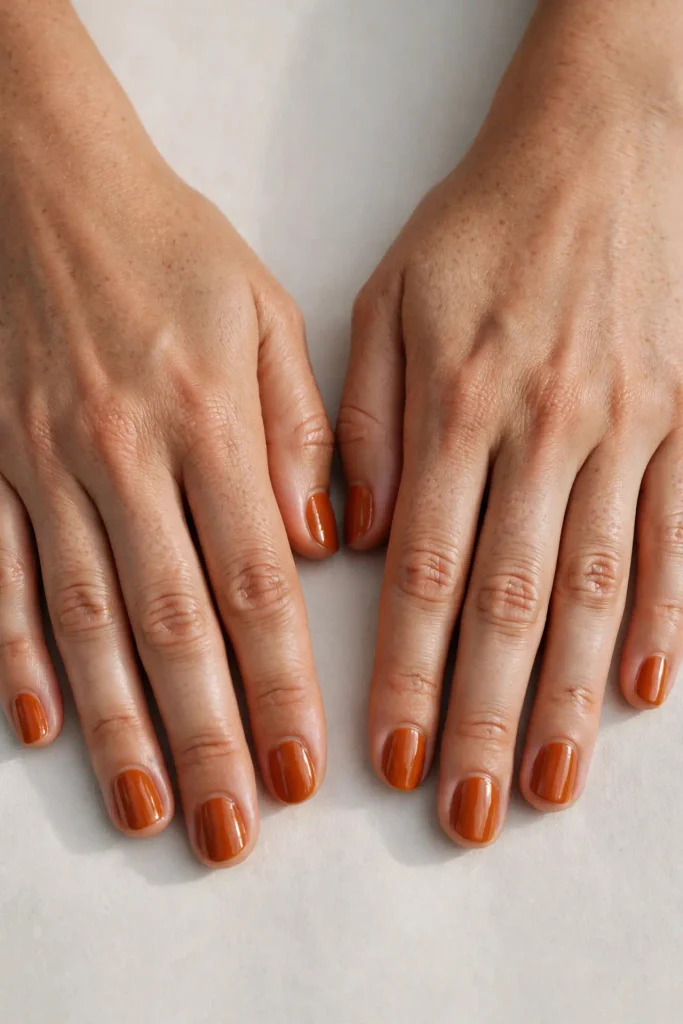
1. Burnt Orange Gloss
Burnt orange is the most “fall” color there is, but on nails it looks surprisingly elegant, like the color of a pumpkin at dusk. A high-gloss finish keeps it looking fresh rather than dull.
Best on: short to medium oval or round nails
Skill level: Beginner
Ask your nail tech for: “A glossy burnt orange, more rust than bright orange, in two thin coats.”
Pro tip: Burnt orange can look streaky if applied thickly. Two thin coats always beat one thick one.
2. Chocolate Chrome
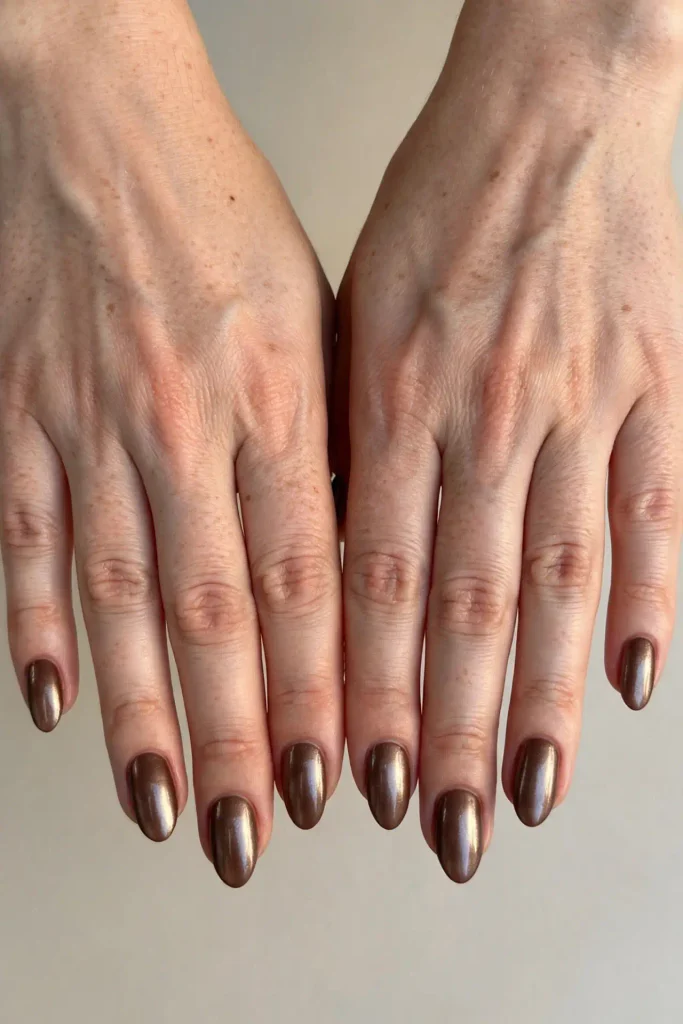
Glazed chrome nails have taken over the past few seasons, and chocolate brown is the fall version. A rich brown base with a sheer chrome powder on top looks like melted chocolate with a pearly shine.
Best on: medium almond or oval nails
Skill level: Salon (chrome powder needs gel)
Ask your nail tech for: “A chocolate brown gel base with a pearl or glazed chrome powder on top.”
Pro tip: Chrome shows every ridge and bump. Ask for a builder gel base if your nails aren’t perfectly smooth.
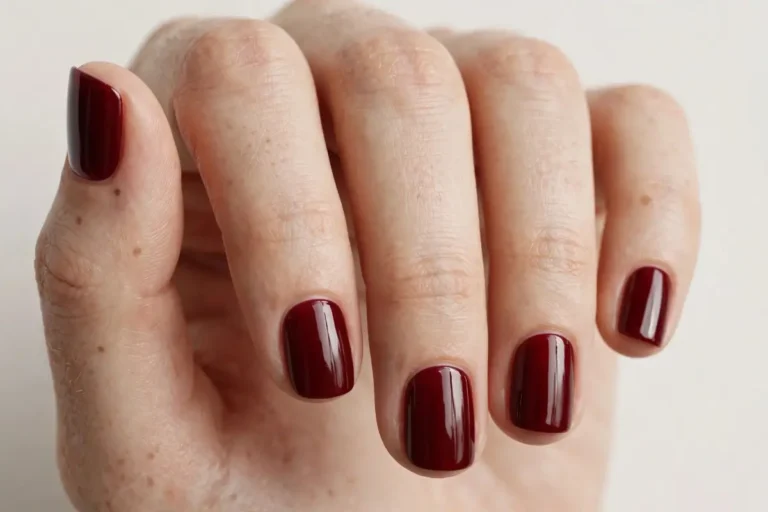
3. Oxblood Jelly
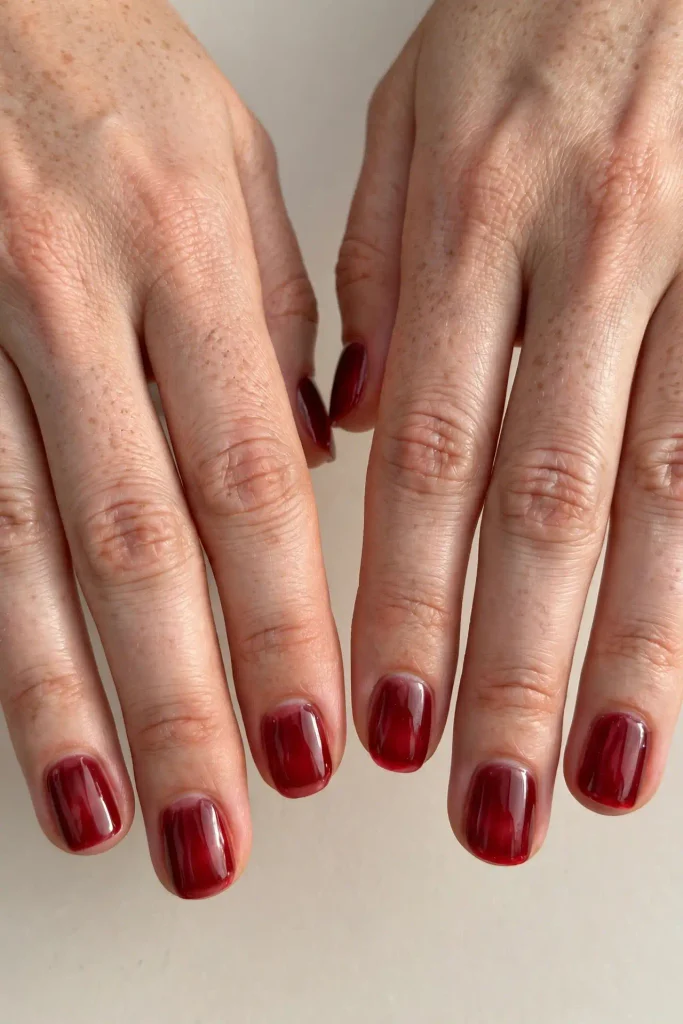
Jelly polish is sheer and slightly see-through, like colored glass. In a deep oxblood red, it looks like a glass of red wine held up to candlelight: dark, rich and a little vampy without being obvious.
Best on: any length, especially short square nails
Skill level: Beginner
Ask your nail tech for: “A sheer jelly finish in deep oxblood red, built up to about three coats.”
Pro tip: Build the color in thin layers. You control how dark and moody it looks.
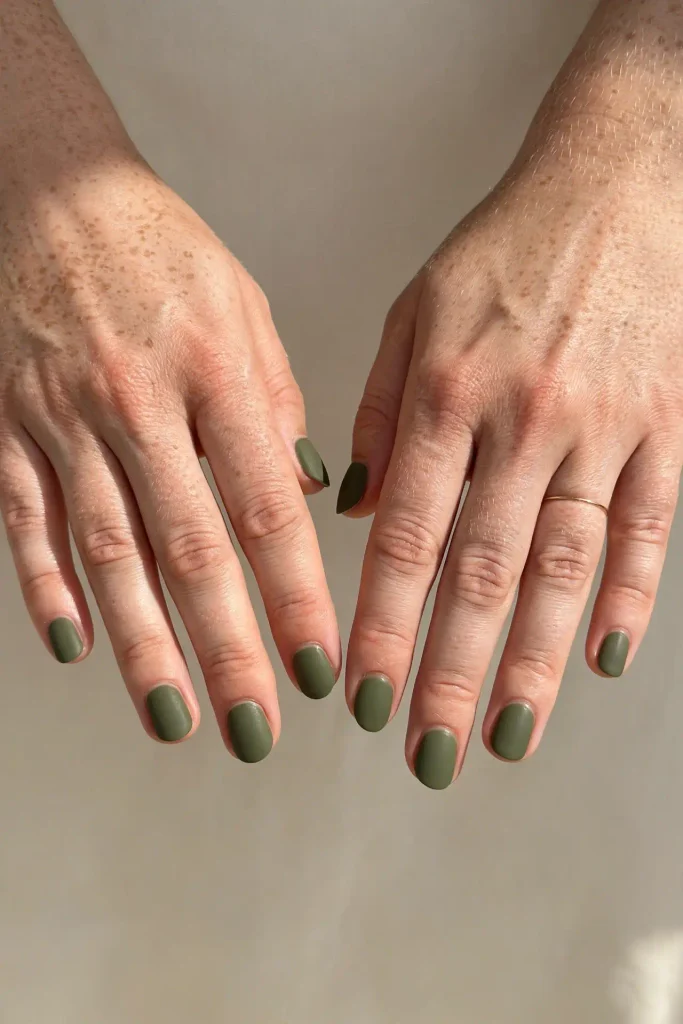
4. Matte Olive
Olive green feels earthy and grown-up, and a matte topcoat makes it look velvety and modern. It pairs beautifully with gold rings and cozy knits.
Best on: short to medium square or squoval nails
Skill level: Beginner
Ask your nail tech for: “A muted olive green with a matte topcoat.”
Pro tip: Matte topcoats can show wear faster at the tips. Carry the matte topcoat with you for a quick refresh midweek.
5. Tortoiseshell
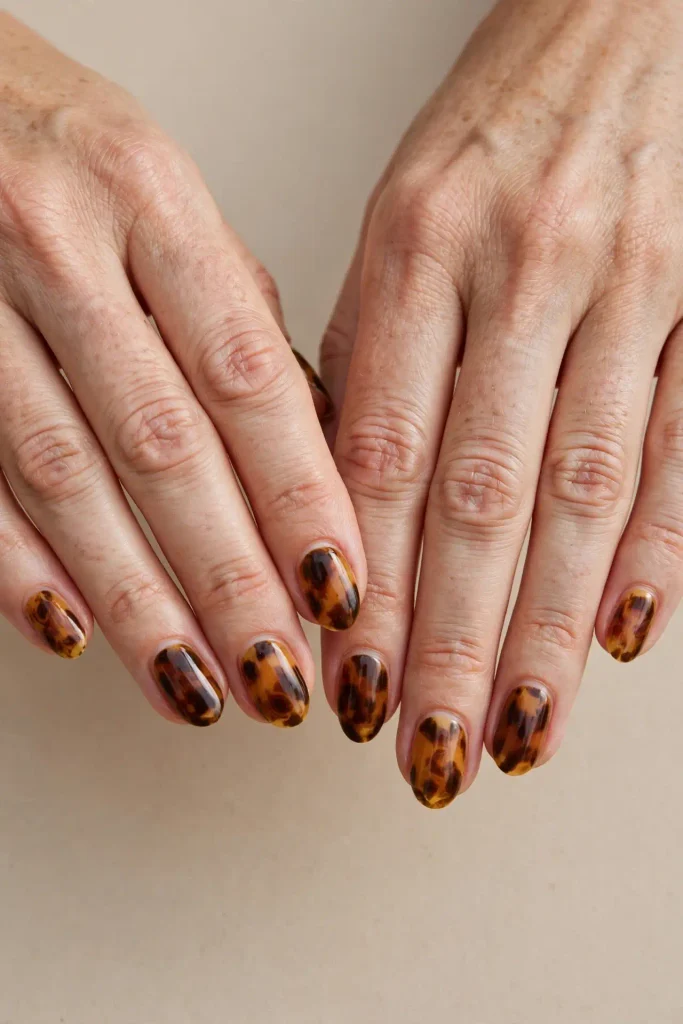
Tortoiseshell nails look like vintage sunglasses on your fingertips: warm amber, honey and deep brown patterns. They suit every skin tone and go with every fall outfit.
Best on: medium almond or oval nails
Skill level: Intermediate
Ask your nail tech for: “Tortoiseshell nail art with a sheer amber base and brown and black spots, finished with glossy topcoat.”
Pro tip: At home, layer blobs of brown and black polish over a sheer amber base, then add another sheer amber coat on top. The top layer is what gives it depth.
6. Espresso French Tips
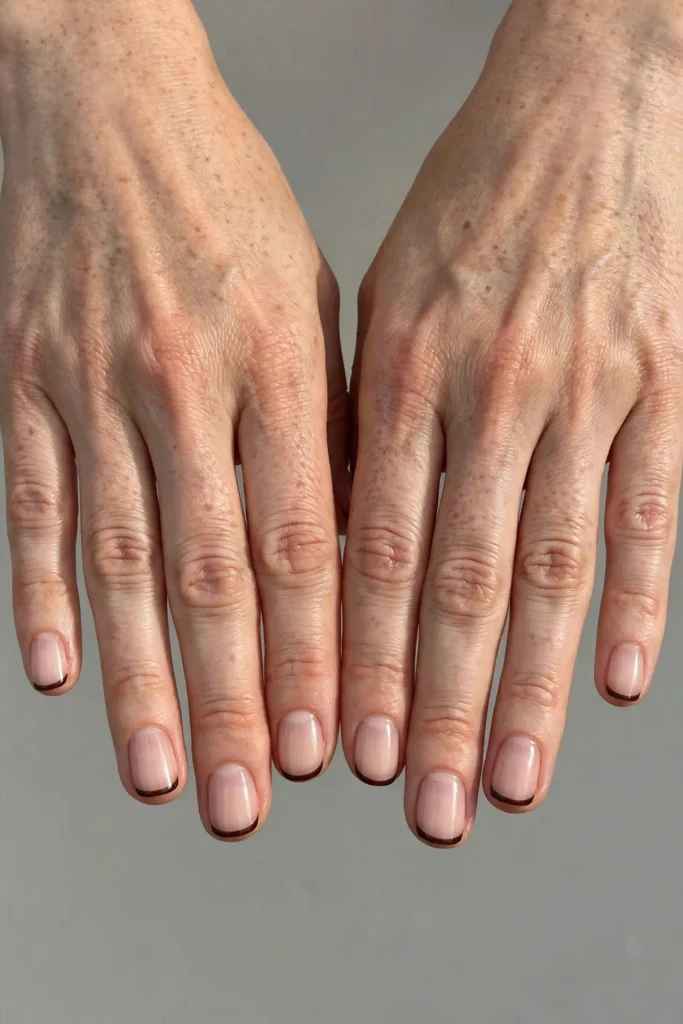
The classic French manicure gets a fall update when you swap the white tips for deep espresso brown. It’s subtle, polished and endlessly elegant.
Best on: medium almond nails
Skill level: Intermediate
Ask your nail tech for: “A sheer nude base with thin espresso-brown French tips.”
Pro tip: Use French tip guide stickers or a piece of tape at home for crisp lines.
7. Sweater Nails
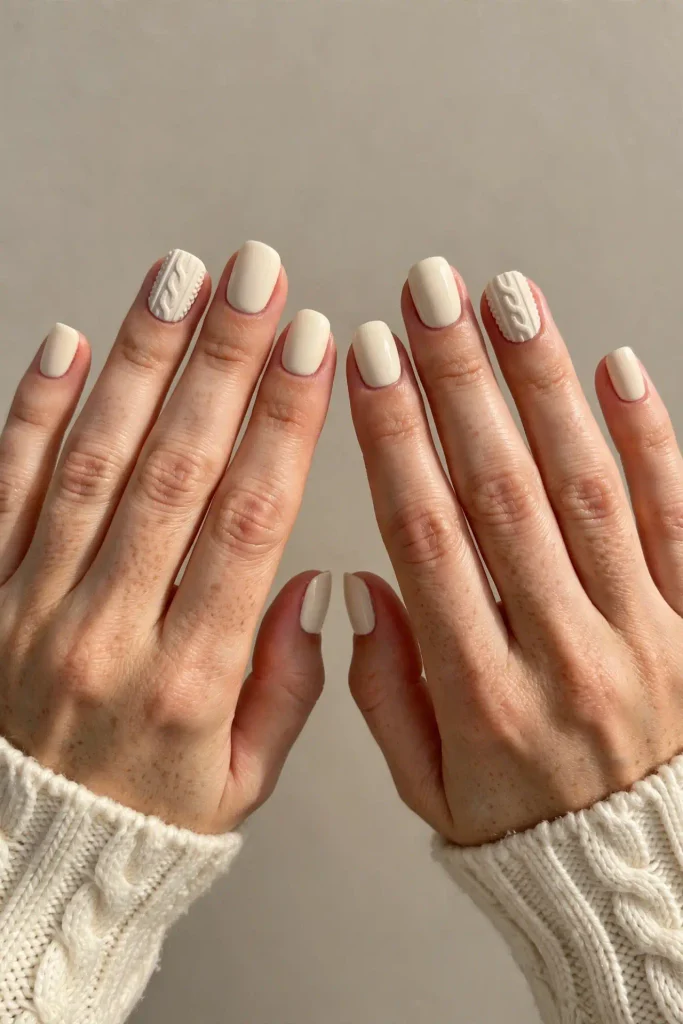
Sweater nails recreate the cable-knit texture of your coziest jumper right on your nails, usually in cream, oatmeal, camel or burgundy. They’re perfect for chilly October days.
Best on: short to medium nails
Skill level: Salon (it’s built with layers of gel)
Ask your nail tech for: “Cable-knit sweater nail art in cream on one or two accent nails, with the rest in solid cream.”
Pro tip: Keep sweater texture to one or two accent nails. On all ten, it can look bulky.
Level 2: Sneaky Halloween Nails
Elegant at a glance, spooky up close.
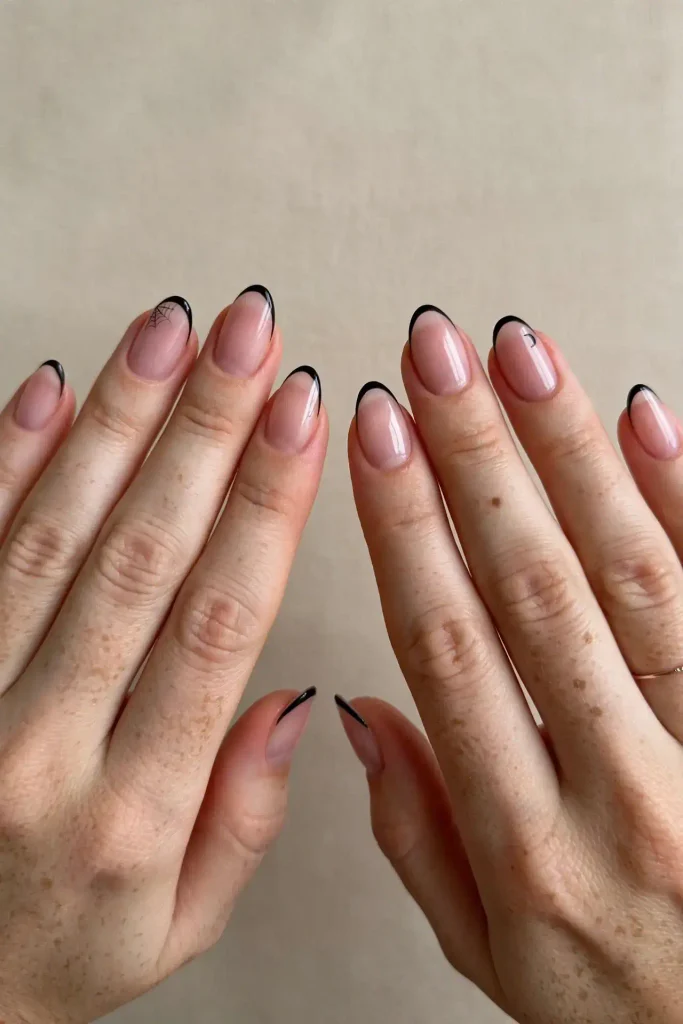
8. Skinny Black French Tips
Black French tips are the easiest way to make a manicure feel Halloween-ready without shouting about it. Keep them razor-thin for a chic, modern look.
Best on: long almond or coffin nails
Skill level: Intermediate
Ask your nail tech for: “A sheer pink or nude base with very thin black French tips.”
Pro tip: A long, thin striping brush makes skinny tips much easier than the polish brush.
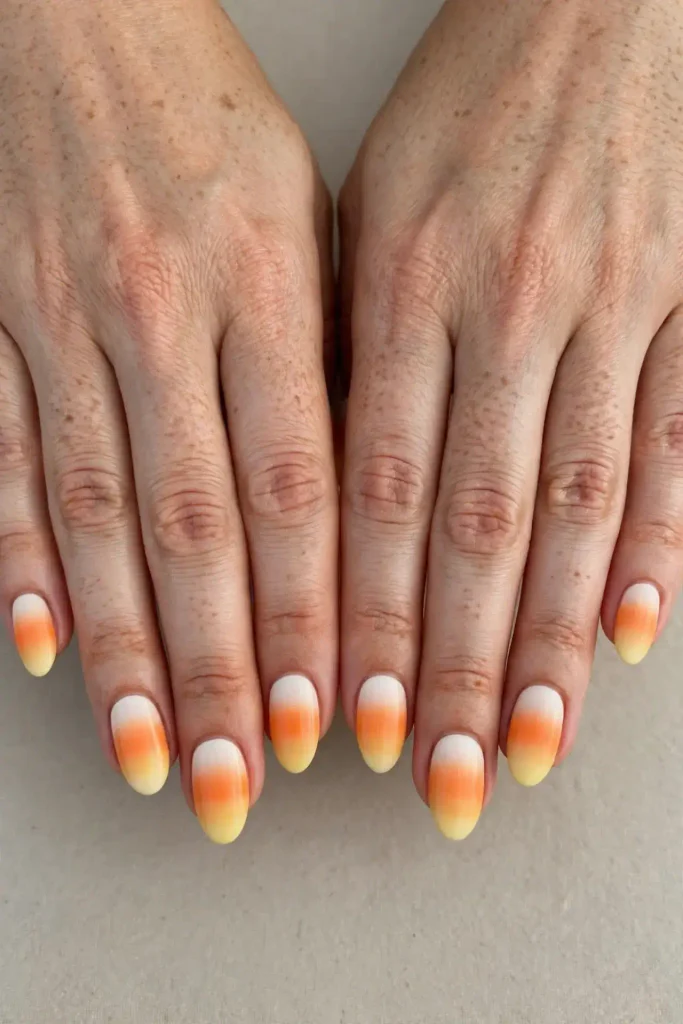
9. Soft Candy Corn Ombré
Candy corn nails are usually bold stripes of yellow, orange and white. This softer version blends the three colors into a gentle gradient, so it reads as a pretty sunset first and a Halloween treat second.
Best on: medium to long almond nails
Skill level: Intermediate
Ask your nail tech for: “A soft ombré from white at the base to orange in the middle and pale yellow at the tips.”
Pro tip: At home, sponge the three colors onto a makeup sponge in stripes and dab it onto your nail.
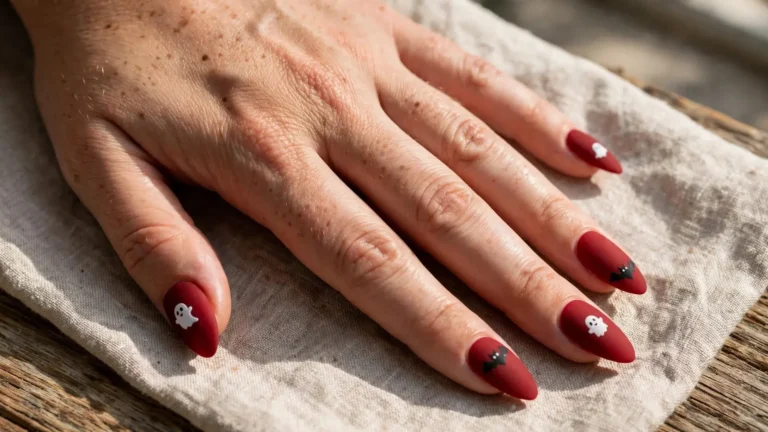
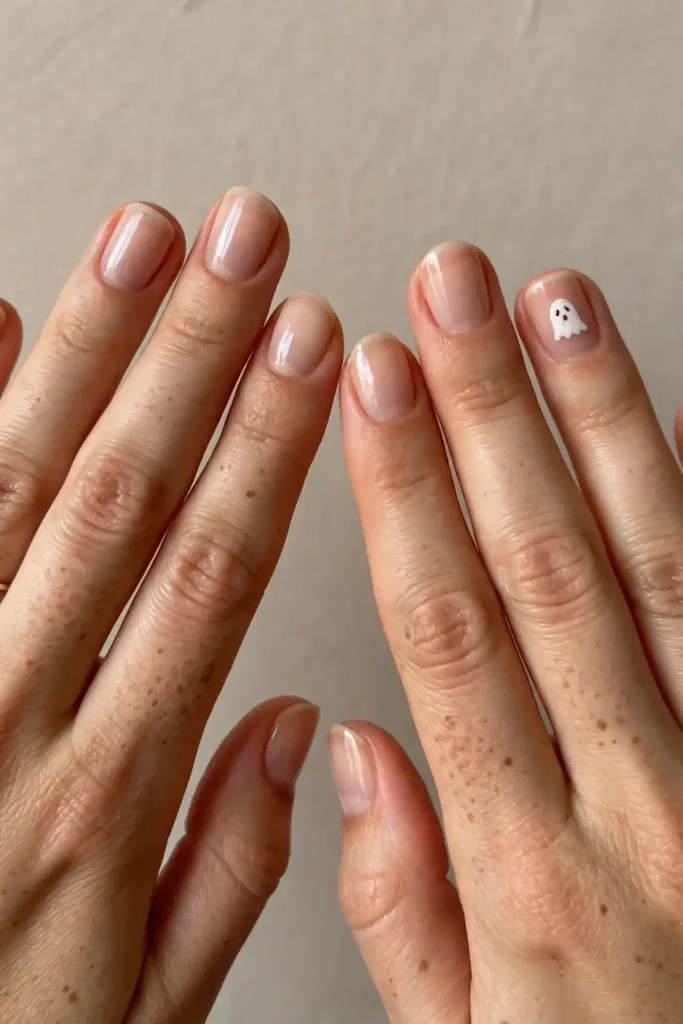
10. One Tiny Ghost
On a clean, sheer nude manicure, add just one tiny white ghost on the ring finger. It’s the kind of detail that makes someone grab your hand in a meeting and say, “Wait, is that a ghost?”
Best on: any shape and length
Skill level: Beginner
Ask your nail tech for: “A sheer nude on all nails, with one small hand-painted white ghost on each ring finger.”
Pro tip: Draw the ghost with a thin brush, then add two tiny black dots for eyes with a toothpick.
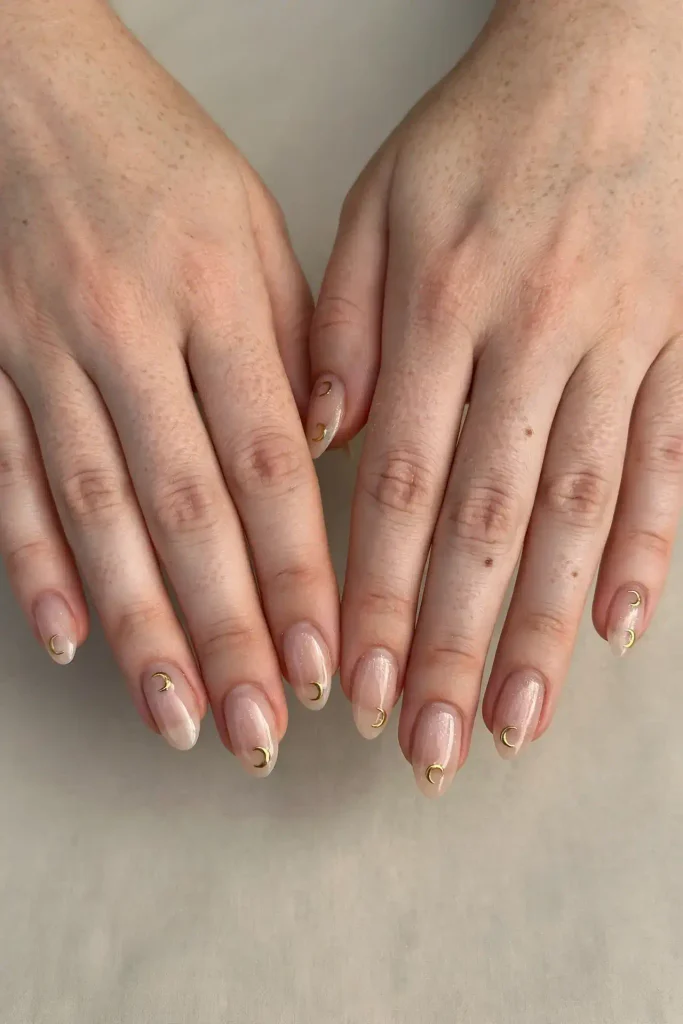
11. Negative-Space Moons
Tiny crescent moons painted over a bare or sheer base feel celestial and witchy. Gold or black moons both look beautiful.
Best on: short to medium oval nails
Skill level: Intermediate
Ask your nail tech for: “Negative-space crescent moons in gold on a clear or sheer nude base, one or two per nail.”
Pro tip: Moon-shaped nail stickers are a great shortcut. Seal them under two layers of topcoat so the edges don’t lift.
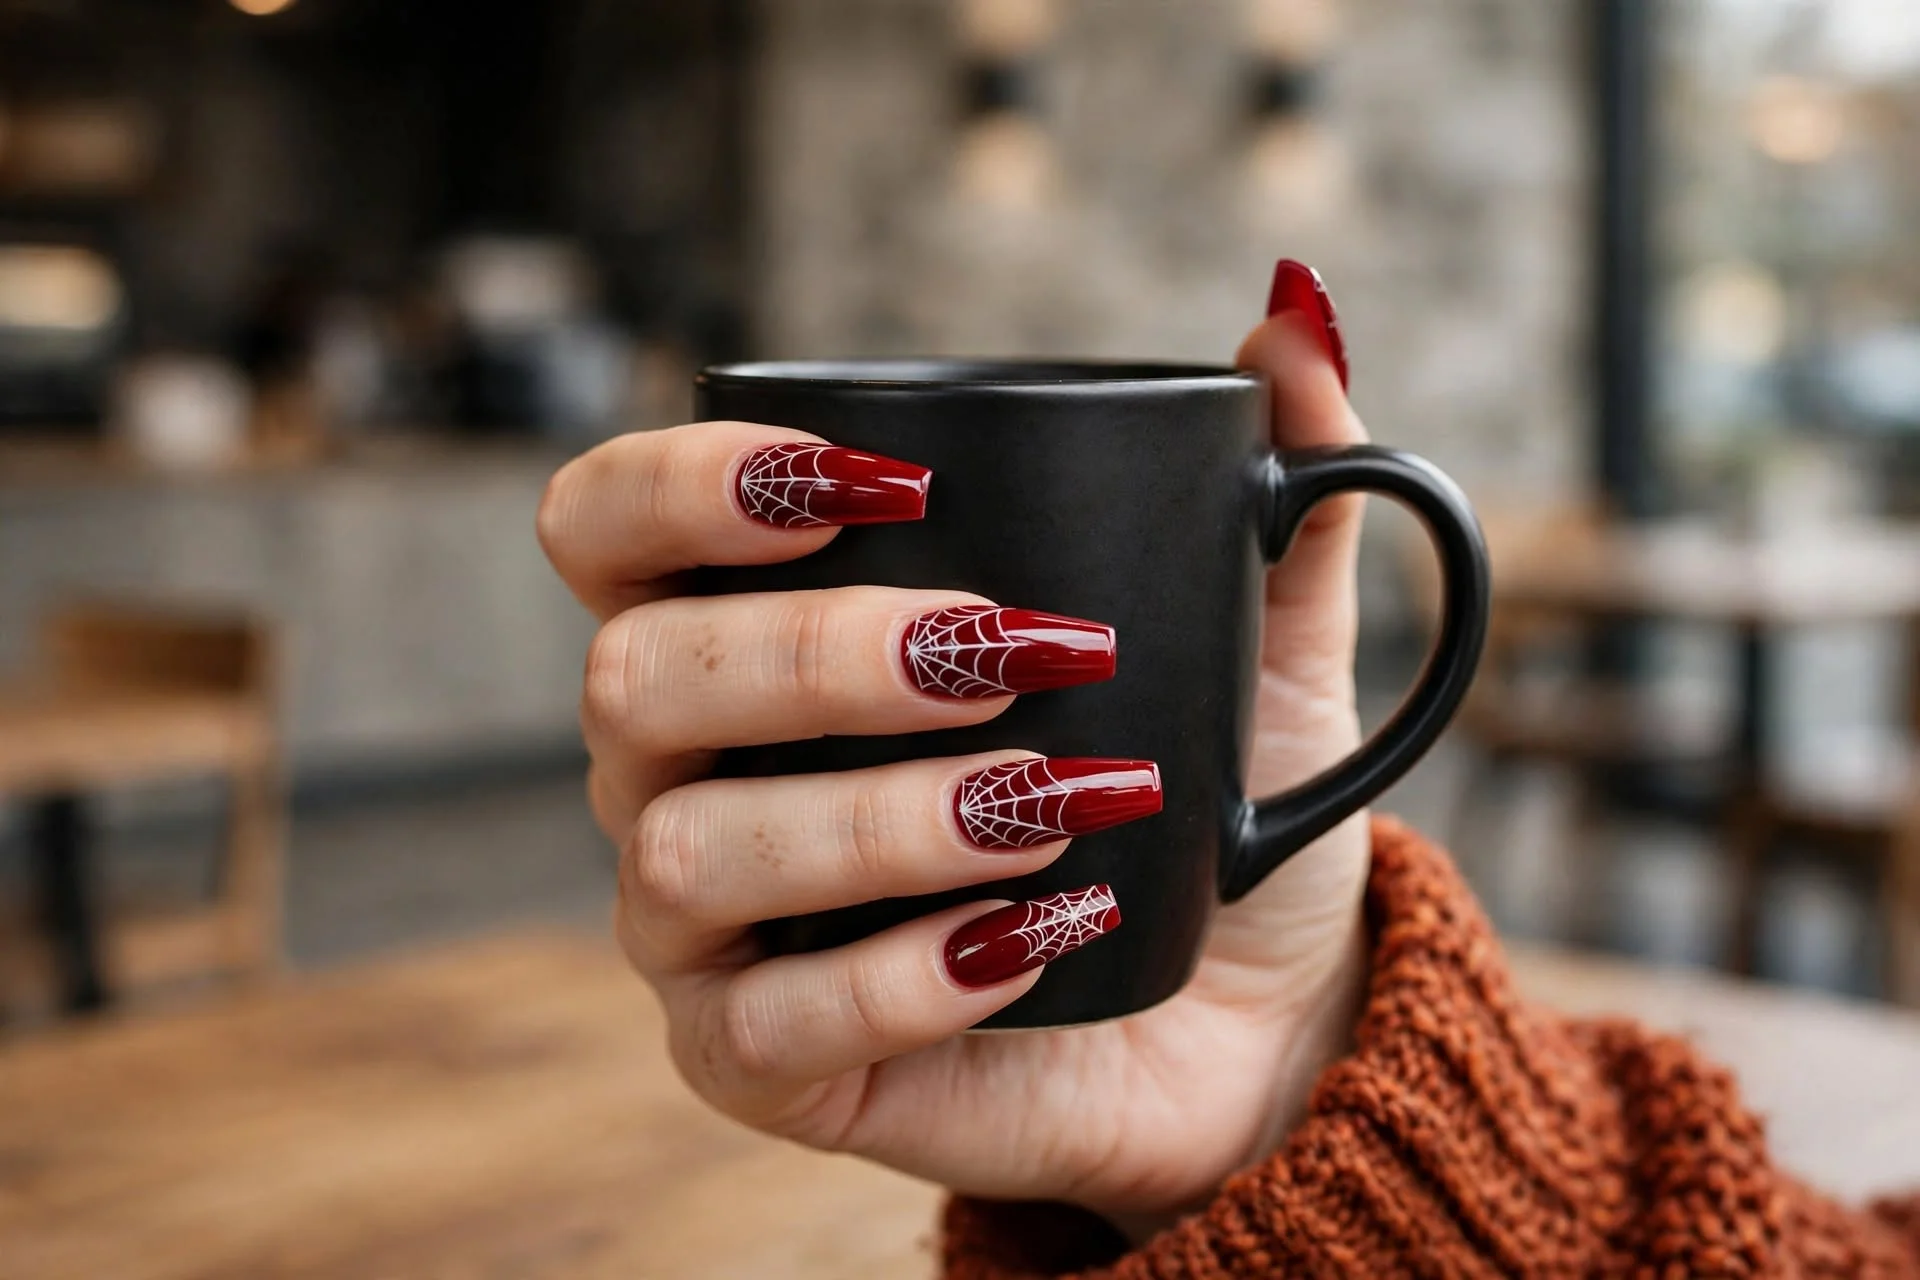
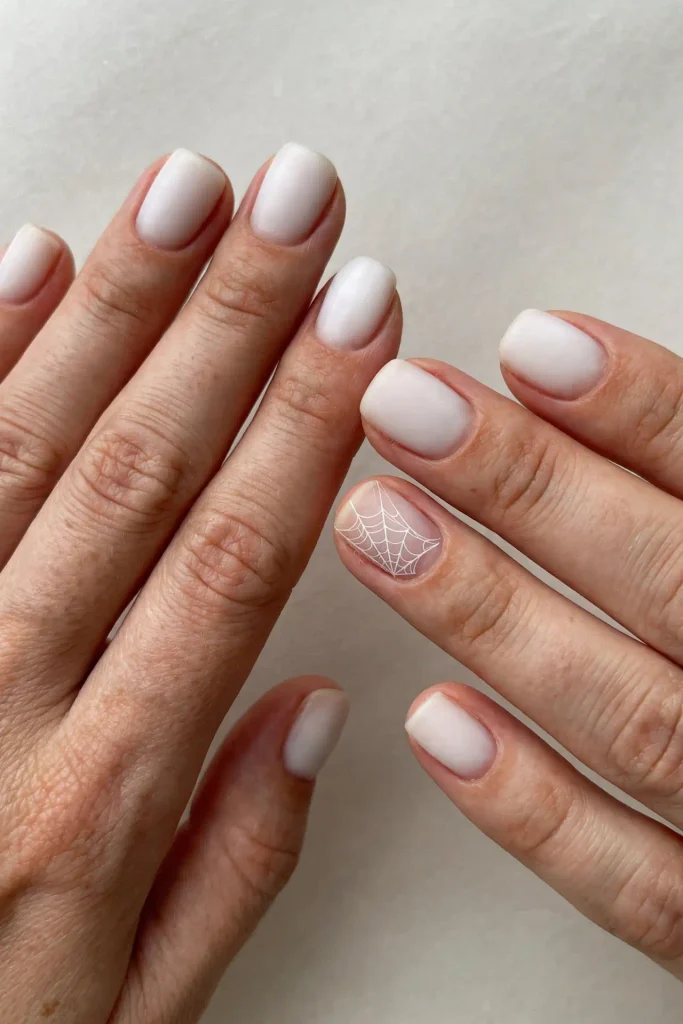
12. Delicate Spider Webs
A fine white or black spider web on one accent nail looks intricate and lacy. Over a sheer nude or milky white base, it feels more elegant than spooky.
Best on: medium to long almond or coffin nails
Skill level: Intermediate
Ask your nail tech for: “A thin spider web on each accent nail, starting from one corner, in white over a milky base.”
Pro tip: Start with three or four straight lines from one corner of the nail, then connect them with gently curved lines.
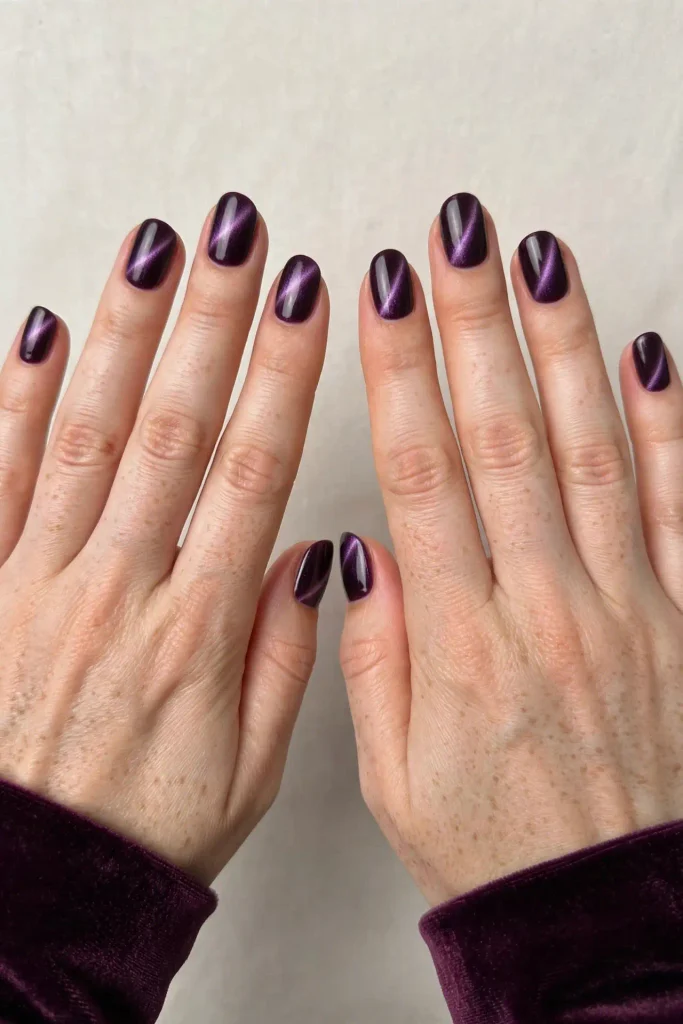
13. Witchy Velvet Cat-Eye
Magnetic cat-eye polish creates a shimmering band of light that moves as you move your hand. In deep purple, midnight blue or smoky black, it looks like a witch’s velvet cloak.
Best on: medium to long almond nails
Skill level: Salon or confident DIY (it needs a special magnet)
Ask your nail tech for: “A velvet cat-eye finish in deep plum, with the shimmer spread across the nail rather than a thin line.”
Pro tip: Hold the magnet over the wet polish for 10 to 15 seconds to set the effect before curing or drying.
Level 3: Full Halloween Nails
It’s the last week of October. Let’s have fun.
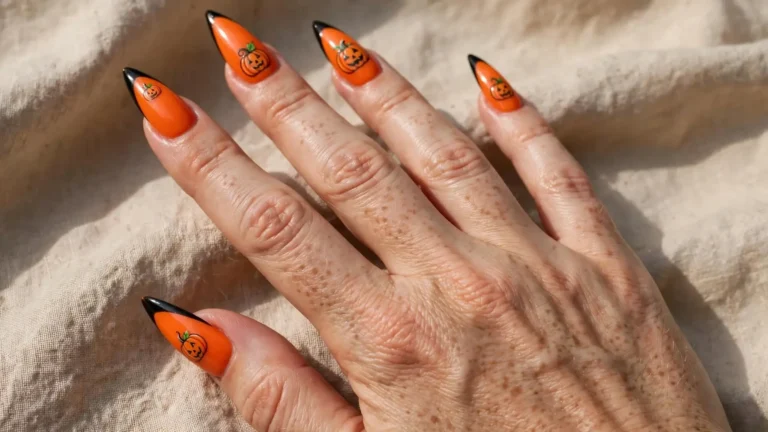
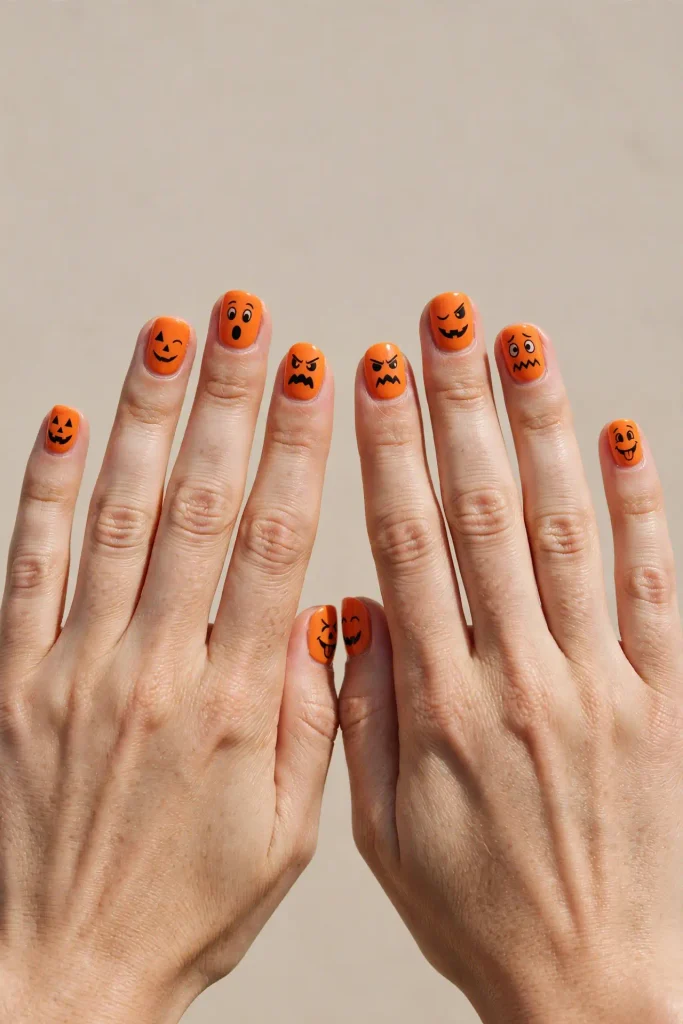
14. Jack-o’-Lantern Faces
Bright orange nails with little black jack-o’-lantern faces, all with different expressions, are joyful and classic. Make one happy, one spooky, one surprised and one winking.
Best on: short to medium round or square nails
Skill level: Beginner to intermediate
Ask your nail tech for: “Bright orange nails with small black hand-painted jack-o’-lantern faces, each one different.”
Pro tip: Paint the eyes as triangles and the mouth as a jagged line. Simple shapes read best on small nails.
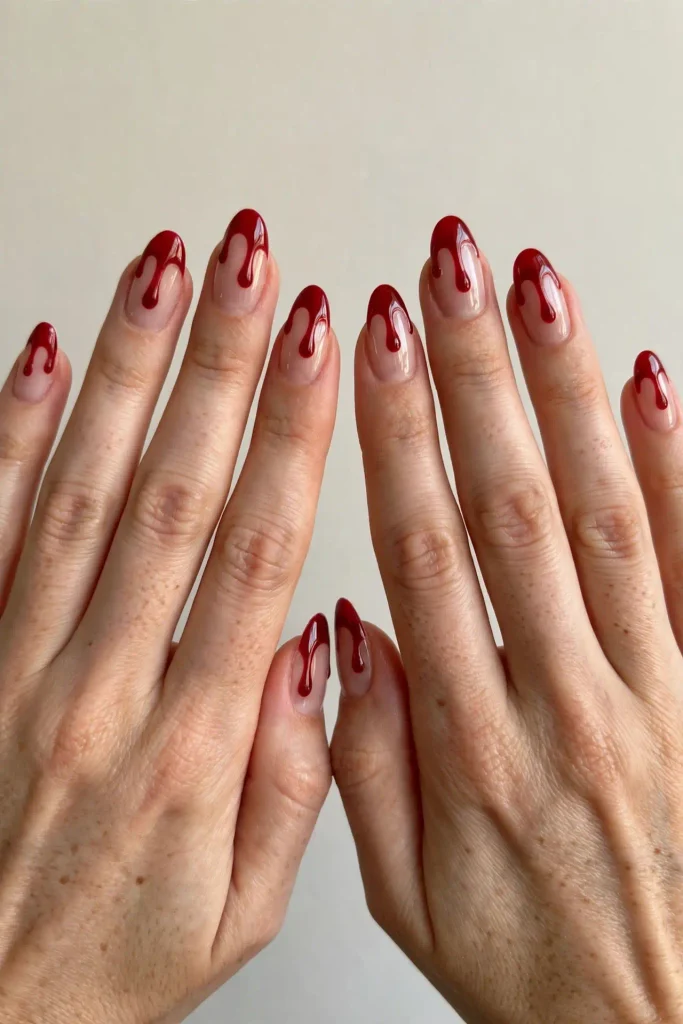
15. Vampire Drips
Glossy red drips trickling down from the tips over a nude base look dramatic and a little dangerous. It’s perfect if you’re dressing up as a vampire.
Best on: long almond or stiletto nails
Skill level: Intermediate
Ask your nail tech for: “Deep red drip nail art starting from the tips, over a sheer nude base, with a high-gloss finish.”
Pro tip: Paint a red tip, then pull small drips down with a dotting tool. Let each drip be a different length.
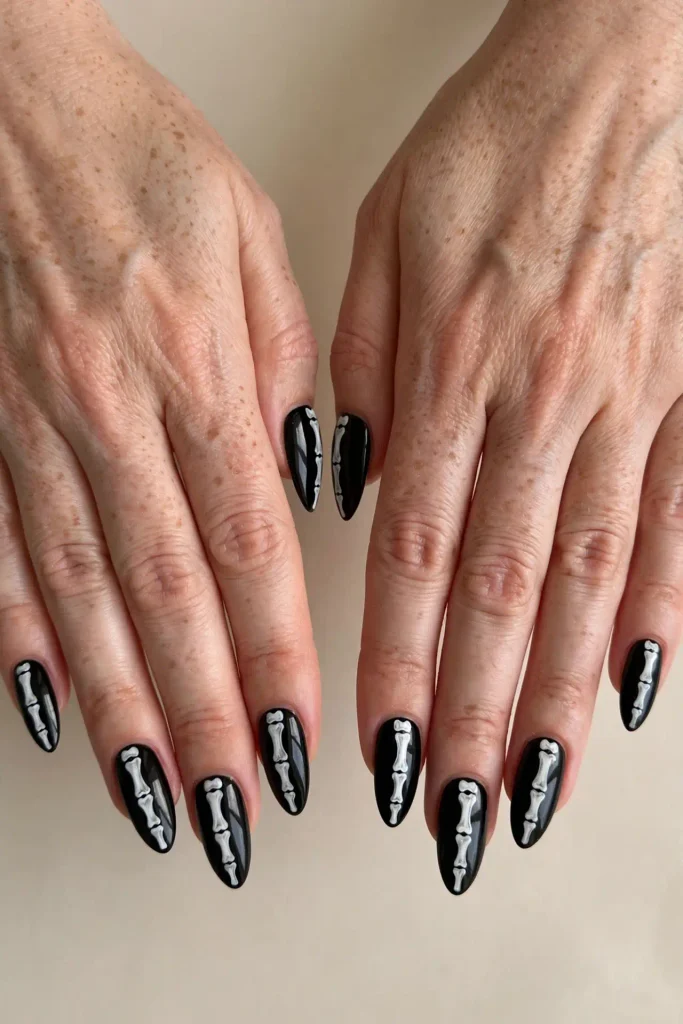
16. Skeleton Bones
Black nails with white bones painted on top look like an X-ray of your own fingers. It’s a clever design that always gets comments.
Best on: long coffin or square nails
Skill level: Advanced
Ask your nail tech for: “Black base with white skeleton finger-bone nail art on each nail.”
Pro tip: Draw each bone as a line with a small dot at both ends. It’s easier than it looks.
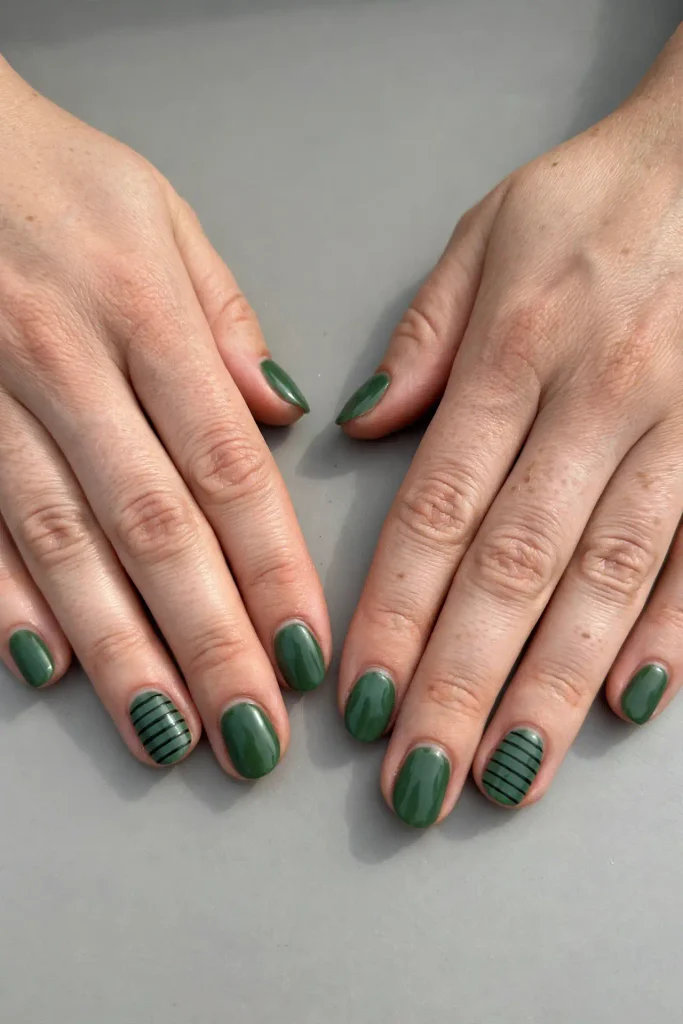
17. Witch Stripes
Inspired by the classic witch’s striped stockings, these nails mix witchy green or purple with thin black stripes. Leave a few nails solid green for balance.
Best on: medium square or coffin nails
Skill level: Intermediate
Ask your nail tech for: “Alternating witch-green and black horizontal stripes on two accent nails, with the rest in solid green.”
Pro tip: Striping tape is your best friend here. Apply the tape over dry polish, paint, then peel while the top layer is still wet.
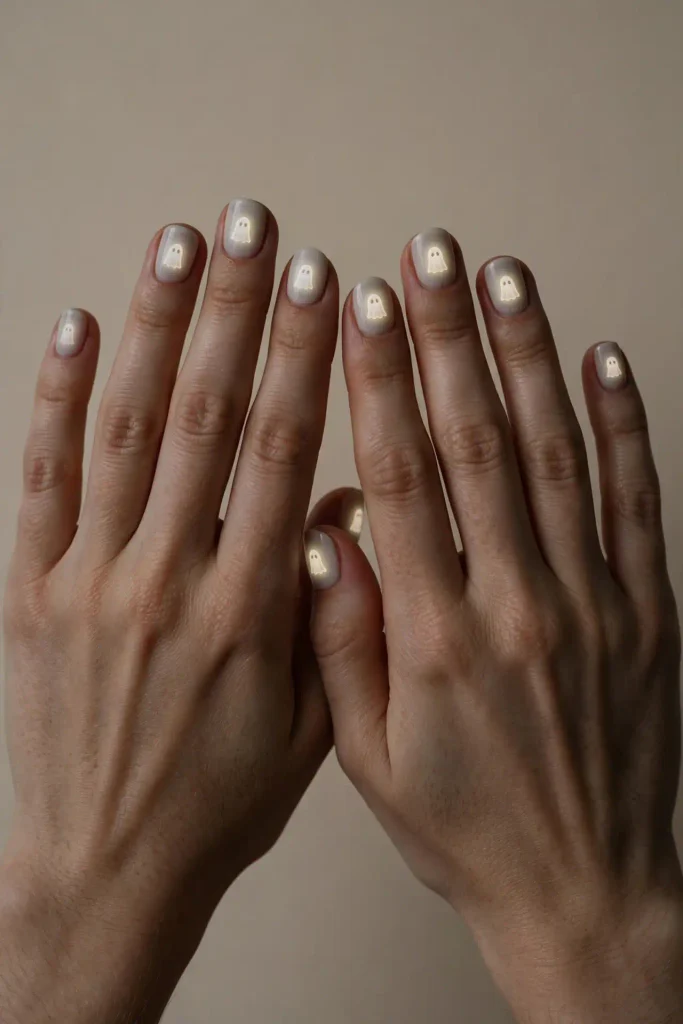
18. Glow-in-the-Dark Ghosts
Paint small ghosts or dots using a glow-in-the-dark topcoat or polish over a sheer base. During the day, your nails look pale and dreamy; in the dark, they light up.
Best on: any shape and length
Skill level: Beginner
Ask your nail tech for: “Sheer milky base with hand-painted ghosts using glow-in-the-dark polish.”
Pro tip: Hold your nails under a bright light for a few minutes before a party so they glow longer.
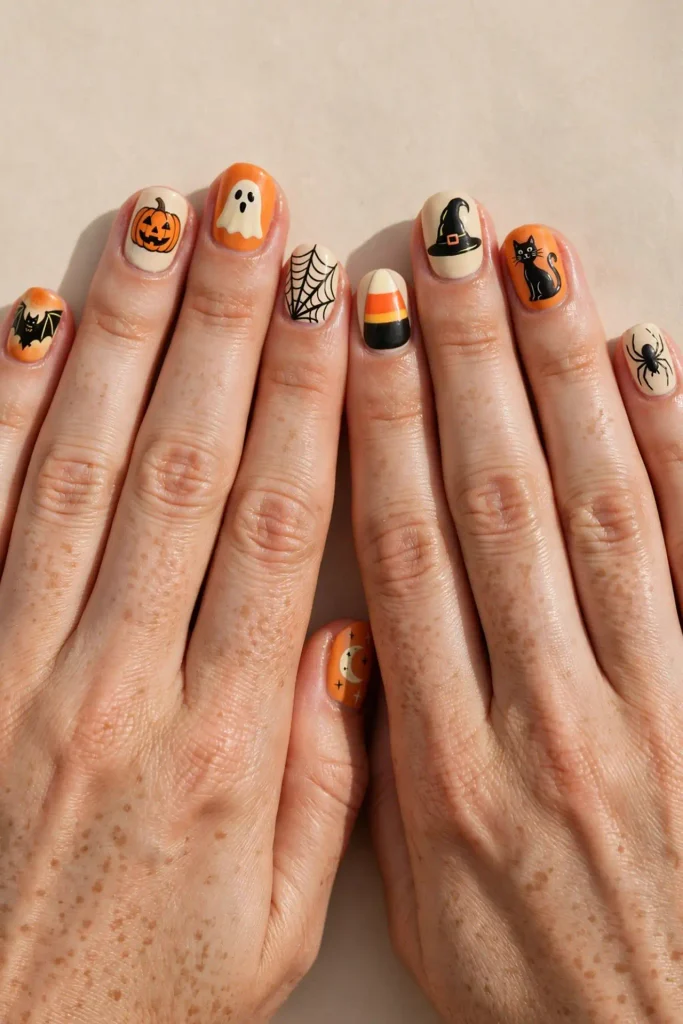
19. The Mix-and-Match Halloween Ten
Can’t choose just one design? Don’t. Paint a different Halloween icon on every nail: a bat, a pumpkin, a ghost, a spider web, a moon, a candy corn, a skull, a witch’s hat. Keep a single base color or palette running through all ten so they look deliberately coordinated.
Best on: medium to long almond nails
Skill level: Advanced (or salon)
Ask your nail tech for: “A different Halloween icon on each nail, all using the same palette of black, orange and cream.”
Pro tip: At home, nail art stickers make this far easier. Mix hand-painted nails with stickers, and nobody will know which is which.
The Nail Shape Guide
Some designs look better on certain nail shapes. Here’s my quick guide:
Short round or square: Best for bold colors, jack-o’-lantern faces and sweater nails. Short nails suit strong, simple designs.
Oval or squoval: The most versatile shape. Solid colors, moons and tortoiseshell all look beautiful.
Almond: Elegant and lengthening. Perfect for French tips, ombré, cat-eye and spider webs.
Coffin: Dramatic and modern. Great for skeleton bones, stripes and the mix-and-match Halloween ten.
Stiletto: Bold and pointed. Made for vampire drips and dark, dramatic colors.
The Best Fall Nail Shades for Your Skin Tone
Choosing a color that flatters your hands makes any design look better.
Fair skin: Oxblood, deep plum, olive and soft burnt orange look rich without overwhelming your hands.
Medium or olive skin: Rust, terracotta, chocolate chrome and warm burgundy look especially glowing.
Deep skin: Bright orange, jewel-toned purple, metallic gold and deep emerald look stunning and vibrant.
Unsure? Look at the veins on your wrist. Greenish veins usually suit warm shades like rust and orange; bluish veins often suit cool shades like plum and berry.
My DIY Nail Art Toolkit
You don’t need a salon setup to try many of these designs at home. These few tools make a huge difference:
Dotting tools for eyes, polka dots and drips
A thin striping brush for lines, webs and skinny French tips
Striping tape for clean, straight stripes
Nail art stickers for tricky icons like bats and skulls
A small clean-up brush dipped in acetone for fixing edges
A quality base coat and quick-dry topcoat
How to Make Your Fall Manicure Last
Nothing’s more disappointing than chipped nails before the Halloween party. These habits help:
Prep properly. Push back your cuticles, file your nails, and wipe them with rubbing alcohol before painting to remove oils.
Use a base coat. It helps polish grip and prevents dark shades like oxblood and brown from staining your natural nails.
Cap the edges. Brush a thin line of polish and topcoat along the very tip of each nail. It seals the edge and prevents chips.
Reapply topcoat every two to three days. It refreshes the shine and adds protection.
Wear gloves when washing dishes or cleaning.
How to Remove Your Manicure Without Damaging Your Nails
When Halloween’s over, be gentle. For regular polish, use an acetone or non-acetone remover and press a soaked cotton pad on each nail for about 10 seconds before wiping. For gel and chrome, soak off with acetone rather than peeling. Peeling gel takes layers of your natural nail with it.
Afterward, apply a cuticle oil and give your nails a few days’ break if they feel weak.
A quick note on gel: Gel polish is cured under UV or LED lamps. If you get gel manicures often, many dermatologists suggest applying sunscreen to your hands beforehand or wearing fingerless UV-protective gloves during curing.
Matching Your Nails to Your Costume
If you’re dressing up, your nails can complete the look:
Vampire: Vampire drips or oxblood jelly
Witch: Witchy velvet cat-eye or witch stripes
Skeleton: Skeleton bones or black with white French tips
Ghost: Glow-in-the-dark ghosts or milky white with one tiny ghost
Pumpkin or scarecrow: Jack-o’-lantern faces or burnt orange gloss
Classic cat: Black French tips or glossy black with a single gold moon
Frequently Asked Questions
What are the best fall nail colors?
Burnt orange, rust, chocolate brown, oxblood, deep plum, olive green and warm nudes are classic fall shades. Metallic gold and chrome add a festive touch.
How can I do Halloween nails at home as a beginner?
Start with simple designs like one tiny ghost, jack-o’-lantern faces or glow-in-the-dark dots. Nail art stickers are also an easy way to add detailed designs.
Are Halloween nails appropriate for work?
Yes, if you choose Level 1 or 2 designs. Rich fall colors, skinny black French tips or a single tiny ghost look polished and professional.
How long do Halloween nail designs last?
Regular polish usually lasts about a week with good prep and topcoat. Gel manicures often last two to three weeks.
Before You Book Your Appointment
Your nails are one of the easiest ways to join in the Halloween fun. They’re small, wearable and you see them all day long. Start with a Level 1 fall shade, sneak in a ghost or a moon as October goes on, and save the full-on vampire drips for the big night.
And remember: save the salon script from this post on your phone. It’s the difference between the manicure you imagined and the one you actually get.
Which level are you on this year: fall-first, sneaky Halloween or full spooky? Tell me in the comments, and share which design you’re booking. I love seeing what everyone chooses.