16 Bow Christmas Nails Too Pretty to Ignore
You know that pause before opening a wrapped gift, when the bow is so neat you almost hate to undo it? That is the energy I want on your nails this December.
These sixteen bow Christmas nails borrow the whole trick: ribbon loops, neat knots and tiny tied bows, painted, pearled or built in gel, on every single nail.
Short nails, long nails, salon sets and kitchen-table attempts. There is a bow here sized for yours.

What I rate about bows is how they change a plain colour: add one small white bow to a plain red manicure and people lean in for a closer look. My lean is painted bows for busy weeks, raised ones for party days. Judge any set by the thumb, too: designs that skip it look unfinished in photos, so every set below puts bow work on all five.
Before You Choose: Three Quick Checks
Three checks before you fall for a screenshot, and they save wobbly bookings.
- Check your length first: a bow needs nail area to sit on. Short nails behave with the mini bows in ideas 2, 13 and 16; long almond nails carry the sculpted bows of idea 3 and the charms of idea 8.
- Check your week: raised bows and typing-heavy days are not friends. If your week is keyboards and knitwear, the painted bows in ideas 1, 7 and 15 sit flat and stay put.
- Check your kit: ideas 3, 5, 8, 10 and 14 need gel kit and a lamp; everything else here can be painted without one.
1. Red Gloss Bow Christmas Nails With Painted Ribbon Bows
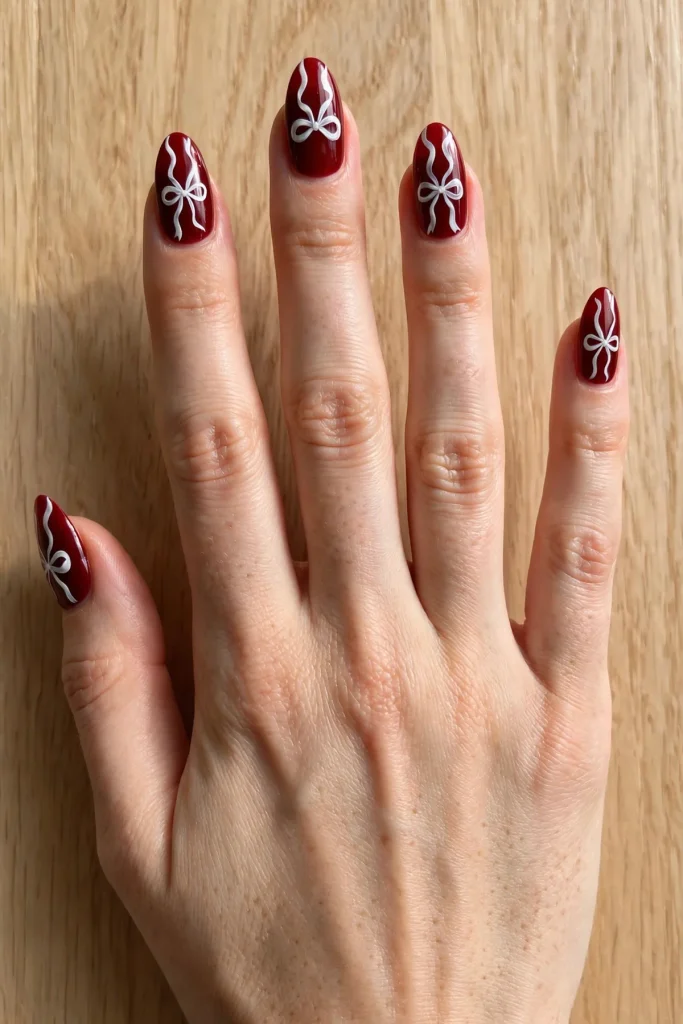
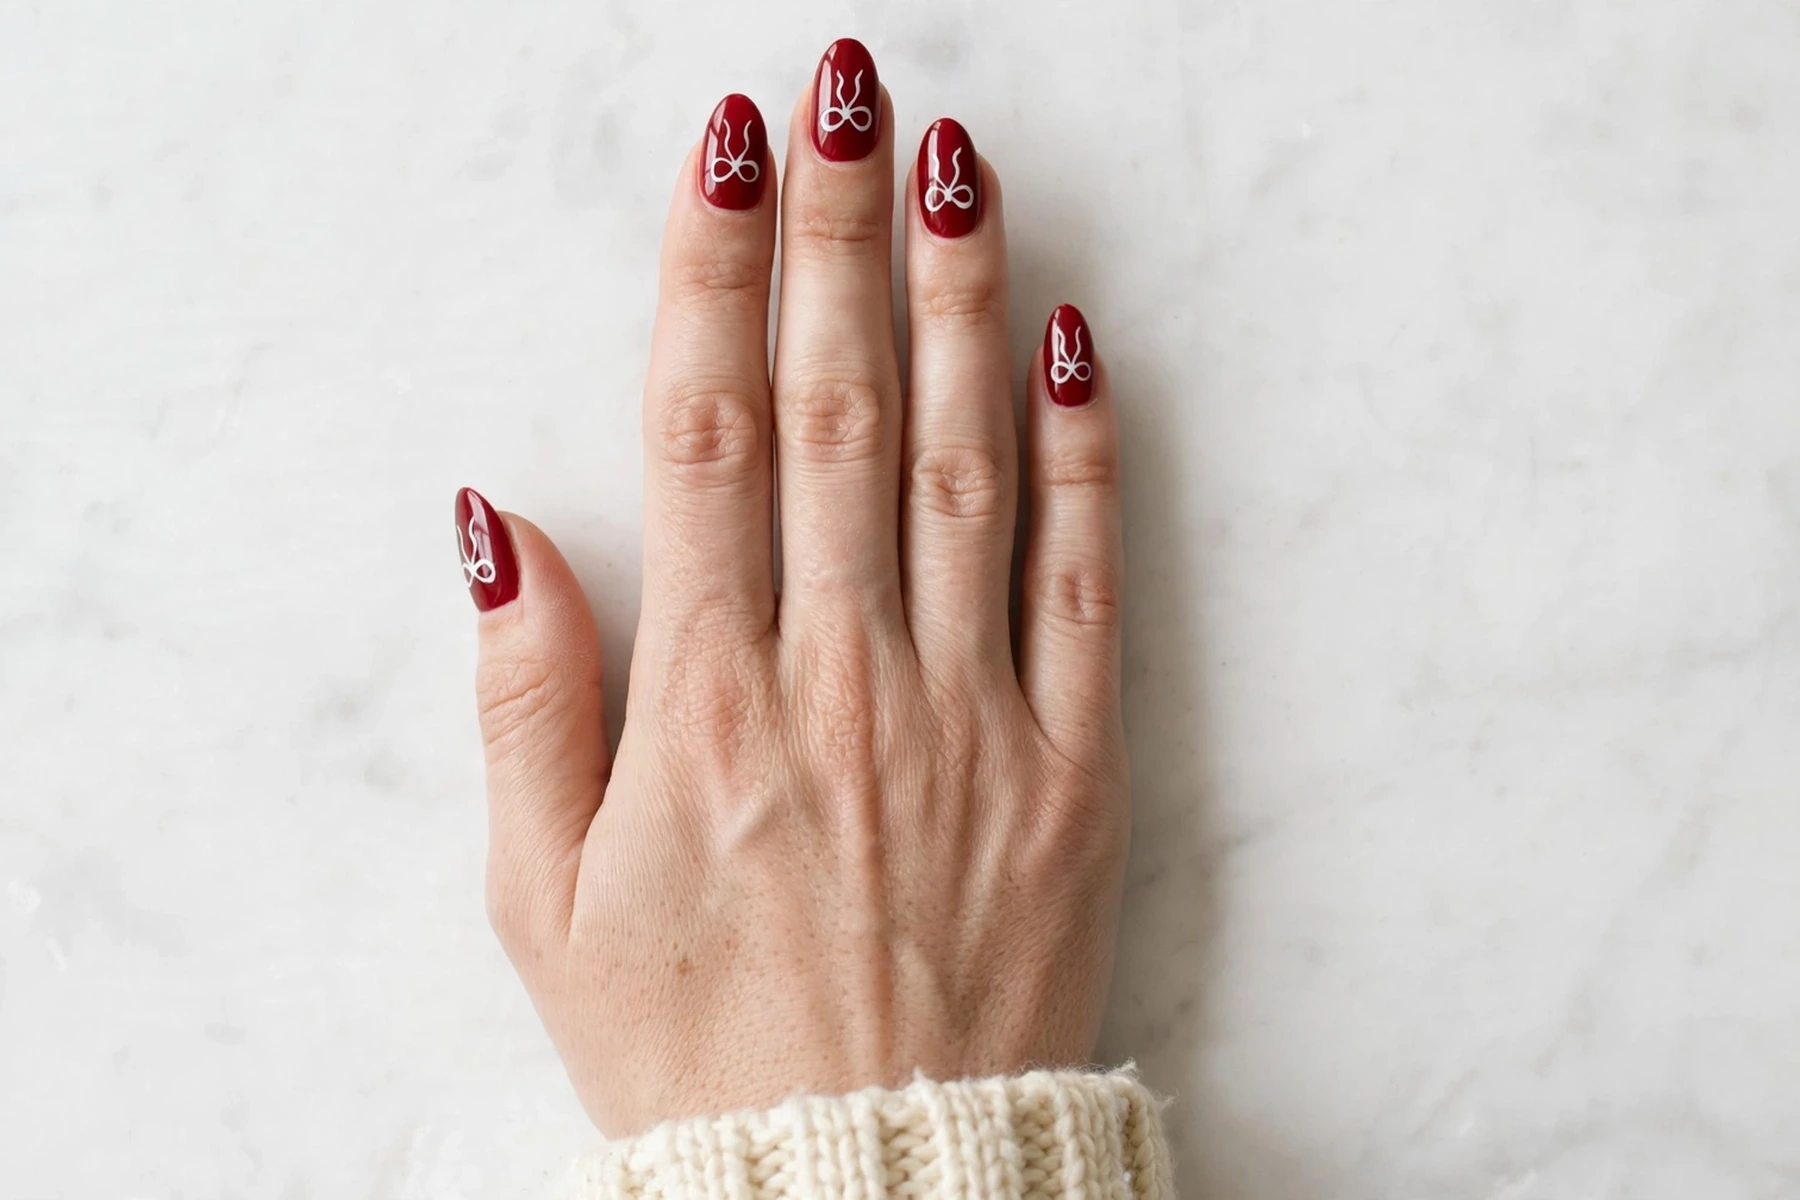
The set that looks like the top of a present: true glossy Christmas red, a hand-painted white ribbon bow on each nail, tails drifting toward the cuticle. Medium to long almond nails give the tails room; about an hour at a salon. Ask for the tails curved, because a bend reads as ribbon, not stripes. Recreate it in this order: base coat, two coats of red, dried properly. With your finest brush, paint the knot as a small dot, loop two petals out, then pull the tails down in curved strokes, and finish with glossy top coat.
2. Bow French Tip Christmas Nails in Blush and White
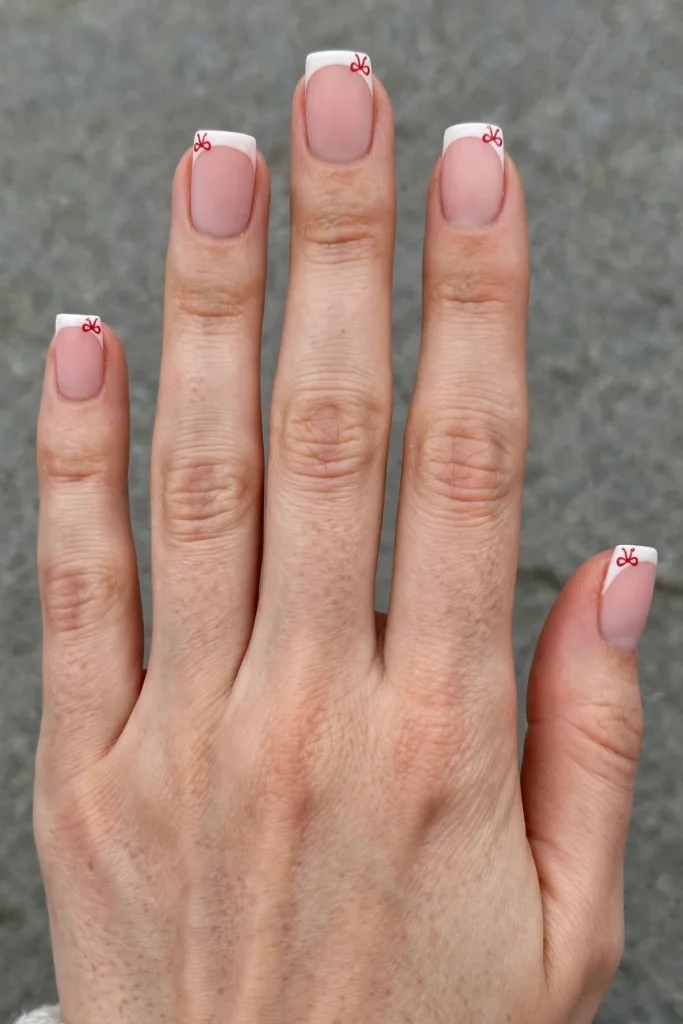
The quiet way into bows: blush pink base, crisp white tips, a tiny red bow at the outer corner of each tip line, thumb included. Short square nails suit it; about forty-five minutes at a salon. That corner spot survives typing and buttoning better than a centre bow does. At home: blush base, then the white tips. Once dry, a dotting tool makes the knot dot, a fine brush adds two tiny loops at the corner, top coat seals it.
3. 3D Bow Christmas Nails on a Nude Almond Base
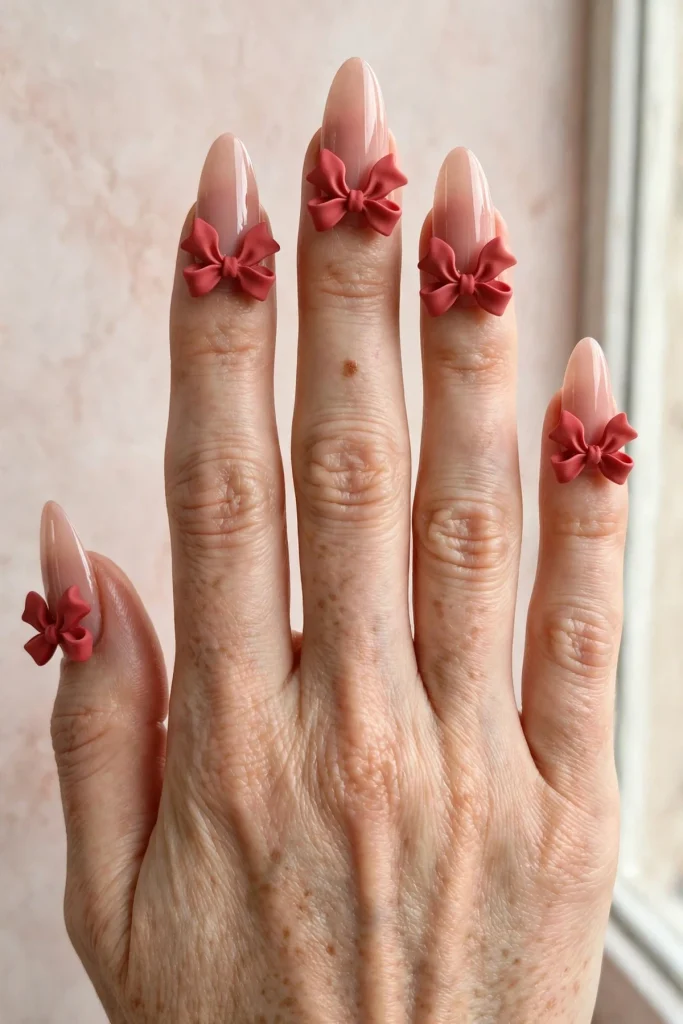
Long almond nails wear nude pink gloss, and every nail carries a chunky bow sculpted from soft red three-dimensional gel, cured hard. Built and cured, this set needs gel kit and a lamp (no regular-polish version), and five matching bows take around ninety minutes at a salon. Ask for each bow just above the nail’s centre, where it snags less. The salon build runs: nude gel base, cured under the lamp. Then each bow is sculpted loop by loop with a silicone tool, flash-curing as it takes shape, a full cure after, and gloss over the base only.
4. Plaid Bow Christmas Nails With Tiny Cuticle Bows
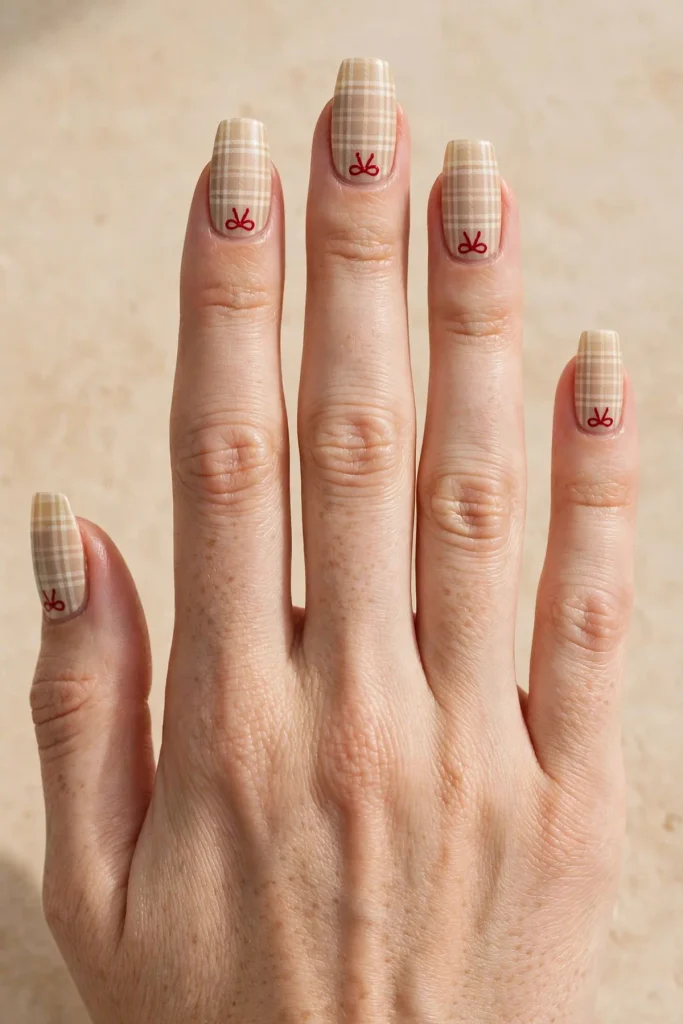
Plaid and bows sound like a crowd, but this set keeps both in line: soft beige and cream plaid on medium coffin nails, lines thin and slightly washed out, one tiny red bow at the cuticle of each nail. About an hour at a salon, glossy finish. Keep the plaid faded: bold lines argue with the bows, and the bows should win. Paint it in layers: cream base, then thin vertical and horizontal lines with a striping brush, each direction dried before the next. Bows last, at the cuticle: dotting-tool knot, two brush strokes, glossy top coat.
5. Pearl Bow Christmas Nails on an Ivory Base

A pearl bow reads like jewellery rather than nail art — it holds its own with a plain dress and no other sparkle.
Ivory oval nails, medium length, each carrying a bow built from tiny pearls clustered into two loops and a knot. Set into gel and sealed, this set needs gel kit and a lamp; around seventy-five minutes in the chair, soft glossy finish. Pale on pale, it photographs gently, a strong pick for daytime parties. In the chair: ivory gel base, cured under the lamp. Your tech maps each bow with dots of gel, presses the pearls in loop by loop, cures to lock them, then a final gel seal and cure.
6. Emerald Bow Christmas Nails With Gold Mini Bows

Deep emerald green, glossy and rich, one tiny gold bow painted near the tip of every nail. Medium almond nails; about fifty minutes at a salon. Dark bases swallow detail, so paint the gold a shade brighter and a touch bigger than feels right. On the nail it settles into just enough. The sequence: base coat, two coats of emerald, fully dry. Paint each mini bow near the tip with a fine brush, knot dot first, then the two loops. Top coat last, one nail at a time.
7. Matte Black Bow Christmas Nails With Red Ribbon Art
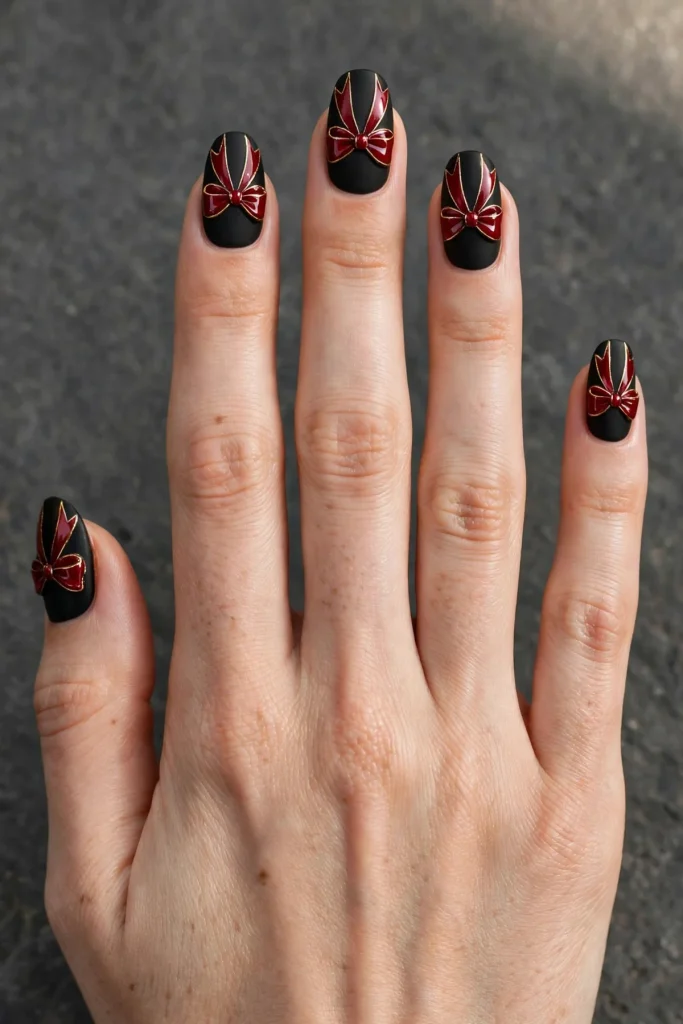
Black goes matte and moody here, and the bows do the shining: medium almond nails in flat black, each with a glossy deep red bow edged in a hair-thin gold line. Around fifty-five minutes at a salon, most of it outline work. Ask for the gold line slightly broken in a place or two, because a perfect outline can look printed. The build: black base, then a matte top coat to kill the shine. Paint each bow in glossy red with a detail brush, edge it with the thinnest gold line you can manage, and stop. A final top coat would flatten the contrast.
8. Bow Charm Christmas Nails With Crystal Centres

Sheer pink long almond nails, each with a glossy red bow charm and a tiny clear crystal in its knot. The charms are gel-fixed and cured, so this set needs gel kit and a lamp; about seventy-five minutes at a salon. Ring and middle fingers take the most knocks, so ask for extra gel around the charm bases on those two. Salon steps: sheer pink gel base, cured. Each charm sits on a bead of clear gel, pressed and cured under the lamp; a small gel skirt is built around its base and cured once more, gloss around the crystal, not over it.
A halfway test for any raised design: drag your fingertip across the bow. If it catches your skin, it will catch your favourite jumper. Painted bows are the safer pick that week.
9. Pink Bow Christmas Nails With White Tip Bows

Baby pink gloss on medium squoval nails, and right at the tip edge of each nail a neat white bow, like the knot on a wrapped parcel. About forty-five minutes at a salon, glossy finish. Keep the pink cool-toned, because warm pinks make a white bow look grey beside them. Angle the thumb’s bow toward the centre; thumbs sit at an angle in photos. The making is simple: two coats of cool pink, dried well, then each bow at the tip edge with a fine brush (knot, two loops, two short tails) and one glossy top coat.
10. Silver Glitter Bow Christmas Nails With Red Bows
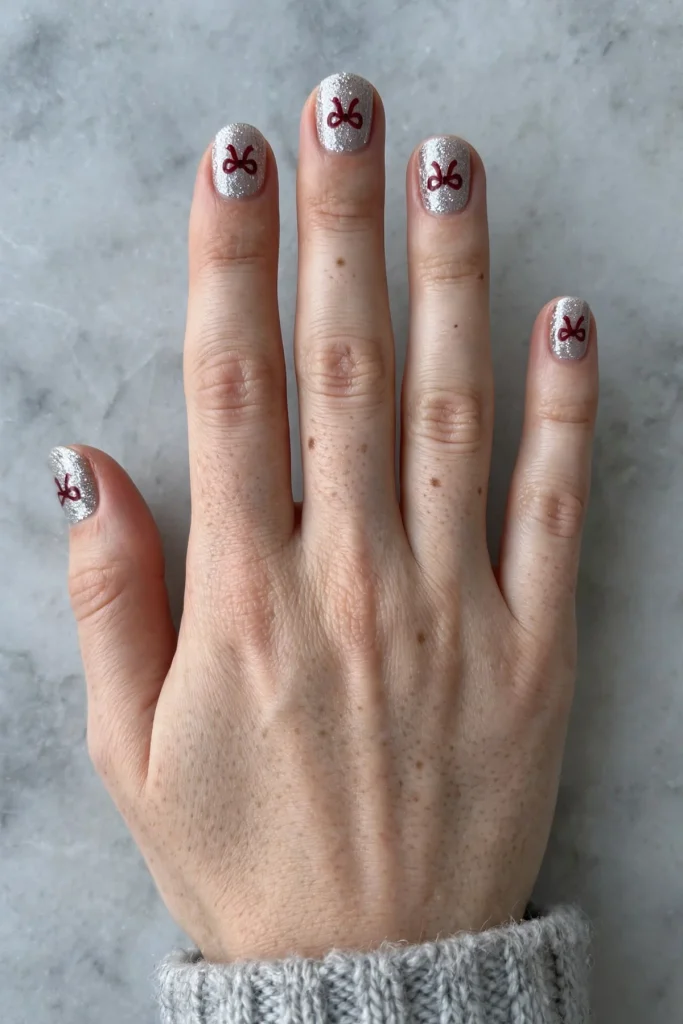
Short round nails, wall-to-wall silver glitter, one deep red bow in the centre of each. The glitter is gel, so it needs gel kit and a lamp to cure that densely, yet short nails make it quick, around forty minutes. Do not let anyone talk you into growing your nails for it: on short nails the bow lands near the nail bed’s centre, where it looks deliberate. The build: two coats of glitter gel, each cured under the lamp. Once the sparkle is sealed, paint the red bows with a detail brush, then gel top coat and a final cure.
11. Negative Space Bow Christmas Nails in Red and Nude

Parts of the nail stay bare here, and it looks dressier for it: medium almond nails, a deep red bow at the base, a hair-thin red line tracing the tip like a French outline, the middle open. Around an hour at a salon, glossy finish. Bare nail hides regrowth: a week of growth barely shows near that open cuticle. Order matters here: base coat on the bare nail, then the red tip outline with a fine brush, dried. Add the bow at the base (knot dot, two loops), keeping the middle untouched, and glossy top coat over everything.
12. Statement Bow Christmas Nails With Mini Bows All Over
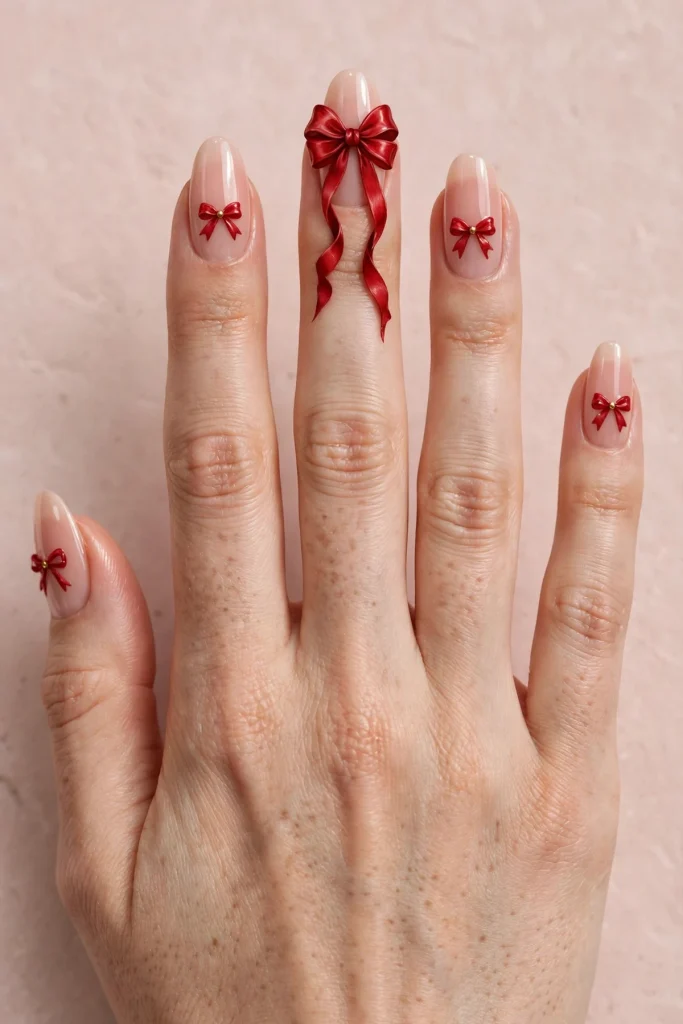
One big bow with minis around it reads calmer than five big bows shouting at once — a headline, then a chorus.
The middle nail of each hand carries one large, detailed red bow: shaded loops, long tails, the full performance piece. Every other nail, thumb included, gets a tiny matching mini bow with a gold dot at its centre, over nude pink gloss on medium almond nails. Around seventy minutes at a salon. Keep the statement bow on the middle nail, not the thumb, which twists away in photos. Plan it like a painting: nude pink base first, the big bow built in stages (knot, shaded loops, long tails) and left to dry, mini bows after, top coat on the minis first and the big bow last, so nothing drags.
13. Short Bow Christmas Nails in Cranberry and Cream

Proof that short nails are not the consolation prize: cranberry red gloss on short squoval nails, a cream bow placed diagonally on each, tails crossing corner to corner. Forty minutes at a salon, or a realistic home attempt. A centred bow can look like a full stop on short nails; the diagonal one stretches them visually. At home: two coats of cranberry, properly dry. With cream polish and a fine brush, paint each bow diagonally (knot off-centre, loop to one corner, tail to the other) in two thin coats so the cream stays opaque, then glossy top coat.
14. Gold Foil Bow Christmas Nails on Burgundy
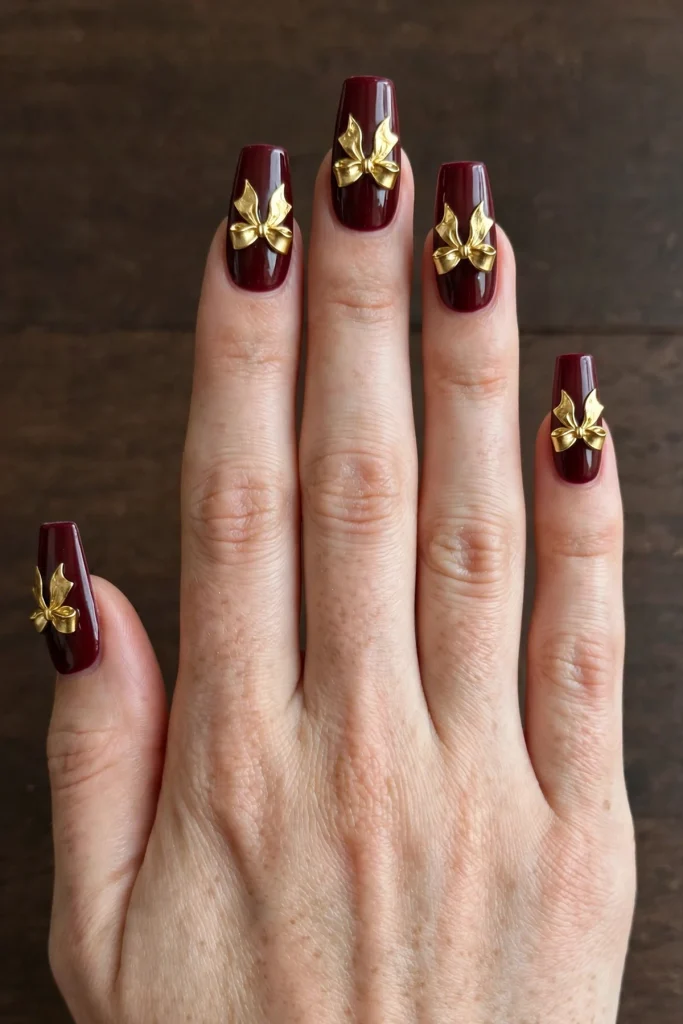
Burgundy so deep it is nearly wine, medium coffin nails, and on each a bow pressed from metallic gold foil. Foil needs a gel seal, so this set needs gel kit and a lamp; about an hour at the salon. Foil catches light like paint cannot: this is the set for evenings and flash photography. Ask for the foil edges sealed twice; foil lifts from its edges first. The foil route: burgundy gel base, cured under the lamp. Gold foil is pressed onto the tacky layer in a bow shape, nail by nail, edges tidied with a silicone tool, then a gel top coat seals it, cured under the lamp, the second seal worked around the edges.
15. Matte Nude Bow Christmas Nails With Glossy Red Bows
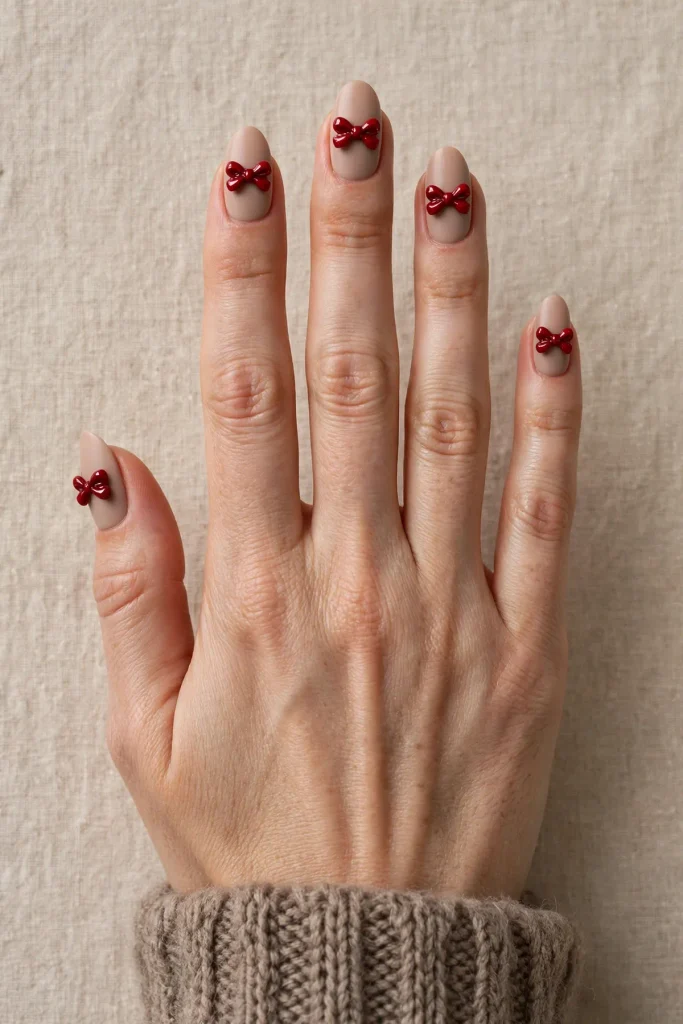
The gloss-on-matte trick from idea 7, on a softer stage: matte nude beige on medium almond nails, bows painted glossy red so each looks lacquered against the flat base. Around fifty minutes at a salon, or very doable at home. The contrast doubles as your maintenance plan: when the bows dull, repaint just the bows without redoing the set. Build it backwards: matte nude base first, fully set. Paint the bows in glossy red with a detail brush and stop there. No top coat over them, because their own shine is the effect.
16. Icy Blue Bow Christmas Nails With Silver Centres
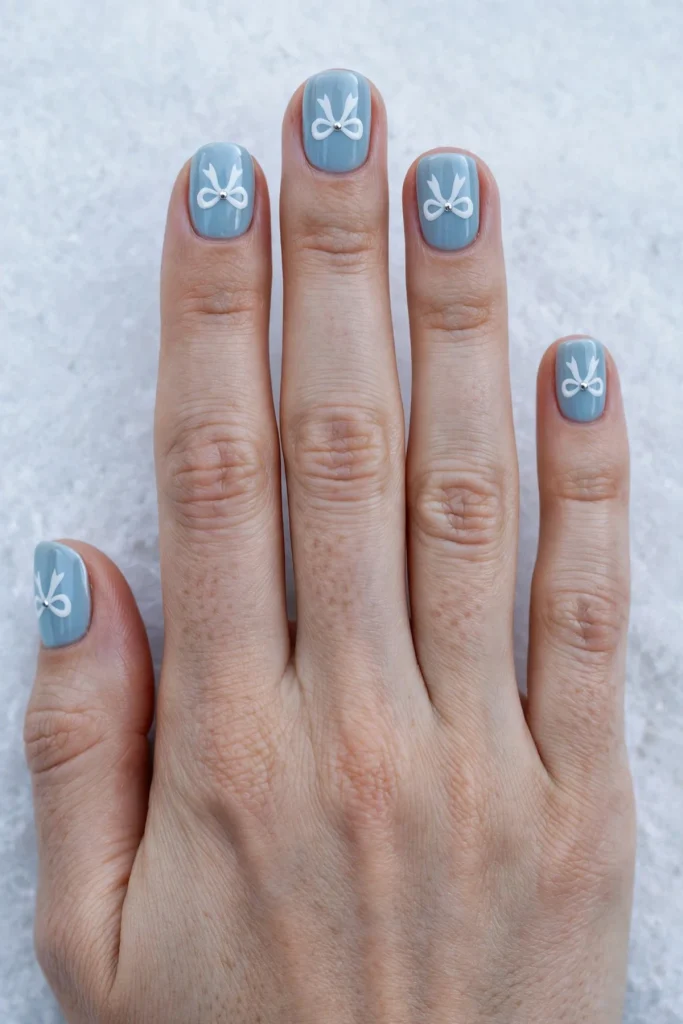
We end somewhere cooler: pale icy blue gloss on short squoval nails, a neat white bow on each, a silver dot in every knot. About forty-five minutes at a salon, glossy finish, and a friendly home attempt. One honest caution: icy blue can wash out very fair skin; the white bow and silver dot put definition back. The build: two coats of icy blue, dried hard. White bows next with a fine brush, then a dotting tool presses a silver dot into each knot. Glossy top coat seals it. Paint the thumb last, since it is the one you will smudge.
Match the Bow to Your Shape
Not every bow belongs on every nail. The quick match-up:
| Bow style | Shape it suits | Length | Home or salon |
|---|---|---|---|
| Bow French tips | Square | Short | Home |
| 3D sculpted bows | Almond | Long | Needs gel kit |
| Pearl bows | Oval | Medium | Needs gel kit |
| Bow charms | Almond | Long | Needs gel kit |
| Mini painted bows | Any shape | Short to medium | Home |
| Foil bows | Coffin | Medium | Needs gel kit |
What to Tell Your Nail Tech So the Bow Lands Right
Bow disappointment usually comes from one skipped conversation. Bring your screenshot, then agree the bow size against your nail width: a bow wider than the nail looks borrowed. Settle placement before any polish opens: cuticle, centre or tip edge changes the set’s whole personality. If tails are involved, say which way they drift; tails toward the cuticle read as ribbon, tails toward the tip can look like scratches.
Bow Nail Care: Keeping Loops, Pearls and Charms in Place
Bows ask a little more of you than flat art. Start with a proper base coat: it grips the nail, slows staining from deep reds, and gives gel something honest to hold onto.
Gel wearers, two non-negotiables. If gel is new to you, ask for a patch test a day or two before the full set, and say so if the skin around your nails stings under the lamp. When a gel set starts to lift, do not peel it off and do not pry at a loose charm. Peeling takes layers of your own nail with it. Book professional removal.
Skip the long soaking tricks in videos, too: charms and pearls are held at small gel points, and long soaks work on exactly those points until a bow drops off in the sink. Gloves for washing up are the cheapest insurance going.
One Bow or Five: The Balance Rule for Bow Nails
My rule: a bow should take up no more than about a third of the nail it sits on. Under that, it reads as a detail. Over that, the bow becomes the nail, and five in a row look like gift wrap, not a manicure.
Scale does the rest. Painted mini bows are light, so they can repeat on every nail without shouting. Raised bows (sculpted, pearled, charmed) carry weight, so one statement bow per hand with quieter minis around it, like idea 12, stays balanced. On short nails, shrink the bow, not the idea: a diagonal mini bow, like idea 13, keeps the charm and loses the clutter.
Bow Nail Questions, Answered Straight
Will bow charms catch on everything I touch?
They can catch on open knits, tights and loose towel loops, yes. Painted bows like ideas 1, 9 and 15 sit flat and catch on nothing, so if your December is jumpers and wrapping paper, stay painted, or keep raised bows small and well skirted.
Can I do bow nails at home without a lamp?
Yes, the painted ones. Ideas 2, 13, 15 and 16 need only regular polish, a fine brush and patience. Anything built or sealed with gel (ideas 3, 5, 8, 10 and 14) needs gel kit and a lamp; no shortcut around curing.
How long does a bow set actually last?
About as long as the manicure underneath it: flat painted bows rarely chip before the base colour does. Gel bow sets usually outlast them, provided the charm bases were built up properly and you are not peeling by week two.
My nails are short. Which bow will not look silly?
Mini bows, placed diagonally or tucked at a French tip’s corner: ideas 2, 13 and 16 were built for you. Keep the bow under half your nail’s width, tails short.
How do bow charms and pearls come off?
Carefully, and for gel sets, professionally. A salon files down the gel and eases the charm away safely. Painted bows come off with your usual remover.
Sixteen ways to tie December onto your nails, from a quick mini bow to a full sculpted ribbon — pick the size your week can handle, and let the thumb have its moment too.