17 Red and Green Christmas Nails That Break the Rules
Red and green together is not the dated choice people claim it is; weak patterns are what date it.
These red and green Christmas nails keep the classic pairing and sharpen it with argyle, checks, tartan and clean colour blocking.
Every pattern sits on every nail, so the set reads festive from across the room.
I reach for this pairing when a set has to say Christmas in one glance, My rule is simple: pick the pattern first, then let the two shades share the work evenly, and the result rarely looks costume-like.
Find Your Pick in 10 Seconds
Short on time? Match your mood to a number and jump straight there.
- Classic Christmas, zero guessing: idea 1 argyle and idea 9 tartan.
- Clean lines and shorter appointments: ideas 6, 11 and 13.
- Soft blends instead of hard lines: idea 8 fade and idea 15 marble.
- Patterns that read from across the room: ideas 3, 10 and 17.
- Short nails, full pattern: ideas 2, 11 and 4 keep every line in scale.
Gel lovers, ideas 3, 8, 14 and 16 are marked clearly, so there are no lamp surprises mid-set. Every set below uses scarlet and emerald only, in every pattern and finish.
Seventeen Ways to Wear the Pairing
1. Argyle Diamonds With Fine Cross Lines
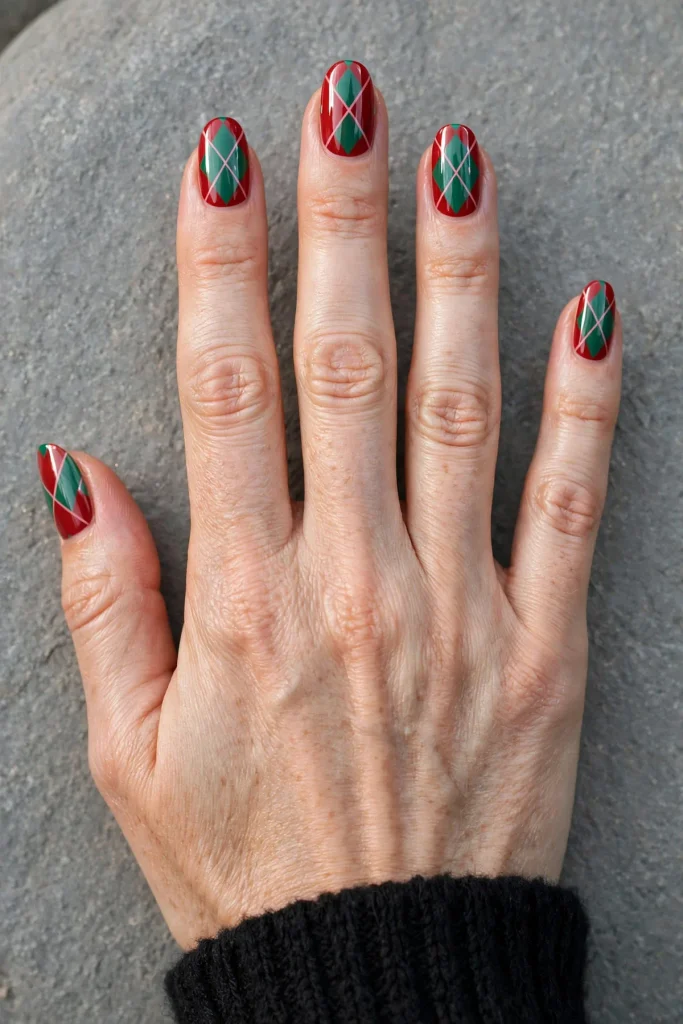
Argyle is the pattern that makes red and green look planned rather than loud. Alternating scarlet and emerald diamonds sit in neat rows, and a fine pale line crosses each diamond. The repeat is small, so it suits medium almond nails well. Ask for a glossy finish; shine keeps the two shades separate and crisp. Difficulty sits at Medium, and a salon visit usually runs about an hour to seventy-five minutes.
Shape note: Almond or oval edges soften the geometry and stop the pattern feeling too sharp.
Finish note: Keep the cross lines one shade lighter than the diamonds, or they disappear into the pattern.
2. Two-Tone French, Swapped on Every Nail
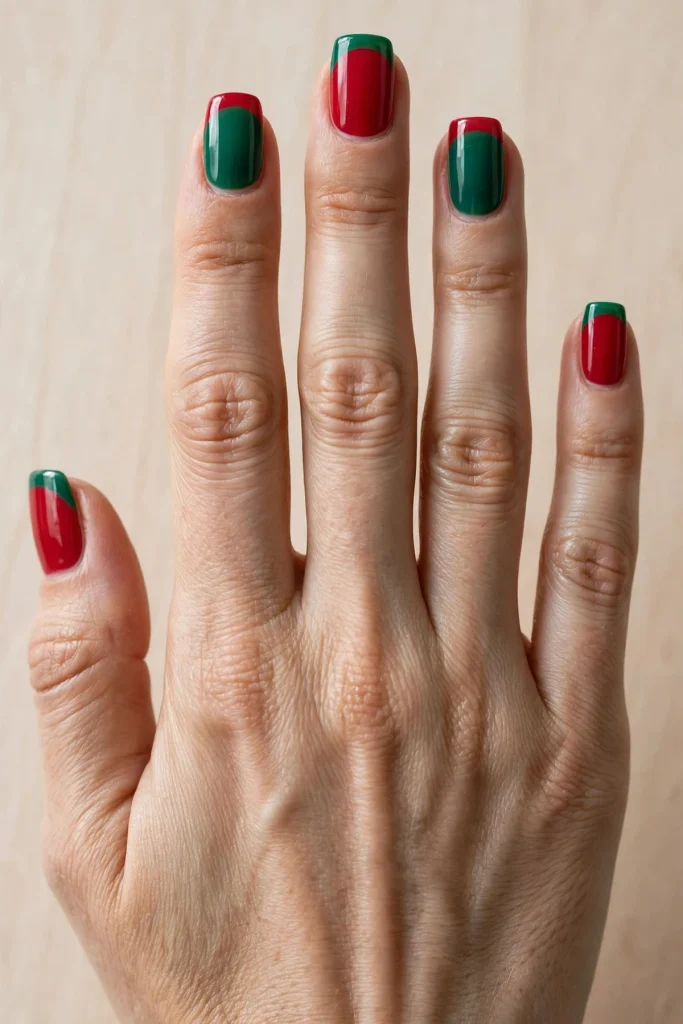
This one suits you if you love a French outline with the full pairing inside it. Nails alternate through the set: scarlet base with an emerald tip, then emerald base with a scarlet tip. The swap keeps the rhythm lively without adding a third colour. Short to medium square nails suit it, with slim tips so the base colour still leads. Difficulty is Medium, mostly for keeping both smile lines even, and the set takes about fifty minutes.
Colour note: A deeper scarlet keeps the red tips from reading orange under warm indoor light.
Time note: Book a plain French slot and say “two-tone swap” — most techs price it the same.
3. Checkerboard Squares With a Matte Finish
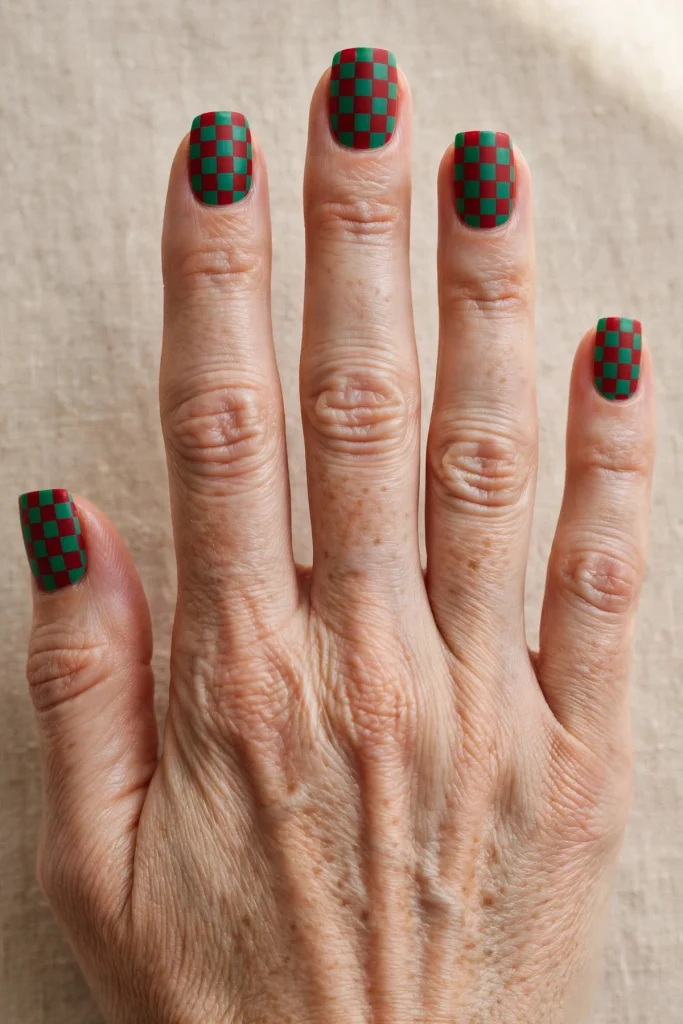
Checkerboard is the loudest pattern here. Neat scarlet and emerald squares cover each nail edge to edge, and a matte top coat makes the grid look like fabric. Medium square nails give the squares room to stay even; on very short nails the grid gets cramped. This set needs a gel kit, because cured layers keep the edges sharp. Difficulty is Expert and the appointment can run ninety minutes.
Gel note: Needs gel kit — each colour layer cures before the next square is placed beside it.
Watch out: Matte tops show dry skin fast, so cuticle oil matters more with this set than most.
4. Diagonal Stripes in Scarlet and Emerald
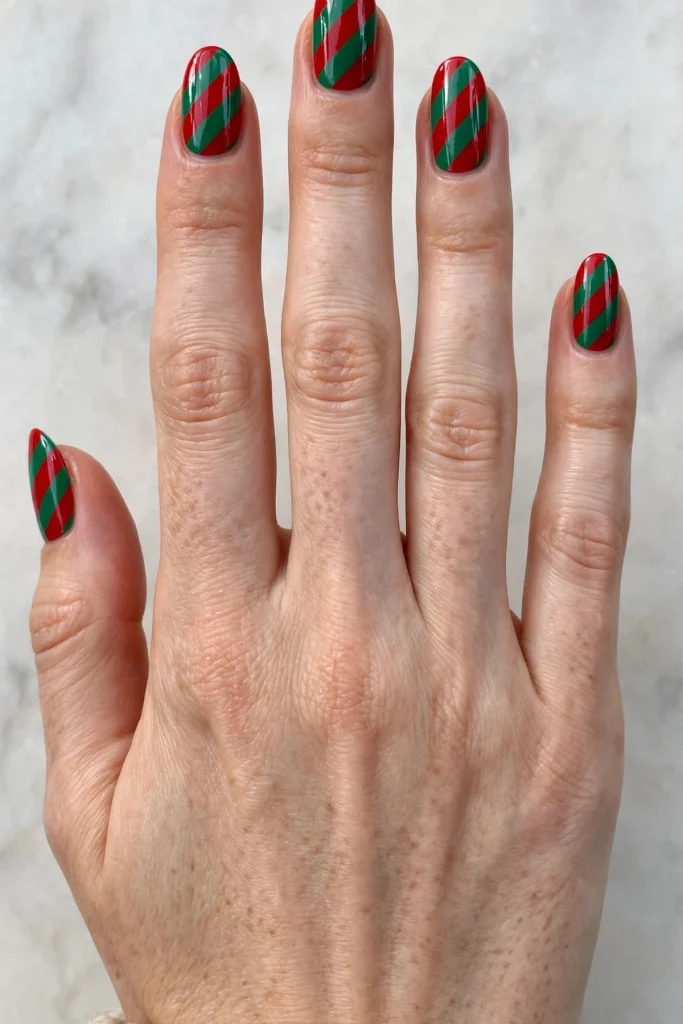
Wide diagonal bands of scarlet and emerald slant across every nail at one shared bold angle, like ribbon wrapped around each fingertip. One shared angle keeps the pattern tailored rather than busy, and it photographs cleanly from any side. Striping tape keeps the edges clean. Medium almond nails carry the slant well. Difficulty is Easy with tape, and the set takes about forty-five minutes.
Tape tip: Pull tape off while the second colour is still wet for the sharpest line.
Salon note: Ask for bands at a matching angle across both hands; uneven slants show in group photos.
5. Harlequin Diamonds in Two Directions
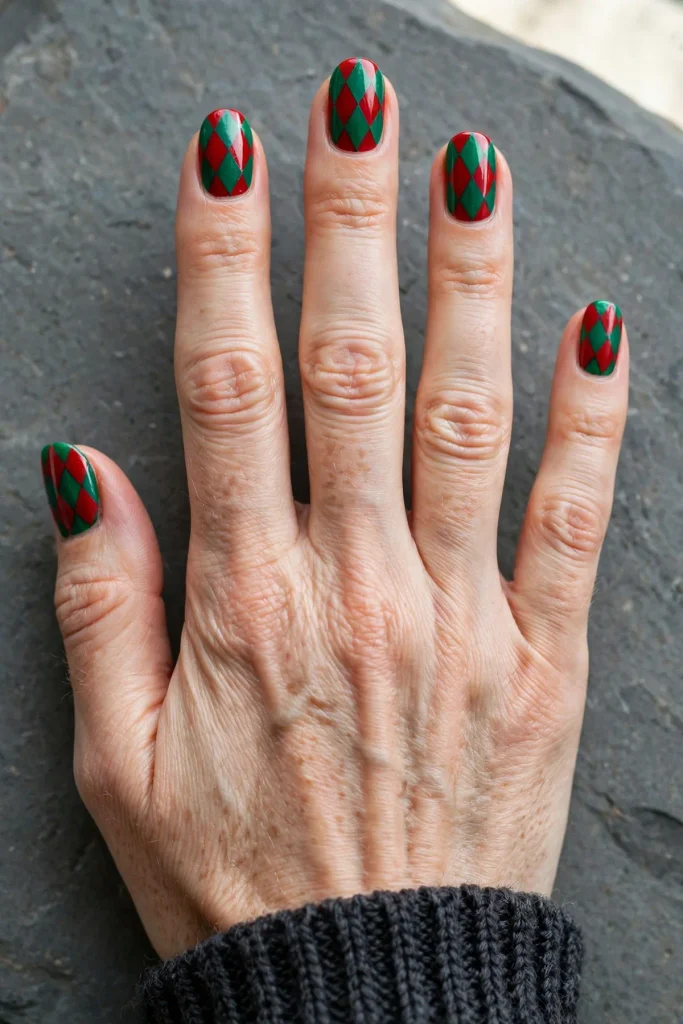
Harlequin diamonds stretch longer than argyle diamonds, and that extra length changes the mood. Scarlet diamonds stand on an emerald base for half the nails, then the pairing reverses, emerald diamonds on scarlet. The tall shapes suit medium oval nails. Keep the diamonds centred; a drifting diamond throws the row off. Difficulty is Medium, the gloss finish keeps it dressy, and the set takes about an hour.
Long diamond patterns are my shortcut when a client wants festive nails that still feel grown-up: the shape does the dressing up, so the colours can stay classic.
Pattern note: Count three diamonds per nail on medium lengths; two look sparse and four look crowded.
Photo note: This pattern photographs well against plain knit sleeves, where the diamonds stay the focus.
6. Colour-Block Halves, Split Down the Middle
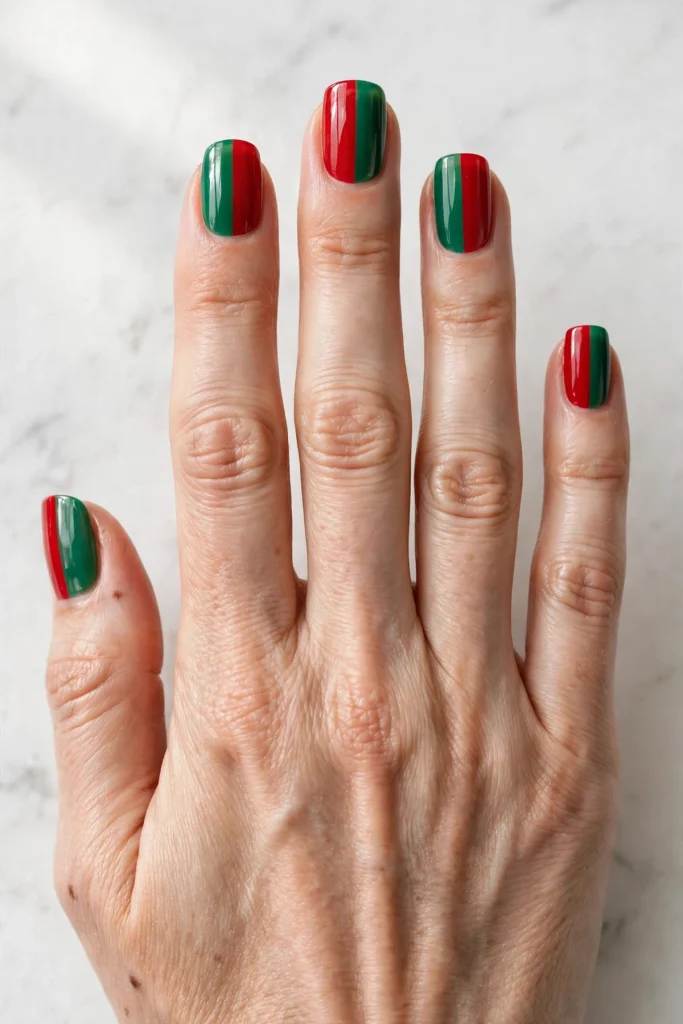
Build this look in three simple steps:
- Paint one half of each nail scarlet and the other half emerald, split straight down the middle.
- Alternate which side carries the red as you move across the hand.
- Seal with gloss so the centre seam reads as one clean line.
Medium square nails show the split well, and bold halves forgive small wobbles. Difficulty is Easy, and the appointment runs about forty minutes.
Swap idea: Turn the split horizontal on the thumbs for one quiet break in the rhythm.
Length note: On short nails, paint the seam slightly off-centre toward the red for a slimmer look.
7. Wave Ribbons From Cuticle to Tip
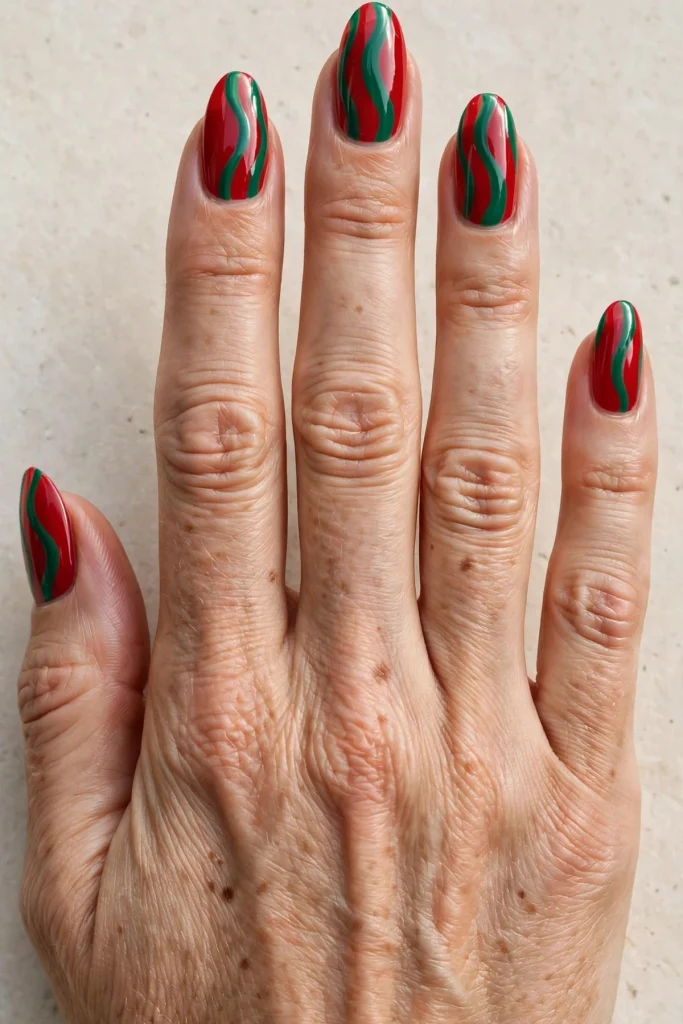
Wave ribbons soften the pairing for anyone who finds straight lines too strict. Flowing vertical waves in scarlet and emerald run from cuticle to tip, each wave bending the same way, like ribbon mid-twirl. Medium to long almond nails give the waves room to travel. Difficulty is Medium, since the brush has to keep a steady rhythm, and the set takes about an hour.
Rhythm note: Three waves per nail is the sweet spot; more waves shrink the colours into stripes.
Gloss note: Skip matte here — shine is what makes the curves look like satin ribbon.
8. A Red-to-Green Fade on Every Nail
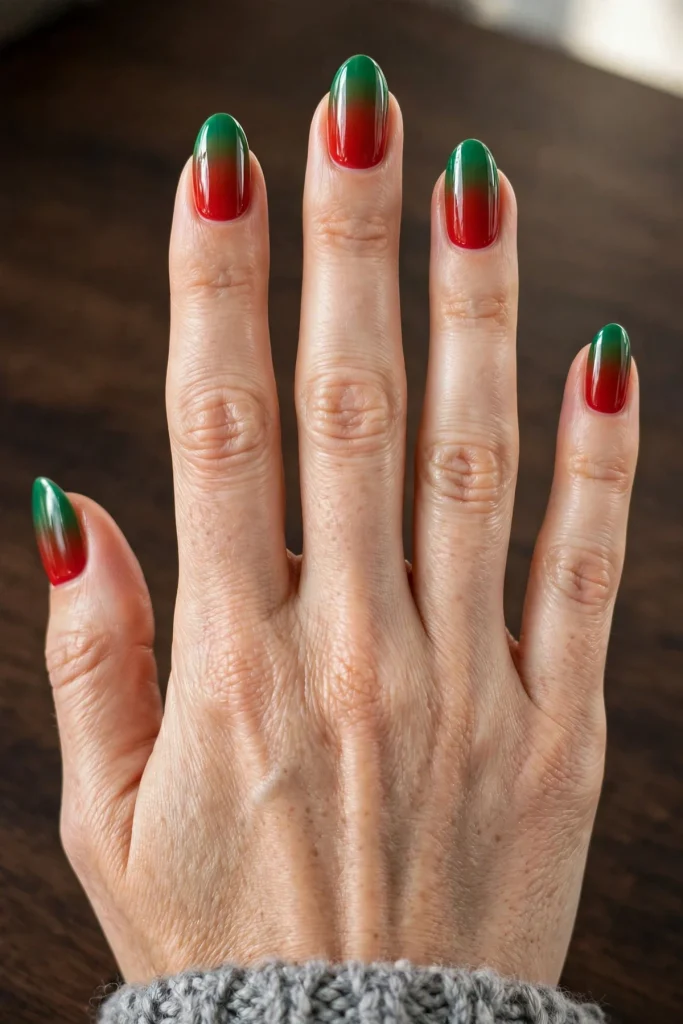
This suits you if hard lines feel too graphic for your taste. Scarlet melts from the cuticle into emerald at the tip. The fade needs a gel kit, because gel gives the working time to blur the middle before curing. Difficulty is Medium, the finish is high gloss, and the appointment runs about seventy-five minutes, since each nail is blended one at a time.
Fade note: The middle of the nail turns muddy if the two shades overlap too far — a short blend zone keeps both colours true.
Kit note: Needs gel kit and a lamp; this is not the set to attempt with quick-dry polish.
9. Tartan Crosshatch on a Deep Red Base
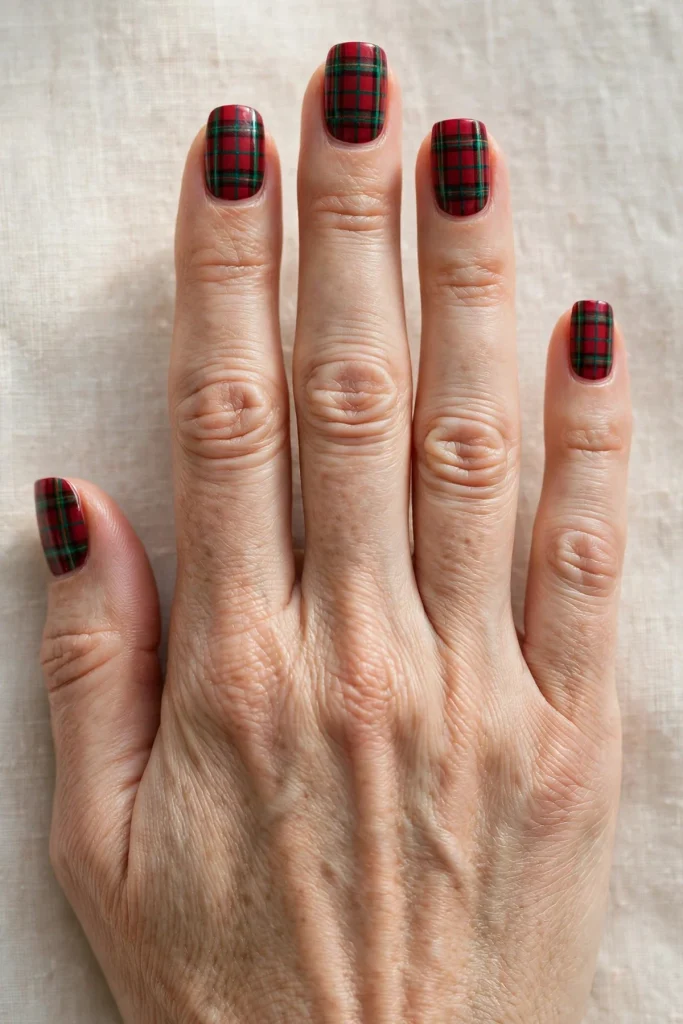
Tartan brings the cosy end of Christmas into the pairing. A deep scarlet base carries emerald cross-stripes both ways, with one thin dark green line inside each band to build the woven feel. Medium square nails suit the grid. Gloss reads dressier for evenings; satin stays cosier. Difficulty is Medium and the set takes about seventy-five minutes.
Halfway reminder: if a full pattern on all ten nails feels like a lot, keep the pattern and drop the length — shorter nails make bold patterns calmer.
Crosshatch note: Paint the wider bands first and the thin lines last, or the lines sink into wet polish.
Base note: A blue-leaning scarlet stops the tartan reading brown next to deep green.
10. Chevron Zigzags Pointing to the Tips
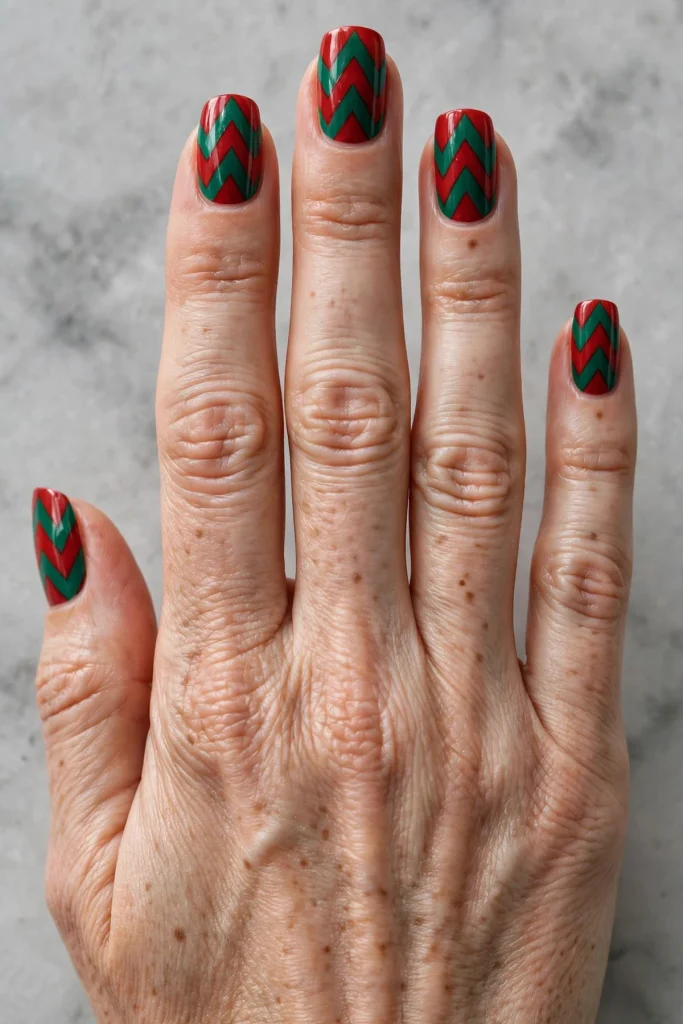
Chevrons give the pairing a graphic, modern edge. Bold zigzag bands in scarlet and emerald point toward the tips, stacking two or three deep on each nail. Medium squoval nails keep the angles sharp. Chevron guides or tape make this an Easy set at home, and a glossy top coat levels the band edges. Plan about fifty minutes in the salon.
Zigzag note: Keep the points centred on the nail’s midline; off-centre points look like a mistake, not a style.
Edge note: Wrap the tips with top coat, chevron points are the first place this pattern chips.
11. Half-Moons, Swapped at the Cuticle
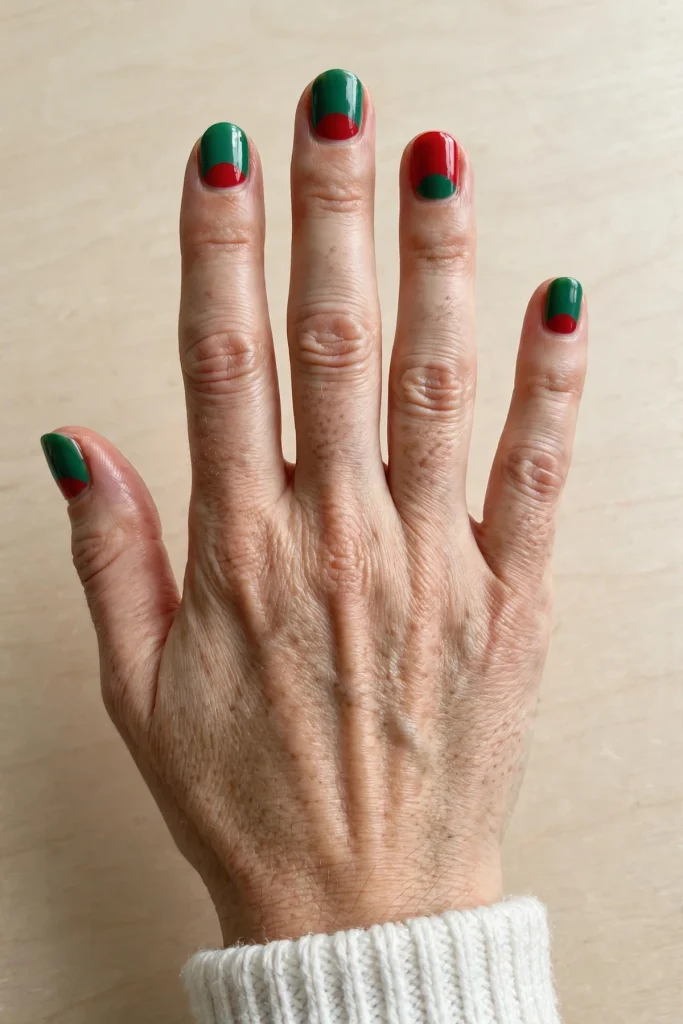
Half-moons are the quietest pattern in this list, and often the prettiest on short nails. Most nails wear an emerald base with a scarlet half-moon at the cuticle, and the pairing reverses on the ring finger, scarlet base with an emerald moon. Short to medium oval nails suit the curve. Difficulty is Easy and the set takes about forty minutes.
Moon note: A small moon reads cleaner than a deep one on short nails, keep it shallow.
Short-nail note: This is the pattern I suggest first when someone wants the pairing on natural nails with no extensions.
12. Herringbone Strokes in Scarlet and Emerald
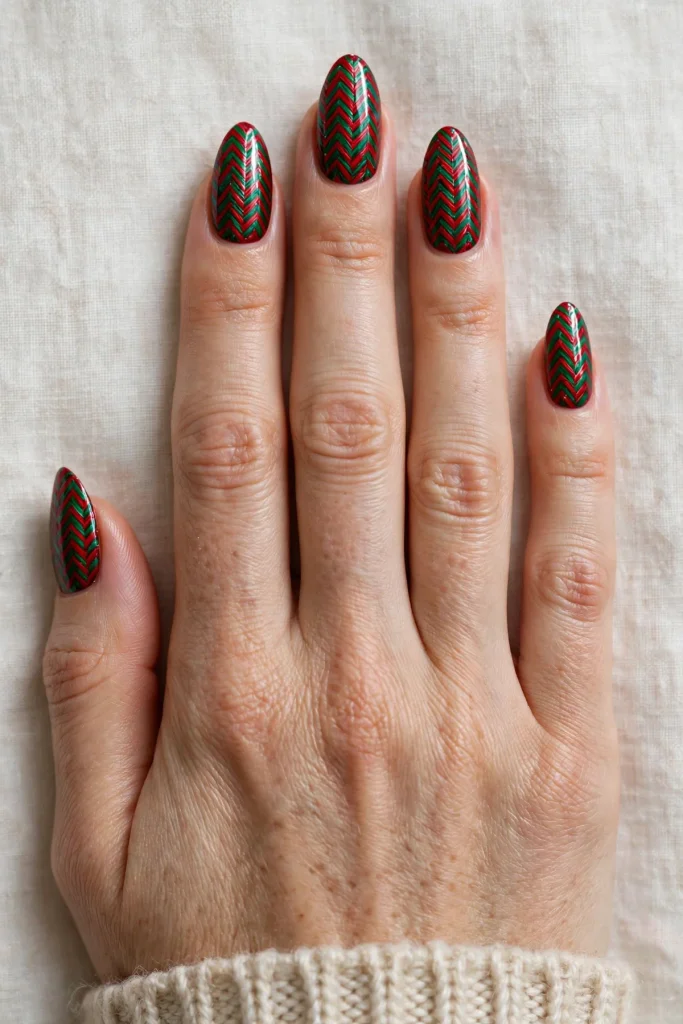
Herringbone is a patience pattern. Short interlocking strokes in scarlet and emerald lean against each other in a woven V, row after row, like fine fabric. Medium almond nails hold about four rows comfortably. Painted freehand with a fine brush, it sits at Expert and can run ninety minutes in a salon. A glossy finish smooths the texture.
Stroke note: Work one row at a time across all five nails, so the lean of each stroke stays consistent.
Patience note: Book this as nail art, not a basic set, rushing herringbone shows in every row.
13. A Side-Sweep Split With Two Finishes
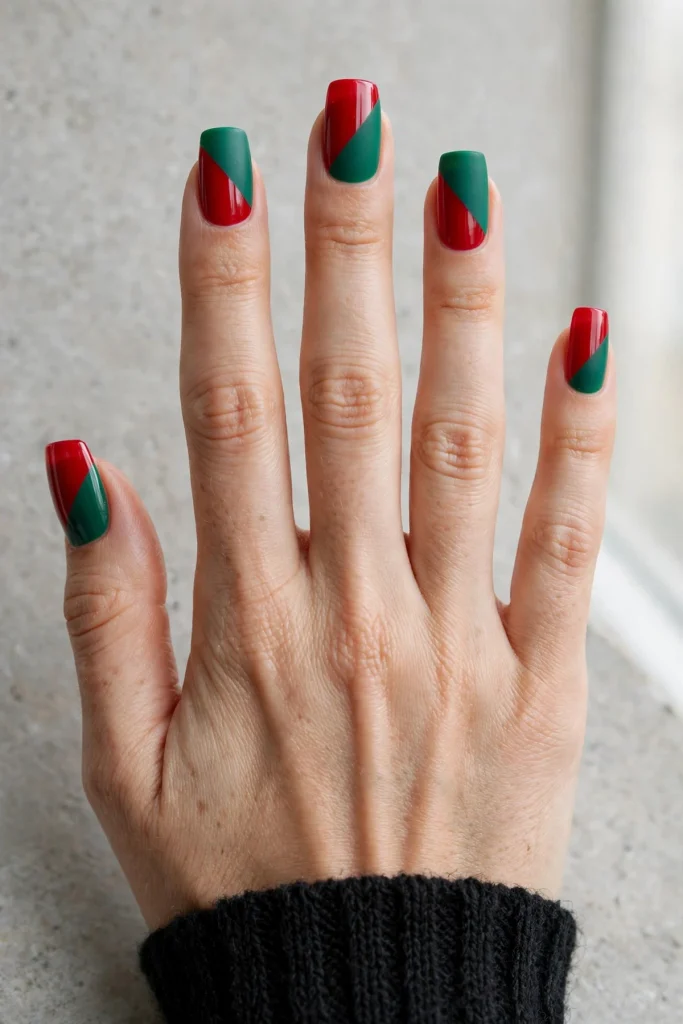
The common mistake with two-colour nails is giving both shades the same finish, which flattens them into one block. This split fixes that: each nail divides diagonally, glossy scarlet on one side and matte emerald on the other. Medium to long square nails carry the long diagonal well. Difficulty is Easy to Medium, and the set takes about fifty minutes.
Mixing a glossy side with a matte side is the easiest way I know to make two colours look like three, the light does the extra work for you.
Split note: Apply the matte top coat only on the green side, with a steady brush along the seam.
Matte note: Matte green darkens as it dries, so judge the pairing after ten minutes, not in the bottle.
14. A Lattice Trellis Over Deep Scarlet
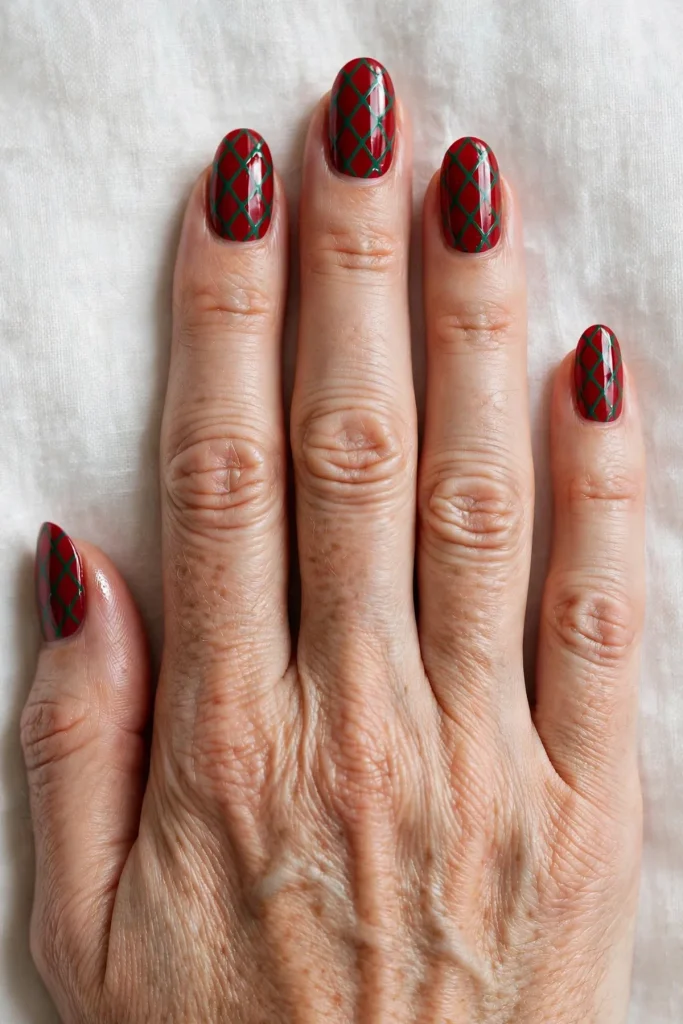
Lattice work suits you if you like detail that rewards a closer look. A deep scarlet base sits under thin emerald lines that cross into a diamond trellis. The fine lines need a gel kit, cured per pass so the grid cannot smudge. Medium almond nails give the diamonds room. Difficulty is Medium, the finish is glossy, and the appointment runs about seventy-five minutes.
Grid note: The trellis looks right when the diamonds are wider than they are tall on the nail.
Gel note: Needs gel kit, flash-cure after each direction of lines so the crossings stay sharp.
15. Marble Swirls, Different on Every Nail
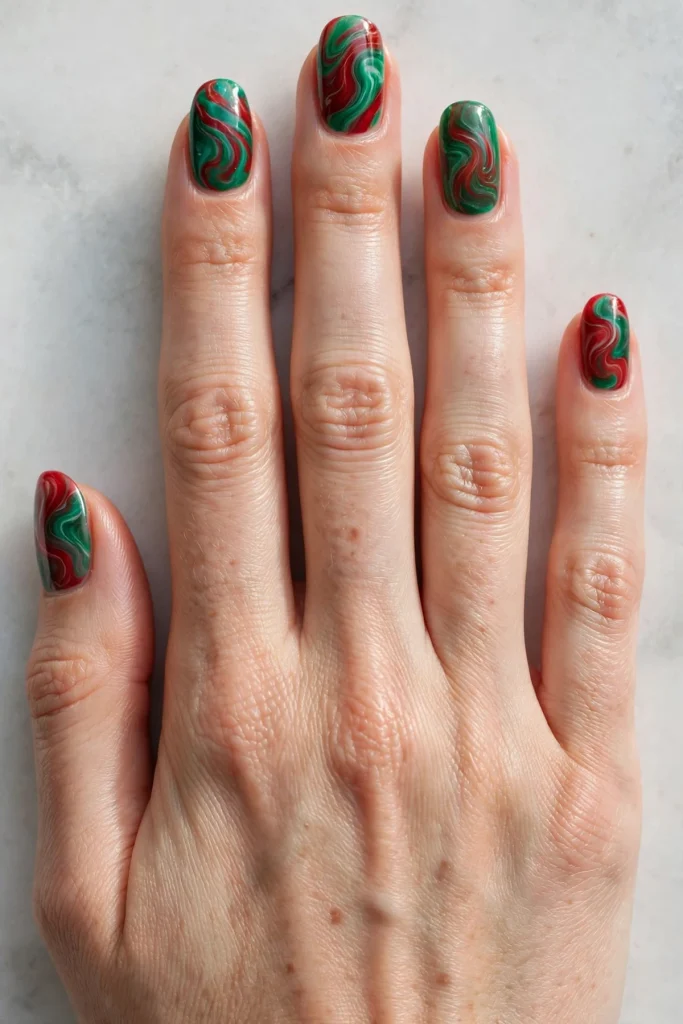
Marble swirls are the one pattern here that is meant to differ from nail to nail. Scarlet and emerald drift through each other in soft stone-like flows, and a high-gloss finish gives the wet, polished-stone feel. Medium oval nails suit the curves. The swirls come from dragging a fine tool through wet polish; difficulty is Expert, so plan about ninety minutes in a salon.
Swirl note: Drag the tool once and stop; a second pass muddies the two shades into brown.
Clean-up note: Keep a small brush and remover ready, marble work tends to travel a little past the edges.
16. Basket Weave With an Over-Under Rhythm
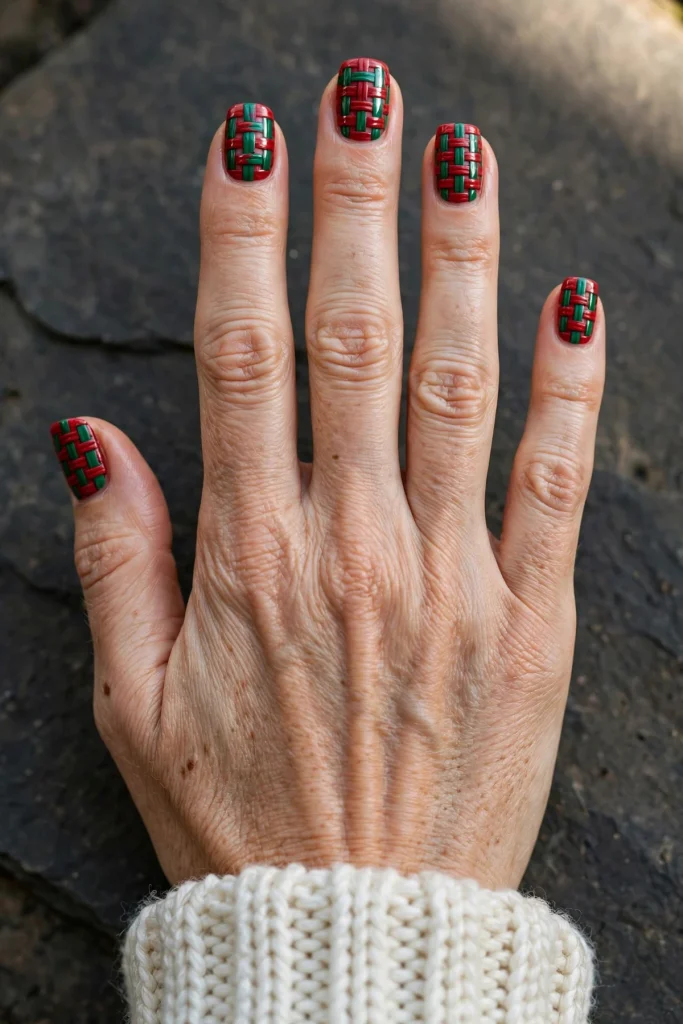
Basket weave turns the pairing into texture. Short strips of scarlet and emerald alternate over and under each other in rows. It needs a gel kit, because each strip cures before the crossing strip goes over it. Medium square nails give the grid its structure. Difficulty is Expert, and a salon visit can run close to two hours for the full set.
Weave check: Count the strips before curing, a missed alternation breaks the over-under rhythm in photos.
Gel note: Needs gel kit and patience; this is a statement set, not a lunch-break appointment.
17. Starburst Rays From the Cuticle
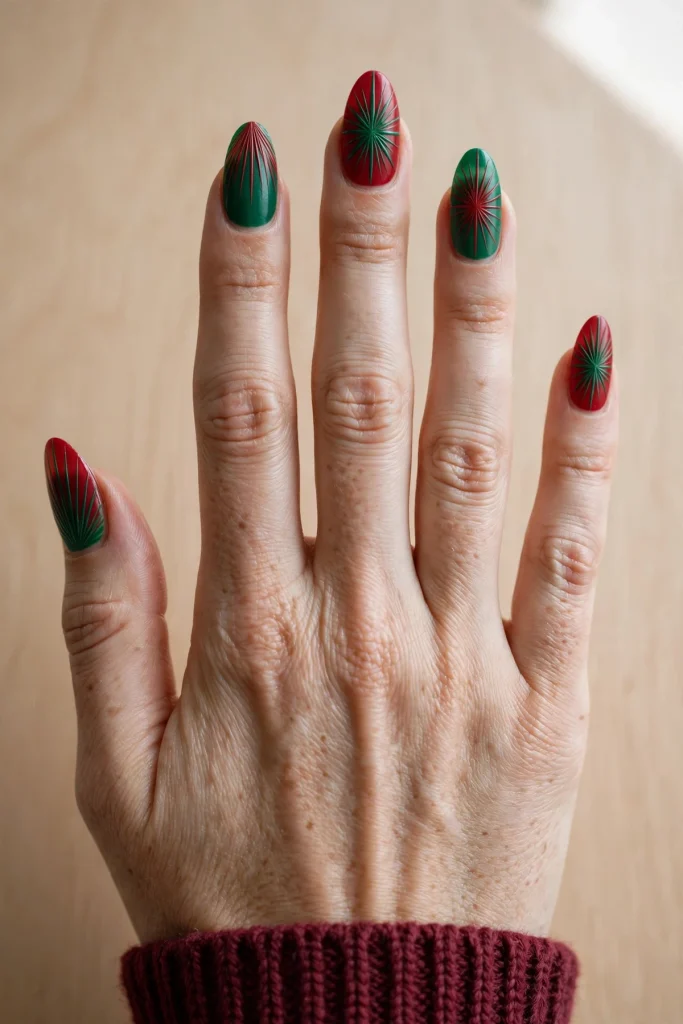
Starburst rays close the list with the most festive energy. Fine rays in scarlet and emerald fan out from the cuticle toward the tip, with base and ray shades alternating across the hand. Medium to long almond nails give the fan its spread. Difficulty is Medium, the finish is glossy, and the set takes about an hour.
Ray note: Odd numbers of rays, five or seven, fan more evenly than even counts.
Length note: On shorter nails, use three wide rays instead of many thin ones, so the fan stays bold.
The Ratio Rule: How Much Red, How Much Green
Most red and green sets that miss the mark fail on ratio, not on colour choice. A near-even split, roughly half and half across the whole hand, reads the most festive, and alternating patterns like the French swap and the half-moons reach it on their own. When one shade leads, let it lead clearly: a scarlet base with emerald lines, like the tartan and the trellis, keeps the green a sharp accent. Deep shades carry more visual weight than bright ones, so a dark emerald needs less area than a bright scarlet to feel equal. If a set looks off, check the thumbs first; their ratio sets the tone for the whole hand.
Briefing Your Nail Tech in One Line Each
Patterns go wrong when the brief is vague. For grids and checks, say which shade forms the base and which forms the lines, and name the finish out loud. For fades and marble, say where the blend should sit on the nail and how soft it should look in photos. For French swaps and half-moons, say the word “alternating” and point at your thumb, techs often default to matching pairs unless you say otherwise. For anything marked gel here, confirm the lamp work is included in your booking time.
Doing These at Home: What Is Realistic
The honest home-friendly sets are the ones built on tape, guides and bold shapes: diagonal stripes, colour-block halves, chevrons and half-moons all forgive a learning hand. Freehand patterns, herringbone, marble and the starburst rays, are doable with a fine brush and a slow evening, The four gel sets (ideas 3, 8, 14 and 16) need a gel kit and a lamp, full stop; regular polish will not hold their layers. Do a small patch test with any new gel product first, and practise on one hand at a time while you learn.
Keeping the Colours True: Care Notes
Red pigment is the keenest stainer in the polish drawer, so a base coat is not optional with this pairing, it keeps scarlet from tinting the natural nail as the set grows out. Wear gloves for washing up. Top up your top coat every few days to keep matte and glossy zones reading as planned. If you wear any of the gel sets, do not peel them off when they lift; peeling takes nail layers with it. Book a professional removal, keep soaks short, and let a lifting edge be your cue to book in rather than to pick.
Red and Green Christmas Nails: Your Questions
Can short nails carry red and green patterns?
Yes, and some patterns suit short nails better than long ones. Half-moons, diagonal stripes and colour-block halves keep their shapes in a small space.
Do red and green nails suit every skin tone?
Usually, yes, the trick is shade depth rather than the pairing itself. Deeper scarlet and emerald often sit richer on deep skin, while brighter shades often pop on fair skin; medium tones tend to carry both well.
How do I stop red polish from staining my nails?
Start with a proper base coat and do not skip it under scarlet. Remove the set with remover on a pad held in place briefly, rather than scrubbing, which pushes pigment around.
Can I do the checkerboard set at home?
Only with a gel kit and a lamp, the squares are built in cured layers, which is what keeps the edges sharp. Without gel, try the colour-block halves instead; the effect is nearly as bold and regular polish handles it well.
Which finish photographs better, matte or glossy?
Glossy usually reads richer in evening photos because it catches the light on both shades. Matte photographs beautifully in daylight and makes grids look like fabric. The side-sweep split in idea 13 uses both.