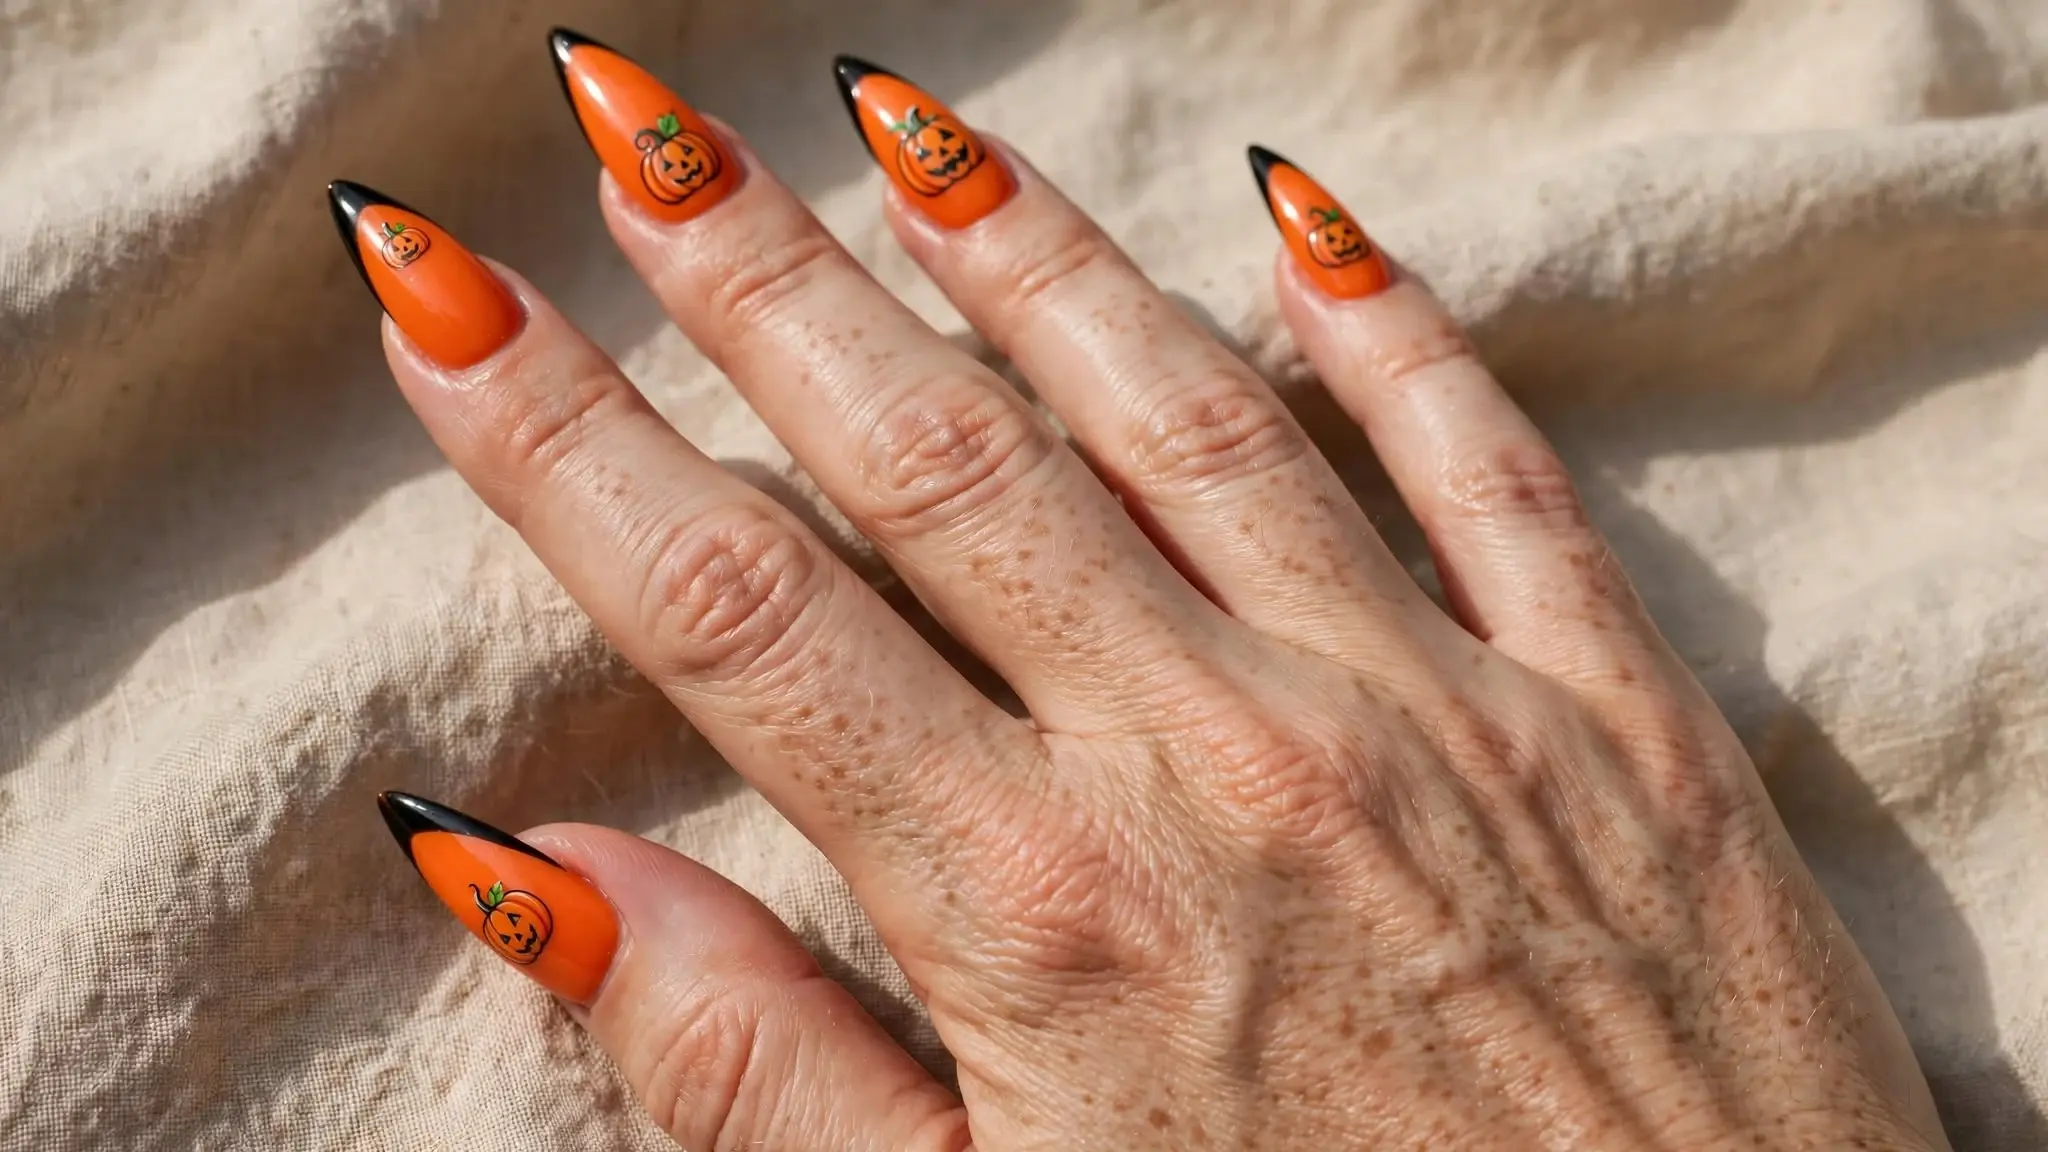
17 Orange Halloween Nails That’ll Make Your Costume Look Twice as Good
Let me tell you about the Halloween I showed up to a party in a $20 witch costume and somehow got more compliments than the girl in the $200 custom vampire gown. The secret? My nails. I had painted them bright orange with tiny black bats, and all night long, strangers kept grabbing my hands to look closer. One girl said, “Wait, your nails ARE the costume.” She was right.
Orange Halloween nails are the ultimate costume cheat code — they work with literally every costume, they photograph beautifully, and they cost almost nothing. Orange is the color of pumpkins, candy corn, falling leaves, and cozy October everything, which means these seventeen designs will carry you from the first pumpkin spice latte of the season straight through Halloween night.
The Classics — Orange Nails Everyone Recognizes
1. The Classic Pumpkin Patch
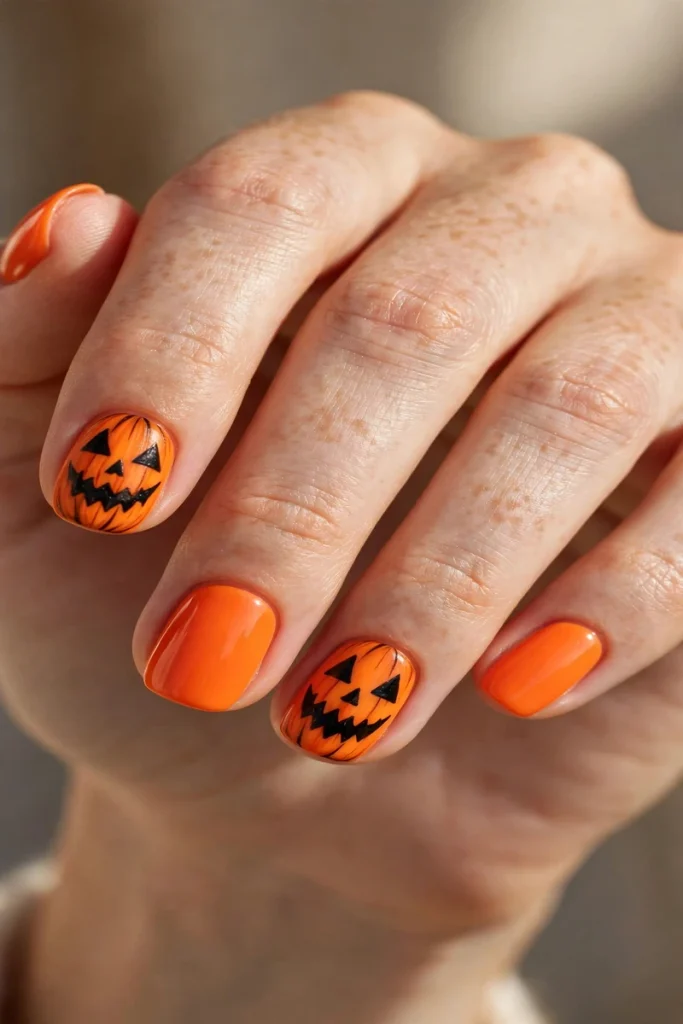
Every great Halloween nail journey starts with the pumpkin, and this design is the gold standard. Bright, juicy orange polish on every nail with hand-painted jack-o’-lantern faces on two accent nails — triangle eyes, a jagged grin, maybe a little green stem on top. I did this one for my first-ever Halloween office party, and my boss — who had never once commented on my nails — stopped me in the hallway to ask where I got them done. The trick to keeping the faces from looking lopsided is to use the very tip of a dotting tool or even a toothpick, and to paint the face before your orange base fully dries so the black melts in just slightly. This is a DIY-friendly design that takes about forty-five minutes, and a salon will charge you around $45 to $65 for the full set with the hand art.
2. Candy Corn Tips
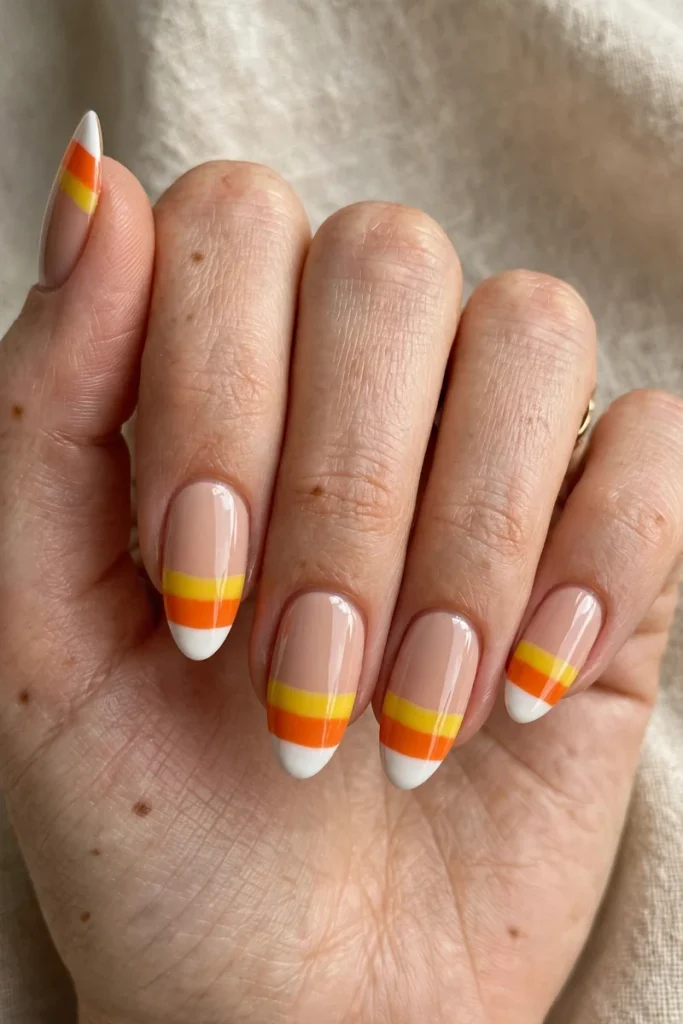
Candy corn is the most controversial candy on earth, but as a nail design, it is pure genius. Picture a French tip reinvented: white at the base of the tip, a band of bright orange in the middle, and sunny yellow at the very edge. It reads as candy corn instantly, even from across the room. I wore these to a fall festival last year and no fewer than three kids pointed at my nails and yelled “candy corn!” which I count as a design success. The key is clean lines between the color bands — use thin striping tape or a steady hand with a detail brush. This works on any nail shape but looks especially sharp on almond or oval nails, and the whole thing costs you one bottle of white, one of orange, and one of yellow if you’re doing it at home.
3. Black and Orange Ombré
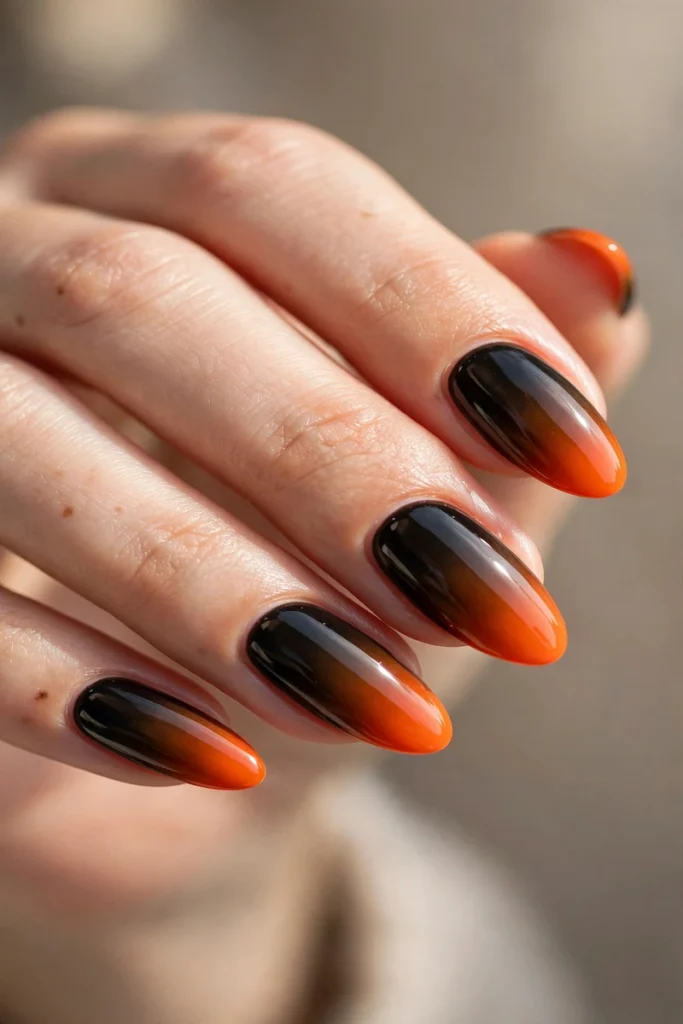
Ombré is the manicure equivalent of a perfect sunset, and a black-to-orange fade is Halloween in a bottle. Start with deep black at the cuticle and blend it into a blazing orange at the tip — or reverse it, with orange at the base melting into black tips, which is somehow even spookier. I’ll be honest: my first attempt at this looked like a muddy mess, because I didn’t blend enough. The secret is a makeup sponge. Paint stripes of black and orange polish onto the sponge, dab it onto the nail, repeat three times, and you get a seamless gradient. Finish with a glossy top coat and it looks like something from a professional salon. This design photographs incredibly well, which is exactly why it goes viral on Pinterest every single October.
4. Glittery Jack-o’-Lantern
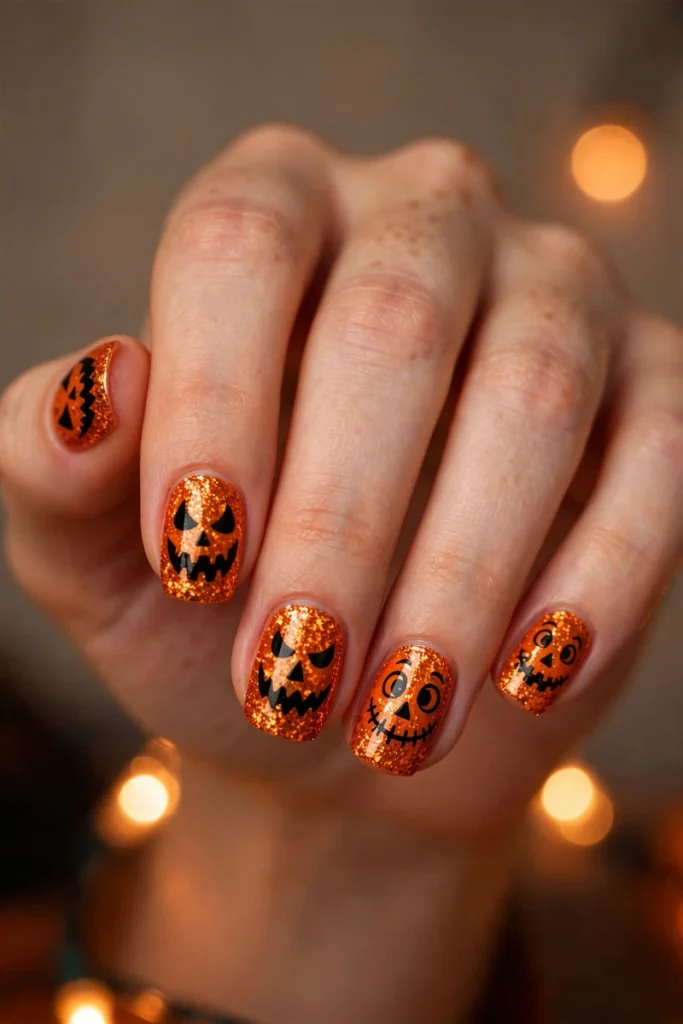
Some girls do subtle Halloween nails. This design is not for them — and I mean that as the highest compliment. Start with a full-coverage orange glitter polish (the chunkier the glitter, the better), then paint bold black jack-o’-lantern faces over the sparkle. The contrast between the twinkling orange background and the stark black faces is absolutely electric under party lighting. I wore these to a Halloween bar crawl and my nails caught the light every time I picked up my drink, which made me feel like a walking disco ball in the best possible way. Fair warning: glitter polish takes longer to remove, so soak your nails in acetone-soaked cotton wrapped in foil for ten minutes instead of scrubbing. Your nails will thank you.
5. The Spooky Spiderweb Accent
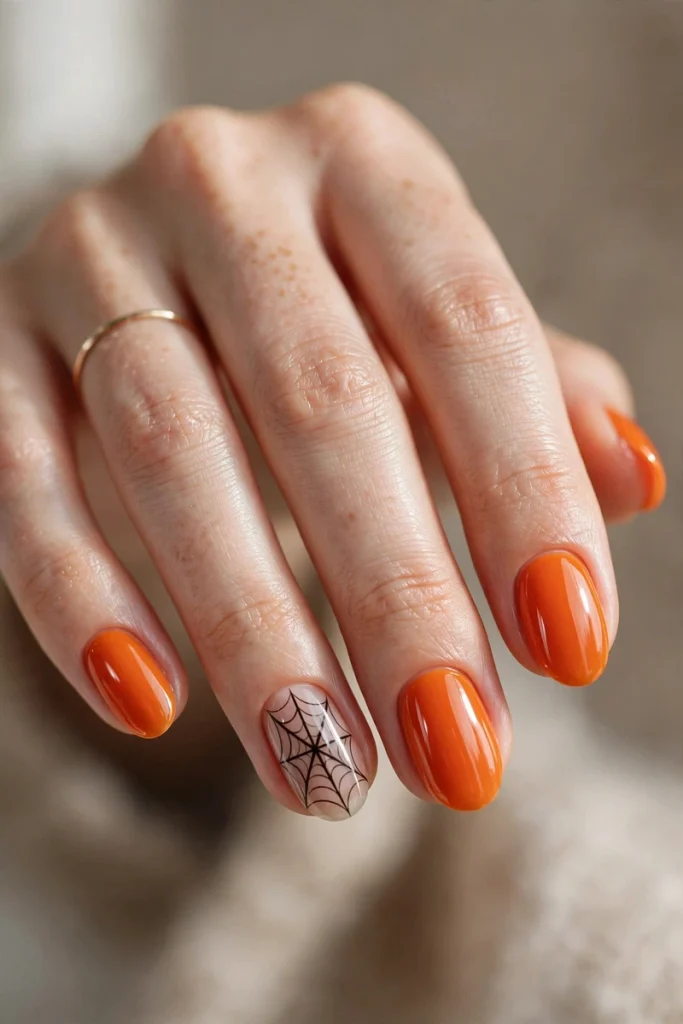
Here’s the design for girls who want Halloween nails that whisper instead of scream. Keep most nails a rich, glossy orange, then paint one delicate black spiderweb on each ring finger — thin curved lines radiating from one corner, connected with little arcs. Add a tiny spider on one web if you’re feeling brave. I did this for a work week in October when I wanted festive nails that wouldn’t scare my clients, and it was the perfect middle ground: clearly Halloween, completely professional. A fine detail brush is your best friend here, and if your hand shakes, rest your pinky on the table to steady yourself. This is a thirty-minute DIY job that looks like a sixty-dollar salon design.
The Spooky Details — Little Touches, Big Impact
6. Burnt Orange Matte
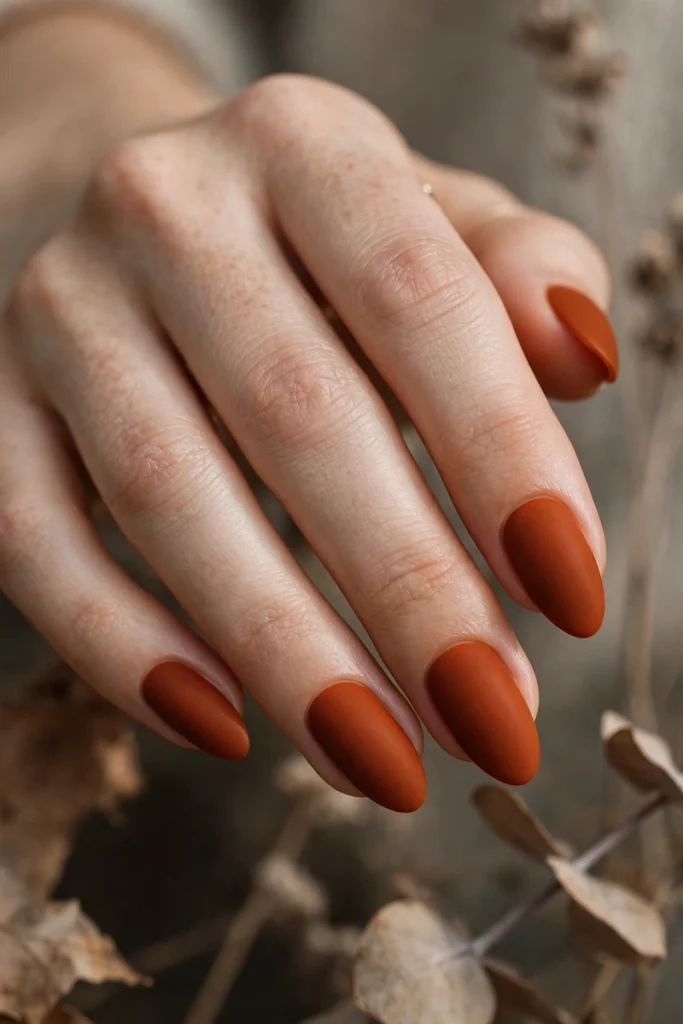
Not every Halloween nail needs a pumpkin face or a spiderweb. Sometimes the spookiest thing is a deep, moody, burnt orange in a flat matte finish — the color of dried autumn leaves and candlelit October evenings. Matte polish makes everything look more expensive and more editorial, and burnt orange is flattering on every single skin tone. I wore this to a fancy Halloween dinner party where costumes were optional, and it was the perfect choice: festive enough to be on-theme, elegant enough for a sit-down dinner. The only catch with matte is that it shows every chip, so use two coats of color and a matte top coat, and reapply the top coat every two days to keep it fresh.
7. Ghostly White and Orange
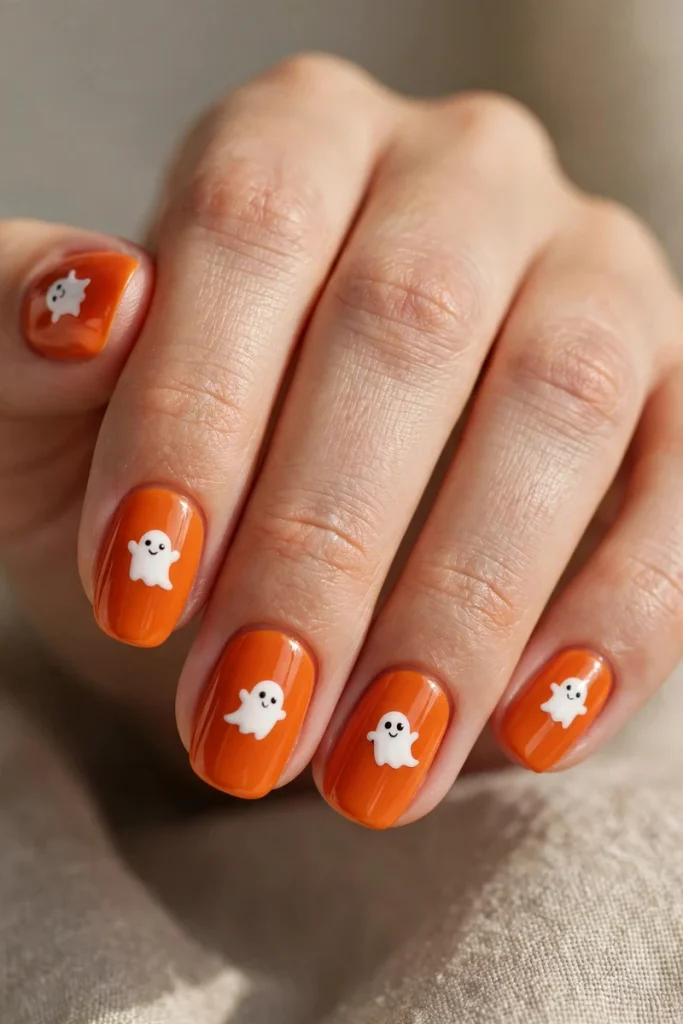
Orange and white is the friendliest color combo on this list, and these little ghost nails prove it. Paint your nails a warm pumpkin orange, then add the simplest ghost you’ve ever drawn: a white rounded blob with two black dot eyes. That’s it. The ghosts look like they’re floating across your nails, and the whole design is so cute it almost doesn’t feel like Halloween — it feels like a cartoon. I did these with my niece last year (she’s seven, and she painted her own ghosts while I supervised), and her ghosts were wobbly and imperfect and absolutely adorable. This is the perfect beginner design: if you can draw a blob, you can do ghost nails.
8. Metallic Copper Chrome
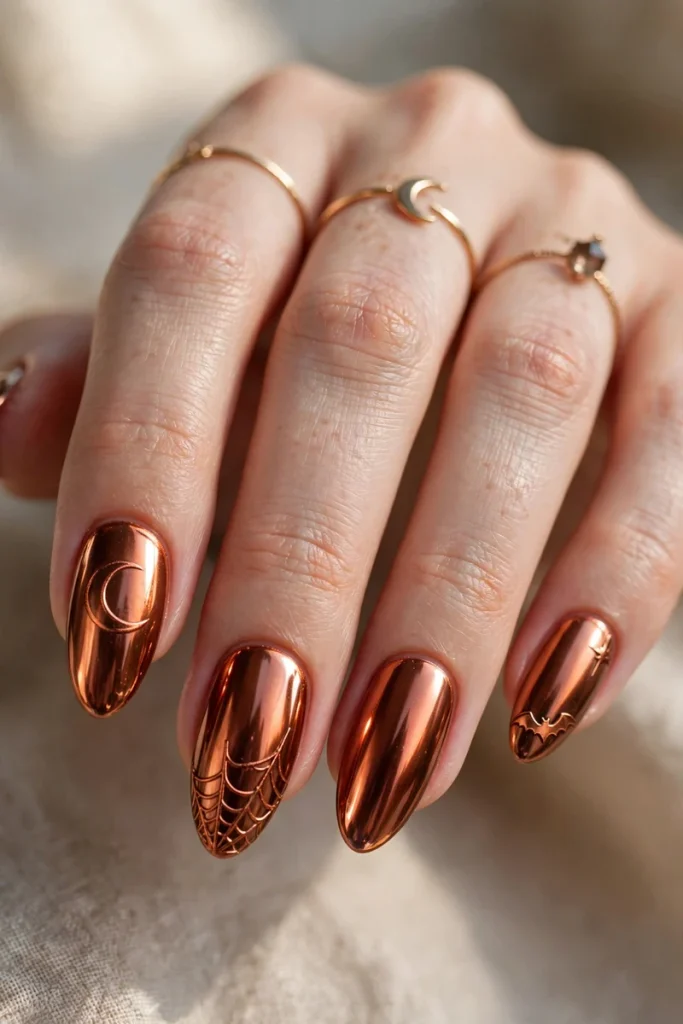
If your Halloween aesthetic is more “glamorous witch” than “scary witch,” metallic copper chrome is your design. Chrome powder buffed over an orange base creates a mirror-like, molten-copper finish that looks like liquid metal on your nails. It catches light from across the room and makes your hands look like jewelry. I got this done at a salon before a Halloween wedding (yes, people have Halloween weddings, and they’re amazing), and I spent the entire reception staring at my own hands. The chrome effect needs a gel base to really work, so this is one to leave to a professional — expect to pay $60 to $80 — but the result lasts a full two weeks without chipping.
9. Tiny Pumpkin Art
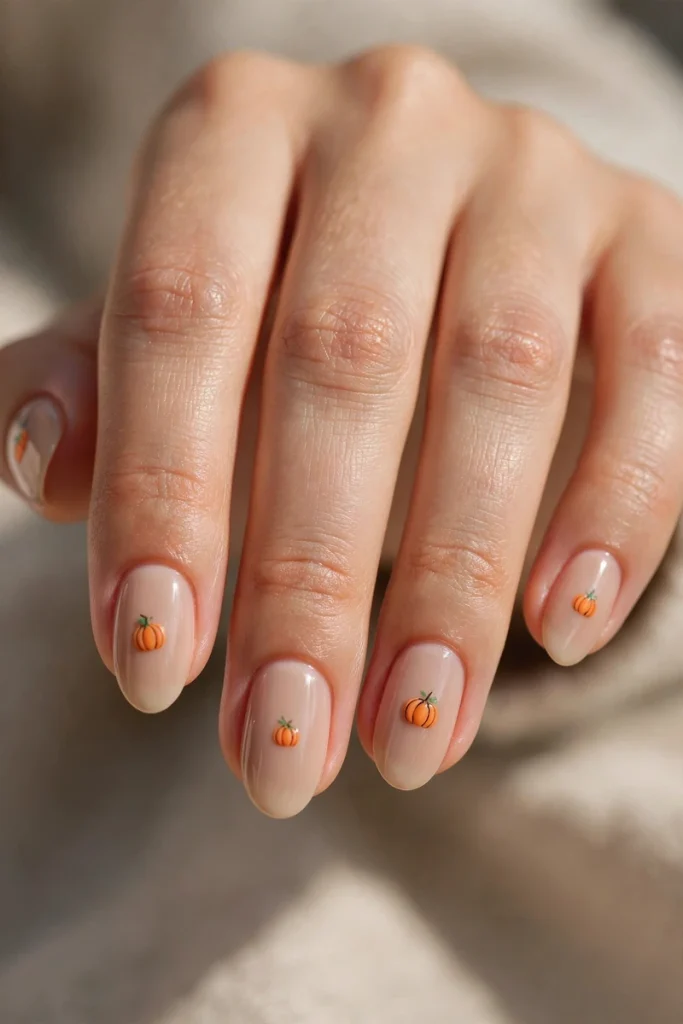
Sometimes less orange is more. Start with a soft nude or sheer pink base, then paint one tiny orange pumpkin on each nail — just a little round orange shape with a green stem, no bigger than a grain of rice. The negative space makes the pumpkins pop, and the whole look is delicate, feminine, and surprisingly sophisticated. This was my choice for a Halloween baby shower I attended (the theme was “a little pumpkin is on the way,” obviously), and it was perfect: festive without being costume-y. Tiny art requires patience and a steady hand, so put on a podcast, take your time, and remember that slightly imperfect pumpkins look more charming than perfect ones.
10. The Black Cat Silhouette
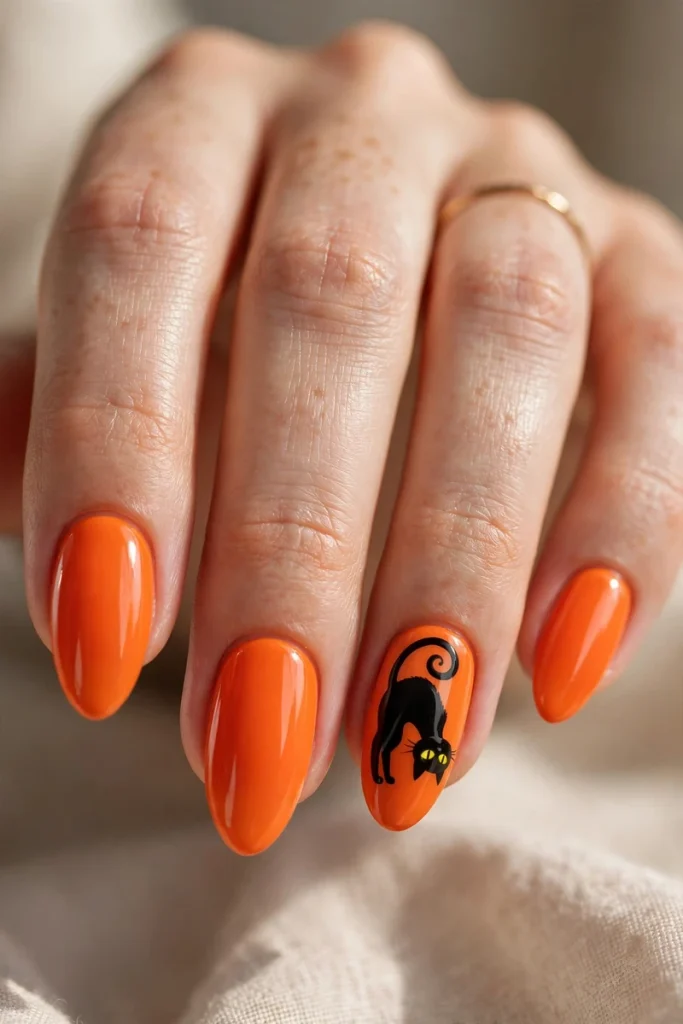
Black cats and Halloween go together like pumpkin and spice, and this design puts the iconic silhouette front and center. Bright orange nails with a sleek black cat — arched back, curled tail, glowing yellow eyes — painted on one or two accent nails per hand. The first time I attempted a cat silhouette freehand, it looked more like a blob with ears, so here’s my honest advice: use a nail art sticker or stamp for the cat and paint the orange base yourself. Nobody will know, nobody will care, and your cats will actually look like cats. This design is a conversation starter — at my Halloween party, a total stranger spent five minutes examining my cat nails before admitting she was a crazy cat lady too. Instant friendship, courtesy of nail art.
The Showstoppers — Nails That Steal the Party
11. The Orange French Twist
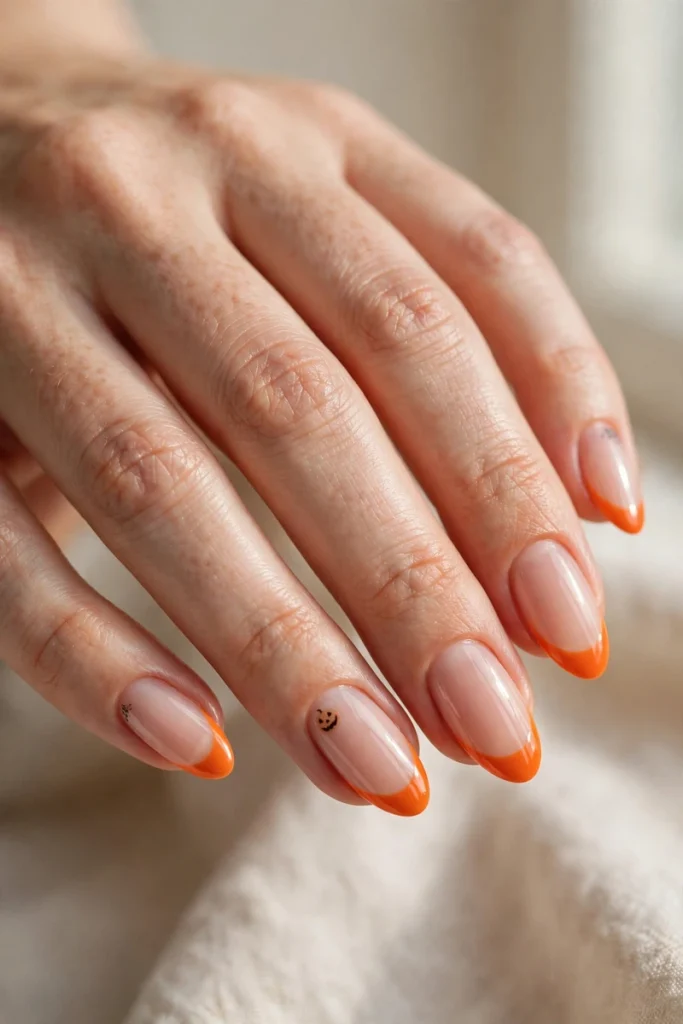
The French manicure got a Halloween makeover, and honestly, it’s better than the original. Instead of white tips, paint your tips in a vivid tangerine orange over a nude base — or go bolder with black bases and orange tips for maximum drama. This design is the definition of wearable Halloween: it works at the office, at brunch, and at the costume party, which means you can wear it for the entire month of October without feeling over-the-top. I wore orange French tips for two straight weeks last fall and got asked about them constantly. The trick to crisp tips is to paint the tip color first, let it dry completely, then clean up the smile line with a small brush dipped in acetone. Salon price for this is usually just a few dollars more than a regular French.
12. Bat Wing Accent Nails
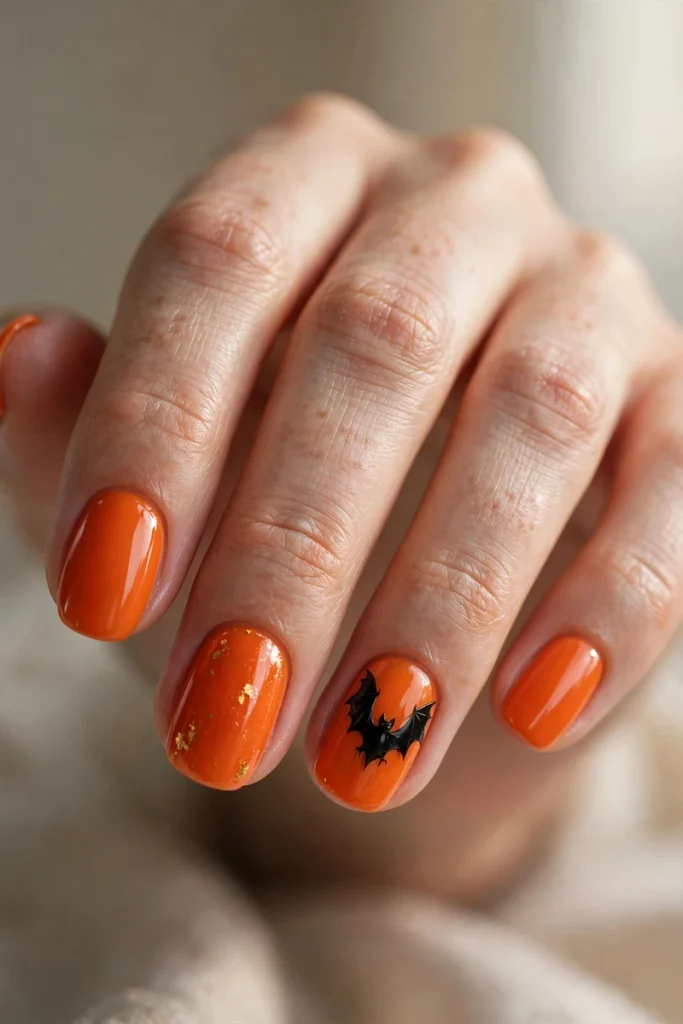
Bats are the unsung heroes of Halloween — spooky, elegant, and surprisingly easy to paint. Keep your nails a glossy orange and add one dramatic black bat silhouette spreading its wings across an accent nail. The wings look complicated but they’re really just two curved triangles with scalloped edges, and once you paint one good bat, you’ll want to put bats on everything. I paired these with an all-black outfit for a Halloween concert and felt like the coolest person in the venue. Pro tip: paint the bat slightly off-center on the nail rather than dead center — it looks more dynamic and artistic, like the bat is actually in flight.
13. Harvest Plaid
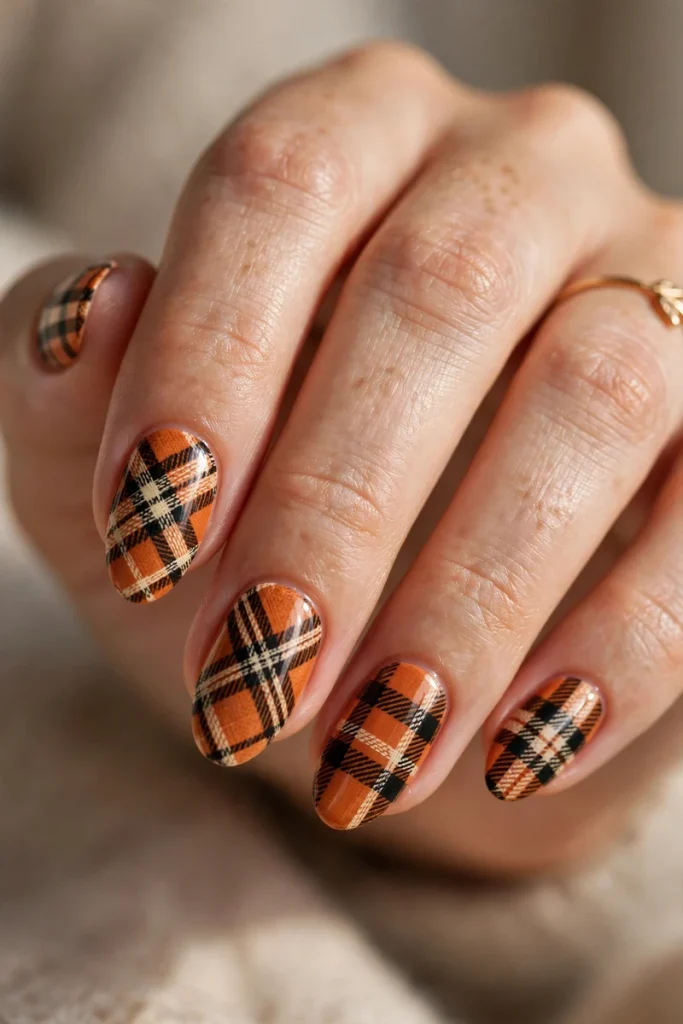
Plaid isn’t just for flannel shirts anymore. An orange, black, and cream plaid pattern on your nails is the coziest Halloween design imaginable — it looks like your favorite fall scarf shrunk down to fingertip size. The pattern is just crisscrossing lines in different widths, which sounds simple until you try to keep the lines straight (use striping tape, trust me). I wore harvest plaid nails to a pumpkin patch with my friends, and they matched the flannel I was wearing so perfectly that we took about fifty photos. This design screams autumn even without any spooky elements, so it’s perfect if you want October nails that aren’t too costume-y.
14. Glowing Neon Orange
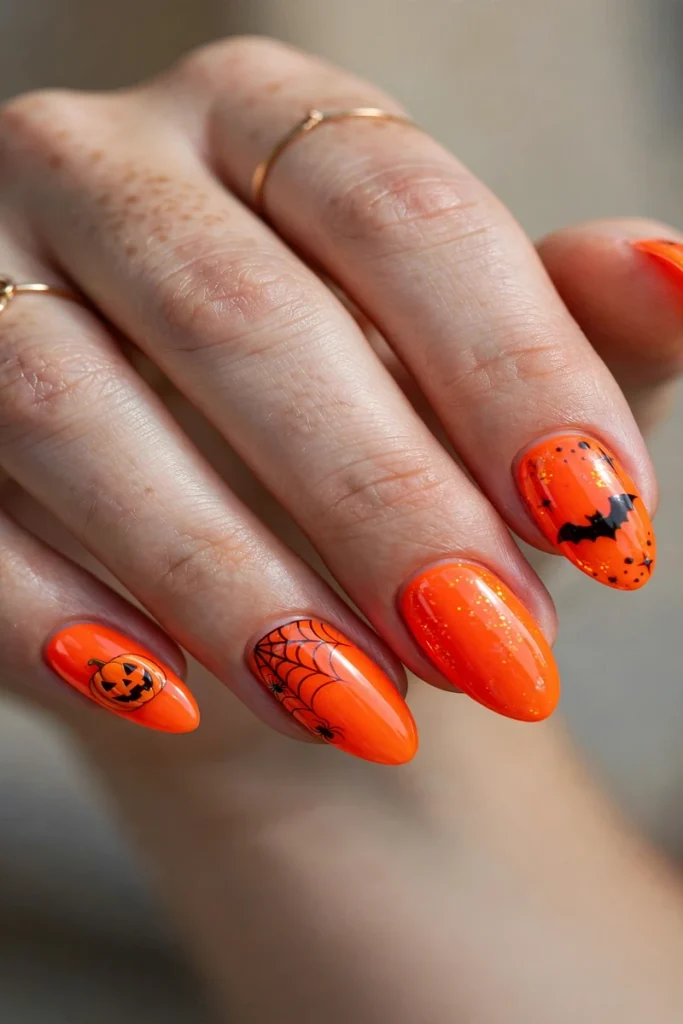
Neon orange nails don’t just look bright — they practically vibrate. Under normal light they’re a shocking, electric tangerine; under blacklight at a Halloween party, they actually glow. I wore neon orange to a glow-in-the-dark Halloween party last year and my hands looked like they were plugged into an outlet. If your Halloween plans involve any kind of party with special lighting, this is the design that will get you noticed. Neon polishes can be a little sheer, so layer three thin coats over a white base to make the color truly pop. One warning: neon stains, so use a good base coat unless you want orange-tinted nails until Thanksgiving.
The Wild Cards — For the Bold and the Brave
15. Drippy Slime Tips
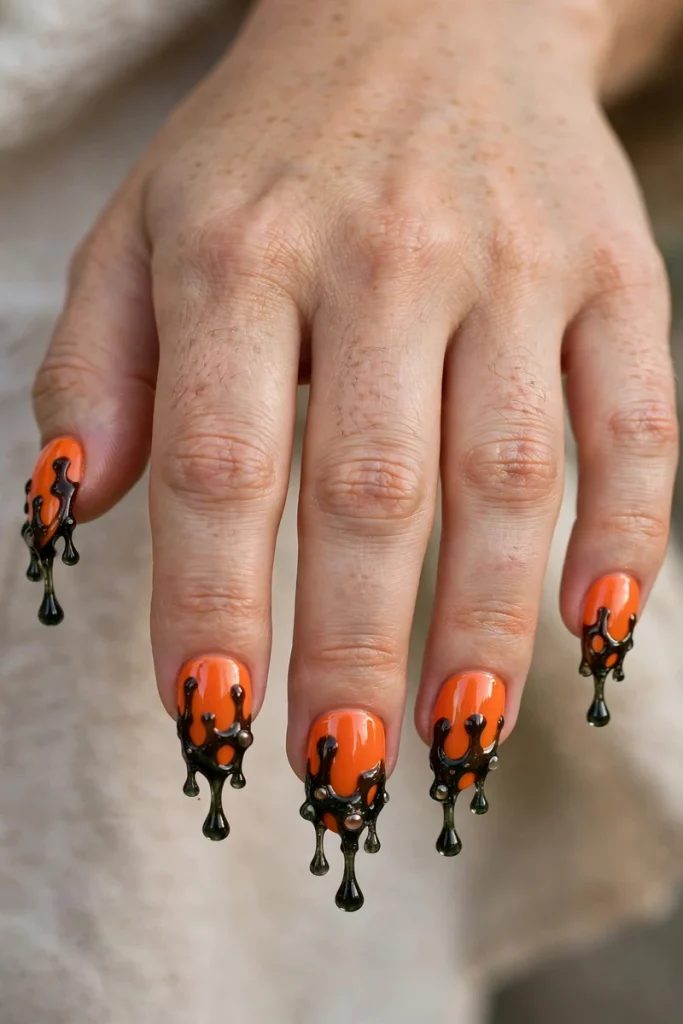
Slime nails are disgusting in the best possible way. Paint your nails orange, then add drips of dark green or black “slime” melting down from the cuticle or up from the tip — like something oozing, in the most festive sense. This design is gloriously gross and weirdly satisfying to look at, and it always gets a reaction. I did slime nails for a horror movie marathon with my friends, and every time someone looked at my hands, they made a face — the good kind of face, the “ew, cool!” face. The drips are easy: paint wavy lines of varying lengths with a detail brush, then fill them in. Imperfect drips look more realistic, so this is very forgiving for beginners.
16. Autumn Leaves Detail
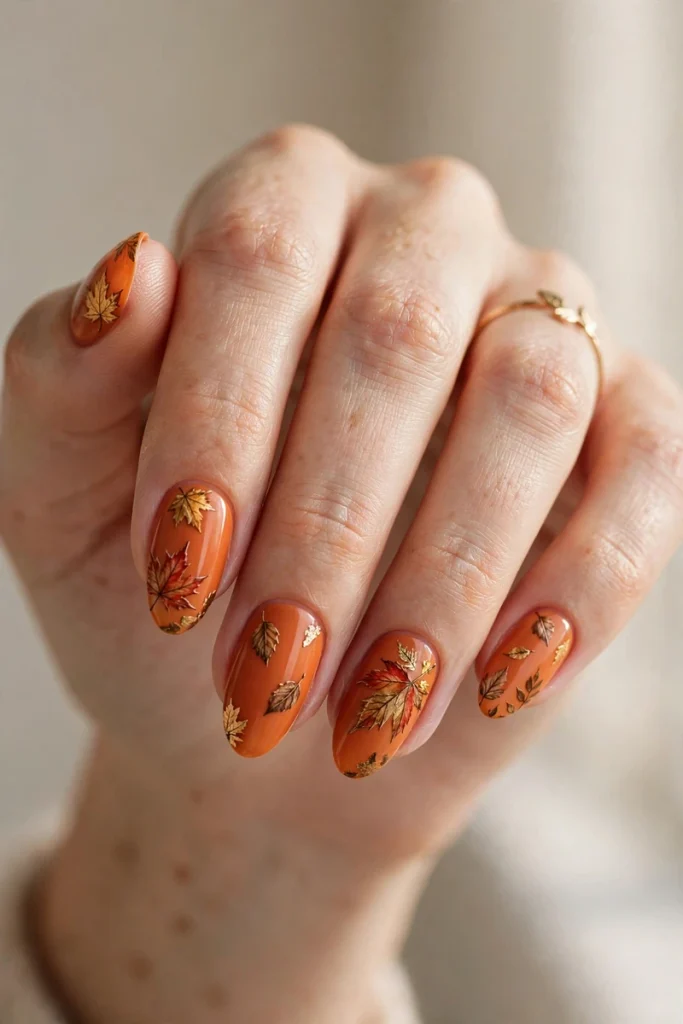
Here’s the design for the girl whose favorite season is fall for the foliage, not the frights. A warm orange base with delicate hand-painted autumn leaves in gold, red, and brown scattered across the nails — like leaves caught in a breeze. It’s romantic, it’s seasonal, and it transitions beautifully from early October all the way through Thanksgiving, which means you get nearly two months of wear out of one manicure idea. I wore leaf nails to a fall wedding and they were the perfect accessory: seasonal without being spooky. Painting tiny leaves takes a small brush and some patience, but each leaf is just a pointed oval with a center line — simpler than it looks.
17. Witchy Purple and Orange
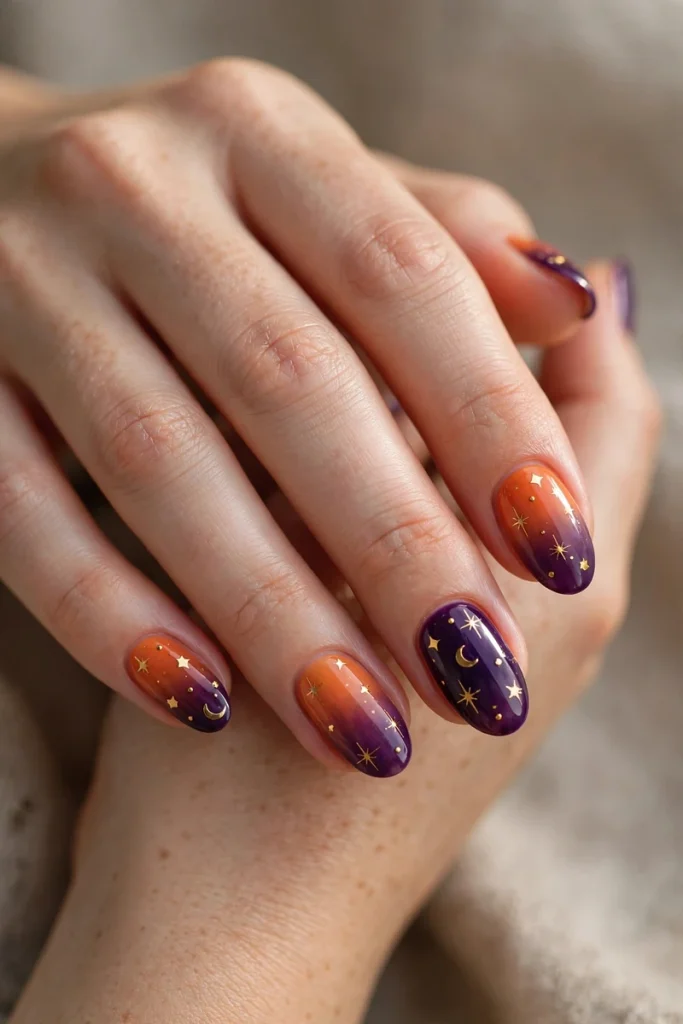
We saved the most magical for last. Orange and purple together is the color palette of every witch’s dream — think potion bottles, spell books, and midnight skies. Alternate orange and deep purple nails, or do an orange-to-purple ombré, and add tiny gold stars or moons on the accent nails. I wore this design to a witch-themed Halloween party (yes, the whole party was witches, it was incredible), and my nails matched my purple velvet cape so perfectly that people assumed I’d planned it for weeks. I had planned it for about an hour. The gold details are what elevate this from pretty to enchanting — a thin gold stripe or a tiny star sticker makes all the difference.
Nail Care Tips for a Lasting Halloween Manicure
Before you pick your design, a few practical notes from someone who has ruined many manicures through trial and error. Always start with a base coat — orange and neon polishes are notorious stainers, and a good base coat is the difference between festive nails and orange-tinted nails for weeks. Cap the free edge of each nail (that means painting polish over the very tip) to prevent chipping. And if you’re doing nail art at home, invest in a detail brush set — the five-dollar set from the beauty supply store will change your life. With proper care, your Halloween manicure should last seven to ten days, which gets you through all the October festivities.
FAQs
How long do orange Halloween nail designs last?
A regular polish Halloween manicure lasts about five to seven days, while gel versions last two to three weeks. Nail art with hand-painted details tends to chip a little faster around the edges, so add a fresh layer of top coat every two to three days to extend the life. If you’re doing your nails for a specific party, paint them the night before for maximum freshness.
Can I do these designs at home, or do I need a salon?
Most of these designs are very DIY-friendly — the pumpkin faces, ghosts, candy corn tips, and slime drips just need a steady hand and a detail brush. The designs I’d leave to a professional are the chrome (which needs gel and special powder), complex ombré blends, and anything with 3D elements. A good rule: if it needs special equipment, book the salon; if it just needs polish and patience, try it at home first.
What nail shape works best for Halloween designs?
Almond and oval shapes are the most versatile for Halloween art — they give you a nice canvas without sharp corners that catch on things. Coffin and stiletto shapes look dramatic and amazing with spooky designs, but they’re more prone to breaking if you’re not used to them. Short square nails work beautifully too, especially for simpler designs like the matte orange or the French twist. Honestly, the best shape is the one you’re comfortable wearing.
How do I remove glitter nail polish without damaging my nails?
Don’t scrub — soak. Saturate a cotton ball with acetone-based remover, place it on the nail, wrap the fingertip in a small piece of foil, and wait ten minutes. The glitter will slide right off. Peeling glitter polish off by hand is tempting but it pulls up layers of your natural nail, leaving them thin and weak. Your future manicures will thank you for the patience.
Conclusion
Here’s the thing about orange Halloween nails: they’re the hardest-working accessory in your entire October wardrobe. They cost less than a fancy coffee, they take less than an hour, and they make every costume, every outfit, and every pumpkin-spice-flavored moment a little bit more fun. Whether you go for the classic pumpkin patch, the glamorous copper chrome, or the gloriously gross slime drips, your nails are going to get noticed — and you’re going to love it. So grab that orange polish, put on your favorite scary movie, and give yourself the manicure your Halloween deserves. Your hands are about to become the most complimented part of your costume.