16 Fall Nail Art Ideas, Explained Like Art Class (No Talent Required)
In school, I was the girl who got told, “Nice effort.” My drawings looked like something a raccoon had done in the dark. So when I first tried nail art, I expected a disaster.
Instead, I found out that nail art is not really about drawing. It is about a handful of small techniques, like dotting, dragging, sponging, and taping. Once you know which technique a design uses, you can make almost anything, even if your handwriting is shaky.
That is why I built this post like an art class syllabus. The 16 designs are grouped into four “classes,” each teaching one technique: Dotting Class, Drag and Swirl Class, Sponge and Blend Class, and Line and Tape Class. You learn the skill once, then apply it to four different fall designs. By the end, you will have a small skill set instead of a screenshot folder you never use.
Here is what else you will find, all things I rarely see in nail posts:
- The Supply Closet, a short shopping list of tools that cost very little
- The Fall Palette Wheel, for choosing colors that always work together
- The Composition Rule, the art-school principle that keeps nail art from looking cluttered
- The Gallery Wall, a way to plan nail art across all ten fingers
- The Mistake Museum, where common disasters become quick fixes
- A Final Exam, a fun challenge to test what you have learned
The Supply Closet
You do not need a big kit. These six items cover nearly every design below.
| Tool | What It Does | Cheap Substitute |
|---|---|---|
| Dotting tool | Makes dots, small circles, and petals | Bobby pin or the end of a pen |
| Fine detail brush | Draws thin lines and small shapes | A toothpick |
| Makeup sponge | Blends colors for gradients | A small piece of dish sponge |
| Striping tape | Makes straight lines and geometric shapes | Thin tape cut into strips |
| Clean-up brush | Erases mistakes around the edges | Cotton swab dipped in remover |
| Thick top coat | Seals the art and smooths bumps | None, this one is worth buying |
The Fall Palette Wheel
Choose one palette per manicure so your colors always look related.
| Palette Name | Colors | Mood |
|---|---|---|
| Harvest | Burnt orange, mustard, cream, brown | Warm and classic |
| Forest | Olive, forest green, tan, gold | Earthy and calm |
| Cellar | Burgundy, plum, black cherry, gold | Rich and romantic |
| Café | Milky mocha, caramel, cream, chocolate | Soft and cozy |
| Dusk | Slate blue, gray, terracotta, cream | Cool and modern |
Rule: Use no more than three colors from a palette on one manicure, plus one metallic if you like.
The Composition Rule
Art teachers use a simple principle that nail artists rarely mention: one focal point per composition. On your hands, that means:
- One star nail with the main design
- Two or three supporting nails with a smaller echo of the design
- The rest plain in a base color from your palette
If every nail has a design, the eye does not know where to look, and the manicure looks busy. If one nail leads and the others support, the whole set looks planned.
Class One: Dotting Class
Skill: making round, even dots with a tool. This is the easiest technique, so start here.
The method: Dip the tip of the tool in polish, touch it to the nail, and lift straight up. Do not drag. Wipe the tool between colors.
1. Falling Leaves Dots
Palette: Harvest
The look: A cream base with tiny orange, mustard, and brown dots drifting down from the tip.
Difficulty: Easy
Teacher’s note: Vary the dot sizes. Slightly uneven dots look like real leaves falling.
2. Dotted Sunflower
Palette: Harvest
The look: A brown center dot surrounded by a ring of small mustard dots on one nail.
Difficulty: Easy to medium
Teacher’s note: Place the center dot first, then the ring. Seven or eight petals is plenty.
3. Berry Cluster
Palette: Cellar
The look: Three to five burgundy dots grouped together on a nude nail, like a bunch of berries, with a tiny green dash for a stem.
Difficulty: Easy
Teacher’s note: Overlap a few dots slightly so the cluster looks natural.
4. Polka Dot Mocha
Palette: Café
The look: A milky mocha base with small cream dots in a loose pattern.
Difficulty: Easy
Teacher’s note: Space the dots out. Too many make the pattern look like a rash.
Class Two: Drag and Swirl Class
Skill: pulling wet polish with a toothpick to create soft, flowing shapes.
The method: Drop small dots onto a wet base, then drag a toothpick through them once, in one direction. Do not overwork it, or the colors turn muddy.
5. Cinnamon Swirl
Palette: Café
The look: A cream base with caramel and brown swirls, like cinnamon dough.
Difficulty: Medium
Teacher’s note: Work on one nail at a time so the base stays wet.
6. Marbled Pumpkin Cream
Palette: Harvest
The look: A soft marble of cream, burnt orange, and a hint of gold.
Difficulty: Medium
Teacher’s note: Use only three drops of color per nail. More creates chaos.
7. Heart Drag Border
Palette: Cellar
The look: A row of tiny burgundy hearts along the tip of each nail, made by dragging a dot of polish downward.
Difficulty: Medium
Teacher’s note: Drop two dots side by side, then drag the toothpick through both to make a heart.
8. Feather Wave
Palette: Forest
The look: Olive, sage, and gold curves that drift across a nail like a feather.
Difficulty: Medium to advanced
Teacher’s note: Practice on paper first. The wave shape comes from one confident drag.
Class Three: Sponge and Blend Class
Skill: creating soft gradients and gentle color shifts.
The method: Paint two or three colors side by side on a sponge, then dab it gently on the nail. Clean the skin edges after with a cotton swab dipped in remover.
9. Sunset Behind Trees
Palette: Harvest and Dusk
The look: A peach-to-orange gradient with thin black branch lines across the top.
Difficulty: Medium
Teacher’s note: Paint the branches after the gradient is fully dry, and keep them very thin.
10. Golden Hour Aura
Palette: Café
The look: A soft, blurry circle of honey orange in the middle of a cream nail.
Difficulty: Easy to medium
Teacher’s note: Dab, do not swipe. The aura should look like a glow, not a stain.
11. Misty Forest Ombré
Palette: Forest
The look: Olive at the tip fading into a milky, sheer nude at the cuticle.
Difficulty: Medium
Teacher’s note: Add a thin layer of top coat between sponge layers to keep the blend smooth.
12. Wine Ombré with Gold Speckle
Palette: Cellar
The look: Burgundy fading into a sheer base, with a few gold flecks.
Difficulty: Medium
Teacher’s note: Add gold flecks last, using tweezers.
Class Four: Line and Tape Class
Skill: making clean, crisp lines with tape or a striping brush.
The method: Place tape on a fully dry base, paint over it, and peel the tape while the polish is still slightly wet. Peeling too late lifts the edge.
13. Cozy Plaid Accent
Palette: Forest
The look: A forest green base with thin black and cream lines forming a small plaid pattern on one or two nails.
Difficulty: Advanced
Teacher’s note: Draw the wide lines first, then the thin ones. Let each set dry.
14. Sweater Stripe
Palette: Café
The look: An oatmeal base with two thin caramel stripes across each nail, like a knit sweater band.
Difficulty: Easy to medium
Teacher’s note: Use tape for the straight edges, and seal with a matte top coat for a wool look.
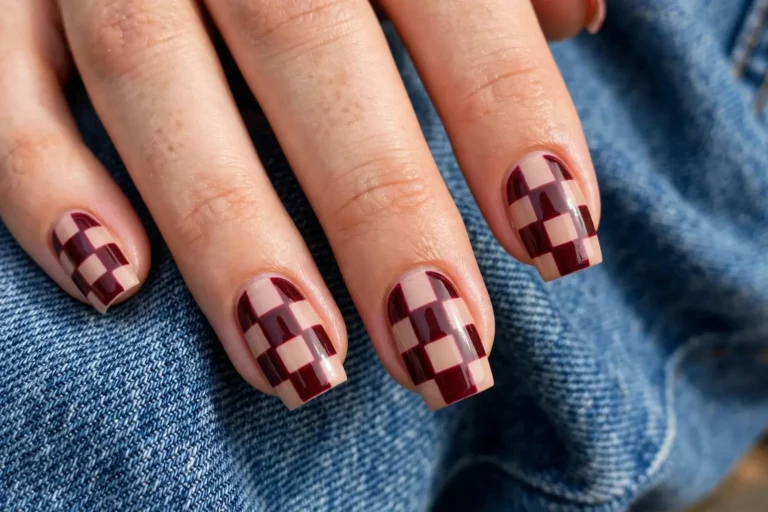
15. Checkerboard Corner
Palette: Cellar and Café
The look: A small corner of burgundy and cream checkers on one nail, with the rest plain.
Difficulty: Advanced
Teacher’s note: Stickers are a great shortcut here, and no one will know.
16. Geometric Gold Frame
Palette: Dusk
The look: A gray base with a thin gold line forming a frame or angle across the nail.
Difficulty: Medium
Teacher’s note: Use gold striping tape for the cleanest result, then seal over it.
The Gallery Wall: Plan Your Ten Fingers
Treat your hand like a small gallery wall. Here is how to place the art.
| Finger | Role | What to Paint |
|---|---|---|
| Thumb | Support | Base color or a small echo of the design |
| Index | Support | Base color with a subtle finish |
| Middle | Star | Your main design |
| Ring | Star or accent | A second design from the same class |
| Pinky | Echo | A tiny detail or plain base |
Tip: If your dominant hand feels tricky, do simpler art on that hand and put the detailed designs on your non-dominant hand.
The Mistake Museum
Every mistake is a future skill. Here are the most common exhibits and how to fix them.
| Exhibit | What Happened | The Fix |
|---|---|---|
| The Smudged Masterpiece | Base was not dry | Wait ten minutes before starting art next time |
| The Wobbly Line | Shaky hand | Use tape or striping stickers |
| The Muddy Swirl | Colors overmixed | Drag once, then stop |
| The Bleeding Dots | Polish too wet | Let the base set slightly before dotting |
| The Peeling Edge | Tape stayed too long | Peel while polish is still slightly wet |
| The Bumpy Surface | Too many layers | Add two coats of top coat to smooth |
| The Chipped Tip | No cap | Cap the free edge with top coat |
Which Class Should You Take First?
| If You Are… | Start With |
|---|---|
| Brand new to nail art | Dotting Class (#1, #3, #4) |
| Comfortable with polish | Drag and Swirl Class (#5, #6, #7) |
| A blender who loves gradients | Sponge and Blend Class (#9, #10, #11) |
| A perfectionist who loves lines | Line and Tape Class (#14, #16) |
Your Final Exam: The 4-Nail Challenge
Once you have tried one design from each class, take the final exam.
- Nail one: A dot design (Dotting Class)
- Nail two: A swirl or marble (Drag and Swirl Class)
- Nail three: A gradient or aura (Sponge and Blend Class)
- Nail four: A line or stripe (Line and Tape Class)
- Nail five: Plain base color from your palette
Repeat on the other hand. You now have a gallery of every technique on one manicure. Take a photo near a window, and you have earned your diploma.
Outfit Match Table
| Outfit | Best Designs |
|---|---|
| Cream or oatmeal sweater | #1, #5, #10, #14 |
| Denim and boots | #2, #6, #9 |
| Black dress or leather | #3, #12, #15 |
| Plaid or flannel | #13, #8 |
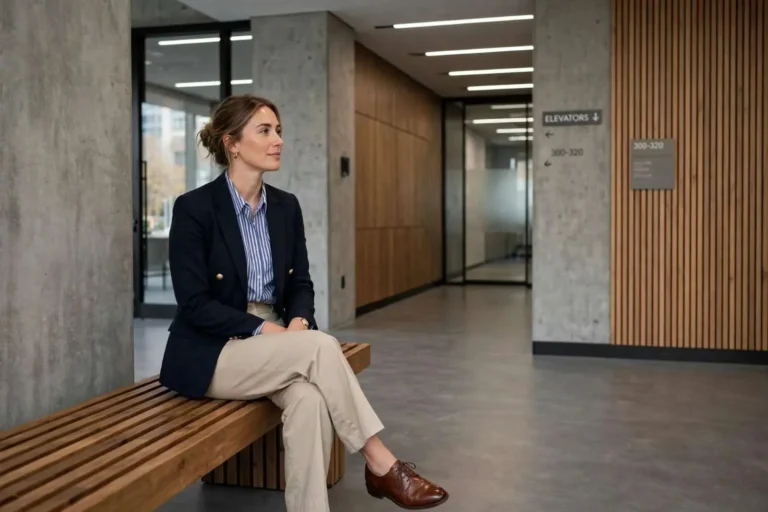
| Office blazer | #4, #11, #16 |
| Velvet or satin | #7, #12 |
Common Nail Art Mistakes
- Adding art to every nail. Follow the Composition Rule and choose one star.
- Using thick polish for details. Thin polish makes cleaner lines.
- Skipping the base coat. Dark colors stain and details chip faster.
- Rushing dry time. Wet layers smudge.
- Choosing too many colors. Stay with three from one palette.
- Forgetting the top coat. It protects the art and adds shine.
Frequently Asked Questions (FAQs)
1. What is the easiest fall nail art for beginners?
Dotting designs like Falling Leaves Dots (#1) and Polka Dot Mocha (#4) are the easiest.
2. Do I need special tools for nail art?
No. A bobby pin, toothpick, makeup sponge, and tape are enough to start.
3. How do I make nail art on short nails?
Choose small designs like dots, thin stripes, and one accent nail. Avoid large patterns that need room.
4. How do I stop nail art from smudging?
Let each layer dry fully, use thin coats, and seal with a top coat.
5. How many nails should have art?
One to three per hand looks polished. All ten can work if the design is very simple.
6. What fall colors work best for nail art?
Burnt orange, mustard, burgundy, olive, chocolate, cream, and gold.
7. How long does nail art last?
Regular polish lasts five to seven days, and gel lasts two to three weeks.
8. Can I do nail art with a shaky hand?
Yes. Use stickers, tape, or a dotting tool, which are more forgiving than brushes.
9. How do I fix a mistake in nail art?
Dip a cotton swab or a clean-up brush in remover and gently erase it, then repaint.
10. What nail shape is best for nail art?
Squoval, oval, and almond are easy to paint, and coffin or square give more space for larger designs.
11. Should I use gel or regular polish for nail art?
Gel is longer-lasting and better for detailed work, while regular polish is cheaper and easier to change.
12. How do I remove glitter or foil art?
Soak a cotton pad in acetone, place it on the nail, wrap with foil for a few minutes, then gently wipe.
Conclusion
Nail art is a skill, not a talent. Once you know the four basic techniques, dotting, dragging, sponging, and taping, you can build almost any fall design, even if your drawing skills stopped at stick figures.
Pick one class, use the Supply Closet, and follow the Composition Rule so your hands look planned. When you are ready, take the Final Exam and see how many techniques you can fit on one hand.
Which class are you signing up for first? Save this post for your next nail night, and send it to a friend who says she is “not artistic.”