17 Halloween Face Paint Ideas That Look Pro-Level (But Are Secretly Easy)
The first time I tried Halloween face paint, I ended up looking like a crayon that had been left in the sun. One eye was bigger than the other, my white base went gray, and the whole thing slid off before I even left the house.
I nearly wiped it all off and went as “woman in a black dress” for the third year running.
Instead, I slowed down, fixed the two things that were actually wrong, and walked into that party to a full minute of people asking who had done my makeup. Nobody believed I had done it myself, in my bathroom, in under half an hour.
Here is the secret nobody tells you. Face paint is not about art skills. It is about order, a light hand, and picking a look that suits your face. Every look below is one I have tested on myself or on a very patient friend at my kitchen table.
Some take ten minutes. Some ask for a slow Sunday afternoon and a podcast. All of them use regular face paint you can find in any seasonal aisle, and I will tell you the exact order to put the colors on, because that is where most looks fall apart.
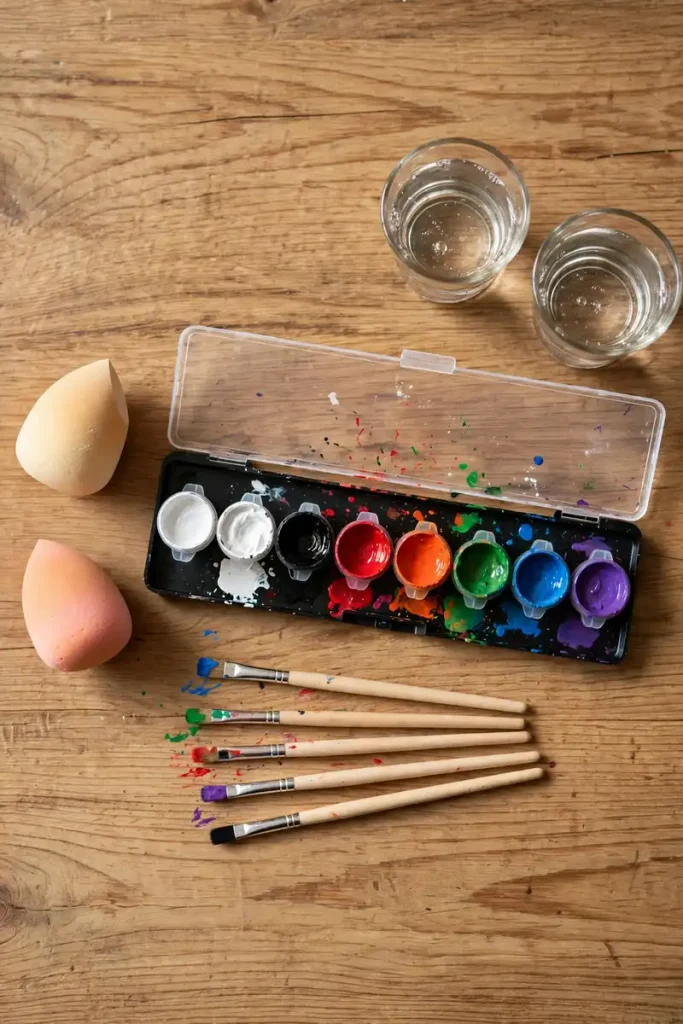
Five Quiet Minutes Before the First Brush Stroke
Start with a clean, dry face and a thin layer of moisturizer, then let it sink in fully. Paint over damp skin smears, and paint over very dry skin cracks, so give it a few minutes either way.
Do a tiny test patch behind your ear if your skin is picky, even with good paint. And keep one rule taped to your mirror if it helps: light colors first, dark lines last. White and pale shades are easy to cover but hard to fix once black sits on top of them.
Tie your hair back, lay out two cups of water, one for light colors and one for dark, and your future self will thank you when the white stays white.
Sweet Faces That Come Together Fast
These are my weeknight looks, the ones I reach for when the invite was last minute and the costume is just a color theme and good intentions.
1. The Cute Pumpkin Everyone Wants a Photo With
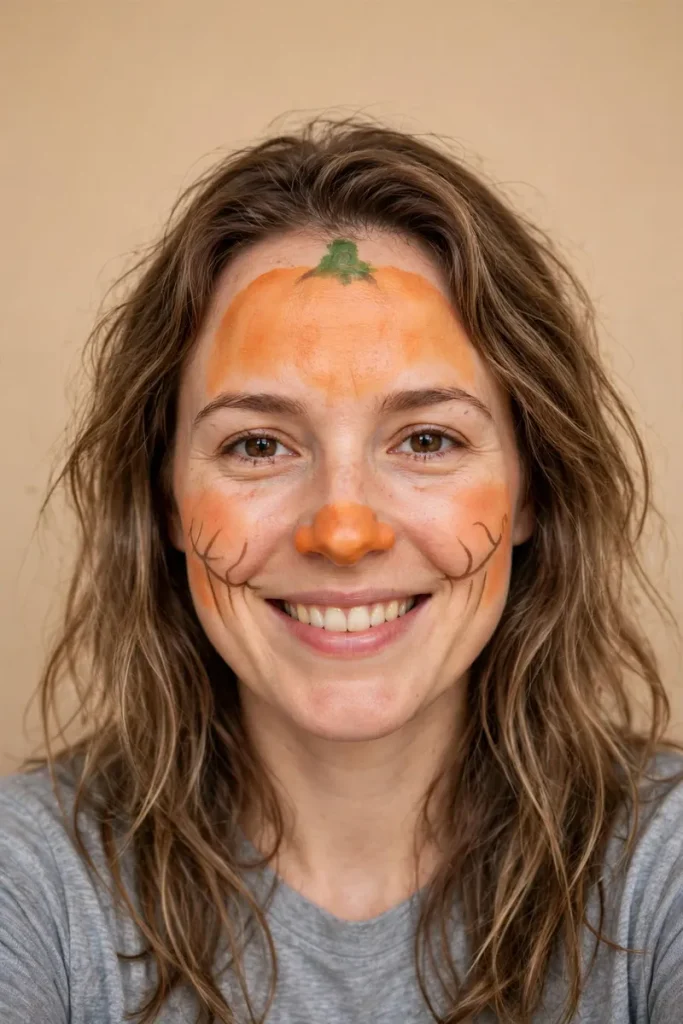
Sponge a soft orange over the cheeks, nose, and forehead, leaving the eye area and chin clean. That broken coverage is what keeps it cute instead of full costume.
Add a small green stem at the top of the forehead, curving a little to one side. Then paint two or three thin brown smile lines along the cheek curves, following your own smile.
A warm brown lip ties it together. My sister wore this with an orange sweater and got stopped for photos all evening, and her whole face took her twelve minutes.
2. Sweet Cat With the Easiest Whiskers Ever
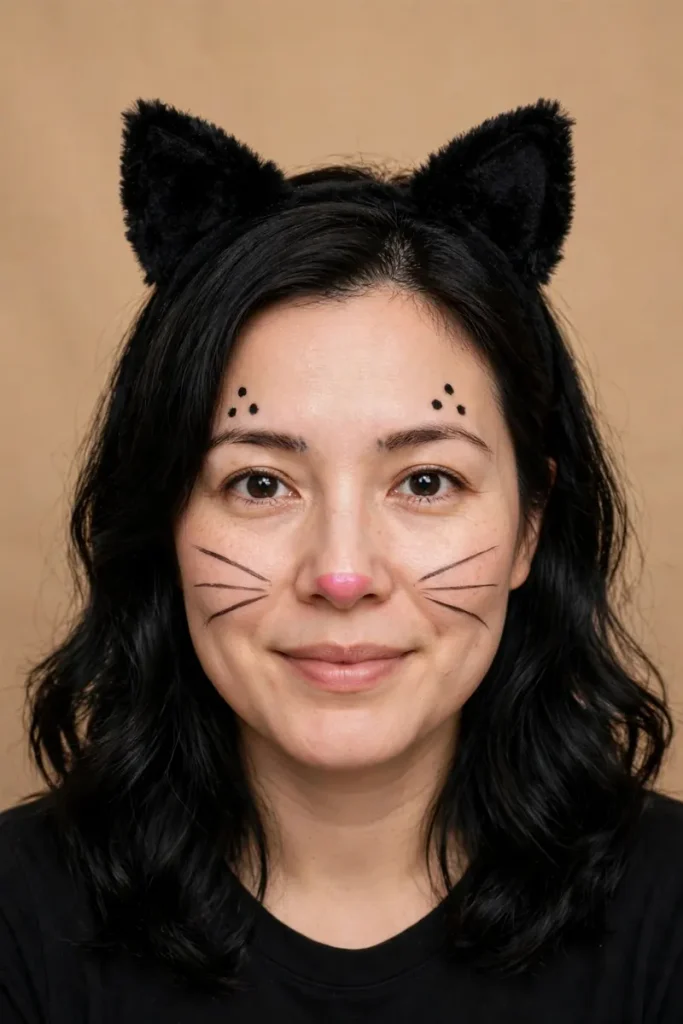
Keep your normal base, then paint a small pink triangle on the tip of the nose. A short black line down from it and a split line over the top lip gives you the cat mouth.
For whiskers, rest your hand against your cheek to steady it and pull three lines outward in one smooth move. Short, quick strokes look cleaner than slow careful ones, which wobble.
Draw a few tiny spots above the brows if you want extra charm. Add ears on a headband and this one never fails, on grown ups or on kids.
3. Friendly Ghost With Rosy Cheeks
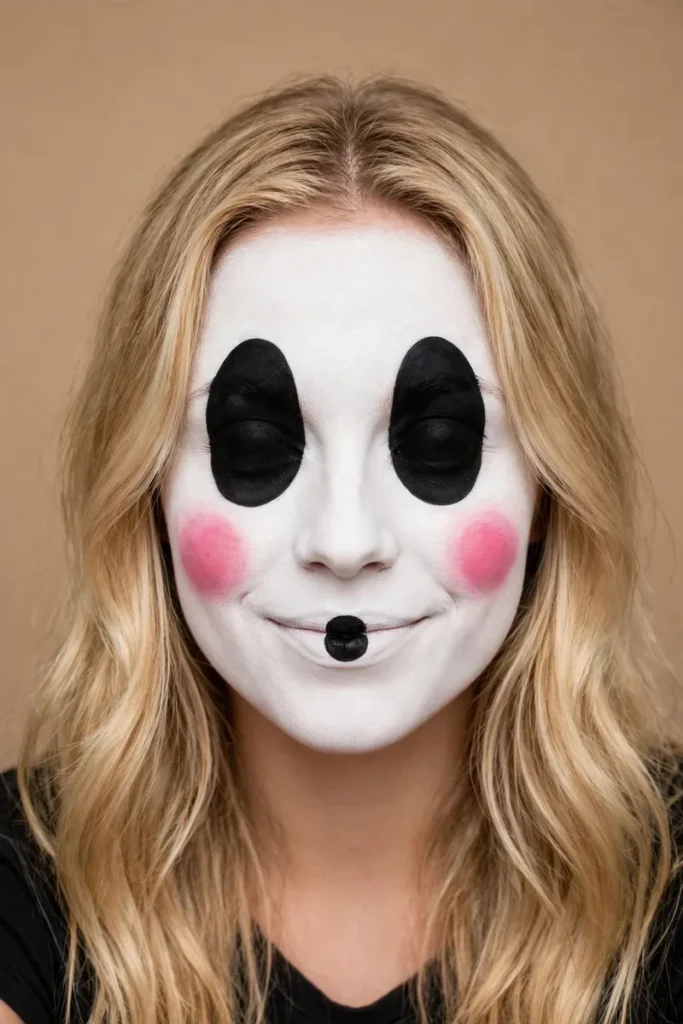
Pat white paint over the whole face with a damp sponge, two thin coats rather than one thick one. Thin coats dry smooth and do not crack when you smile.
Paint two tall black ovals over the eyes, going up toward the brows, and a small round open mouth on the lips. The tall eyes are the whole trick here, they give that sweet surprised look.
Finish with a lot of pink blush in round circles on the cheeks. Without the blush it reads scary, with it, it reads adorable, so do not skip it.
4. One-Eye Butterfly That Looks Like Art
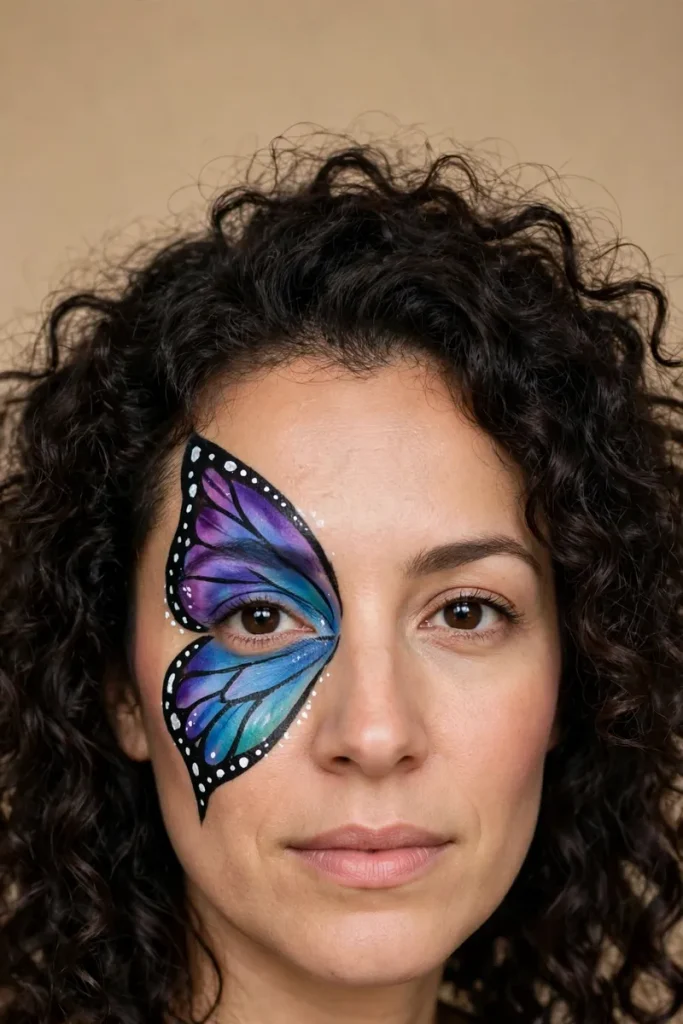
Pick two colors that sit well together, purple and blue or pink and orange. Paint a wing shape around one eye, bigger above the brow, smaller below, with the eye sitting where the body of the butterfly would be.
Outline the wing in black with a thin brush, then add white dots along the edge. Dots forgive everything, they make uneven edges look planned.
Leave the other side of the face with plain soft makeup. That contrast is why this look photographs so well, and it keeps your painting time under fifteen minutes.
5. Spider Web Corners for Makeup Lovers
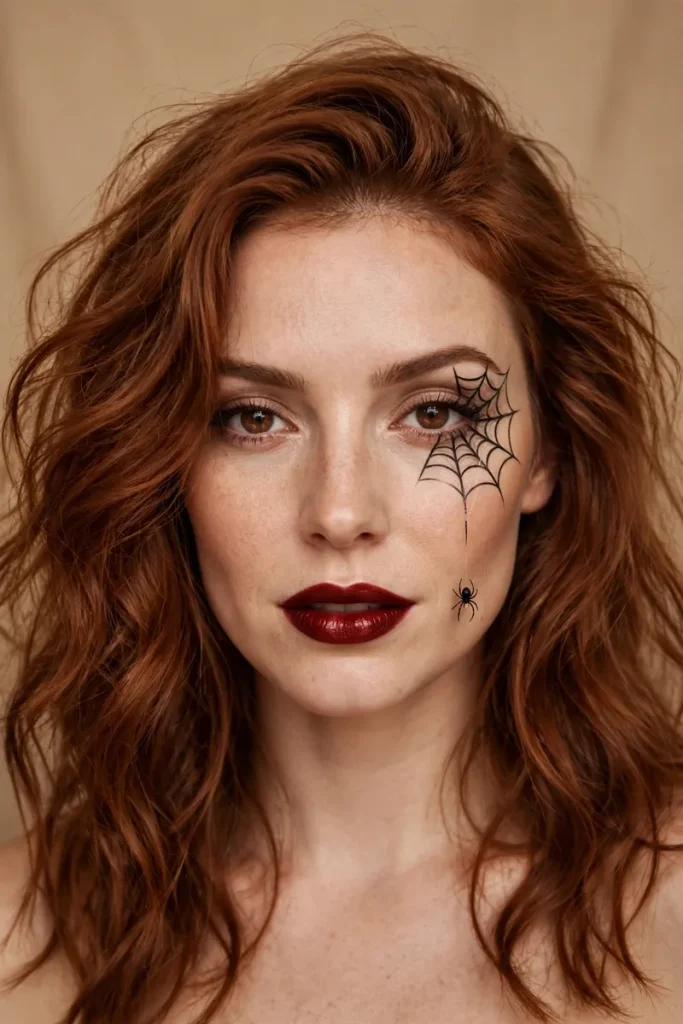
If you already love eyeliner, this is your look. Do your usual makeup, then draw a small web in the outer corner of one eye: three lines fanning out, joined by soft curved lines between them.
Hang one tiny spider from the web on a thin line down the cheek. It sounds like a small thing, but that little spider is what people lean in to look at.
Pair it with a deep red or black lip and keep the other eye plain. I wear this when I want Halloween in my face but my own style still showing underneath.
The Classics Nobody Has to Guess
Some looks never need an answer to “so, what are you?” These are the ones people name from the other side of the room, and they are worth learning properly.
6. Half Skull, Half Your Own Face
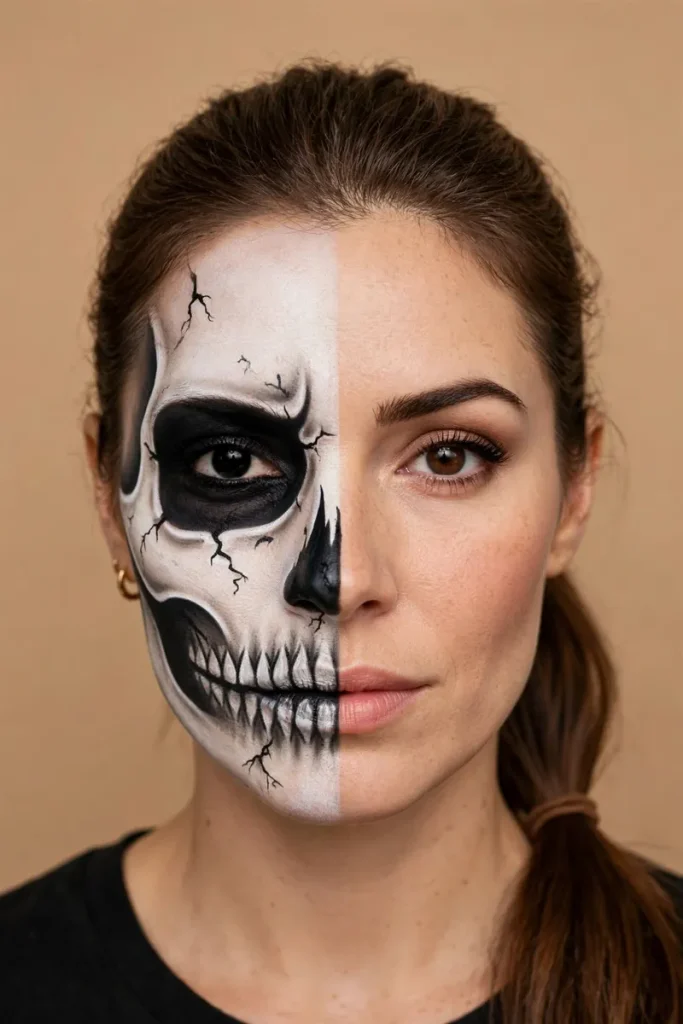
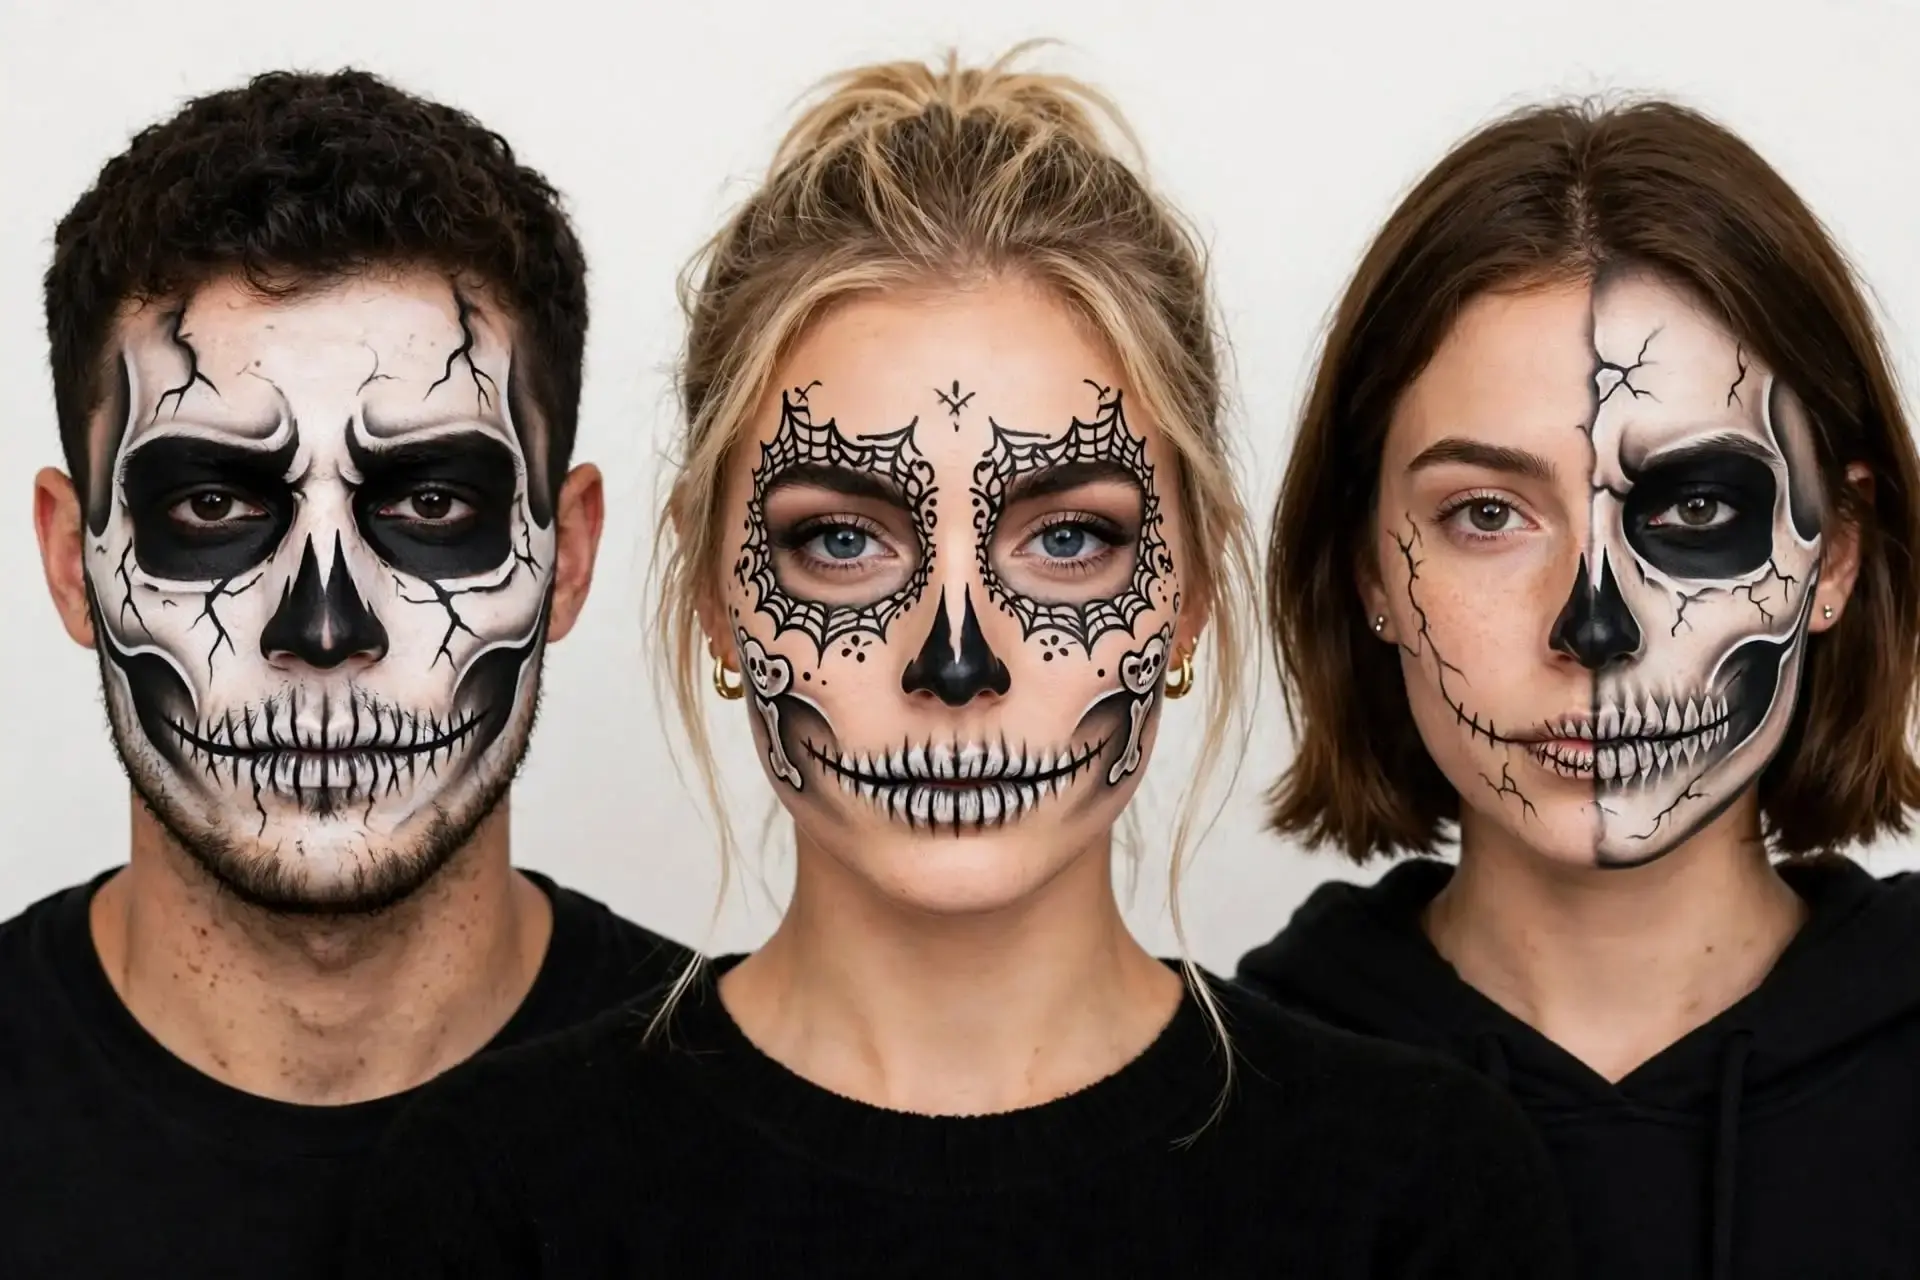
Draw a wavy line down the center of your face first, in a light pencil if you have one. Paint one side white, then add the black eye socket, nose cavity, and teeth lines on that side only.
Teeth are just short vertical lines over a dark mouth shape, so draw the mouth wide and let the lines do the work. Keep them uneven on purpose, real skull teeth never match.
The clean side gets your best glam makeup, lashes and all. That clash between pretty and bony is the reason this look stops people mid sentence.
7. Vampire With a Soft, Pretty Bite
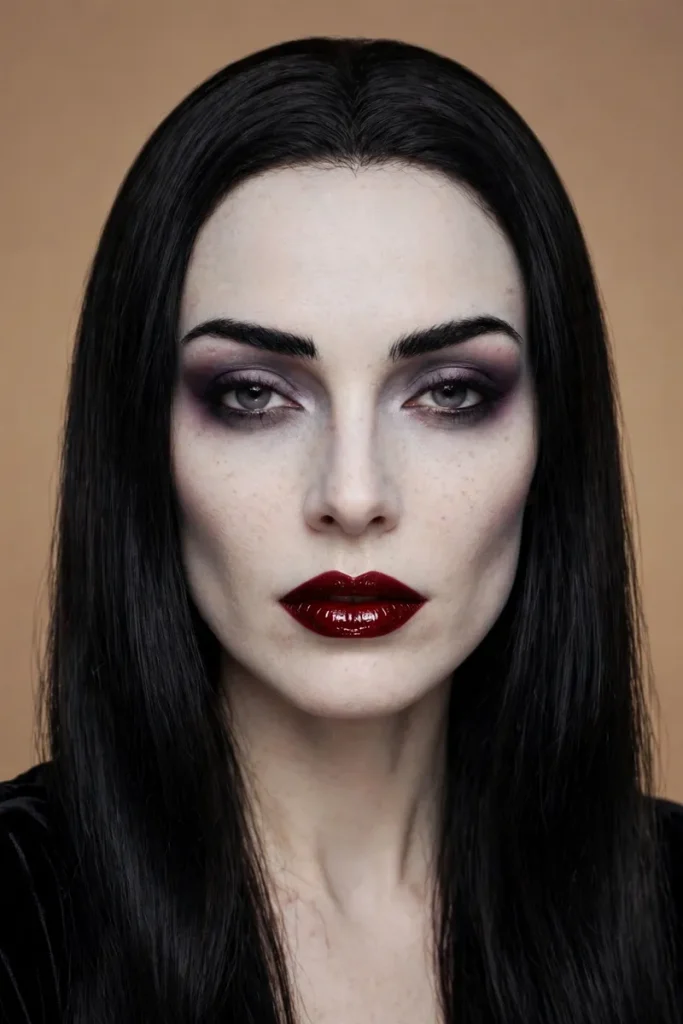
Go one shade paler than your skin with your base, then smoke out the eyes in gray and deep plum. Pale skin with soft eyes looks elegant, while heavy black eyes can tip it into zombie.
Paint your lips deep red and add two thin drips of dark red paint from one corner of the mouth, down the chin. Let the drip be thin, thick drips look like a spill.
A tiny pair of white fangs painted on the lower lip is a sweet extra. Keep the rest of the face clean and let the mouth tell the story.
8. Green Witch With a Golden Eye
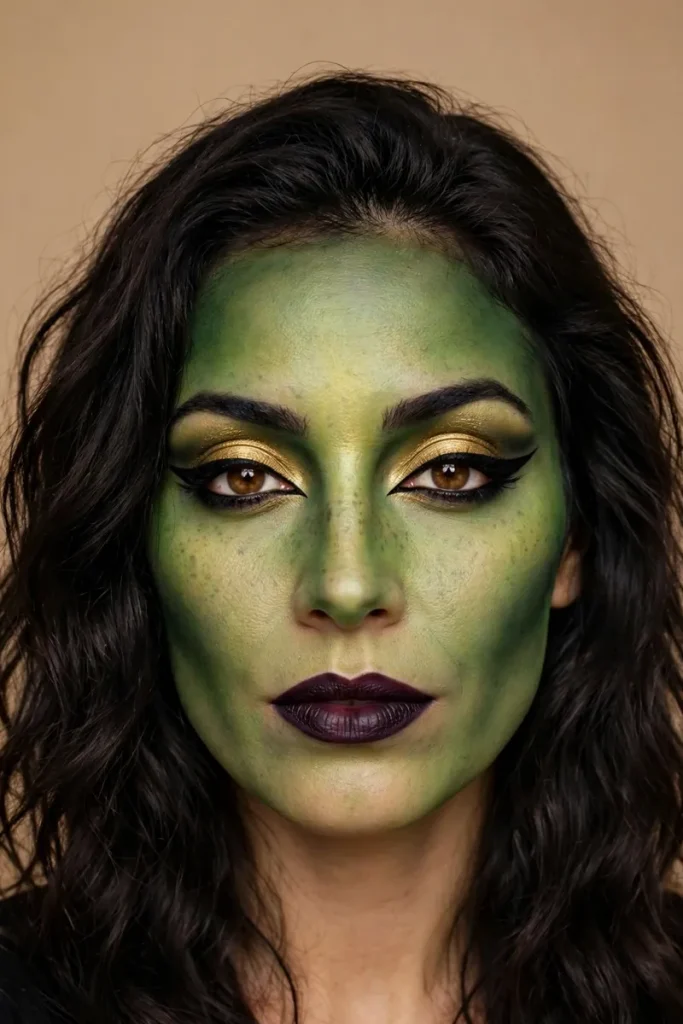
Sponge green over the face and neck, blending it lighter in the center and deeper at the edges so your face keeps its shape. Flat green looks like a mask, shaded green looks alive.
Gold shadow on the lids and a strong black wing lift the whole thing from swamp to glam. Add a small painted wart on the chin only if you enjoy the joke of it.
Dark plum lips work better than black here, trust me. Black on green can look muddy in photos, while plum keeps that rich, wicked glow.
9. Cute Clown With Soft Colors
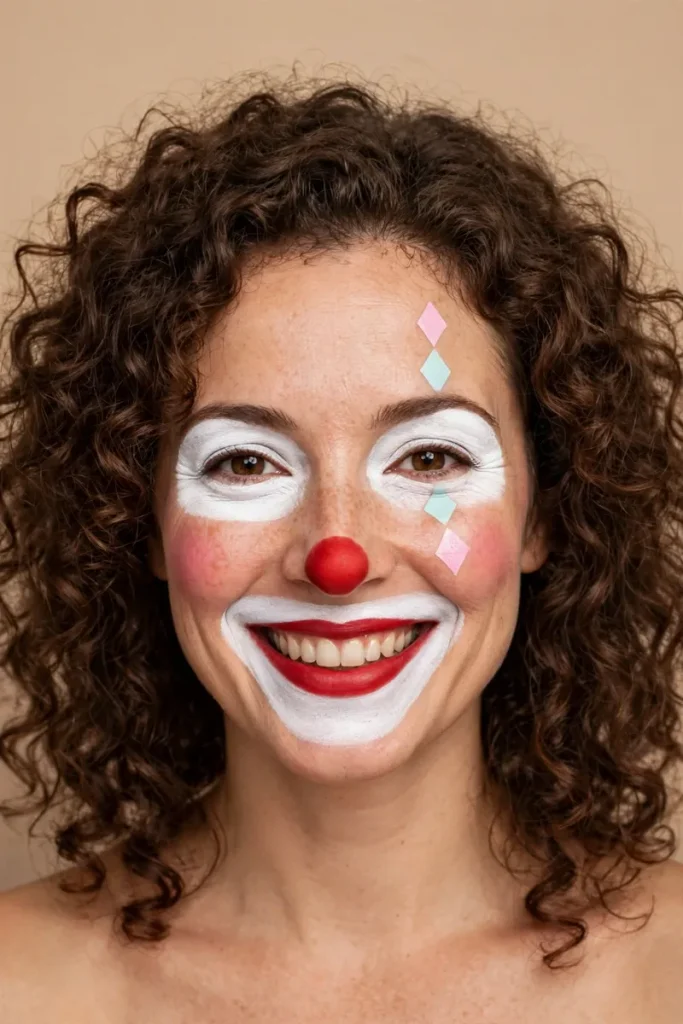
Forget the scary version. Use a clean white base only around the eyes and mouth, then paint pastel diamonds above and below one eye in pink, mint, or baby blue.
A round red nose and a wide red smile, drawn a little past your real smile, give the classic shape. Round rosy cheeks keep it friendly instead of frightening.
This is the one I suggest for anyone painting kids or working a school party. It reads clown from far away and sweet up close, which is a rare mix.
10. Zombie With Cracked, Tired Skin
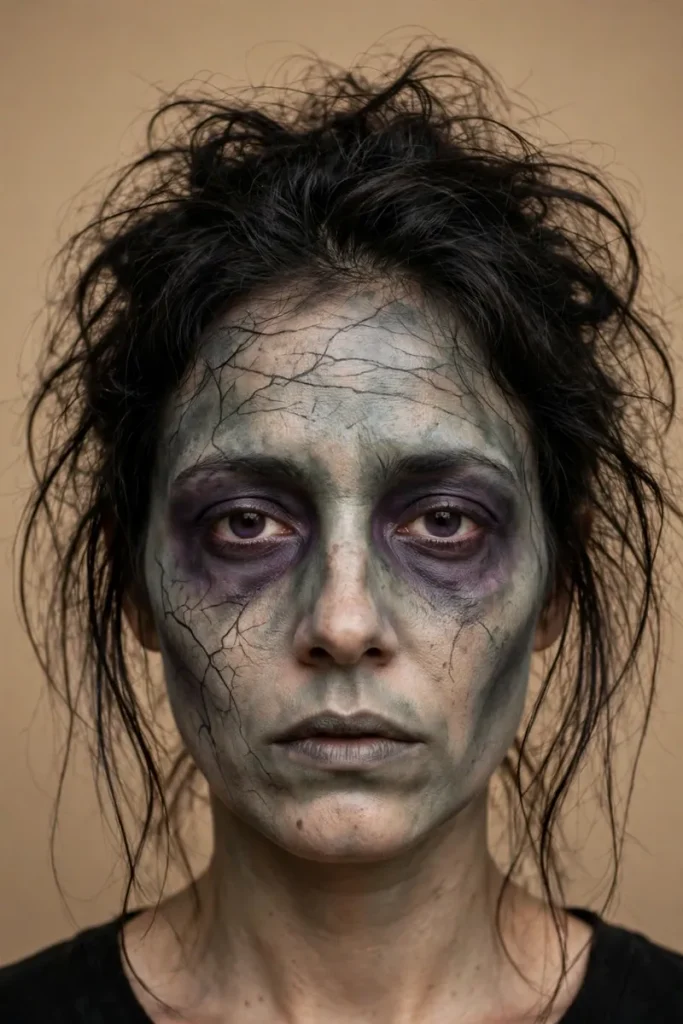
Start with a gray green base, sponged on in patches so some of your own skin shows through. Full even coverage looks like paint, patchy coverage looks like trouble.
Darken the eye sockets, under the cheekbones, and around the mouth with purple gray shadow. Then crack the look open with thin dark lines across the forehead and one cheek.
Mess up your hair and skip the neat edges on everything. Zombie is the one look where a shaky hand helps you, so relax and enjoy being imperfect.
Pretty First, Spooky Second
My favorite group, if I am honest. These are for the girls who want the compliments and the photos, with just enough spook in the mix to earn them.
11. Glam Skeleton With Tiny Gems
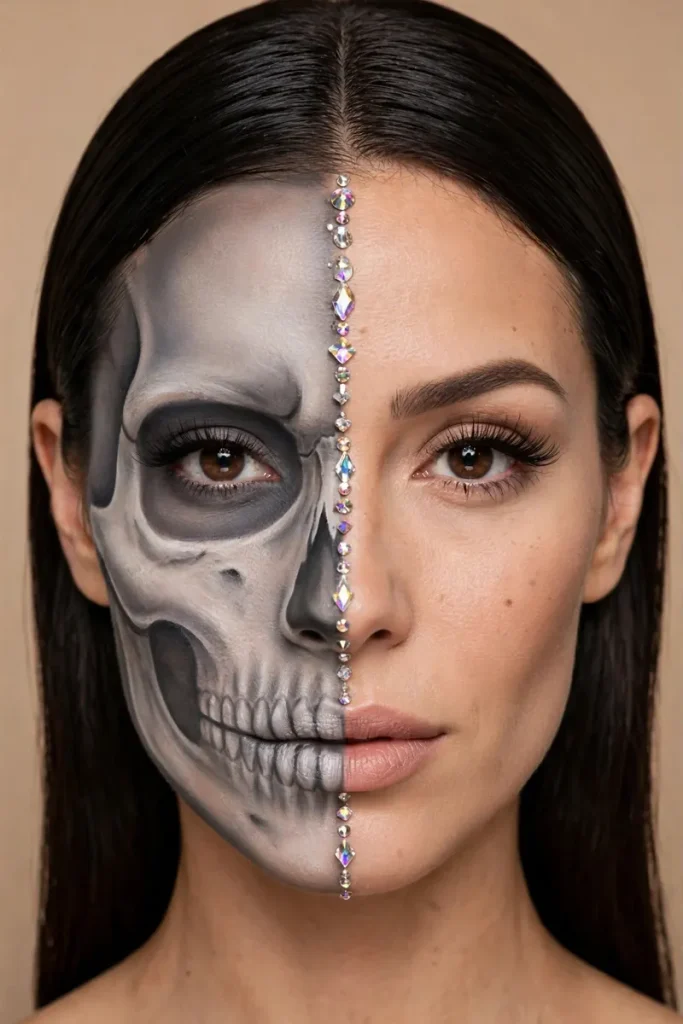
Follow the half skull idea but soften every line. Use gray shadow instead of hard black for the socket, and blend the edges so the bone melts into glam skin.
Stick small gems along the line where skull meets skin, and a few on the teeth lines. Gems catch party light every time you move, which plain paint cannot do.
Use lash glue for the gems and press each one for five seconds. I lost half of mine to a hug once because I rushed this step, learn from me.
12. Moon Goddess in Blue and Gold
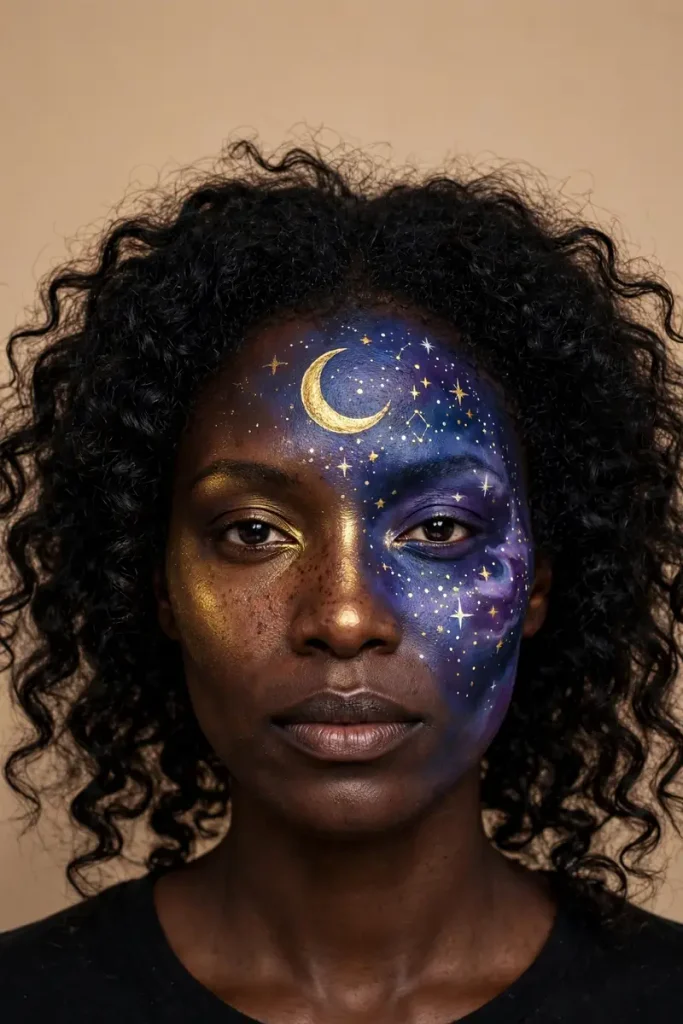
Blend deep blue and purple across the forehead and down one side of the face, fading out before the chin. It should look like evening sky settling on your skin.
Paint a gold crescent moon in the center of the forehead and dot small gold and white stars along the blend, thicker near the moon, thinner as they fall.
Gold highlighter on the cheekbones pulls it into makeup, not costume. This one gets me the most saves every year, and it suits every skin tone I have tried it on.
13. Leopard Spots Over Golden Skin
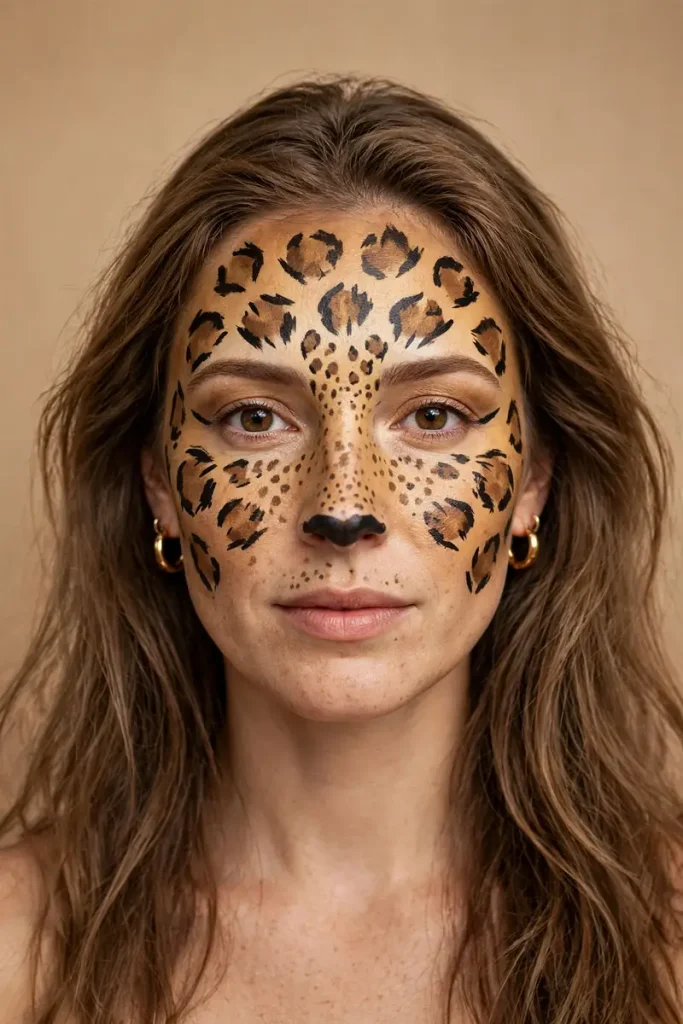
Warm up the whole face with a golden tan base, a bit deeper than your own skin. Then scatter tan brown spots across the forehead, cheeks, and nose, in different sizes.
Edge each spot with two or three broken black strokes, never a full ring. Broken edges are what make spots read as fur instead of polka dots.
Add a black nose tip and a line down to the lip if you want the full cat family feel, or stop at the spots for a softer look. Either way, gold earrings finish it beautifully.
14. Mermaid Scales That Shimmer
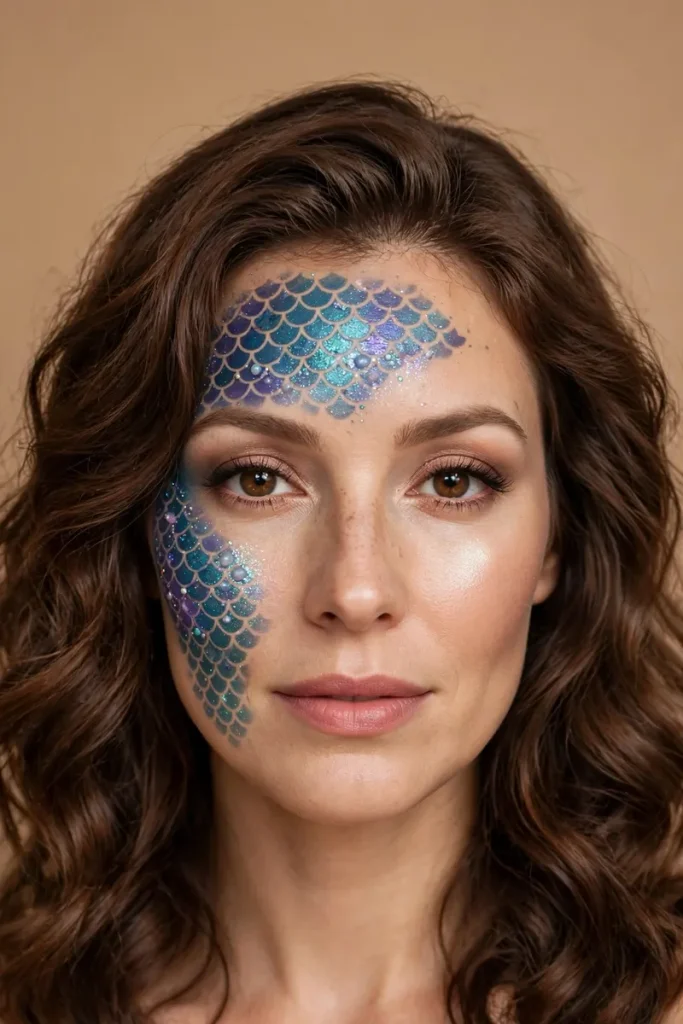
Hold a piece of fishnet or a scale stencil against the forehead and one cheek, then sponge teal, blue, and a touch of purple over it. Lift it straight off, do not slide it, or the scales smear.
No stencil? Paint rows of small half circles by hand, starting at the hairline and working down. Slower, but the hand done version has a softness I honestly like more.
Press shimmer shadow over the scales while the paint is almost dry, not wet. That timing gives a real glow instead of glitter glue chaos.
For the Ones Who Go All In
And then there are these. Clear your afternoon, put on music, and enjoy the process, because these three are a project and a half, in the best way.
15. Devil Glam in Red and Black
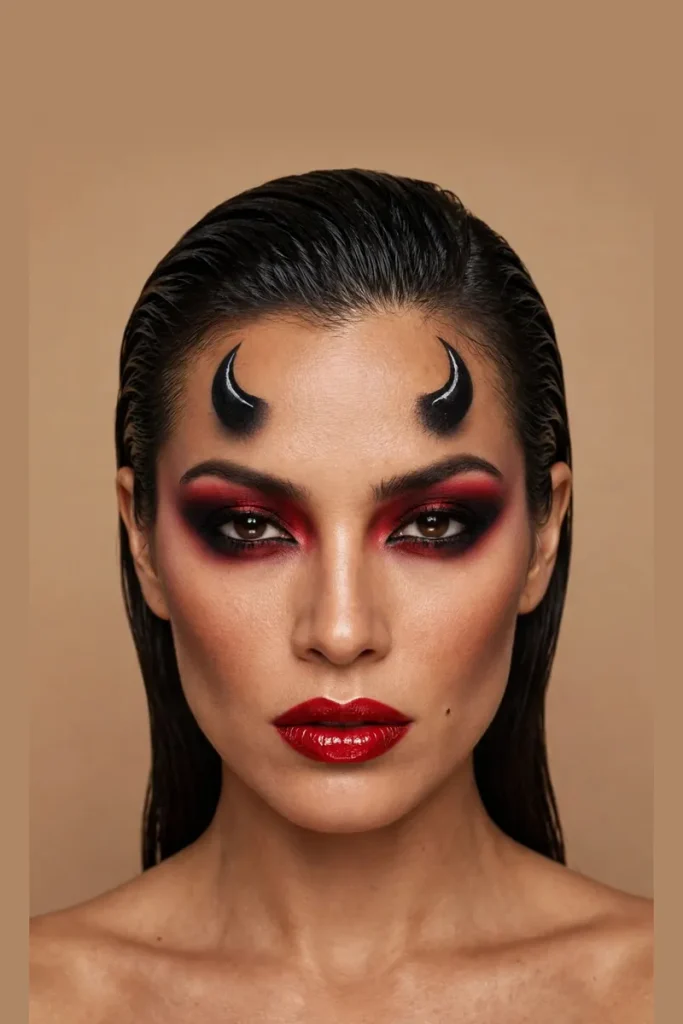
Smoke the eyes in red and black, deep at the outer corners, and keep the skin warm and bronzed rather than pale. This devil is glamorous, not ghoulish.
Paint two small curved horns on the forehead in black, with a white highlight line down one side of each. That single highlight is what makes them look round and real.
Glossy red lips and sharp brows finish the face. Wear it with slicked back hair and let the horns do the talking above the neckline.
16. Cracked Doll With a Porcelain Face
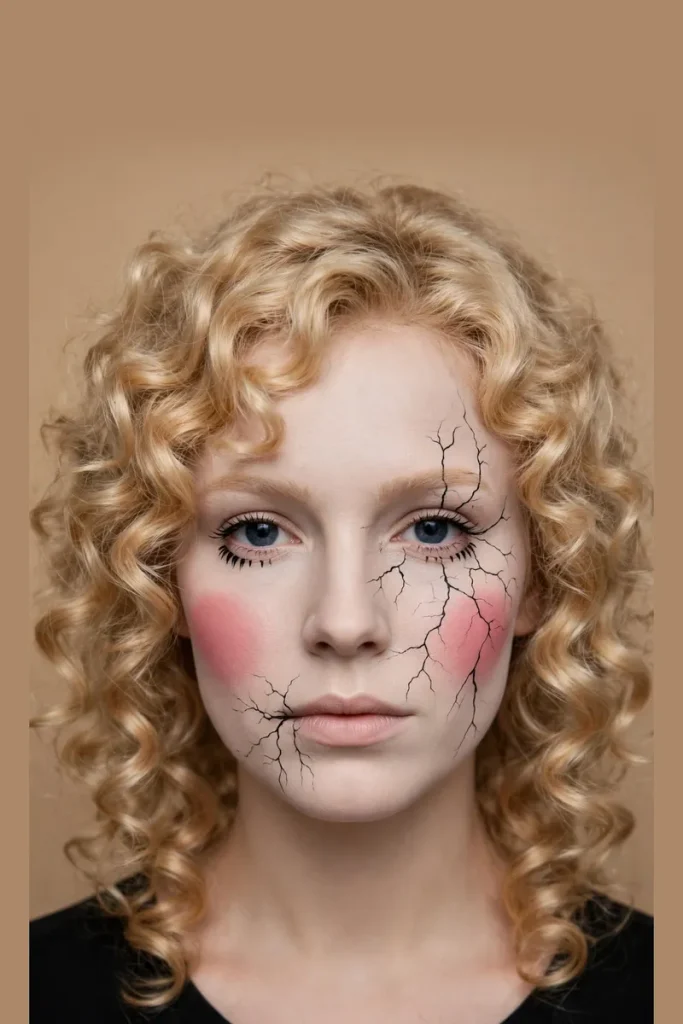
Build a smooth pale base, paler and more even than the vampire, and add big round blush low on the cheeks. Paint bottom lashes on with short black strokes for that wide doll stare.
Then add the cracks: thin black and gray lines branching from one eye and the corner of the mouth, with one small patch shaded as if a piece is lifting.
Keep every crack thin and give them tiny branches. One thick crack looks like a scar, many thin ones look like broken porcelain, which is the whole point.
17. Pumpkin Skull, the Mashup That Wins Parties
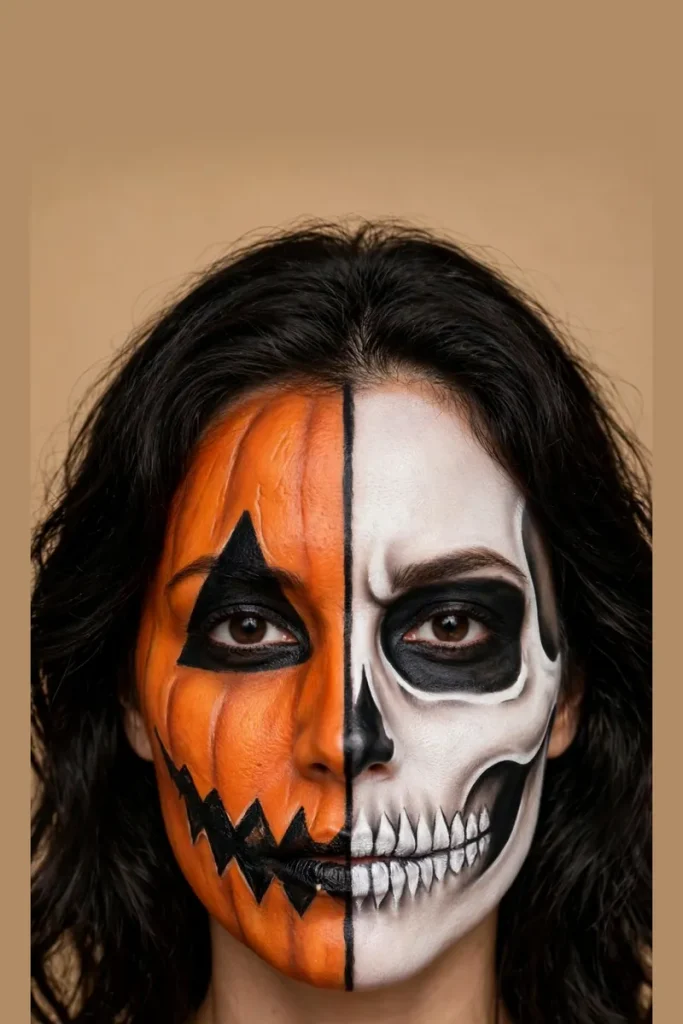
End on the bold one. Paint half the face as a carved pumpkin, orange base, black triangle eye, jagged grin, and the other half as a clean white skull with dark socket and teeth.
Do the orange side first and let it dry before the white touches it, or the middle line turns muddy. A fine line of black down the center hides the join.
It takes the longest of all seventeen, I will not lie to you. But when both halves land, this is the face people remember next October, and that is worth one slow afternoon.
Getting It to Last, and Getting It Off
Set finished paint with a light dust of translucent powder on the shiny spots, or a gentle mist of setting spray held far from the face. Too close and the spray spots the paint, too far and it does nothing.
Carry a small kit in your bag: the lip color, a black liner, and two cotton buds. Most fixes during a party are one smudged line, and a dry bud lifts a smudge cleaner than a wet one.
For removal, work an oil based cleanser or plain coconut oil over the paint with your fingers first, then wash as normal. Never scrub dry paint off, that is how skin ends up red for three days.
Little Questions, Honest Answers
What paint should a beginner buy?
A basic water based face paint palette with white, black, red, orange, green, blue, and purple covers every look on this list. Water based paint is forgiving, blends well, and washes off without a fight.
Can I use normal makeup instead of face paint?
For the web, leopard, and glam looks, yes, shadow and liner do most of the work. For big blocks of white, orange, or green, real face paint gives cleaner color and feels lighter on the skin.
How do I stop white paint from cracking?
Thin coats, a damp sponge, and let each coat dry before the next. Cracks come from one thick layer moving with your face, and they almost vanish when you build the white slowly.
What if my hands shake on the fine lines?
Rest your little finger on your cheek as an anchor and draw lines in short pieces instead of one long pull. Also, dots and short dashes forgive shaking far better than long curves do.
How long do these looks really take?
The fast five can be done in ten to fifteen minutes once you have done them once. The classics take about half an hour, and the last three deserve an hour and a relaxed mood.
Final Thoughts
You do not need an art degree or a steady painter hand to wear a face people ask about. You need the colors in the right order, a light touch, and a look that makes you smile when you catch it in the mirror.
If this is your first year, start with the cat or the pumpkin and let it be easy. Next year you will be the one calmly painting a skull at the kitchen table while your friends panic, and it is a lovely place to be.
Save this list for party night, and tell me in the comments which face you picked and how it went. I read every story, and the messy first tries are honestly my favorites.
Happy painting, friends. May your lines be steady and your white stay white.
With love,
Ruth Luiz